

It is known that process flows created in Pega do not comply with any open standard, even though they look more like BPMN models. People who want to migrate start their transition from Pega to Camunda by manually redrawing processes in the Modeler. However, manually redrawing process flows is tedious and time-consuming, especially if there are many or if the processes to be converted are complex. In this lesson, we will look at a utility that can help you generate a BPMN-compatible process, which will serve as a starting point for the transition from Pega to Camunda.
Guide to the Pega XML to BPMN converter
Camunda Consulting has created a set of freely available tools for migrating technology flows. Tools for migrating Pega technology flows can be found . You will immediately notice that this is a Maven project, which can be opened in almost any integrated development environment. Eclipse and IntelliJ are two of the most popular IDEs. However, you will first need to clone or download the migration tools repository – this can be done .
For this guide, we will be using Eclipse as our IDE.
- After cloning or downloading the Git repository, copy the contents of the Pega converter tools repository into a fresh workspace. For example, if your Git repository is located at C:gitRepos, then you will find the Pega converter at C:gitReposmigrate-to-camunda-toolsPegacreate BPMN from Pega XML.
- Copy the entire folder to your chosen workspace.
- Then launch Eclipse and select the workspace to which you just copied the contents. Once Eclipse is launched, navigate to File > Import > General > Projects from Folder or Archive.
- Click on the button Next.
- In the dialog that appears, click on Directory and navigate to the folder you just copied into your workspace. Your screen should look something like this (see below).
- Click Finish.
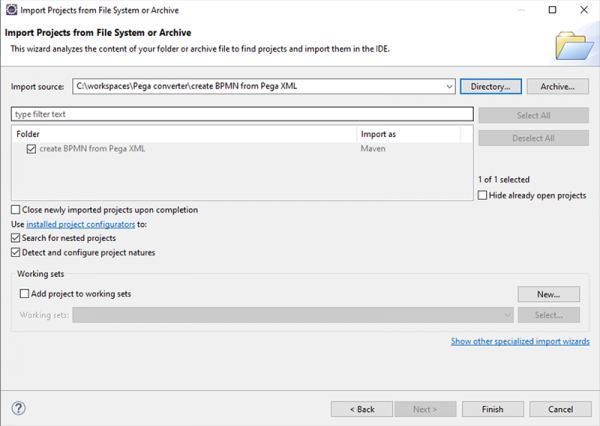
The project will be imported into your workspace. You may want to update any differences in the Java compiler between the provided code and your environment, but it should work as is.
Next, we will create a Run configuration that will allow you to run the converter in Eclipse:
- Højreklik på rodmappen for projektet og vælg Kør som > Kør konfigurationer…
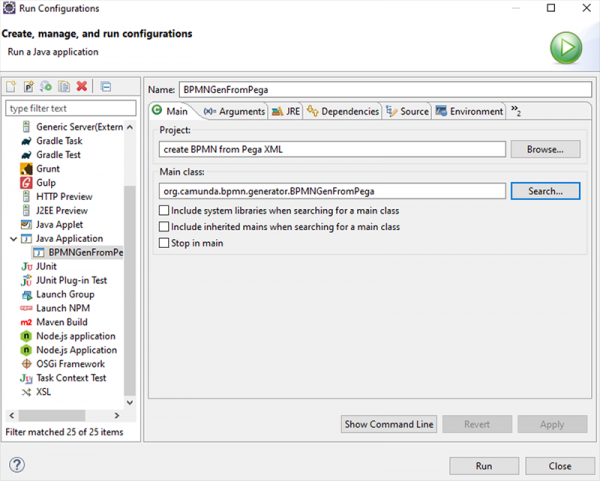
- In the dialog that appears, click on Java-applikation for at oprette en ny konfiguration. Projektets navn skal allerede være udfyldt i denne dialog. Hvis ønskes, kan du give denne konfiguration et nyt navn.
- Dernæst skal du vælge hovedklassen. Klik på knappen Søg og sørg for at vælge — BPMNGenFromPega — org.camunda.bpmn.generator. Vælg den og klik på OK.
- Din skærm skal se nogenlunde sådan ud:
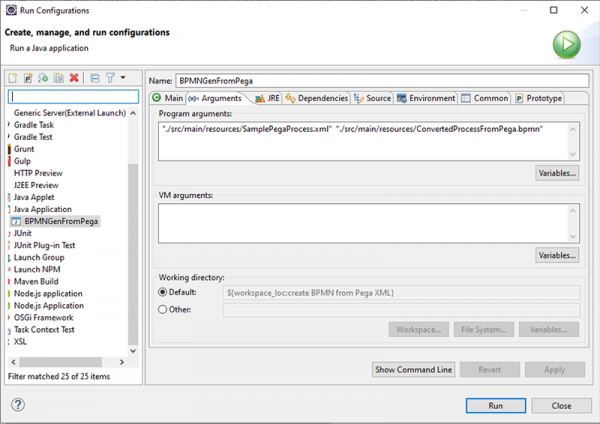
Nu skal du angive to argumenter, den første er XML-eksporten fra Pega, og den anden er navnet på den konverterede fil. For en sikkerheds skyld skal du indtaste stien og filnavnene i sektionen Programarguments fanen Argumenter, indkapslet i citationstegn. Til at begynde med vil du få et eksempel på en Pega xml-fil. For at bruge dette eksempel skal du indtaste følgende data for indgangs- og udgangsfiler:
”.\/src\/main\/resources\/SamplePegaProcess.xml” “.\/src\/main\/resources\/ConvertedProcessFromPega.bpmn”
Din skærm skal se nogenlunde sådan ud:
Klik på Kør. Et konsolvindue bør åbne, hvor du vil se følgende:
Diagram .\/src\/main\/resources\/SamplePegaProcess.xml konverteret fra Pega og kan findes på .\/src\/main\/resources\/ConvertedProcessFrom Pega.bpmn
Ressourcemappen indeholder en PNG-fil (samplePegaProcessDiagram.png) af den oprindelige proces i Pega og skal se således ud:
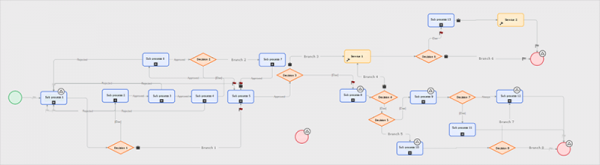
Ved at bruge Camunda Modeler, åbne ConvertedProcessFromPega.bpmn og det skal se nogenlunde sådan ud:
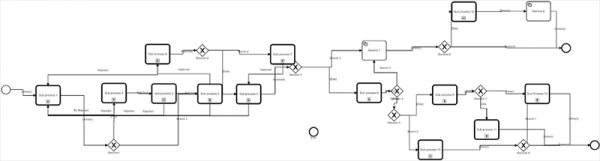
Oprettelse af en jar-fil
Hvis du bare ønsker at oprette en jar-fil til værktøjet, har du flere muligheder:
- Enten højreklik på filen pom.xml og vælg Kør som > Maven install.
- Eller højreklik på rodmappen og vælg Vis i lokal terminal og kør følgende Maven-kommando: mvn clean package install.
Under alle omstændigheder (eller ved at bruge den metode, der passer dig bedst) skal du få en jar-fil i mappen /target. Kopier denne jar hvor som helst og udgiv følgende kommando i terminalen:
java -jar yourGeneratedJarFile.jar “your input file” “your output file”
Sådan! Du er velkommen til at efterlade feedback på vores og for flere konvertere, efterhånden som de tilføjes.
Kilde: habr.com
