

Termux Step by Step
When I first encountered Termux, being far from a Linux user, two thoughts crossed my mind: "This is amazing!" and "How do I use it?" After searching online, I found no article that would allow me to start using Termux in a way that was more enjoyable than a pain. Let's fix that.
So, why did I delve into Termux? First, hacking—specifically, a desire to understand it a bit more. Second, the inability to use Kali Linux.
Here, I will try to gather together everything useful I've found on the topic. This article might not surprise those who are already familiar, but I hope it will be helpful to those just discovering the delights of Termux.
For better understanding of the material, I recommend that you replicate what I've described not just by copy-pasting, but by typing the commands yourself. For convenience, we will need either an Android device with a connected keyboard, or in my case, an Android device and a PC/Laptop (Windows) connected to the same network. Ideally, the Android device should be rooted, but it’s not mandatory. Sometimes I will indicate something in parentheses, which usually helps to better understand the material (if what’s written in parentheses is not entirely clear, feel free to skip it; later on, it will clarify itself as needed).
Step 1
I will be banal yet incredibly logical at the same time.
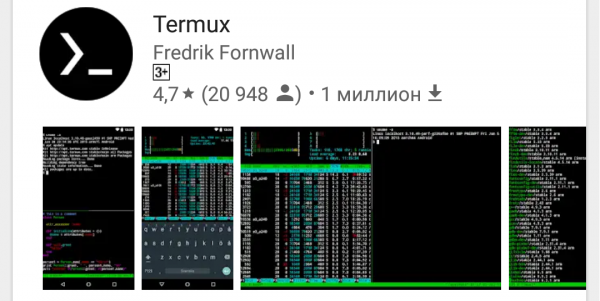
Let's install Termux from the Google Play Store:
Open the installed application and you will see:
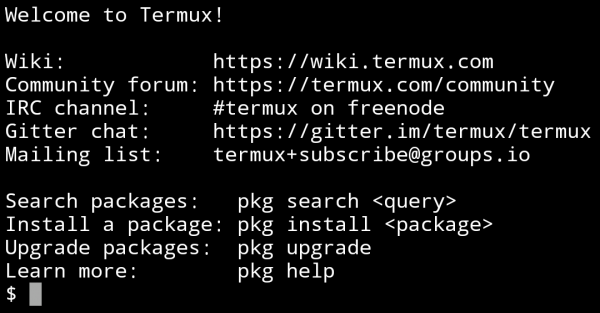
Next, it's a good idea to update the pre-installed packages. For this, we will sequentially enter two commands, agreeing to everything during execution by entering Y:
apt update
apt upgrade
With the first command, we check the list of installed packages and look for those that can be updated, and the second one updates them. For this reason, the commands need to be written in this specific order.
Now we have the most recent version of Termux.
A few more useful commands
ls – displays a list of files and directories in the current directory
cd – moves to the specified directory, for example:
It is important to understand: if no path is specified directly (~\/storage\/downloads\/1.txt), it will default to the current directory.
cd dir1 – will move to dir1 if it exists in the current directory.
cd ~\/dir1 – will move to dir1 via the specified path from the root folder.
cd or cd ~ — move to the root folder.
clear – clears the console.
ifconfig – you can check the IP, or configure the network.
cat – allows working with files/devices (within a single stream) for example:
cat 1.txt – let's view the contents of the file 1.txt
cat 1.txt >> 2.txt – copies the file 1.txt to the file 2.txt (the file 1.txt will remain)
rm — used for deleting files from the file system. Keys used with rm:
-r – process all nested directories. This key is necessary if the file being deleted is a directory. If the file being deleted is not a directory, then the -r key does not affect the rm command.
-i – prompt for confirmation of each deletion operation.
-f – does not return an error code if errors were caused by non-existent files; does not prompt for operation confirmations.
For example:
rm -rf mydir – delete without confirmation and error code for the file (or directory) mydir.
mkdir – creates a directory at the specified path
echo – can be used to write a string to a file, if ‘>’ is used the file will be overwritten, if ‘>>’ the string will be appended to the end of the file:
echo "string" > filename
For more details on UNIX commands, search the internet (self-development is not to be overlooked).
The key combinations Ctrl + C and Ctrl + Z interrupt and stop command execution, respectively.
Step 2
Make your life easier
To avoid unnecessarily torturing yourself by entering commands with an on-screen keyboard (of course, this can't be avoided in ‘field’ conditions), there are two ways:
- Connect a full keyboard to your Android device in any convenient way.
- Use ssh. In simple terms, you will have a Termux console open on your computer running on your Android device.
I chose the second path, although it is a bit complicated to set up, but the convenience of use is worth it.
You need to install an ssh client program on your computer, I use Bitvise SSH Client, so all further actions are performed within this program.
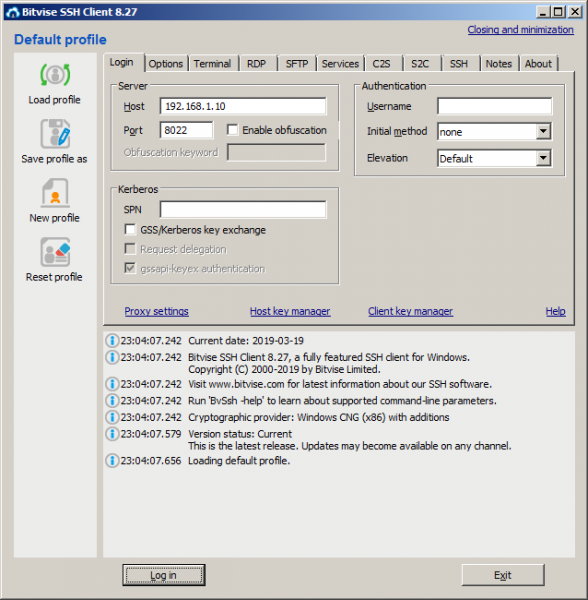
Since Termux currently only supports connections via the Publickey method using a key file, we need to create that file. For this, in the Bitvise SSH Client program on the Login tab, click on Client key manager In the opened window, generate a new public key and export it in OpenSSH format to a file named termux.pub (any name can actually be used). Place the created file in the internal storage of your Android device in the Downloads folder (Termux has simplified access to this folder, and a few others, without root).
In the Login tab, enter the IP of your Android device in the Host field (you can find it by entering the command ifconfig in Termux) and in the Port field, it should be 8022.
Now let's move on to installing OpenSSH in Termux; to do this, enter the following commands:
apt install openssh (during the process, if necessary, enter 'y')
pkill sshd (this command stops OpenSSH)
termux-setup-storage (connect internal storage)
cat ~/storage/downloads/termux.pub >> ~/.ssh/authorized_keys (copy the key file)
sshd. (start the ssh host)
Return to Bitvise SSH Client and click the Log in button. During the connection process, a window will appear where you select Method – publickey, Client key is the Passphrase (if you set one while generating the key file).
In the case of a successful connection (if everything was done as written, it should connect without problems), a window will open.
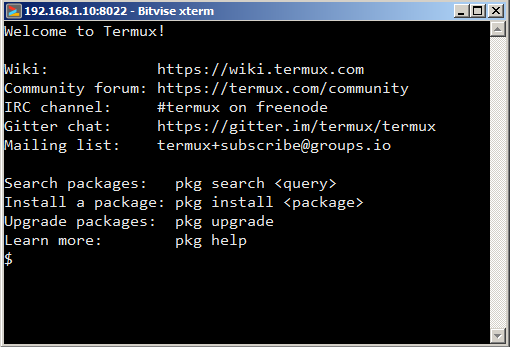
Now we can enter commands from the PC, and they will be executed on your Android device. It's not hard to guess what advantages this gives.
Step 3
Let's configure Termux and install additional utilities.
First of all, let's install bash-completion (the autocompletion feature, or magic Tab, as some call it). The utility works by allowing you to autofill commands when you press Tab. To install, write:
apt install bash-completion (Works automatically by pressing Tab)
What is life without a text editor with code highlighting (in case you want to code, and you will want to). To install, write:
apt install vimNow you can use autocompletion — type 'apt i' and then press Tab, and our command will complete to 'apt install'.
Using vim is not difficult; to open the file 1.txt (if it doesn't exist, it will be created), write:
vim 1.txt To start entering text, press 'i'.
To finish entering text, press ESC.
Before entering a command, there should be a colon ':'.
':q' – exit without saving.
':w' – save.
':wq' – save and exit.
Now that we can create and edit files, let's enhance the appearance and informativeness of the Termux command line a bit. To do this, we need to assign the environment variable PS1 the value "[ 33[1;33;1;32m]:[ 33[1;31m]w$ [ 33[0m][ 33[0m]" (if you're curious about what this is and how it works, please ). To do this, we need to add the following line to the ‘.bashrc’ file (which is located at the root and is executed at every shell startup):
PS1 = "[ 33[1;33;1;32m]:[ 33[1;31m]w$ [ 33[0m][ 33[0m]"For simplicity and clarity, let's use vim:
cd
vim .bashrc
We write the line, save it, and exit.
You can also add a line to the file in another way, using the ‘echo’ command:
echo PS1='"[ 33[1;33;1;32m]:[ 33[1;31m]w$ [ 33[0m][ 33[0m]"' >> .bashrcNote that to display double quotes, the entire line with them must be enclosed in single quotes. In this command, there is ‘>>’ because the file will be appended, to overwrite ‘>’.
In the .bashrc file, you can also write aliases – shortcuts. For example, we want to run update and upgrade with one command. To do this, we add the following line to .bashrc:
alias updg = "apt update && apt upgrade"To add the line, you can use vim or the echo command (if you can't do it yourself – see below)
The syntax for aliases is as follows:
alias = ""So, let's add the shortcut:
echo alias updg='"apt update && apt upgrade"' >> .bashrcHere are a few more useful utilities
Install using apt install
man — Built-in help for most commands.
man %commandname
imagemagick — A utility for working with images (conversion, compression, cropping). Supports multiple formats including pdf. Example: Convert all images from the current folder into one pdf and reduce their size.
convert *.jpg -scale 50% img.pdf
ffmpeg — One of the best audio/video converters. Look up instructions on how to use it.
mc — A two-panel file manager similar to Far.
There are still many steps ahead, the main thing is that the movement has begun!
Source: habr.com
