

Unity is a platform that has been around for quite some time and is constantly evolving. However, when working with multiple projects at the same time, challenges may still arise in using shared source files (.cs), libraries (.dll), and other assets (images, sounds, models, prefabs). In this article, we will share our experience with a native solution to this problem for Unity.
Methods of Sharing Common Resources
There is more than one way to use shared resources across different projects, but each approach has its pros and cons.
1. Duplication — manually duplicate resources across projects.
Pros:
- Suitable for all types of resources.
- No problems with dependencies.
- No issues with asset GUIDs.
Cons:
- Large repositories.
- No versioning capability.
- Difficulties in tracking changes in shared resources.
- Challenges in updating shared resources.
2. — sharing common resources through external submodules.
Pros:
- You can work with source files.
- Assets can be shared.
- No problems with dependencies.
Cons:
- Requires Git skills.
- Git does not work well with binary files — you’ll need to enable LFS.
- Access control for repositories.
- Challenges when upgrading and downgrading versions.
- Potential GUID collisions and no clear behavior from Unity for resolution.
3. NuGet — sharing common libraries through NuGet packages.
Pros:
- Convenient for projects not dependent on Unity.
- Easy versioning and dependency resolution.
Cons:
- Unity cannot use NuGet packages 'out of the box' (a NuGet Package Manager for Unity can be found on GitHub that fixes this, but there are nuances).
- Difficulties in sharing other types of assets.
4. Unity Package Manager — sharing common resources through Unity's native solution.
Pros:
- A native interface for managing packages.
- Protection against overwriting .meta files in packages during GUID conflicts.
- Versioning capability.
- Ability to share all types of resources for Unity.
Cons:
- GUID conflicts may still occur.
- No documentation for implementation.
The last method has more advantages than disadvantages. However, it is currently not very popular due to the lack of documentation, so we will discuss it in detail.
Unity Package Manager
Unity Package Manager (hereinafter UPM) is a tool for managing packages. It was introduced in Unity 2018.1 and was initially used only for packages developed by Unity Technologies. However, starting from version 2018.3, the ability to add custom packages has been introduced.
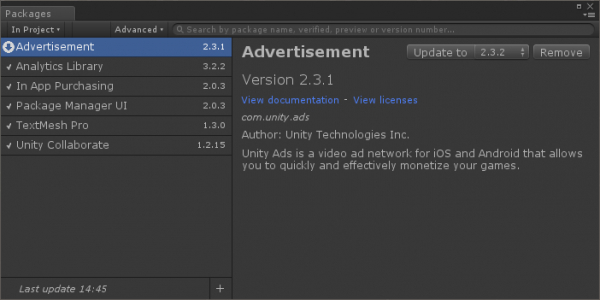
Unity Package Manager Interface
Packages do not reside in the project's source files (the Assets directory). They are located in a separate directory. %projectFolder%/Library/PackageCache and do not affect the project in any way; their only mention in the source files is in the file packages/manifest.json.
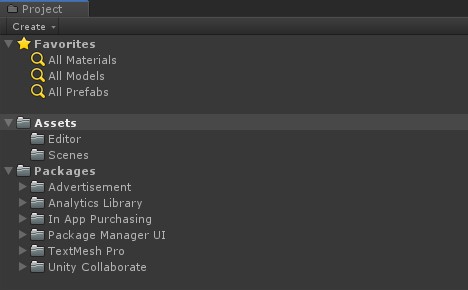
Packages in the project's file system
Package sources
UPM can use several package sources:
1. File system.
Pros:
- Speed of implementation.
- Does not require third-party tools.
Cons:
- Versioning complexity.
- Requires shared access to the file system for everyone working on the project.
2. Git repository.
Pros:
- Only a Git repository is needed.
Cons:
- You cannot switch between versions through the UPM window.
- It does not work with all Git repositories.
3. npm repository.
Pros:
- Fully supports UPM functionality and is used for distributing official Unity packages.
Cons:
- Currently ignores all string versions of packages except for '-preview'.
Below, we will discuss the implementation of UPM + npm. This combination is convenient as it allows working with any type of resources and managing package versions, as well as fully supports the native UPM interface.
Verdaccio can be used as an npm repository. Environment setup First, you need to install
Creating a package
To create a package, you need to place a file .
, which will describe it, into the directory of this package's contents. You need to do the following:
Go to the project directory that you want to turn into a package. package.jsonRun the npm init command and during the dialog, enter the required values. For name, specify the name in reverse domain format, for example, com.plarium.somepackage.
For convenient display of the package name, add a displayName property in package.json and fill it in.
Since npm is JavaScript-oriented, the file contains unnecessary properties main and scripts, which Unity does not use. It's better to remove them to avoid cluttering the package description. The file should look something like this:
To conveniently display the package name, add the displayName property in package.json and fill it out.
Since npm is JavaScript-oriented, the file contains unnecessary properties main and scripts that Unity does not use. It’s better to remove them to avoid cluttering the package description. The file should look something like this:
- For convenient display of the package name, add a displayName property in package.json and fill it in.
- Since npm is JavaScript-oriented, the file contains unnecessary properties main and scripts, which Unity does not use. It's better to remove them to avoid cluttering the package description. The file should look something like this:
- To conveniently display the package name, add the displayName property in package.json and fill it out.
- Since npm is JavaScript-oriented, the file contains unnecessary properties main and scripts that Unity does not use. It’s better to remove them to avoid cluttering the package description. The file should look something like this:
{ "name": "com.plarium.somepackage", "displayName": "Some Package", "version": "1.0.0", "description": "Some Package Description", "keywords": [ "Unity", "UPM" ], "author": "AUTHOR", "license": "UNLICENSED" } - Open Unity and generate a .meta file for package.json (Unity does not recognize assets without .meta files; packages for Unity are opened as read-only).
Send package
To send the package, you need to execute the command: npm publish --registry *repository URL*.
Installing and updating packages via Unity Package Manager
To add a package to a Unity project, you need to:
- Add to the file
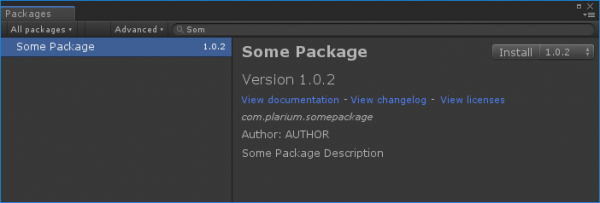
manifest.jsoninformation about package sources. To do this, you need to add the propertyscopedRegistriesand specify the scopes and the source URL where specific scopes will be searched."scopedRegistries": [ { "name": "Main", "url": "repository URL", "scopes": [ "com.plarium" ] } ] - Go to Unity and open the Package Manager window (working with custom packages is no different from working with built-in ones).
- Select All Packages.
- Find the required package and add it.
Working with sources and debugging
To connect the sources to the project, you need to create an for the package.
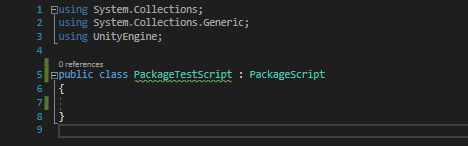
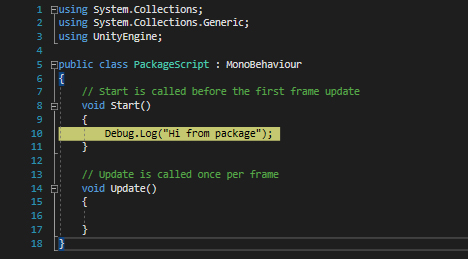
Using packages does not limit debugging capabilities. However, when working with packages in Unity, you cannot jump to the IDE by clicking on an error in the console if the error occurred in the package. This is due to the fact that Unity does not see scripts as separate files, as when using Assembly Definition they are compiled into a library and connected to the project. When working with sources from the project, jumping to the IDE by clicking is available.
Script in a project with an attached package:
Script from the package with an active breakpoint:
Urgent corrections to packages
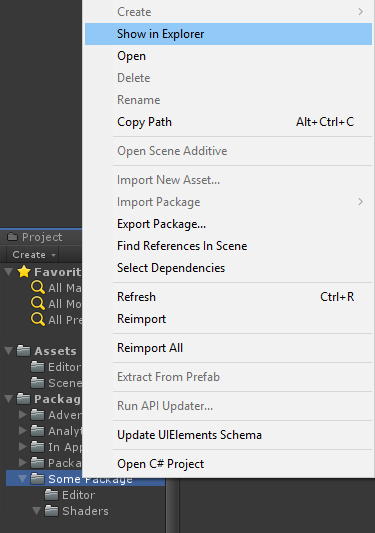
Packages added to the project in Unity are read-only, but can be modified in the package cache. To do this:
- Go to the package in the package cache.

- Make the necessary changes.
- Update the version in the file
package.json. - Send the package
npm publish --registry *repository URL*. - Update the package version to the corrected one through the UPM interface.
Package import conflicts
When importing packages, the following GUID conflicts may occur:
- Package — package. If it is found that there are assets with the same GUID in already added packages during the import of a package, the assets with matching GUIDs from the imported package will not be added to the project.
- A package is a project. If assets with matching GUIDs are found during the import of the package, the assets from the package will not be added to the project. However, dependent assets will start using the assets from the project.
Transferring assets from the project to the package
If you transfer an asset from the project to the package while Unity is open, its functionality will be preserved, and references in dependent assets will start using the asset from the package.
Important: when copying an asset from the project to the package, a conflict "Package — Project" will occur, as described in the above section.
Possible conflict resolutions
- Reassigning GUIDs according to custom algorithms when importing all assets to avoid collisions.
- Adding all assets to one project and then splitting them into packages.
- Creating a database that contains the GUIDs of all assets and validating them when sending packages.
Conclusion
UPM is a new solution for distributing common resources in Unity that can serve as a worthy alternative to existing methods. The recommendations described in the article are based on real cases. We hope you find them useful.
Source: habr.com
