

What we will cover:
How to quickly set up shared storage for two servers using drbd+ocfs2 solutions.
Who will benefit from this:
This tutorial will be useful for system administrators and anyone looking for storage implementation methods or wanting to try out the solution.
Which solutions we rejected and why
We often face the situation where we need to implement shared storage with good read-write performance for a small web cluster. We tried various options for implementing shared storage for our projects, but few were able to meet multiple criteria right away. Now, we will explain why.
- Glusterfs did not meet our requirements for read and write performance, and there were issues with concurrent reading of a large number of files, resulting in high CPU load. The reading problem could be mitigated by directly accessing files in the bricks, but this is not always applicable and is generally incorrect.
- Ceph was not appealing due to its excessive complexity, which can be detrimental for projects with 2-4 servers, especially if the project is later maintained. Again, there are serious performance limitations, forcing the construction of separate storage clusters, just like with glusterfs.
- Using a single NFS server for shared storage raises concerns regarding fault tolerance.
- S3 is an excellent popular solution for specific tasks, but it is not a file system, which limits its applicability.
- Lsyncd. Since we have started discussing 'non-file systems,' it's worth mentioning this popular solution. Not only is it unsuitable for bidirectional exchange (though it can be adapted if necessary), but it also does not work stably with a large number of files. A downside is that it is single-threaded. The reason lies in the program's architecture: it uses inotify to monitor operational objects, which are set up at launch and during rescanning. Rsync is used as the transfer medium.
Tutorial: how to set up shared storage based on drbd+ocfs2
One of the most convenient solutions for us became the combination ocfs2+drbdNow we will explain how to quickly set up a shared storage for two servers based on solution databases. But first, let's talk a bit about the components:
DRBD is a standard storage system provided by Linux that allows for data replication between servers block-wise. Its main application is in building fault-tolerant storage.
OCFS2 is a file system that enables multiple systems to share the same storage. It comes included with Linux and consists of a kernel module and userspace tools for working with the file system. OCFS2 can be used not only on top of DRBD but also over iSCSI with multiple connections. In our example, we use DRBD.
All actions are performed on Ubuntu Server 18.04 in a minimal configuration.
Step 1. Configure DRBD:
In the file /etc/drbd.d/drbd0.res, we describe our virtual block device /dev/drbd0:
resource drbd0 {
    syncer { rate 1000M; }
    net {
        allow-two-primaries;
        after-sb-0pri discard-zero-changes;
        after-sb-1pri discard-secondary;
        after-sb-2pri disconnect;
    }
    startup { become-primary-on both; }
    on drbd1 {
        meta-disk internal;
        device /dev/drbd0;
        disk /dev/vdb1;
        address 10.10.10.192:7789;
}
    on drbd2 {
        meta-disk internal;
        device /dev/drbd0;
        disk /dev/vdb1;
        address 10.10.10.193:7789;
}
}
meta-disk internal — use the same block devices to store metadata
device /dev/drbd0 — use /dev/drbd0 as the path to DRBD.
disk /dev/vdb1 — use /dev/vdb1
syncer { rate 1000M; } — use gigabit bandwidth of the channel
allow-two-primaries — an important option that allows changes to be accepted on two primary servers
after-sb-0pri, after-sb-1pri, after-sb-2pri — options that determine the actions of a node upon detection of split brain. More details can be found in the documentation.
become-primary-on both — sets both nodes to primary.
In our case, we have two absolutely identical VMs, with a dedicated virtual network bandwidth of 10 gigabits.
In our example, the network names of the two nodes in the cluster are drbd1 and drbd2. For proper operation, it is necessary to map the names and IP addresses of the nodes in /etc/hosts.
10.10.10.192 drbd1
10.10.10.193 drbd2
Step 2. Configure the nodes:
On both servers, execute:
drbdadm create-md drbd0 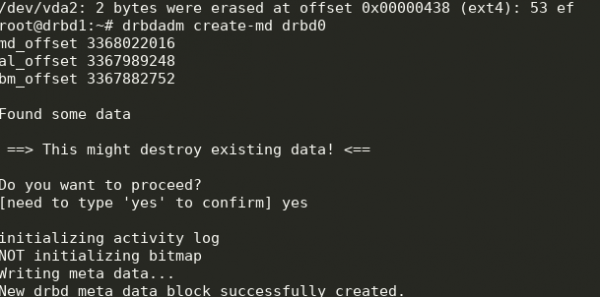
modprobe drbd
drbdadm up drbd0
cat /proc/drbd
We get the following:

We can start the synchronization. On the first node, you need to execute:
drbdadm primary --force drbd0Check the status:
cat /proc/drbd 
Great, synchronization has started. Wait for it to finish and see the result:

Step 3. We start the synchronization on the second node:
drbdadm primary --force drbd0
We get the following:

Now we can write to drbd from both servers.
Step 4. Installation and configuration of ocfs2.
We will use a rather trivial configuration:
cluster:
     node_count = 2
     name = ocfs2cluster

node:
     number = 1
     cluster = ocfs2cluster
     ip_port = 7777
     ip_address = 10.10.10.192
     name = drbd1

node:
     number = 2
     cluster = ocfs2cluster
     ip_port = 7777
     ip_address = 10.10.10.193
     name = drbd2
It needs to be recorded in /etc/ocfs2/cluster.conf both nodes.
Creating a filesystem on drbd0 on any node:
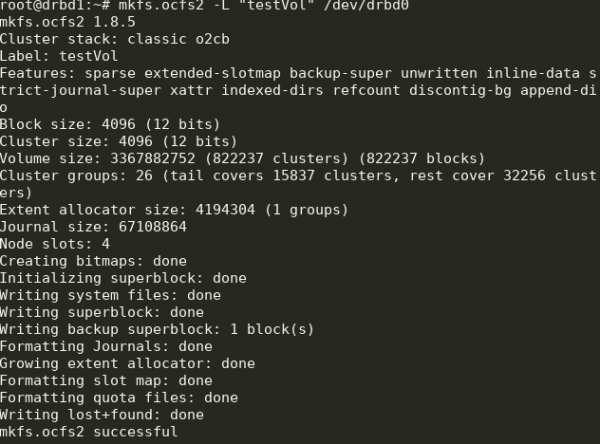
mkfs.ocfs2 -L "testVol" /dev/drbd0
Here we created a filesystem with the label testVol on drbd0, using the default parameters.
In /etc/default/o2cb, it is necessary to set (as in our configuration file)
O2CB_ENABLED=true
O2CB_BOOTCLUSTER=ocfs2cluster
and execute on each node:
o2cb register-cluster ocfs2clusterAfter which we enable and add to autostart all the necessary units:
systemctl enable drbd o2cb ocfs2
systemctl start drbd o2cb ocfs2
Part of this will already be running during the setup process.
Step 5. Adding mount points in fstab on both nodes:
/dev/drbd0 /media/shared ocfs2 defaults,noauto,heartbeat=local 0 0Directory /media/shared this must be created in advance.
Here we use the noauto option, which means that the filesystem will not be mounted at startup (I prefer to mount network filesystems via systemd) and heartbeat=local, which means using the heartbeat service on each node. There is also global heartbeat, which is more suitable for larger clusters.
Next, we can mount /media/shared and check the synchronization of the contents.
Done! As a result, we get a more or less fault-tolerant storage system with scaling capabilities and decent performance.
Source: habr.com
