

The search, interview, test task, selection, hiring, and onboarding process is a challenging and well-understood journey for both employers and employees.
A newcomer lacks the necessary specialized skills. Even an experienced specialist must adapt. Managers face the challenge of determining which tasks to assign to the new employee at the outset and how much time to allocate for them. This must be done while ensuring engagement, involvement, drive, and integration, without risking critical business tasks.
To address this, we initiate internal relay projects. They consist of independent short stages. The results of such work serve as a foundation for subsequent developments and allow newcomers to showcase their abilities, integrate into the team with an interesting task, and without the risk of failing an important project. This involves gaining experience, getting to know colleagues, and the opportunity to present oneself positively when there are no strict limitations imposed by legacy.
An example of such a relay project is the concept of a rotational screen based on the stroboscopic effect, capable of displaying arbitrary user-generated dynamic images created on a phone screen. Prototypes can be found. .
The work was conducted sequentially by several employees and will continue with new ones during their onboarding (which lasts from two weeks to a month, depending on abilities and skill levels).
The stages were as follows:
a) conceptualize the design (by studying existing samples, reviewing analogs, and demonstrating creative initiative);
b) develop the conceptual electrical schematic and lay it out on the board;
c) create a protocol for transmitting images from the phone to the device;
d) ensure control via smartphone through Bluetooth LE.
The initial concept was to use something very compact, like a three-blade spinner that would display messages when manually spun. One blade housed a BLE module, the second contained ten RGB LEDs, and the third had an optical sensor, with a battery in the center. A schematic diagram was made, and initial experiments were conducted. It became clear that the image quality was very low, the resolution small, the gaming effect short-lived, and the capabilities modest. Moreover, spinners faded into the past just as quickly as they appeared. It was decided to raise the bar and develop a rotary stroboscopic screen. This could at least be used for practical purposes at exhibitions and conferences, and interest in such solutions will not wane anytime soon.
Regarding the design, there were two main questions: how to arrange the LEDs (in a vertical plane, like in the example above, or horizontally) and how to power the rotating board with the LEDs.
For educational purposes, the LEDs were arranged only in a horizontal plane. As for powering the board, there was an important choice: either we use a bulky, noisy, but cheap brushed motor, or we opt for a more elegant solution with contactless power transfer using two coils—one on the motor, the other on the board. The elegant solution is certainly more expensive and time-consuming, as the coils needed to be calculated and then wound (preferably not by hand).
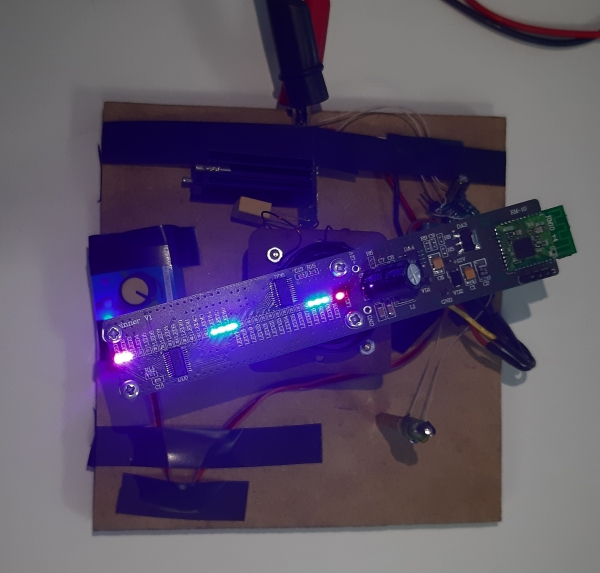
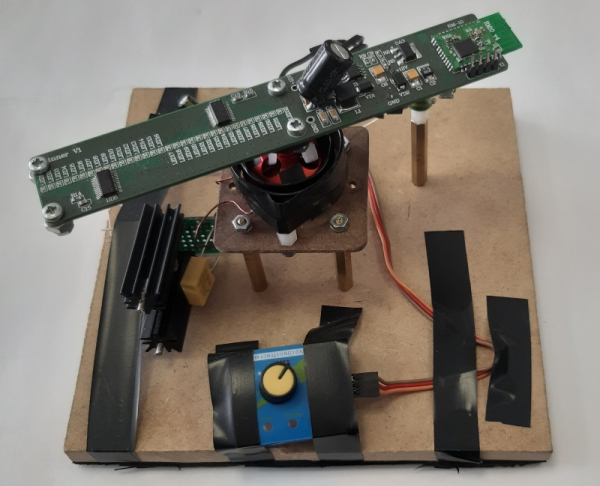
This is what the resulting prototype looks like.
The specifics of mass-produced products are such that every cent in production costs matters. The success can depend on the cost of a handful of passive components. Therefore, manufacturers often have to choose a less efficient but cheaper option to maintain commercial competitiveness. Thus, imagining that the rotary screen would go into mass production, the developer chose a brushed motor.
The resulting prototype sparked, buzzed, and shook the table when launched. The structure that ensured stability turned out to be so heavy and cumbersome that it made no sense to bring it to a production prototype. After celebrating the interim success, a decision was made to replace the engine with a rotating transformer with an air gap. Another reason was the inability to power the engine from a computer's USB port.
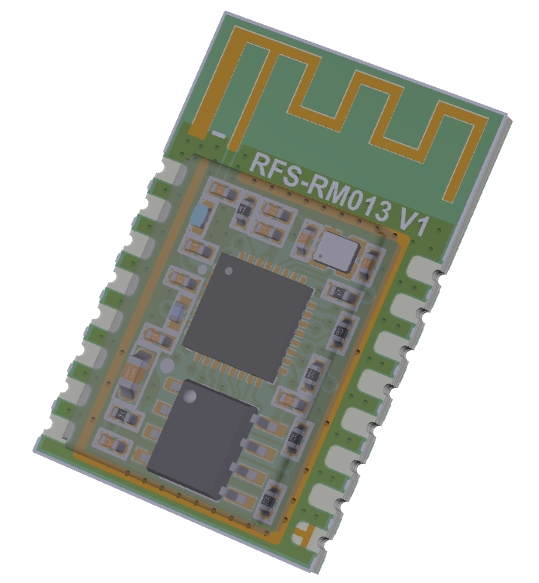
The base of the LED board was our RM10 module and six LED drivers. .
The drivers have 16 channels that can independently control each one. Thus, six such drivers and 32 RGB LEDs have the capability to display 16 million colors in total.
For synchronizing and stabilizing the output image, two magnetoresistive Hall effect sensors were used. .
The plan was simple – the sensor provides an interrupt for every rotation of the board, and the position of the LEDs is determined by the pulse between two passes, calculating their azimuth and illumination in a 360-degree sweep.
But something went wrong – regardless of the rotation speed of the board, the sensor randomly outputted either one or two interrupts per pass. As a result, the image appeared blurred and folded into itself.
Replacing the sensors did not resolve the issue, so the Hall effect sensor was replaced with a photoresistor.
If anyone has thoughts on why the magnetoresistive sensor might have behaved this way, please share in the comments.
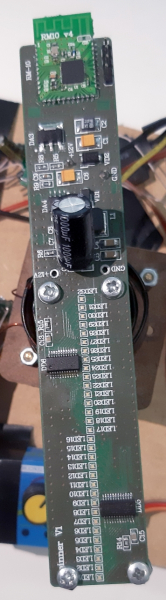
The top side of the board
With the optical sensor, the image is sharp but stabilizes after about 30 seconds. This happens due to a combination of reasons, one of which is the timer's discretization. This is 4 million ticks per second, divided by 360 degrees with a remainder, which introduces distortion into the displayed image.
In Chinese stroboscopic clocks, the image is set in a couple of seconds at the cost of a small segment of the circle simply not being displayed: on the circular image, there is a blank space; on text, it's not noticeable, but the picture ends up incomplete.
However, the problems did not end there. The microcontroller cannot provide the necessary data transmission speed for the possible number of shades (about 16 MHz) – the screen outputs 1 frame per second, which is insufficient for the human eye. Clearly, a separate microcontroller needs to be placed on the board to control the image, and until then, the decision has been made to replace MBI5030 with . This is only 7 colors, including white, but it's enough for working on the software part.
And an important point, which was the purpose of this educational task – to program the microcontroller and control it via a smartphone app.
Currently, the scanning is transmitted via Bluetooth directly through nRF Connect, and the app interface is under development.
Thus, the intermediate results of the relay team are as follows:
The rotary screen has a row of 32 LEDs and an image diameter of 150 mm. It displays 7 colors, sets an image or text in 30 seconds (which is not ideal, but acceptable for a start). Through the Bluetooth connection, a command can be sent to change the image.
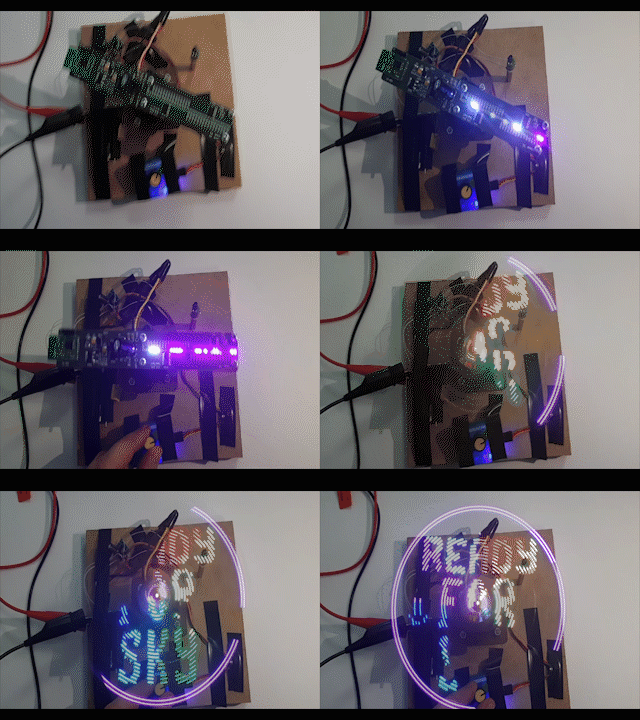
This is how it looks
And for the new young developers, the following tasks remain to ensure successful training:
Overcome the lack of RAM in the microcontroller for full-color rendering of the color palette. Improve the app to create and transmit static or dynamic images. Give the design a finished look. We will keep you updated.
P.S. Of course, after completing the Bluetooth LE work (), we will design and implement a Wi-Fi/Bluetooth version on ESP32. But that will be a story for another time.
Source: habr.com
