


If you are involved in building medium to large Wi-Fi networks, where the minimum number of access points is several dozen, and on larger sites it can be counted in hundreds and thousands, you need tools for planning such an impressive network. The results of the planning/design phase will determine the operation of Wi-Fi throughout the lifecycle of the network, which, in our country, can sometimes last about 10 years.
If you make a mistake and lay out fewer access points, the increased load on the network after three years will make users anxious, as the environment will cease to be transparent to them, voice calls will start to break up, video will disintegrate, and data will be transmitted much slower. You will not be remembered kindly.
If you make a mistake (or play it safe) and lay out more access points, the client will overpay significantly and may immediately encounter problems from excessive interference (CCI and ACI) created by the access points themselves, especially if the network engineer decided to rely on automation (RRM) for network configuration and did not check how the automation performed through radio surveying. Will you even hand over the network in this case?
As in all aspects of our life, in Wi-Fi networks, it is essential to strive for a golden mean. The number of access points should be just enough to fulfill the requirements set in the technical specification (after all, you didn’t skimp on writing a solid specification, did you?). At the same time, a good engineer has a vision that allows for an objective assessment of the network's lifespan and to lay down an adequate safety margin.
In this article, I will share my experience in building Wi-Fi networks and will detail the tool #1 that has long helped me tackle the most challenging tasks. This tool is Ekahau Pro 10, formerly known as Ekahau Site Survey Pro. If you are interested in the topic of Wi-Fi in general, welcome below!

The article will be useful both for integration engineers who build Wi-Fi networks and for engineers who maintain wireless networks or IT directors, who order the construction of a network that includes Wi-Fi. The days when one could simply "estimate" the number of points per square meter or quickly throw together a "project" for a Wi-Fi network in a vendor's planner are, in my opinion, long gone, although echoes of that era are still heard today.
How can I best present the software that helps me create a good Wi-Fi? Should I just describe its advantages? That sounds like dull marketing. Comparing it subjectively to others? That's already more interesting. Sharing my journey so that the reader understands why I spend 20 hours a month on Ekahau Pro? I hope you'll enjoy the story!
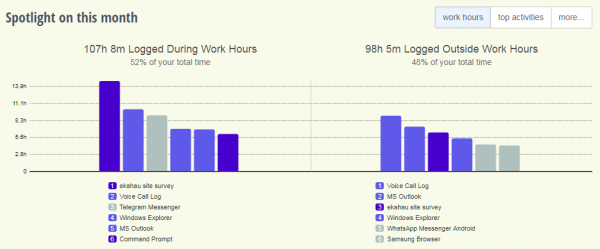
This is a screenshot from my RescueTime for last month, March 2019. I think no comments are needed. When working with Wi-Fi, especially during the commissioning, it usually turns out like this.
Part of my story in the context of Wi-Fi that will lead smoothly to the topic
If you want to read about Ekahau Pro right away, scroll to the next page.

Back in 2007, I was a young network engineer, having graduated just a year earlier from the "Radio Faculty" at UPI with a degree in Mobile Object Communication Systems. I was fortunate to get a job in the production department of a fairly large integrator called Mikrotest. There were three radio engineers in the department including me, one of whom was more into Tetra, and the other an experienced man who did a bit of everything. They redirected Wi-Fi projects to me at my request.
One of the first such projects was Wi-Fi in the Tyumen Technopark. At that time, I had only a CCNA and a couple of Design Guides on the topic, one of which mentioned the necessity of a Site Survey. I told the project manager that it would be good to conduct this survey, and he agreed since he needed to go to Tyumen anyway. After a bit of Googling on how to conduct this survey, I took a couple of Cisco 1131AG points and an existing PC Card Wi-Fi adapter from the same company, because the Aironet Site Survey Utility allowed for good visualization of the signal strength at reception. I was not yet aware of programs that can perform measurements and draw coverage maps by themselves.
The methodology was simple. We hung the point where it could be adequately placed later, and I made signal level measurements. I noted the values on a drawing with a pencil. After these measurements, I ended up with such a sketch:
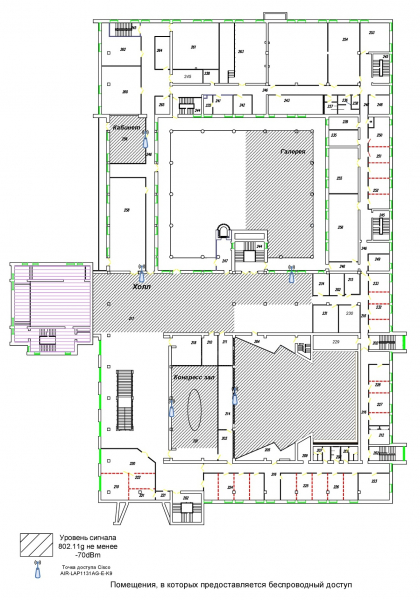
Can surveys be done like this now? In principle, yes, but the accuracy of the results would be poor, and the time spent would be too much.
After gaining experience from the first radio survey, I began to wonder if there might be software that does this? After talking with a colleague, I discovered that our department had a boxed version of AirMagnet Laptop Analyzer. I installed it right away. The tool turned out to be great, but for a different task. However, Google suggested a product called AirMagnet Survey. After looking at the price of this software, I sighed and went to my boss. The boss relayed my request to his superior in Moscow, and unfortunately, the software was not purchased. What should an engineer do when management refuses to buy the software? You know.
The first practical use of this program was in 2008 when I designed the Wi-Fi system for the UGMK-Health medical center. The task was simple – to ensure coverage. No one, including me, thought about the serious network load that might occur in a few years. We installed a test Cisco 1242 access point in the proposed location, and I took measurements. The software made it easier to analyze the results. Here’s what we got back then:
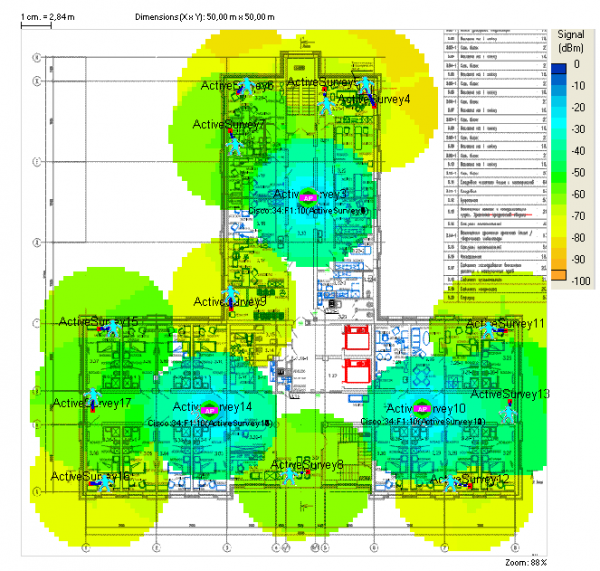
It was decided that three access points per floor would be enough. I didn’t know at the time that it would be beneficial to add at least one more to the center of the building, so that Wi-Fi phones could roam more smoothly, as I hadn’t even started with CCNA Wireless yet. The main focus was on the CCNP course; that year I passed the 642-901 BSCI exam, and routing protocols interested me more than 802.11.
Time passed, and I completed 1-2 Wi-Fi projects a year.The rest of the time, I worked on wired networks. I did the design or calculation of the number of access points either in AirMagnet or in Cisco WCS/Planning mode (this has long been known as Prime). Sometimes I used VisualRF Plan from Aruba. Serious Wi-Fi testing wasn't in vogue back then. From time to time, more out of curiosity, I conducted radio surveys using AirMagnet. Once a year, I reminded management that it would be good to purchase the software, but I received the standard response, 'we'll include it in the budget for a big project.' When such a project came, Moscow again responded, 'oh, we can't buy it,' to which I said, 'oh, I can't design, sorry,' and the software was purchased.
In 2014, I successfully passed the CCNA Wireless certification, and while preparing, I began to realize that "I know that I know almost nothing." A year later, in 2015, an interesting challenge arose. I needed to provide Wi-Fi coverage for a fairly large outdoor area. About 500 thousand square meters. Moreover, in some places, the access points had to be installed at a height of around 10-15 meters, with the antennas tilted downwards by 20-30 degrees. That's when AirMagnet unfortunately said that such a feature wasn't available! It seemed simple, just tilt the antenna down! Well, the radiation pattern of the Extreme WS-AO-DX10055 antenna was known, I obtained sufficient data to make a decision on the height and tilt angle of the antennas.
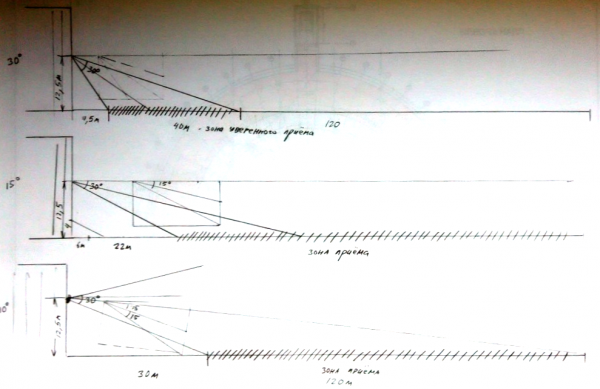
As a result, a solution emerged: to cover the area with 26 access points at a transmission power of 19 dBm on 5 GHz.
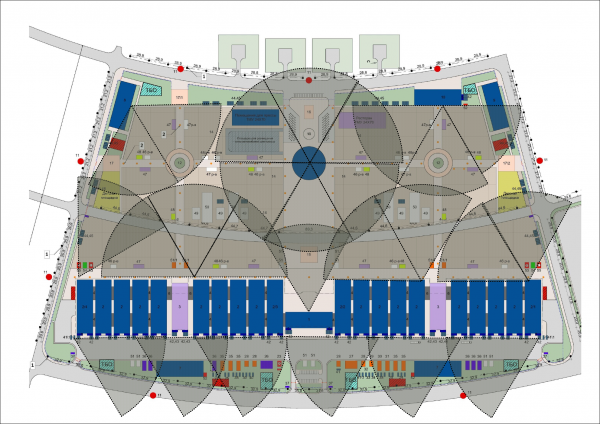
Alongside this project, I was the chief engineer responsible for building a Wi-Fi network for the local medical university (UGMU), while the project itself was carried out by an engineer from a subcontracting organization. I was quite surprised when he (thanks, Alexey!) showed me Ekahau Site Survey! This happened just shortly after I had completed the hand calculations!
I saw a depiction that was quite different from the familiar AirMagnet.
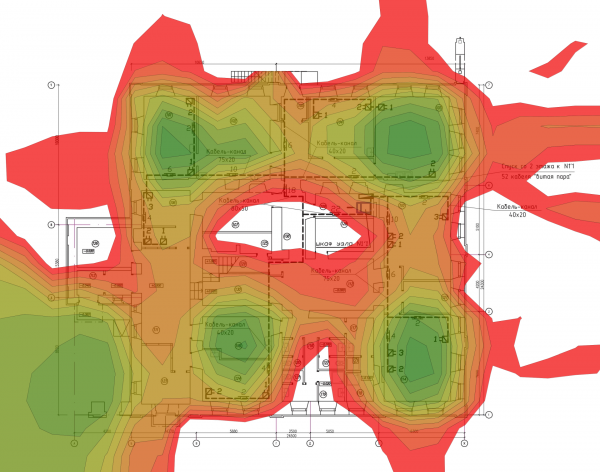

Now, I look at this illustration and see some kind of terrible red crab, and I don't use red in visualizations. But those lines between the decibels captivated me!
The engineer showed me how to change the visualization parameters for clearer representation.
I eagerly asked the pressing question, can the antenna be tilted? Yes, easily, he replied.
In the latest version of the software, the antenna I needed wasn't included, as it seemed to be a quite new product. Noticing that the antenna database was in XML format and the file structure was quite understandable, I created a file named Extreme Networks WS-AO-DX10055 5GHz 6dBi.xml using the radiation pattern. This file helped me create an illustration
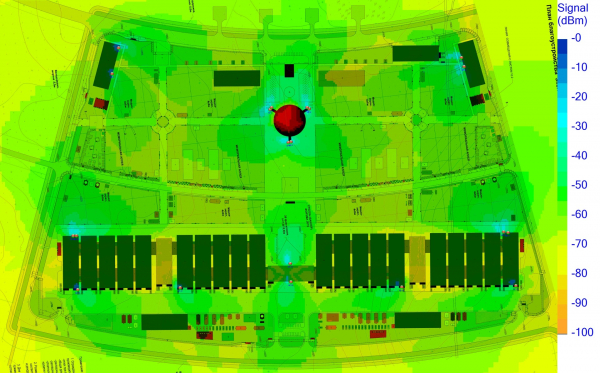
to achieve a clearer one, where I could move the boundaries and set the distance between the lines in dB. The most important thing was that I could change the tilt of the antenna.
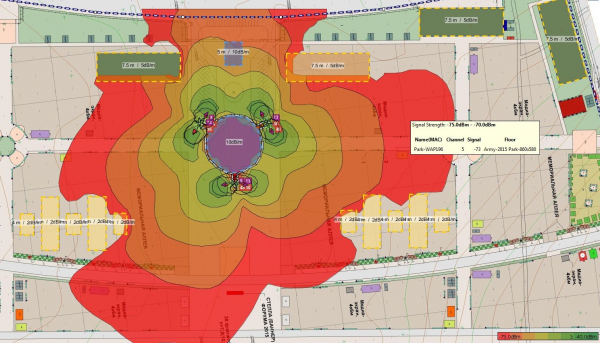
And this tool also has measuring capabilities! That same day, I fell in love with Ekahau.
By the way, in the new version 10, the data on diagrams is stored in JSON, which is also editable.
Around the same time, the integrator where I had worked for almost 9 years ceased to exist. It wasn't sudden; the process of decline had been going on for about a year. By the end of summer, that process was complete, and I received my labor record book, 2 months' salary, and invaluable life experience. By that time, I had already realized that Wi-Fi was what I wanted to delve into—an area I found genuinely interesting. I had savings for about six months, a pregnant wife, and an apartment I owned, for which I had paid off all debts a year ago. A good start!
After meeting with familiar people, I received several job offers from integrators, but none promised to focus primarily on Wi-Fi. At that point, I made the final decision to embark on my own. Initially, I wanted to simply register as a sole proprietor, but I ended up forming an LLC, which I named GETMAXIMUM. That's a separate story, with further developments regarding Wi-Fi.
The main idea was to do things in a humane way.
Even as a leading engineer, I couldn't influence timelines or decision-making regarding equipment selection and work methods. I could only express my opinion, but was it taken into account? At that point, I had experience in designing and building Wi-Fi networks, along with auditing networks that had been constructed by others. I had a strong desire to apply this experience in practice.
The first task appeared in October 2015. It was a large building where someone had designed over 200 access points, laid out a couple of WISMs, PI, ISE, CMX, and all of it needed to be configured properly.
In this project, Ekahau Site Survey revealed its potential, and the hours spent on radio surveys allowed us to see that even with the latest software, the RRM automation set the channels quite strangely in some places, which needed adjustments. The same went for power levels. In some cases, the installers did not bother and simply placed the access points according to the blueprint, not taking into account that the metal structures significantly interfered with the propagation of the radio signal. While this might be excusable for installers, it is unacceptable for engineers to allow such situations.
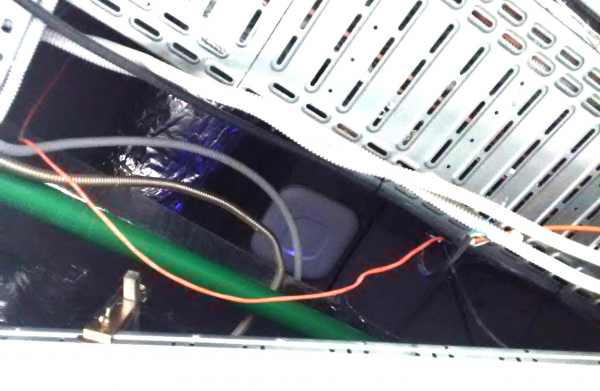
This was the project that solidified the thought that the design of a Wi-Fi network with more than 100 access points, or even a smaller number in non-standard conditions, needs to be approached with great care. After completing the project in 2016, I purchased the CWNA textbook and began studying it to systematize and refresh my accumulated knowledge. Even before that, my former colleague, from whom I learned a lot (Roman Podoynitsyn, the first CWNE in Russia [#92]), recommended to me the course as the most comprehensible and practical. Since 2016, I have been recommending this course to everyone. It truly is the most practical of all available options, and there are affordable textbooks for it.
Next, I was tasked with designing a Wi-Fi network for a clinic under construction, where many systems, including telephony, relied on Wi-Fi. When I created a model of this network, I was surprised myself. In the existing clinic, back in 2008, I installed three access points per floor, and later they added one more each. Here in 2016, it turned out to be 50. Per floor. Yes, the floor is larger, but that’s 50 access points! We aimed for excellent coverage with a level of -65dBm at 5GHz in all areas without channel overlap and a level of “2nd strongest” at -70dBm. The walls are brick, which is actually good, as dense networks benefit from walls being our friends. The problem was that these walls did not exist yet, only plans were available. Thankfully, I knew the attenuation a plastered wall of “half brick” would provide, and Ekahau allowed me to flexibly adjust this parameter.
I experienced all the benefits of Ekahau 8.0. It understood dwg! Layers with walls were immediately translated into walls on the model! Hours of pointless wall drawing are gone forever! I accounted for a small margin in case the plastering was heavier. I showed this model to the client. He was shocked: “Max, in 2008 there were 3 access points per floor, now 50!? I trust you, but how do I explain this to management?” I anticipated such a question, so I had previously discussed my project with a familiar engineer at Cisco (they have been using Ekahau for a long time) and he approved it. Where stable voice communication for a large number of users is needed, the number of access points cannot be low. For 2.4GHz, we could have installed fewer, but the capacity of such a network wouldn't suffice. I presented the Ekahau model during a general meeting, explained everything in detail, and then sent a clear report on the modeling. This convinced everyone. We agreed to conduct a clarifying measurement when the building's framework was completed and partitions were erected on at least one floor. And that's what we did. The calculations were confirmed.
Later, the laptop with the exact model in Ekahau helped me convince clients many times about the need for just that many access points to solve their specific tasks.
A reader might ask, how accurate are the Wi-Fi models created in Ekahau? If your approach is engineering-based, the models are accurate. This approach can also be termed “Thoughtful Wi-Fi.” Experience in modeling, designing, and subsequently implementing different Wi-Fi networks has shown the accuracy of the models. Whether it’s a university network, a large office building, or factory shops, the time spent on planning leads to excellent results.
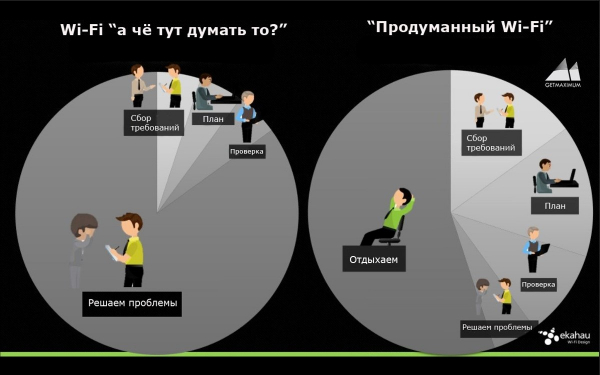
The story smoothly starts to transition towards Ekahau Pro.

A life hack for correctly understanding walls: save the dwg in 2013 format (not 2018) and if there’s anything on layer 0, move it to another layer.
In 2017, version 8.7 introduced a remarkable copy & paste feature for all elements. Since Wi-Fi is sometimes built on old objects where drawings in AutoCAD are scarce, walls often need to be drawn manually. If there are no drawings, an evacuation plan photo is used. This happened once at the Russian Post in Yekaterinburg. Usually, there are some drawings available, and they have standard elements. For example, columns. You draw a single column neatly as a square (it's possible to depict a circle, but a square is always sufficient) and copy it across the drawing. This saves time. It’s important that the drawings you’ve received correspond to reality. It’s better to check, but usually, the local admin is aware.
About Sidekick.
In September 2017, Sidekick was announced, the first universal measuring device “everything in one,” and in 2018, it began to appear among all serious engineers.
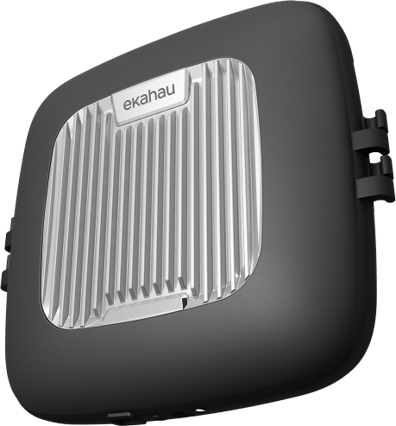
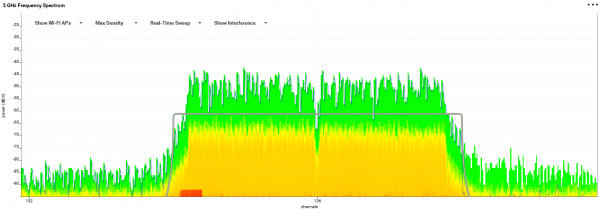
Twitter was buzzing (and continues to buzz) with enthusiastic reviews from cool guys who switched to it. That’s when I began to think about purchasing it, but the price was steep for a small company like mine, and I already had a set of adapters and a couple of Wi-Spy DBx units that seemed to work well. Gradually, the decision was made. You can compare the data from the datasheets of Sidekick and Wi-Spy DBx. In short, the difference is in speed and detail.. The Sidekick scans both 2.4GHz and 5GHz ranges in 50ms, while the old DBx sweeps through 5GHz channels in 3470ms, and 2.4GHz in 507ms. Do you understand the difference? Now you can see and record the spectrum in real time during radio surveys! The second important factor is the resolution bandwidth. For the Sidekick, it is 39kHz, which allows you to even see 802.11ax subcarriers (78.125kHz). The default value for DBx is 464.286kHz.
Here’s the spectrum from the Sidekick
Here’s the spectrum of the same signal from the Wi-Spy DBx
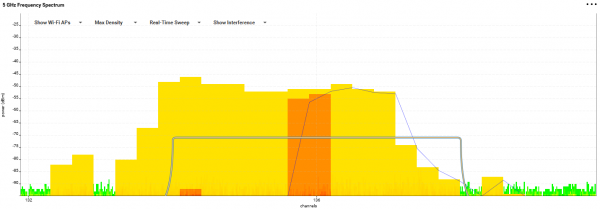
Is the difference clear? What do you think of OFDM?
You can look into more details here, I recorded a short
The most wonderful thing is to witness this yourself! A good example is this video , where various non-Wi-Fi devices are included.
Why is such detail necessary?
To accurately identify and classify sources of interference and map them.
To better understand how data is transmitted.
To accurately determine channel load.
So, what do we have? In one box:
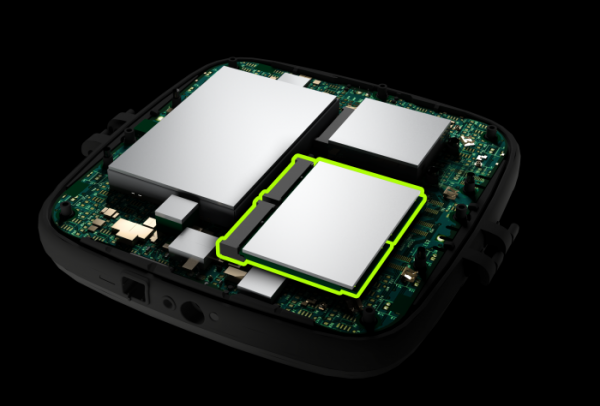
- A pair of calibrated Wi-Fi adapters in passive mode for listening to both bands, compatible with 802.11ax.
- One fast and accurate dual-band spectrum analyzer.
- A 120GB SSD, whose functionality is not completely revealed yet. It can store esx projects.
- A processor for processing data from the spectrum analyzer, to avoid burdening the laptop CPU in survey mode (the CPU is heavily loaded in real-time spectrum viewing mode).
- A 70Wh battery for 8 hours of autonomous operation of everything mentioned above.
Here’s a photo of the Sidekick next to a Cisco 1702 and Aruba 205 for size comparison.
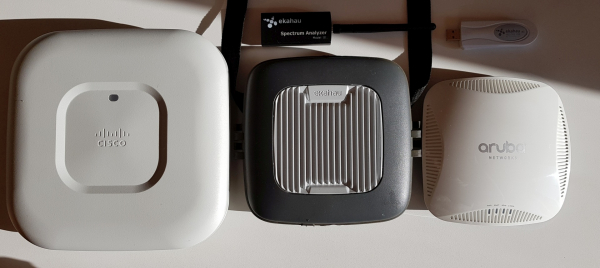
The Sidekick is now with many powerful Wi-Fi engineers and measurement results can be objectively compared and discussed. In Russia, there are not many; I know four people who have them, including me. Two of them are at Cisco. I believe that just as Fluke devices became the de facto standard for testing wired networks, the Sidekick will become the same in Wi-Fi networks..
What else can I add?
It doesn't drain the laptop's battery; it has its own. This allows us to operate longer without recharging. This is especially relevant if you have a Surface. Ekahau Pro 10 has announced support for the iPad. That means you can now install Ekahau on the iPad (minimum iOS 12) and dance around! Or when my daughter grows up, I will be able to entrust her with radio surveys.

Yes, the software for the iPad is simplified, but it's quite sufficient for surveys. The data collected will be the same as if you had used a laptop.

Oh, yes, now you can also capture pcap!
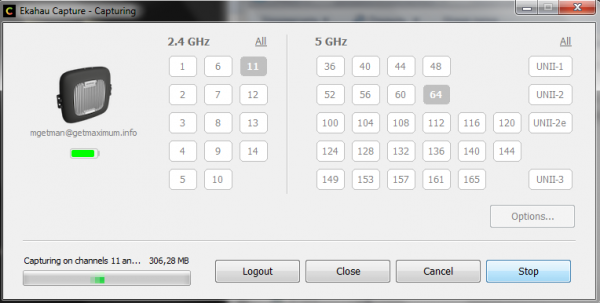
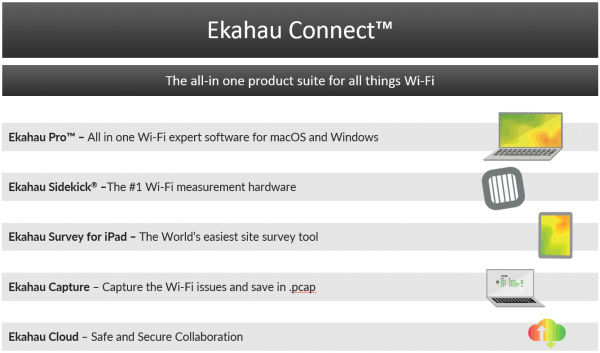
All this joy (software for iPad, Capture, Cloud, Training videos, annual support (and updates from Ekahau) for those who already have Ekahau and Sidekick costs about the same amount you would spend on a one-day flight from Yekaterinburg to Moscow. In Russia, it should cost around the same amount, as it has since December 2018. . If previously in Russia Ekahau could be bought at an outrageous price, now the price will be comparable to the rest of the world. I really hope so. The set is called Ekahau Connect.
Are there any downsides?
When I bought the Surface Pro last year, I hoped that the weight of my backpack would decrease by 1 kg compared to my trusty ThinkPad X230. The Sidekick weighs 1 kg. It's compact, but heavy!
You will no longer resemble a ghostbuster, and the security personnel at the venues will approach you more often with questions about what you're doing here. In my experience, security doesn't really like approaching a guy with five antennas sticking out of his laptop.
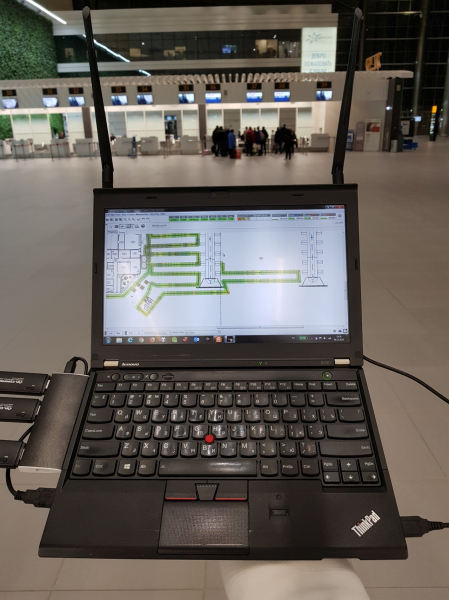
On the plus side, the accounting staff at the surveyed facility will no longer be scared by your jokes about "I'm measuring the radiation background, what's happening here... Oooooo!" So this can be noted as a positive.

And the third, a significant downside for me, is that the Sidekick shows spectrum utilization differently. You need to get used to it. The data you used to collect on DBx may not be entirely relevant.
And another plus that I remembered. At airport security, they sometimes ask to show the contents of your backpack. I eagerly start to show, "These are spectrum analyzers, this is a signal generator for testing Wi-Fi networks, this is a set of antennas for these devices..." Last time I flew, there was a woman behind me whose eyes widened more and more as I pulled out the contents of my backpack!
"Where are you flying to?" she asked.
"To Yekaterinburg," I replied.
"Phew, thank God, I'm going to another city!"
With the Sidekick and Surface or iPad, you will no longer scare women!
Are there cheaper products? What alternatives are there? I'll tell you at the end.
Now let's talk about Ekahau Pro.
The history of Ekahau Site Survey began in 2002, and in 2003 the first version of ESS was released.
I found this picture There is also a photo of a young engineer , whose name is closely associated with this software. Interestingly, the software was initially not intended for Wi-Fi use, but it soon became clear that this product was quite useful in the Wi-Fi domain.
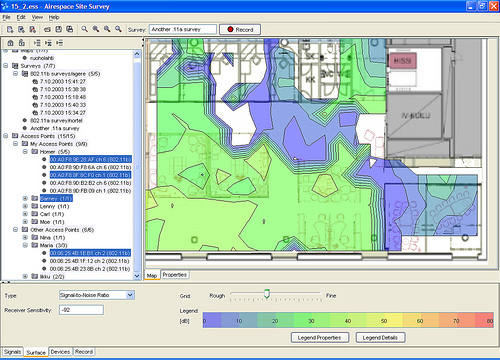
It was also amusing to read an article from 2004 about Ekahau Site Survey 2.0 on that carefully stores old articles.
Over 16 years of development, there were 10 releases, 5 of which are detailed in the . By pasting this into Word, I got 61 pages of text. No one probably knows how many lines of code were written. In the Ekahau Pro 10 presentation, it was mentioned that there were 200,000 lines of new code in version 10.
Ekahau stands out from the rest due to their attentiveness.
The Ekahau team is open to communication with the engineering community. Moreover, they are among those who unite this community. Partly due to excellent webinars, just They invite experienced engineers who share their expertise live. The most interesting part is that you can ask your questions! For example, on the topic of Wi-Fi in warehouses and manufacturing will be on April 25.
The easiest way to interact with them is through Twitter. An engineer might write something like: Come on @ekahau @EkahauSupport! This behavior has been in ESS forever now. Please fix it. #ESSrequest and provides a description of the problem, and immediately receives feedback. In every new release, significant suggestions are taken into account, making the software increasingly convenient for engineers!
On April 9, 2019, just a few hours before Ekahau Pro 10 was presented, an update was made available to happy users of version 9.2 with support.
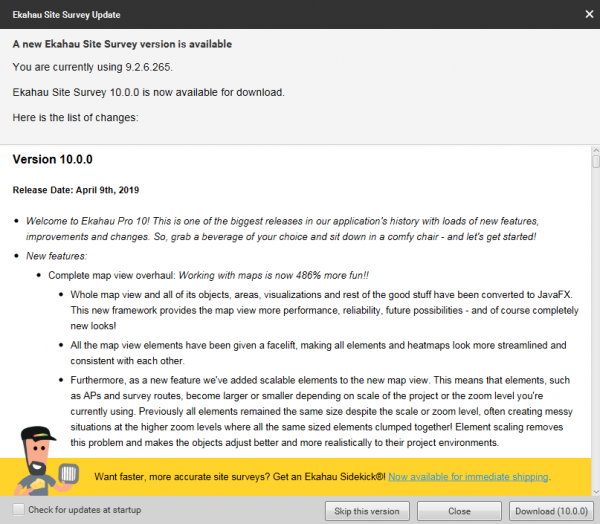
For those who have not yet dared to upgrade, you can do so confidently, as the 'old' 9.2.6 will remain an independent working program just in case. After a week of testing, I saw no reason to stay on version 9.2. Version 10 works perfectly!
I will describe the features from the Change Log for the new Ekahau Pro 10 that I noted myself:
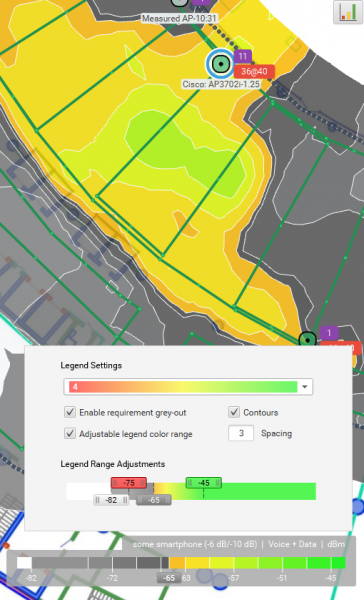
Complete map view overhaul: Working with maps is now 486% more fun + Visualization legend 2.0 + Complete visualization engine overhaul: Faster and better heatmaps!
Now everything is written in JavaFX and runs very smoothly. Much faster than before. This is worth trying. It also looks better and of course retains what I have loved about Ekahau for a long time – clarity. All maps can be flexibly customized. For example, I usually set 3 dB between colors and two cutoffs at 10 dB down and 20 dB up from the calculated signal level.
802.11ax support — for both surveys and planning
The database includes 11ax access points from all major vendors. During the survey, the adapters understand the corresponding information elements in 11ax beacons. I believe that projects with 11ax will begin this year, and Ekahau will help implement them as effectively as possible. Regarding the guys from Ekahau held a webinar in February. If this issue concerns you, I recommend checking it out.
Interference detection & Interferers visualization
This is thanks to Sidekick. Now, after the survey, the new 'Interferers' map will show the locations of devices that significantly disrupt your Wi-Fi! I have conducted a couple of small test surveys, and I have not detected any such devices.
Previously, it was necessary to arrange a 'fox hunt', attaching a Yagi antenna or patch to your DBx to figure out where the fox was hiding that was killing your 60th channel with a signal from a 'pseudo-radar', which you could see in the log from the controller and in Cisco Spectrum Expert as two narrow bands:
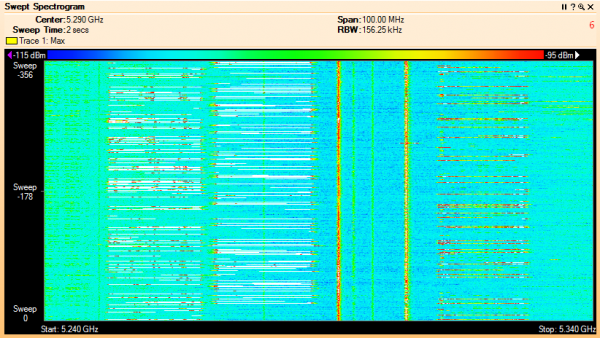
Now, just a standard walkthrough of the area is enough, and there’s a good chance that the source of interference will be shown right on the map! By the way, in the spectrogram above, the source of the problem was a malfunctioning 'Combined Volume Security Detector' Sokof-2. If your access point suddenly reported a radar Radar detected: cf=5292 bw=4 evt='DFS Radar Detection Chan = 60 even though the nearest airport is several dozen kilometers away, it’s a reason to walk around the site with a spectrum analyzer, and Sidekick is very helpful here.
Ekahau Cloud and Sidekick File Storage
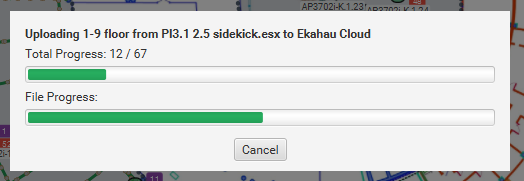
For reliability, as well as for working on large projects, there is now a cloud that can be shared by the team. Previously, I either used my cloud on Synology or just regularly made backups on a flash drive, because if the hard drive on my laptop failed, a week’s work surveying a large site could be lost. Make backups. Now the capabilities are even greater. In my opinion, Ekahau Cloud is ideal for truly large distributed tasks..
If anyone from the IT team of Ashan reads this post, here’s an idea for successfully modernizing your Wi-Fi network, which was built poorly: buy Ekahau Pro, hire a team of engineers with the same Ekahau Pro and identical Sidekicks, conduct a detailed pilot survey, analyze thoroughly as a team, and then proceed! You will need one competent radio engineer on staff who won't just read reports 'per standards,' but will look more at esx files and analyze. Then you'll have success and achieve a Wi-Fi system everyone will be proud of. And if someone random does a survey for you on AirMagnet, and gets that into your wonderful standard report, oh dear, what will happen.
New multi-note system
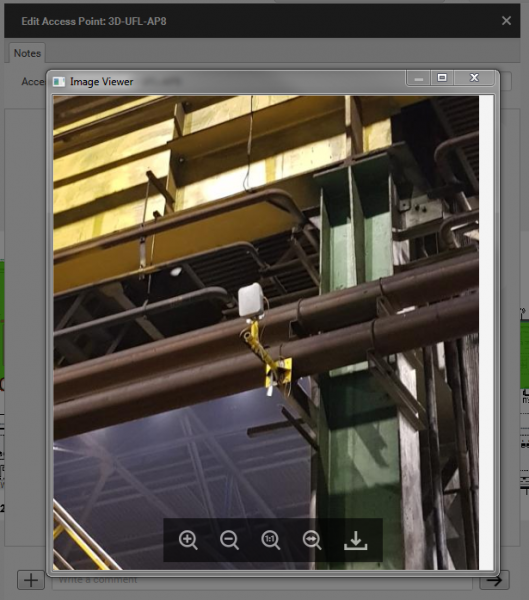
Previously, I used to insert photos of access points in the esx project and wrote short comments, more for myself for future reference. Now, it’s possible to make notes anywhere on the map and discuss contentious points, working as a team on a single project! I hope to soon experience the benefits of such work. Example: there is a disputed location, we take a photo – insert it in the esx – upload it to the cloud, consult with colleagues. I will be thrilled when they add support for 360-degree photos, as I have been shooting objects with the Xiaomi Mi Sphere for over a year; sometimes it's much more illustrative than just a flat photo.
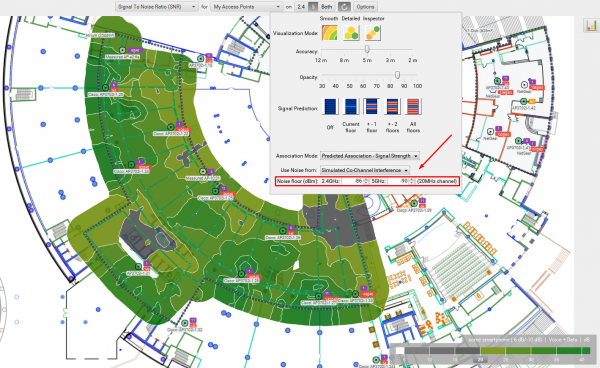
Ability to set noise levels.
Signal-to-noise ratio has always been a contentious visualization for my understanding.
Any Wi-Fi adapters can only indirectly define the level of background noise. Only a spectrum analyzer will show the actual level. If you surveyed the site with a spectrum analyzer during the preliminary inspection, you know the actual level of background noise. Just insert this level into the Noise Floor fields and obtain an accurate SNR map! That's what I was missing!
What is noise, what is signal, and what is Energy, I recommend recalling by reading a short on this topic.
The following nice features appeared in versions 9.1 and 9.2, but in 10 they shine in full glory.
I will describe them further.
Visualization from the perspective of a specific adapter.
The guys at Tamosoft boast that their Tamograf can conduct surveys from many types of client devices, and there is some truth to that. We don’t build Wi-Fi networks to operate with a reference adapter. The networks consist of thousands of different real devices! In my opinion, it's better to have an excellent reference measuring adapter that quickly scans all channels and allows you to effectively 'normalize' the results obtained from a real device. In Ekahau Pro, there's a super convenient 'View as' feature that allows you to set an offset or difference in the device profile that you define yourself.
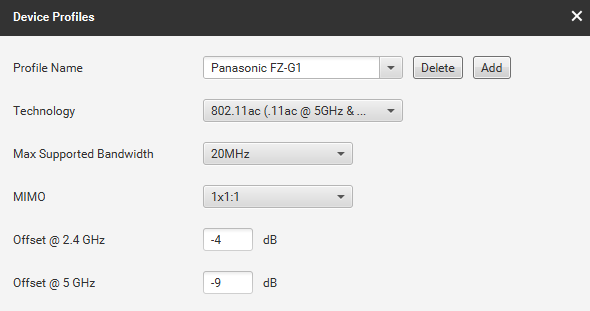
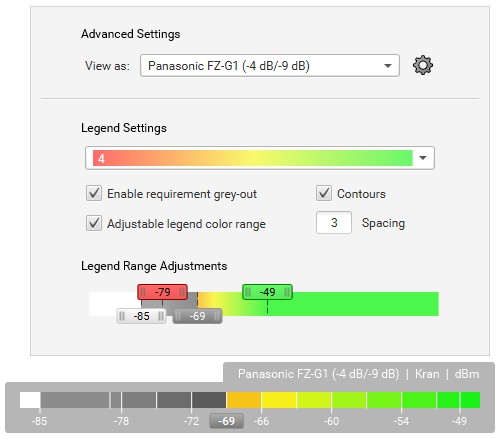
If the real device is a Windows or MacOS laptop, I run Ekahau on it and compare the signal levels in the near, mid, and far field across several channels. Then I take an average value and create a device profile. If it's a handheld device on Android and there is no built-in utility showing RSSI, I install a free utility that does. My favorite is Aruba Utilities. All that's left is to press Ctrl on the legend and choose the device, for example, see how the Panasonic FZ-G1 perceives the network.
If there are many devices in the park or BYOD is active, the engineer's task is to understand which device has the lowest sensitivity and create visualizations based on that device. Sometimes the requirement to provide radio coverage at -65 dBm fails against real devices with a 14-15 dB difference compared to the measuring adapter. In such cases, we either adjust the specifications to set it at -70 or -75, or clarify that -67 is for certain devices, while for the Casio IT-G400, it's -71 dBm.
If you need a kind of 'average device,' set an offset of -10 dBm relative to the measuring adapter; it's often close to the truth.
Visualization from another height
For those building Wi-Fi in industrial facilities, it's essential that coverage is available not only at ground level for people but also at height for devices on cranes or loaders. I have experience in setting up factory and port Wi-Fi. With the introduction of the 'Visualization Height' option, it has become very convenient to specify the height from which we view. A loader or crane at a height of 20m with an access point installed in client mode perceives the network differently than a person with a Honeywell device on the ground, when access points are hanging at 20m and serving both levels. It's now very easy to see how different users perceive the network! Don't forget to revert the height back to the main level afterwards.
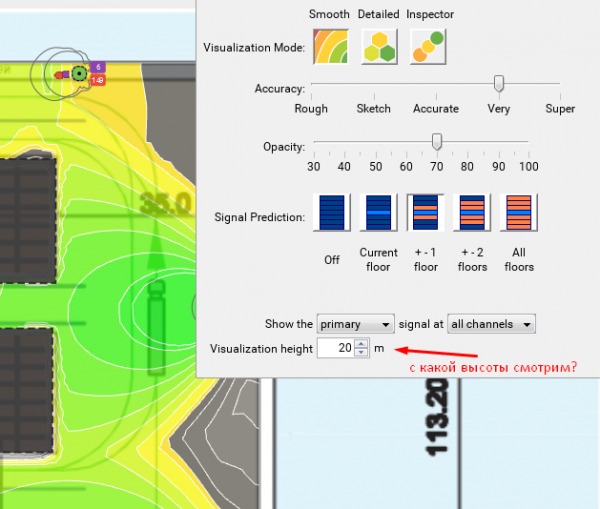
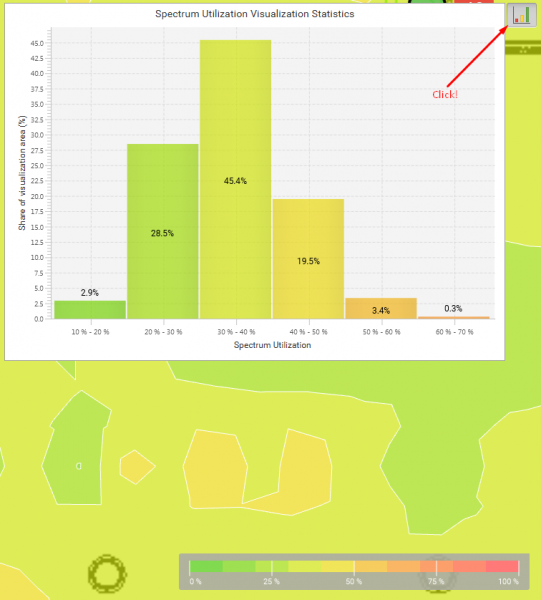
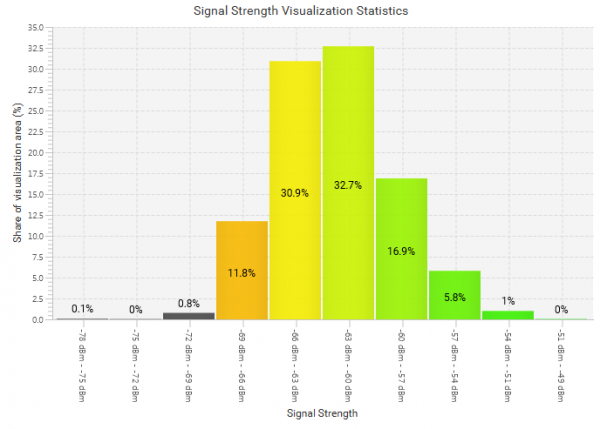
Diagram for any parameters
Clicking the button with the diagram provides an excellent breakdown by percentages, which helps quickly assess the situation, and if a 'before-after' comparison is needed, this is a great tool.
BLE coverage
This is a useful feature considering that many access points have built-in BLE radios, which also need to be designed correctly. Here, for example, is an image we created with Aruba-515 access points. This fantastically beautiful access point contains Bluetooth 5 radio, which can be used for tracking devices, as Wi-Fi location itself is not precise and quite inert, besides requiring strict compliance with several conditions. In Ekahau, we can adequately design the coverage so that three beacons are heard at each point, for instance.
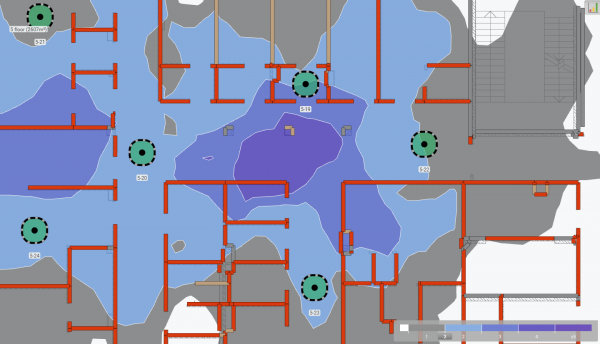
By the way, now that you have placed an access point on the map, set the power, height, and are starting to cover the Wi-Fi area using copy-paste, the access point number, for example, 5-19 automatically switches to the next one, 5-20. Previously, manual adjustments were needed.
I could continue describing various useful features of Ekahau Pro for a long time, but it seems that the article is already quite extensive, so I will stop here. I will simply list what exists and what I have actually used:
- Import/Export from Cisco Prime, so that PI displays more accurate maps.
- Merge or combining several projects into one, when multiple engineers survey a large building.
- Highly customizable display of what is shown on the map. To explain it simply… you can hide/show walls, point names, channel numbers, areas, notes, Bluetooth beacons… essentially leave only what is truly needed in the drawing, making it very clear!
- Statistics on how many kilometers you have walked. Inspiring.
- Reports. There are many ready-made templates available, and theoretically, you can create very interesting reports in two clicks. But maybe out of habit, or because I like to write something unique about each object and show the situation from different perspectives, I don’t use auto-reports. We plan to create a good template in Russian with a team of engineers for basic parameters that we won’t be ashamed to share with colleagues.
Now, let me briefly tell you about other programs.
So you can better understand if you need , or if it would be cheaper for your tasks to buy something else, I will list all the programs and say something about each that I know and/or have tried. They are which I worked with for more than 5 years, until 2015. which I thoroughly tested last year to understand if there might be worthy competitors to Ekahau. as a budget product for Survey (but it does not simulate) and , a very niche, yet cool product for stadium design. That’s basically it. There are a couple more products, but they aren’t particularly interesting. I do not claim absolute knowledge; if I missed any valuable tool, please mention it in the comments, and I will try it and add it to this article. And of course, there is paper and a compass for those who prefer to work the old-fashioned way. It should be noted that in rare cases, this is the most adequate tool.
There is a very on Wikipedia, and the data in it is outdated, although you can check the price range. Currently, for Pro versions, the prices are higher across the board.
Here is current information to present to your boss as an argument for purchasing the right software for work.:
AirMagnet

Once upon a time, large dinosaurs roamed the Earth, but they have long since become extinct due to changing conditions. In a museum, some engineers have a dinosaur skeleton (AirMagnet) that they even use for measurements, as the management firmly believes that this beloved dinosaur is still relevant. To everyone's surprise, dinosaur skeletons are still being sold, often at a very high price, as it seems that some people impulsively buy them. Why? I don't understand. Recently, I asked colleagues who are still using AirMagnet if anything has changed in the latest software releases. Almost nothing. Colleagues, Wi-Fi has transformed significantly over the past 10 years. If the software hasn’t changed in 10 years, it’s dead. My personal opinion: you can continue working with dinosaurs, but if you want to build Wi-Fi the right way, you need Ekahau Pro..
Tamograph
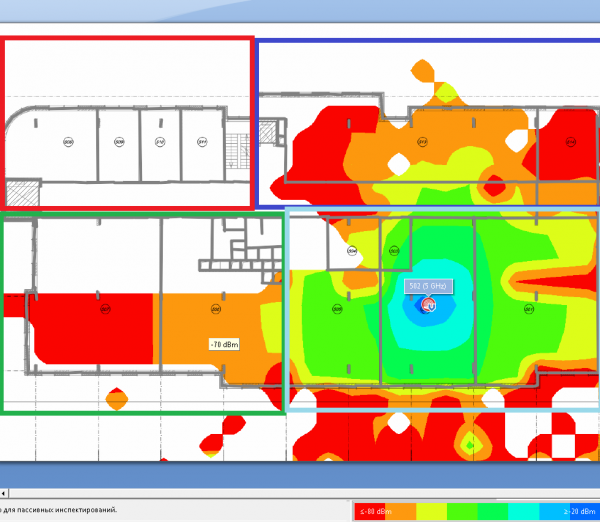
It allows both modeling and measuring, and it also supports a couple of Wi-Spy DBx like the older Ekahau releases, but in my opinion, it is not as convenient to use. There are many different machines in the world. If you used to drive a basic one and then took a ride (or even spent a month driving) in a decent car, you probably wouldn’t want to go back. Of course, it’s great to drive around in the woods in a Niva or UAZ, but in most cases, you need a different vehicle for city work.
The most critical feature that was missing in Tamograph even at the end of 2018 is Channel Overlap, or as it is now called, Channel Interference. Channel overlap means the number of APs on a frequency channel that are detected at a certain level (usually the Signal Detect level or +5dB above the noise level). If you have 2 access points on the channel, you know the network capacity is halved in the overlapping area. If there are 3, it divides into thirds, and it can even be worse. I have encountered places where there were 14 APs on the 2.4 GHz channel, and even around 20.
When I design and measure a real network, this parameter is my second priority after Signal Strength! And yet, it is absent here. Unfortunately. I wish they would provide such visualization.
Ekahau accurately determines the location of access points. If you are conducting an audit of a large network that you did not build, and the points are behind the ceiling, it is crucial for the software to show the most precise locations. Tamograf does not have such a flexible color palette with separating lines. Although it is much better than AirMagnet. In my test survey, where I first walked through a large workshop with Ekahau, and then with Tamograf, on the same adapters, I noticed a significant difference in signal level readings. The reason is unclear.
My personal opinion: if you occasionally deal with Wi-Fi and have a limited budget, you can manage with Tamograf, but it won't be as comfortable or fast.By the way, if you take the full set with a couple of old DBx, the price difference with Ekahau Pro + Sidekick won't be that significant. And you probably understood the difference between Sidekick and DBx after reading this article.
Among the advantages of Tamograf is that it simulates reflections. How accurately, I do not know. In my opinion, in complex environments, preliminary radio surveys are always necessary, including active ones, to see these reflections as well. This cannot be simulated adequately.
iBwave
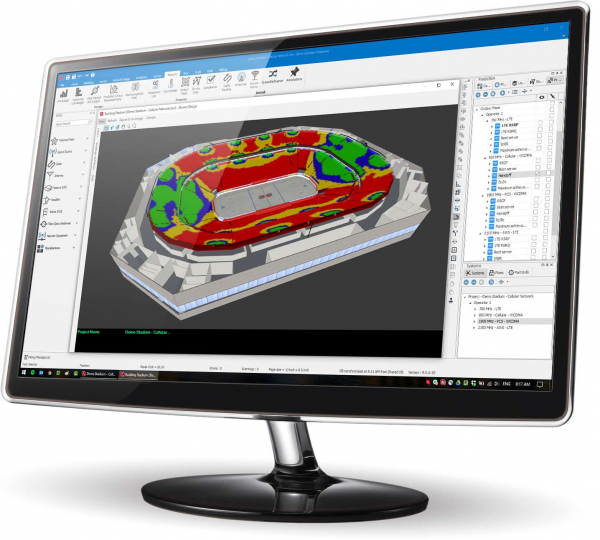
This is fundamentally a different modeling product, primarily. They work with 3D models. They are futuristic, and their product prices are the highest on the market. I recommend watching the video where Kelly talks about AR technologies. You can and be amazed by spinning their model. In my opinion, when BIM models become mainstream for designing everything-in-one-3D-model, then the time for iBwave will come, unless Ekahau acts quickly in this direction, and they are quite swift. So, if you need to deploy stadiums, consider iBwave. With Ekahau and others, it is also possible, but it requires skill. I do not know any engineer in Russia who has iBwave.
Yes, their Viewer is what all other programs need! It would be much more convenient to provide clients, who don’t have the software, with the original file for analysis along with the report.
NetSpot and similar programs.
In the free version, NetSpot only shows the current situation in the air, like many other programs. By the way, if I am asked to recommend a free program for this task, then Lizard's is just what you need for Windows. For Mac, there's support here. which has impressed engineers abroad, but it is slightly paid now. Netspot, which does Survey, costs already 149 dollars. It does not model, you know? My personal opinion: if you are setting up Wi-Fi for apartments or small cottages, then NetSpot is your tool; in other cases, it won't be suitable.
Brief conclusion
If you are seriously involved in designing and building medium and large Wi-Fi networks, nothing currently exceeds Ekahau Pro for this purpose.. This is my personal engineering opinion after 12 years of experience in this field. If an integrator is considering development in this direction, their engineers must have Ekahau Pro. If the integrator does not have a CWNA-level engineer, it might be better for them not to take on Wi-Fi networks, even with Ekahau.
Success requires tools and knowledge of how to use them.
Training
Ekahau offers excellent courses on the program (ECSE), where in just a few days, a skilled engineer introduces the basics of wireless technology and conducts many lab assignments using Ekahau and Sidekick. Such courses were not available in Russia before. A colleague of mine flew to Europe. Now this topic is beginning to gain traction in Russia. In my opinion, before any such training, you need to buy and read it independently. If your knowledge allows you to ask reasonable questions, I am always happy to answer them; you can write to info on the site uralwifi.ru. If you want to see Ekahau Pro and Sidekick firsthand, it’s very easy to do this in Yekaterinburg, you just need to arrange a meeting with me in advance in the center. Sometimes I am in Moscow, occasionally in other cities, as projects are all over Russia. A couple of times a year, I teach an author's course based on CWNA with a large number of labs on Ekahau in Yekaterinburg. There may be a course at one Moscow training center this year; it’s still unclear.
Great! Who should I hand the money to?
Official distributor , as I mentioned earlier. If you are an integrator, you purchase from Marvel. If you are not an integrator, then you buy from an acquaintance who is an integrator. I don’t know who is selling right now, just ask. They will also tell you the price. I've been thinking about whether or not to start selling Ekahau, as I am really impressed with it. So, if you don’t know who to buy from, you can ask me by email (or any other way, as it’s easy to find me, Google “Maxim Getman Wi-Fi” and it will guide you).
And if you need to create a great Wi-Fi, but you don’t have engineers, or they are busy, what should you do?
Reach out. We have 3 engineers on this topic along with the necessary set of software and hardware. Currently, we have 1 Sidekick. I hope there will be more. We collaborate with integrators and automation specialists to solve difficult Wi-Fi challenges, as that’s our expertise. When everyone is focused on their own tasks – the results
Conclusion
To cook well, a chef needs three components: knowledge and talent; high-quality ingredients; a good set of tools. For success in engineering as well, good tools are essential, and by using them wisely, one can build a good Wi-Fi system based on any serious vendor. I hope this article clarified an important aspect of building Wi-Fi in a professional manner.
Only registered users can participate in the survey. , please.
I am involved in serious Wi-Fi projects and
have been using Ekahau for a long time, they’re great.
We still have some dinosaurs, AirMagnet.
I find Tamograph sufficient.
I’m a futurist, using iBwave.
I advocate a classic approach, with a ruler, compass, and FSPL formulas.
I’m inspired to purchase Ekahau Pro.
2 users have voted. There are no abstentions.
Source: habr.com
