

Hello everyone!
This article describes the steps you need to take to add UEFI boot support to your WDS.
That is, the instructions in this article assume you already have a configuration similar to the following:
1. Windows Server 2012R2 (or newer)
2. Fully configured DHCP for WDS
3. The WDS itself
4. IIS
5. A virtual machine or PC running Ubuntu
Here, I also describe actions that did not yield satisfactory results.
I outlined them to save you time and make your search easier.
Preface
I used to set up a WDS at work with numerous features, as I was tired of running around with a bunch of flash drives and constantly rewriting them.
By the way, these articles helped me back then:
It looks like this
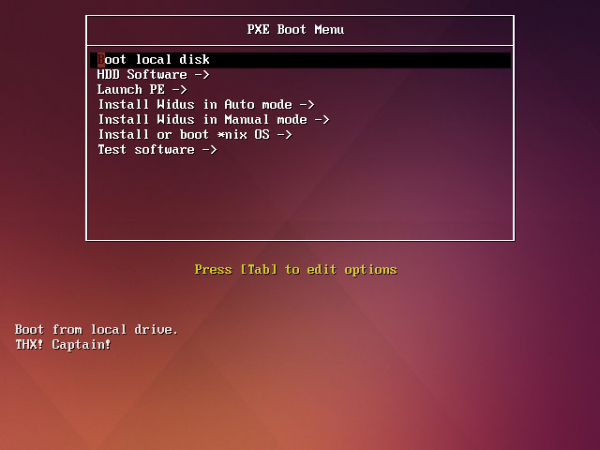
Everything was fine; new boot images were added, the winPE image was enhanced with new features, and everything worked.
However, not all devices support BIOS/Legacy boot mode, and if they do, enabling it can often be found in a very obscure place.
Moreover, installing Windows in legacy mode when there's an option for UEFI is not ideal.
As a result, I decided to add UEFI boot support and went to Google.
However, I couldn't find any structured information on how to get a working WDS + UEFI.
That's why I decided to write this article.
Before we start, I will describe the issue that took up the most time.
When adding UEFI support to WDS, the following rather non-obvious situation may arise:
If you add a boot file to WDS and attempt to boot on the device
in UEFI, you see the following text:
The selected boot device failed. Press to Continue.
Or Boot Device Not Found
But the legacy boot works fine.
Then one possible reason could be the absence of the file wdsmgfw.efi,
at the following path: %WDSpath%Bootx64wdsmgfw.efi
You can find it here: C:\Windows\System32\RemInst\bootx64wdsmgfw.efi
Alternatively, if you are missing this file for some reason, I have uploaded it to .
Thanks to the guys from .
I spent the most time on this issue, as I thought the problem lay somewhere in the WDS or DHCP configuration.
I configured policies by adding Vendor Classes for different architectures and setting up DHCP options 060, 066, 067. for setting up DHCP policies.
Architectures in ASCII for DHCP configuration
PXEClient:Arch:00000 — BIOS/Legacy
PXEClient:Arch:00006 — UEFI x86
PXEClient:Arch:00007 — UEFI x64
I also tried various boot file options .efi
- syslinux
- grub 2
I also tried to find the problem in the Event log.
win + r -> eventvwr -> Application and Service logs -> Microsoft -> Windows -> Deployment-Services-Diagnostics
But, as I mentioned above, the problem lay in the file wdsmgfw.efi.
Either I accidentally deleted it myself, or it didn't copy during installation
and setup of WDS.
Well, let's get started!
Instruction
Step 1 — Checking the functionality of WDS
Take any device or virtual machine that supports UEFI network booting and try to boot.
You should see the following picture:
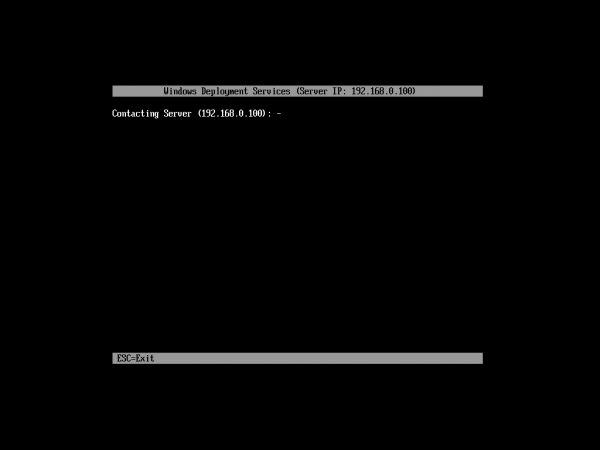
If so, great, you can continue.
If not, then see what I wrote in the preface.
Step 2 — Building the iPXE boot file
Launch the prepared Ubuntu, open the terminal, and paste this line:
git clone https://git.ipxe.org/ipxe.git ipxe
Here I would like to make a small note that you may need to add packages necessary for compiling C and C++ in Ubuntu.
I just already had them installed.
Downloaded? — Great!
Now you need to create a configuration file for the build.
In the terminal, type:
cd ipxe/src
gedit chain.ipxe
And paste the following code into this file, then save:
#!ipxe

dhcp
chain http://%IP-address-your-IIS-server%/install.ipxe
Now go back to the terminal and start the compilation:
make bin-x86_64-efi/ipxe.efi EMBED=chain.ipxe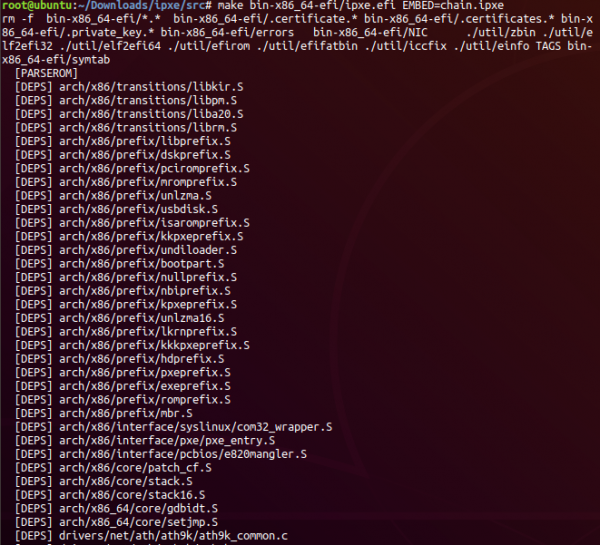
If everything is okay, you should see the following output in the terminal:
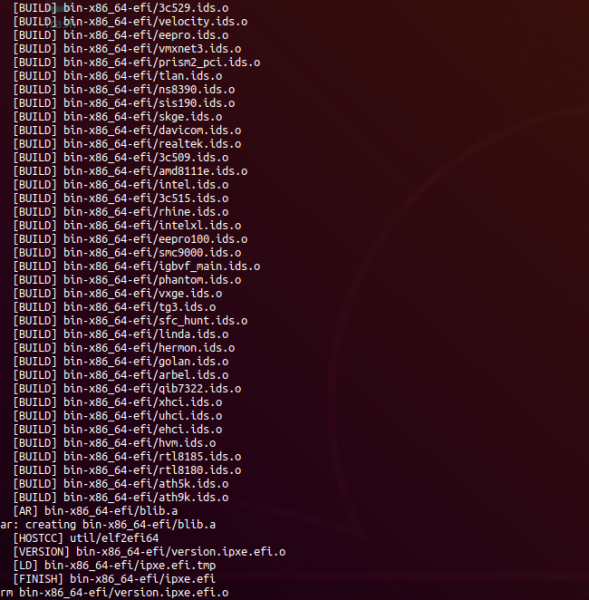
And the file ipxe.efi, located at: ipxe/src/bin-x86_64-efi/ipxe.efi
If for some reason you couldn't compile it yourself,
I have attached my .
It is compiled for booting from http://192.168.0.100/install.ipxe
That's all from Ubuntu.
Step 3 — Adding ipxe.efi to WDS
Take the file we obtained in the second step and copy it to the path:
%WDSpath%Bootx64%your-boot-folderIBOOT
Then rename it to BOOTX64.EFI.
This is not mandatory, it's just more convenient.
Then run cmd as an administrator, and type the following commands:
wdsutil /set-server /bootprogram:Bootx64%your-boot-folderIBOOTBOOTX
64.EFI /architecture:x64uefi
and
wdsutil /set-server /N12bootprogram:Bootx64%your-boot-folderIBOOTBOOTX
64.EFI /architecture:x64uefi
This will set the obtained file for booting via WDS.
Let's check the configuration:
wdsutil /get-server /Show:Config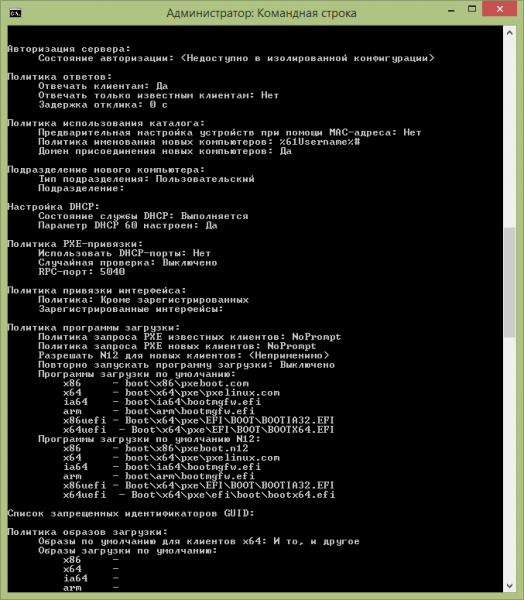
I also copied the file ipxe.efi, renamed it to BOOTIA32.EFI, and configured the boot for it, just in case. architecture:x86uefi
But ultimately, there is no point in this, as the file Bootmgfw.efi does not support x86.
Let's check what we got.
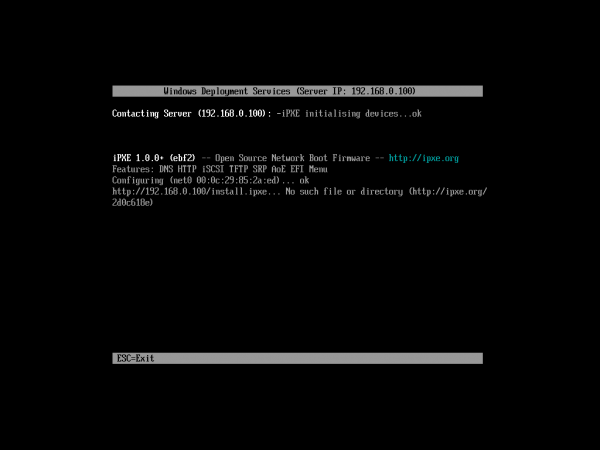
Great, WDS is sending our file for loading, and it is looking for the configuration at the path: http://192.168.0.100/install.ipxe
Step 4 — Menu Configuration
Let's go to the root folder of your website.
By default, this is: C:\inetpub\wwwroot
Create a text file install.ipxe.
And configure it according to and your needs.
There is also a Russian-language command.
I used the guide when configuring my WDS.
Example configuration for install.ipxe
#!ipxe

:start
menu Please choose an operating system to start/install
item --gap Start Win PE
item WinPE-x64 WinPE x64
item --gap ipxe shell
item shell       Drop to iPXE shell

choose target && goto ${target}

:failed
echo Booting failed, dropping to shell
goto shell

:shell
echo Type 'exit' to get the back to the menu
shell
set menu-timeout 0
set submenu-timeout 0
goto start

:WinPE-x64
kernel http://192.168.0.100/wimboot
initrd http://192.168.0.100/peSE/Boot/bcd
initrd http://192.168.0.100/peSE/Boot/boot.sdi
initrd http://192.168.0.100/peSE/Boot/peSE64.wim
boot || goto failed
You can read about the configuration for loading winPE .
Step 5 — MIME Types
After creating the menu and adding all necessary files to the root folder of IIS,
you need to give access to them.
Because even if you try to download a file via your browser using its address, you will receive an error: HTTP 404.3 - Not Found.
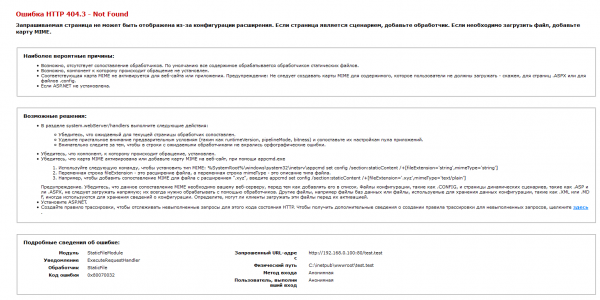
To do this, you need to add MIME types in the IIS management panel according to
the file extensions that you will be loading via HTTP.
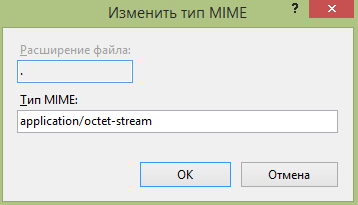
I did not search for which MIME type is best for these purposes and set application/octet-stream, after which everything started working.
For files without an extension, use a dot.
Like this:
Conclusion
In the end, we have the ability to boot over the local network via UEFI.
If we did everything right, we will have a boot selection menu that looks something like this:
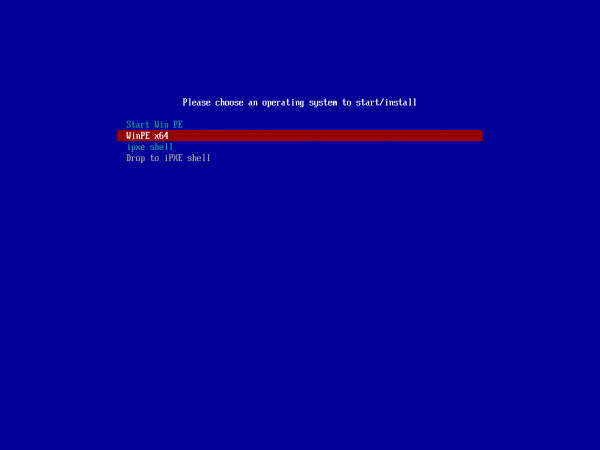
If you have prepared the basic tools and you do not get bogged down in configuration, it takes about 10-20 minutes to implement this capability.
It took me 2 working days since I had to Google a lot.
Good luck with the implementation!
Thank you for your attention, and a huge thanks to those people whose articles helped me!
On Habr it's: and .
Source: habr.com
