

Introduction
In this series of articles, I want to discuss the build system of the buildroot distribution and share my experience in customizing it. Here, I will present practical experience in creating a small operating system with a graphical interface and minimal functionality.
First and foremost, one should not confuse the build system with the distribution. Buildroot can compile a system from a set of packages that it has been provided. Buildroot is built on makefiles, which gives it huge customization capabilities. Replacing a package with another version, adding your own package, changing the package build rules, customizing the filesystem after installing all packages? Buildroot can do all that.
In Russia, buildroot is used, but in my opinion, there is little Russian-language information available for beginners.
The goal of the work is to build a distribution with live booting, an icewm interface, and a browser. The target platform is virtualbox.
Why build your own distribution? Often, there is a need for limited functionality with limited resources. More often in automation, firmware needs to be created. Adapting a general-purpose distribution by cleaning out unnecessary packages and turning it into firmware is a much more labor-intensive process than building a new distribution. Using Gentoo also has its limitations.
Buildroot is a very powerful system, but it will not do anything for you. It can only provide capabilities and automate the build process.
Alternative build systems (yocto, open build system, and others) are not considered and not compared.
Where to find it and how to get started
Project website — . Here you can download the latest version and read the documentation. There you can also reach out to the community, there is a bug tracker, mailing lists, and an IRC channel.
Buildroot operates with defconfig files for the target board being built. A defconfig is a configuration file containing only options that do not have default values. It determines what and how will be built. You can also separately configure the busybox, linux-kernel, uclibc, u-boot, and barebox configurations, but all will be tied to the target board.
After unpacking the downloaded archive or cloning from git, you have a ready-to-use buildroot. The documentation details the directory structure, but I will discuss the most important aspects:
board — a catalog of files specific to each board. These can include scripts for creating system images (iso, sdcart, cpio, and others), an overlay directory, kernel configurations, and more.
configs — the actual defconfig of the board. Defconfig is an incomplete configuration for the board, containing only parameters that differ from the default settings.
dl — a directory with downloaded source codes/files for building.
output/target — the generated filesystem of the resulting OS. Later, images for booting/installing are created from it.
output/host — host utilities for building.
output/build — built packages.
The configuration of the build is done through KConfig. This same system is used for building the Linux kernel. Here’s a list of the most commonly used commands (to be executed in the buildroot directory):
- make menuconfig — invoke the build configuration. You can also use a graphical interface (make nconfig, make xconfig, make gconfig).
- make linux-menuconfig — invoke the kernel configuration.
- make clean — clear the build results (everything stored in output).
- make — build the system. During this process, already built processes are not rebuilt.
- make defconfig_name — switch the configuration to a specific defconfig.
- make list-defconfigs — display the list of defconfigs.
- make source — only download the installation files without building.
- make help — display a list of possible commands.
Important notes and useful tips
Buildroot does not rebuild already built packages! Therefore, there may be situations where a complete rebuild is required.
You can rebuild a specific package with the command make packagename-rebuild. For example, you can rebuild the Linux kernel:
make linux-rebuildBuildroot keeps the state of any package by creating .stamp files in the output/build/$packagename directory:
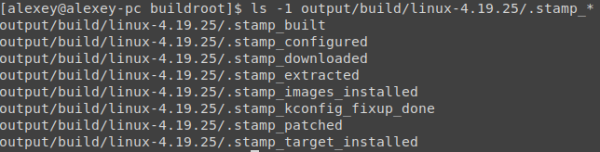
Consequently, you can rebuild root-fs and images without rebuilding packages:
rm output/build/host-gcc-final-*/.stamp_host_installed; rm -rf output/target; find output/ -name ".stamp_target_installed" | xargs rm -rf; makeUseful variables
In Buildroot, there is a set of variables for convenient configuration.
- $TOPDIR — the root directory of the Buildroot.
- $BASEDIR — the OUTPUT directory.
- $HOST_DIR, $STAGING_DIR, $TARGET_DIR — directories for building host fs, staging fs, and target fs.
- $BUILD_DIR — the directory with unpacked and built packages.
Visualization
Buildroot also has visualization capabilities. You can build a dependency diagram, a build time graph, and a package size graph in the final system. Results are available as PDF files (with options for svn, png) in the output/graph directory.
Examples of visualization commands:
make graph-dependsbuild the dependency treemake -graph-dependsbuild the dependency tree of a specific packageBR2_GRAPH_OUT=png make graph-buildbuild a build time graph with output in PNGmake graph-sizebuild a package size graph
Useful scripts
There is a subdirectory in the buildroot catalog utils with useful scripts. For example, there is a script that checks the integrity of package descriptions. This can be helpful when adding your own packages (I'll do this later). The file utils/readme.txt contains descriptions of these scripts.
Let's assemble the stock distribution
It is important to remember that all operations are performed from the perspective of a regular user, not root.
All commands are executed in the root of buildroot. The buildroot package already includes a set of configurations for many common boards and virtualization.
Let's look at the list of configurations:
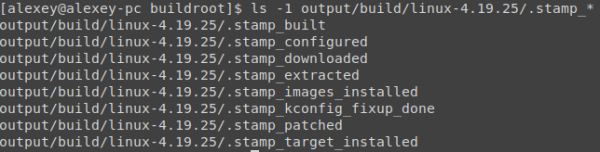
Switching to the qemu_x86_64_defconfig config
make qemu_x86_64_defconfigAnd start the build
makeThe build completes successfully, let's look at the results:

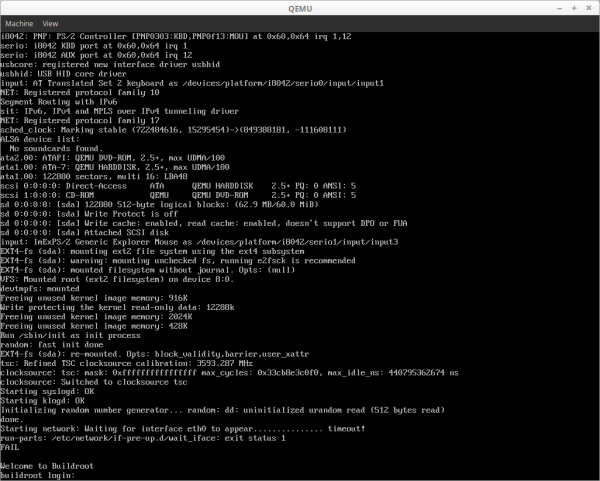
Buildroot has built images that can be run in Qemu to verify they work.
qemu-system-x86_64 -kernel output/images/bzImage -hda output/images/rootfs.ext2 -append "root=/dev/sda rw" -s -SThe result — a system running in qemu:
Creating configuration for a custom board
Adding board files
Let's look at the list of configurations:

In the list, we see pc_x86_64_efi_defconfig. We will create our board by copying its configuration:
cp configs/pc_x86_64_bios_defconfig configs/my_x86_board_defconfigWe will immediately create a board directory to store our scripts, rootfs-overlay, and other necessary files:
mkdir board/my_x86_boardSwitching to this defconfig:
make my_x86_board_defconfigThus, now the build configuration (stored in .config in the root of the buildroot directory) corresponds to the target x86-64 legacy (bios) boot machine.
Let's copy the configuration of linux-kernel (it will be needed later):
cp board/pc/linux.config board/my_x86_board/Configuring build parameters through KConfig
Let's start the configuration:
make menuconfig The KConfig window will open. There is an option to configure with a graphical interface (make nconfig, make xconfig, make gconfig):
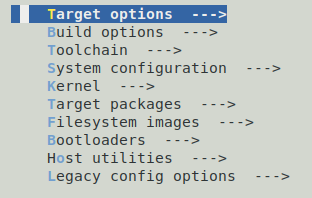
Enter the first section Target Options. Here you can select the target architecture for which the build will be conducted.

Build options — here you find various build settings. You can specify directories for the source code, the number of build threads, mirrors for downloading source codes, and other settings. We will leave the settings as default.
Toolchain – here the build toolchain itself is configured. More details on this.
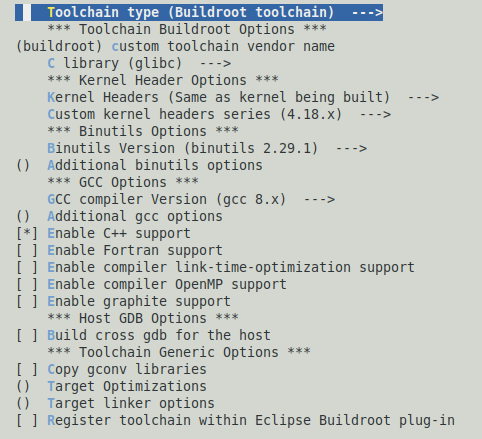
Toolchain type – the type of toolchain being used. This can be built-in within buildroot or an external toolchain (you can specify a directory with an already built one or a URL for downloading). There are additional options for different architectures. For example, for arm, you can simply select a version of the external Linaro toolchain.
C library – selection of the C library. This affects the functioning of the entire system. Typically, glibc is used, which supports all possible functionality. However, it may be too large for an embedded system, so uglibc or musl are often chosen instead. We will select glibc (this will be required later for using systemd).
Kernel Headers and Custom Kernel Headers series – should match the kernel version that will be in the built system. For kernel headers, you can also specify the path to a tarball or a git repository.
GCC COMPILER VERSIONS – selection of the compiler version that will be used for building.
Enable C++ support – we will select this for building with C++ libraries supported in the system. This will be useful for us later.
Additional gcc options – you can specify additional compiler options. We don’t need that for now.
System configuration allows you to specify future parameters of the created system:
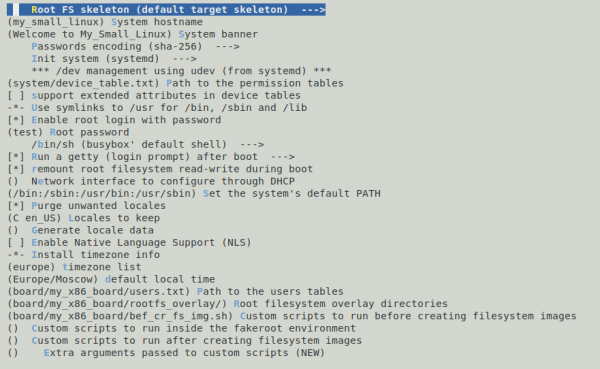
Most items are clear from their titles. Let’s pay attention to the following points:
Path to the users tables — a table with the users to be created ().
Example file. A user named user will be created with password admin, automatically gid/uid, /bin/sh shell, default group user, member of group root, comment Foo user.
[alexey@alexey-pc buildroot ]$ cat board/my_x86_board/users.txt
user -1 user -1 =admin /home/user /bin/sh root Foo user
Root filesystem overlay directories — the directory overlaid on top of the built target-fs. It adds new files and replaces existing ones.
Custom scripts to run before creating filesystem images — Scripts executed just before collapsing the filesystem into images. We will leave the script empty for now.
Let’s move to the Kernel section.
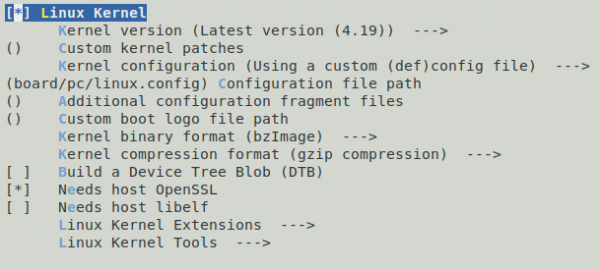
Here, kernel settings are configured. The kernel itself is configured via make linux-menuconfig.
You can specify the kernel version in various ways: select from the suggested, enter the version manually, specify a repository, or a ready tarball.
Kernel configuration — path to the kernel config. You can choose the default configuration for the selected architecture or defconfig from Linux. The Linux source code contains a set of defconfigs for different target systems. You can find the necessary one by . For example, for the BeagleBone Black board, you can .
The Target packages section allows you to select which packages will be installed in the built system. For now, we'll leave it unchanged. Later, we'll add our packages to this list.
Filesystem images — a list of filesystem images that will be built. Let's add an iso image.
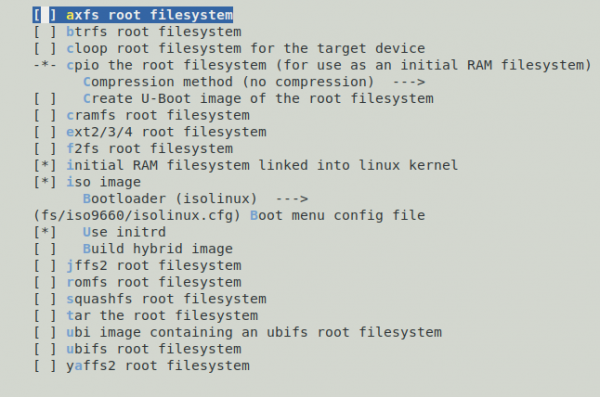
Bootloaders — selection of the bootloaders to be built. Let's choose isolinix.
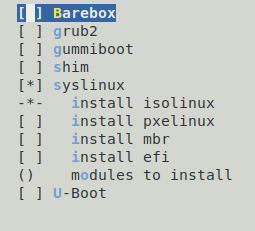
Configuring Systemd
Systemd is becoming one of the pillars of Linux, alongside the kernel and glibc. Therefore, I moved its setup to a separate item.
It is configured through make menuconfig, then Target packages → System tools → systemd. Here you can specify which systemd services will be installed and started at system boot.

Saving the system configuration
We save this config through KConfig.
After that, we'll save our defconfig:
make savedefconfigConfiguring the Linux kernel
Configuring the Linux kernel is invoked with the following command:
make linux-menuconfigLet's add support for the VirtualBox graphics card.
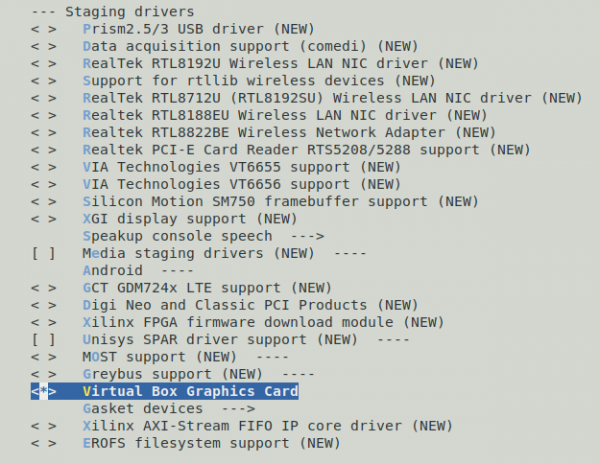
Let's add VirtualBox Guest integration support.
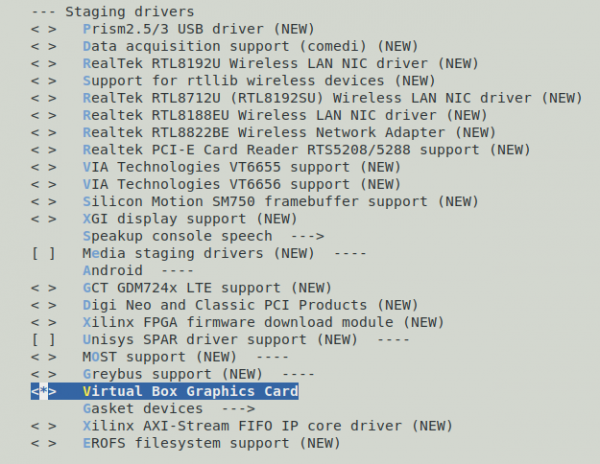
Save and exit. IMPORTANT: the configuration will be saved in output/build/linux-$version/config, but not in board/my_x86_board/linux.config.

Therefore, you need to manually copy the config to the storage location:
cp output/build/linux-4.19.25/.config board/my_x86_board/linux.configAfter that, we will perform a full rebuild of the entire system. Since buildroot does not rebuild what has already been built, you must manually specify the packages for rebuilding. To save time and effort, it is easier to rebuild a small system completely):
make clean; makeAfter the build is complete, launch VirtualBox (tested on versions 5.2 and 6.0) booting from the CD. System parameters:
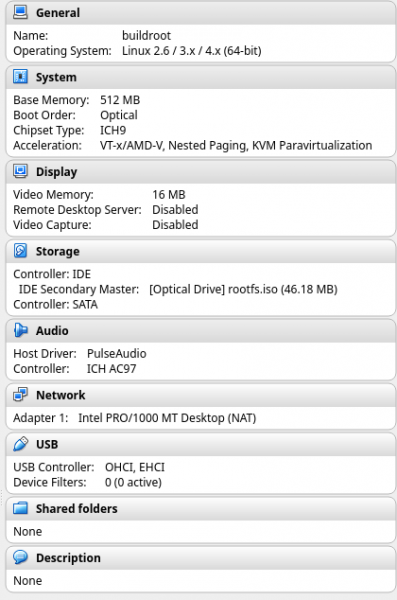
Booting from the built iso:

List of materials used
- Buildroot manual
Source: habr.com
