

During the design of the Zimbra deployment in an enterprise, the IT manager has to choose the operating system on which the Zimbra infrastructure nodes will run. As of today, most Linux distributions, including domestic RED OS and ROSA, are compatible with Zimbra. Typically, for Zimbra installation, enterprises opt for either Ubuntu or RHEL since these distributions are developed by commercial companies. However, it is not uncommon for IT managers to choose CentOS, which is a community-supported fork of the commercial RHEL distribution by Red Hat, designed for production use.

The minimum system requirements for Zimbra include 8 GB of RAM on the server, at least 5 gigabytes of free space in the /opt folder, as well as a fully qualified domain name and MX record. Generally, the biggest problems for beginners arise precisely with these last two points. A significant advantage of CentOS 7 in this case is that it allows you to set the server's domain name during the operating system installation. This makes it possible to install the Zimbra Collaboration Suite without significant issues, even for users with no prior experience working with Linux.
In our case, the domain name of the server where Zimbra will be installed will be mail.company.ru. After the installation is complete, you just need to add a line like 192.168.0.61 mail.company.ru mail, where instead of 192.168.0.61, you need to specify the static IP address of your server. After that, all package updates need to be installed, and A and MX records should be added to the server using the commands dig -t A mail.company.ru and dig -t MX company.ru. Thus, our server will have a fully qualified domain name, and we can now install Zimbra on it without any problems.
You can download the archive with the current version of the Zimbra distribution from the official site . Once the archive is unpacked, you simply need to run the installation script named install.sh. The set of console commands you will need for this is as follows:
mkdir zimbra && cd zimbra
wget --no-check-certificate
tar zxpvf zcs-8.8.12_GA_3794.RHEL7_64.20190329045002.tgz
cd zcs-8.8.12_GA_3794.RHEL7_64.20190329045002
./install.sh
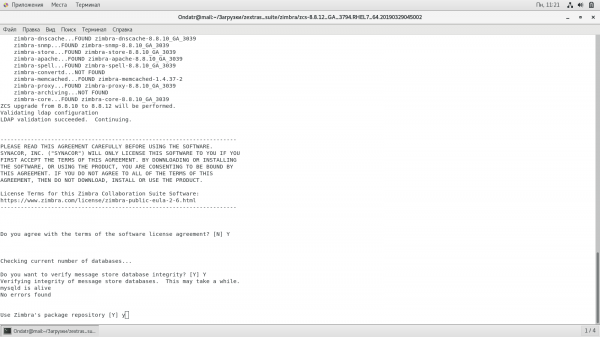
Immediately after this, the Zimbra Collaboration Suite installation program will launch. First, you will need to accept the license agreement to continue the ZCS installation. The next step will be choosing the modules for installation. If you want to create a single mail server, it makes sense to install all packages right away. However, if you intend to create a multi-server infrastructure with scaling capabilities, you should select only some of the proposed installation packages, as described in one of our previous articles.
After the installation is complete, a Zimbra setup menu will open directly in the terminal. If you chose a single-server installation, you will only need to set the administrator password. To do this, first select option 7, then option 4 to set the administrator password, which must be at least 6 characters long. After the password is set, press the R key to return to the previous menu, and then the A key to accept the changes made.
After the Zimbra installation is complete, open the necessary ports for its operation in the firewall using the command firewall-cmd —permanent —add-port={25,80,110,143,443,465,587,993,995,5222,5223,9071,7071}\/tcp, and then restart the firewall using the command firewall-cmd —reload
Now we just need to start Zimbra using the command service zimbra start, to begin operation. You can access the administration console in your browser by going to :7071\/zimbraAdmin\/. Access for email users will be provided at the address . It should be noted that in case of any issues or errors while using Zimbra, the answer can be found in the logs, which can be located in the folder /opt/zimbra/log.
Once the Zimbra installation is complete, you can also install the Zextras Suite extensions, which can enhance the reliability and cost-effectiveness of using Zimbra by adding in-demand business features. To do this, you need to download the latest version of Zextras Suite from the site and unpack it. After that, navigate to the unpacked folder and run the installation script. The entire process in the console looks as follows:
wget
tar xfz zextras_suite-latest.tgz
cd zextras_suite/
./install.sh all
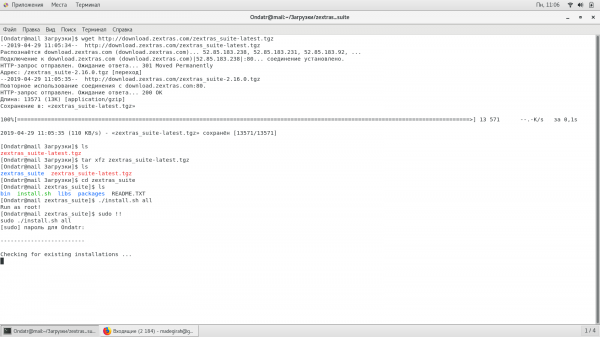
After this, your Zimbra will have the ability to archive and deduplicate data in mail storage, connect secondary volumes, delegate administrative privileges to other users, utilize online chat directly in the Zimbra web client, and much more.
Source: habr.com
