

The author of the article that we are publishing today states that it is intended for developers who want to learn Docker Compose and are on their way to creating their first client-server application using Docker. It is assumed that the reader of this material is familiar with the basics of Docker. If not, you can take a look at a series of materials, at a publication where the basics of Docker are discussed alongside the fundamentals of Kubernetes, and at an article for beginners.
What is Docker Compose?
Docker Compose is a tool that is part of Docker. It is designed to solve deployment-related tasks.
While learning the basics of Docker, you may have encountered the creation of simple applications that work independently, not relying on external data sources or services. However, in practice, such applications are rare. Real projects usually include a whole set of applications that work together.
How do you know if you need to use Docker Compose when deploying a certain project? In fact, it's quite simple. If multiple services are used to ensure the functionality of that project, Docker Compose may be useful. For example, in the situation of creating a website that needs to connect to a database for user authentication. Such a project may consist of two services — one that powers the site and another that supports the database.
Docker Compose technology, if described simply, allows you to start multiple services with a single command.
The difference between Docker and Docker Compose
Docker is used to manage individual containers (services) that make up an application.
Docker Compose is used to simultaneously manage multiple containers that are part of the application. This tool offers the same capabilities as Docker but allows for working with more complex applications.
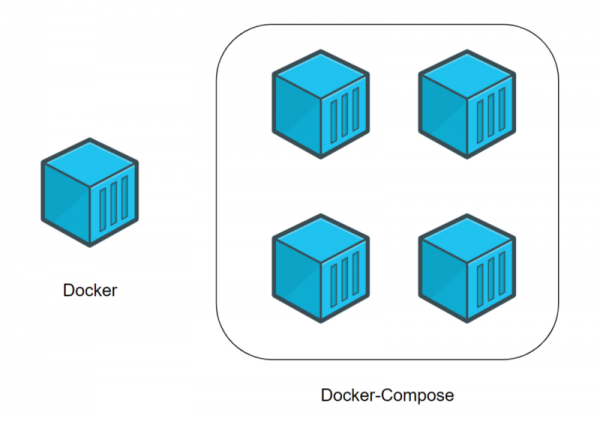
Docker (an individual container) and Docker Compose (multiple containers)
A typical use case for Docker Compose
Docker Compose is, in skilled hands, a very powerful tool that allows for the rapid deployment of applications with complex architectures. Now we will look at a practical example of using Docker Compose, the analysis of which will allow you to appreciate the advantages that Docker Compose offers.
Imagine you are a developer of a web project. This project includes two websites. The first allows businesses to create online stores in just a few clicks. The second is focused on customer support. These two sites interact with the same database.
Your project is becoming increasingly popular, and it turns out that the server power on which it operates is no longer sufficient. As a result, you decide to transfer the entire project to another machine.
Unfortunately, you haven't used anything like Docker Compose. Therefore, you will have to migrate and reconfigure services one by one, hoping that you don’t forget anything during this process.
If you are using Docker Compose, then transferring your project to a new server is a matter that can be resolved by executing a few commands. To complete the transfer of the project to the new location, you only need to adjust certain settings and upload a backup of the database to the new server.
Developing a client-server application using Docker Compose
Now that you know what we are going to use Docker Compose for, it’s time to create your first client-server application using this tool. Specifically, this involves developing a small website (server) in Python that can deliver a file containing a snippet of text. This file is requested by a program (client), also written in Python. After receiving the file from the server, the program displays the text contained within it on the screen.
Please note that we expect you to have a basic understanding of Docker and that you already have the Docker platform installed.
Let’s get to work on the project.
▍1. Creating the Project
To build your first client-server application, let's start by creating a project folder. It should contain the following files and directories:
- File
docker-compose.ymlThis is a Docker Compose file that will contain the instructions necessary to run and configure services. - Folder
serverIt will contain the files needed to ensure the server operates. - Folder
clientHere will be the client application's files.
As a result, the main folder of your project should look like this:
.
├── client/
├── docker-compose.yml
└── server/
2 directories, 1 file
▍2. Creating the server
Here, as we create the server, we will touch on some basic concepts related to Docker.
2a. Creating files
Go to the folder server and create the following files in it:
- File
server.pyIt will contain the server code. - File
index.htmlThis file will contain a snippet of text that the client application should output. - File
DockerfileThis is a Docker file that will contain the instructions necessary to set up the server environment.
Here is how the contents of your folder should look: server/:
.
├── Dockerfile
├── index.html
└── server.py
0 directories, 3 files
2b. Editing the Python file.
Let's add to the file server.py the following code:
#!/usr/bin/env python3

# Импорт системных библиотек python.
# Эти библиотеки будут использоваться для создания веб-сервера.
# Вам не нужно устанавливать что-то особенное, эти библиотеки устанавливаются вместе с Python.

import http.server
import socketserver

# Эта переменная нужна для обработки запросов клиента к серверу.

handler = http.server.SimpleHTTPRequestHandler

# Тут мы указываем, что сервер мы хотим запустить на порте 1234.
# Постарайтесь запомнить эти сведения, так как они нам очень пригодятся в дальнейшем, при работе с docker-compose.

with socketserver.TCPServer(("", 1234), handler) as httpd:

    # Благодаря этой команде сервер будет выполняться постоянно, ожидая запросов от клиента.

   httpd.serve_forever()
This code will create a simple web server. It will serve clients the file index.html, the contents of which will later be displayed on the web page.
2c. Editing the HTML file
We will add the following text to the file index.html let's add the following text:
Docker-Compose is magic!This text will be sent to the client.
2d. Editing the Dockerfile
Now we will create a simple file Dockerfile, which will be responsible for organizing the runtime environment for the Python server. As a basis for the created image, we will use , intended for running programs written in Python. Here is the contents of the Dockerfile:
# На всякий случай напоминаю, что Dockerfile всегда должен начинаться с импорта базового образа.
# Для этого используется ключевое слово 'FROM'.
# Здесь нам нужно импортировать образ python (с DockerHub).
# В результате мы, в качестве имени образа, указываем 'python', а в качестве версии - 'latest'.

FROM python:latest

# Для того чтобы запустить в контейнере код, написанный на Python, нам нужно импортировать файлы 'server.py' и 'index.html'.
# Для того чтобы это сделать, мы используем ключевое слово 'ADD'.
# Первый параметр, 'server.py', представляет собой имя файла, хранящегося на компьютере.
# Второй параметр, '/server/', это путь, по которому нужно разместить указанный файл в образе.
# Здесь мы помещаем файл в папку образа '/server/'.

ADD server.py /server/
ADD index.html /server/

# Здесь мы воспользуемся командой 'WORKDIR', возможно, новой для вас.
# Она позволяет изменить рабочую директорию образа.
# В качестве такой директории, в которой будут выполняться все команды, мы устанавливаем '/server/'.

WORKDIR /server/
Now let's focus on the client.
▍3. Creating the client
While creating the client part of our project, we will recall some Docker basics.
3a. Creating files
Go to your project folder client and create the following files in it:
- File
client.py. Here will be the client code. - File
Dockerfile. This file serves the same purpose as its counterpart in the server folder. Specifically, it contains instructions describing the creation of an environment to run the client code.
As a result, your folder client/ at this stage of work should look like this:
.
├── client.py
└── Dockerfile
0 directories, 2 files
3b. Editing the Python file
Let's add to the file client.py the following code:
#!/usr/bin/env python3

# Импортируем системную библиотеку Python.
# Она используется для загрузки файла 'index.html' с сервера.
# Ничего особенного устанавливать не нужно, эта библиотека устанавливается вместе с Python.

import urllib.request

# Эта переменная содержит запрос к 'http://localhost:1234/'.
# Возможно, сейчас вы задаётесь вопросом о том, что такое 'http://localhost:1234'.
# localhost указывает на то, что программа работает с локальным сервером.
# 1234 - это номер порта, который вам предлагалось запомнить при настройке серверного кода.

fp = urllib.request.urlopen("http://localhost:1234/")

# 'encodedContent' соответствует закодированному ответу сервера ('index.html').
# 'decodedContent' соответствует раскодированному ответу сервера (тут будет то, что мы хотим вывести на экран).

encodedContent = fp.read()
decodedContent = encodedContent.decode("utf8")

# Выводим содержимое файла, полученного с сервера ('index.html').

print(decodedContent)

# Закрываем соединение с сервером.

fp.close()
Thanks to this code, the client application can load data from the server and display it on the screen.
3c. Editing the Dockerfile
As with the server, we are creating a simple one for the client. Dockerfile, responsible for creating the environment in which the client Python application will operate. Here is the client code Dockerfile:
# То же самое, что и в серверном Dockerfile.

FROM python:latest

# Импортируем 'client.py' в папку '/client/'.

ADD client.py /client/

# Устанавливаем в качестве рабочей директории '/client/'.

WORKDIR /client/
▍4. Docker Compose
As you may have noticed, we created two separate projects: server and client. Each has its own file Dockerfile. So far, everything discussed stays within the basics of working with Docker. Now we will start working with Docker Compose. To do this, let’s refer to the file docker-compose.yml, located in the root folder of the project.
Note that we are not aiming to cover all commands that can be used in docker-compose.yml. Our main goal is to analyze a practical example that gives you basic knowledge of Docker Compose.
Here is the code to be placed in the file docker-compose.yml:
# Файл docker-compose должен начинаться с тега версии.
# Мы используем "3" так как это - самая свежая версия на момент написания этого кода.

version: "3"

# Следует учитывать, что docker-composes работает с сервисами.
# 1 сервис = 1 контейнер.
# Сервисом может быть клиент, сервер, сервер баз данных...
# Раздел, в котором будут описаны сервисы, начинается с 'services'.

services:

  # Как уже было сказано, мы собираемся создать клиентское и серверное приложения.
  # Это означает, что нам нужно два сервиса.
  # Первый сервис (контейнер): сервер.
  # Назвать его можно так, как нужно разработчику.
  # Понятное название сервиса помогает определить его роль.
  # Здесь мы, для именования соответствующего сервиса, используем ключевое слово 'server'.

  server:

    # Ключевое слово "build" позволяет задать
    # путь к файлу Dockerfile, который нужно использовать для создания образа,
    # который позволит запустить сервис.
    # Здесь 'server/' соответствует пути к папке сервера,
    # которая содержит соответствующий Dockerfile.

    build: server/

    # Команда, которую нужно запустить после создания образа.
    # Следующая команда означает запуск "python ./server.py".

    command: python ./server.py

    # Вспомните о том, что в качестве порта в 'server/server.py' указан порт 1234.
    # Если мы хотим обратиться к серверу с нашего компьютера (находясь за пределами контейнера),
    # мы должны организовать перенаправление этого порта на порт компьютера.
    # Сделать это нам поможет ключевое слово 'ports'.
    # При его использовании применяется следующая конструкция: [порт компьютера]:[порт контейнера]
    # В нашем случае нужно использовать порт компьютера 1234 и организовать его связь с портом
    # 1234 контейнера (так как именно на этот порт сервер
    # ожидает поступления запросов).

    ports:
      - 1234:1234

  # Второй сервис (контейнер): клиент.
  # Этот сервис назван 'client'.

  client:
    # Здесь 'client/ соответствует пути к папке, которая содержит
    # файл Dockerfile для клиентской части системы.

    build: client/

    # Команда, которую нужно запустить после создания образа.
    # Следующая команда означает запуск "python ./client.py".

    command: python ./client.py

    # Ключевое слово 'network_mode' используется для описания типа сети.
    # Тут мы указываем то, что контейнер может обращаться к 'localhost' компьютера.

    network_mode: host

    # Ключевое слово 'depends_on' позволяет указывать, должен ли сервис,
    # прежде чем запуститься, ждать, когда будут готовы к работе другие сервисы.
    # Нам нужно, чтобы сервис 'client' дождался бы готовности к работе сервиса 'server'.

    depends_on:
      - server
▍5. Building the Project
After all necessary instructions have been added to docker-compose.yml , the project needs to be built. This step of our work resembles using the command docker build, but the corresponding command relates to multiple services:
$ docker-compose build▍6. Running the Project
Now that the project is built, it’s time to run it. This step corresponds to the step where, when working with individual containers, the command is executed docker run:
$ docker-compose up After executing this command, the terminal should display the text loaded by the client from the server: Docker-Compose is magic!.
As previously mentioned, the server uses the computer's port 1234 to handle client requests. Therefore, if you navigate in your browser to the address , it will show a page with the text Docker-Compose is magic!.
Useful Commands
Let’s look at some commands that may be useful when working with Docker Compose.
This command allows you to stop and remove containers and other resources created by the command to start the containers. This command will bring up 3 containers::
$ docker-compose downThis command outputs service logs:
$ docker-compose logs -f [service name] For example, in our project, it can be used as follows: $ docker-compose logs -f [service name].
With this command, you can display a list of containers:
$ docker-compose psThis command allows you to execute a command in the running container:
$ docker-compose exec [service name] [command] For example, it might look like this: docker-compose exec server ls.
This command allows you to display a list of images:
$ docker-compose imagesSummary
We have covered the basics of working with Docker Compose technology, knowledge of which will allow you to use this technology and, if desired, begin a more in-depth study of it. repository with the project code that we discussed here.
Dear readers! Do you use Docker Compose in your projects?
Source: habr.com
