

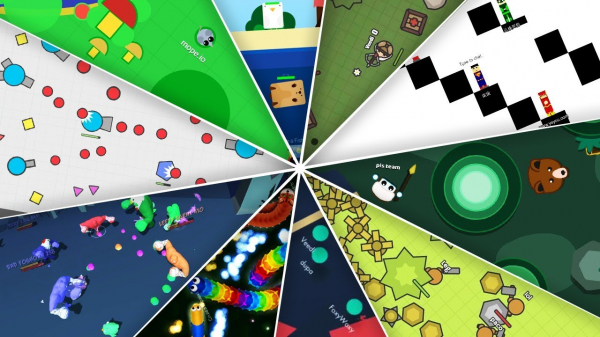
Released in 2015 became the progenitor of a new genre , whose popularity has since skyrocketed. I have personally experienced the rise in popularity of .io games: over the last three years, I .
In case you have never heard of such games: these are free multiplayer web games that are easy to join (no account required). Typically, they pit numerous opposing players against each other on a single arena. Other famous games in the .io genre include: and .
In this post, we will explore how to create an .io game from scratch. All you need is a basic understanding of Javascript: you should understand concepts such as syntax , the keyword this and . Even if you don't know Javascript perfectly, you will still be able to grasp most of the content in this post.
Example of an .io game
For the sake of learning, we will be referring to . Try playing it!
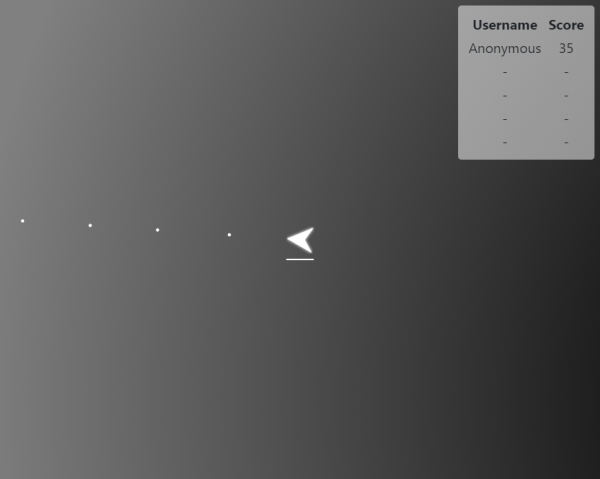
The game is quite simple: you control a ship in an arena filled with other players. Your ship automatically fires projectiles, and you try to hit other players while avoiding their projectiles.
1. Brief overview/project structure
I recommend of the example game so you can follow along.
The example uses the following:
- — the most popular web framework for Node.js, managing the game's web server.
- — a websocket library for data exchange between the browser and the server.
- — a module bundler. You can read about why to use Webpack .
Here is what the project directory structure looks like:
public/
    assets/
        ...
src/
    client/
        css/
            ...
        html/
            index.html
        index.js
        ...
    server/
        server.js
        ...
    shared/
        constants.js
public/
Everything in the folder public/ will be served statically by the server. The public/assets/ contains the images used by our project.
src/
All the source code is located in the folder src/. The names client/ and server/ speak for themselves, while shared/ contains a constants file that is imported by both the client and the server.
2. Builds/project parameters
As mentioned above, we use a module bundler to build the project . Let’s take a look at our Webpack configuration:
webpack.common.js:
const path = require('path');
const MiniCssExtractPlugin = require('mini-css-extract-plugin');

module.exports = {
  entry: {
    game: './src/client/index.js',
  },
  output: {
    filename: '[name].[contenthash].js',
    path: path.resolve(__dirname, 'dist'),
  },
  module: {
    rules: [
      {
        test: /\.js$/,
        exclude: /node_modules/,
        use: {
          loader: "babel-loader",
          options: {
            presets: ['@babel/preset-env'],
          },
        },
      },
      {
        test: /\.css$/,
        use: [
          {
            loader: MiniCssExtractPlugin.loader,
          },
          'css-loader',
        ],
      },
    ],
  },
  plugins: [
    new MiniCssExtractPlugin({
      filename: '[name].[contenthash].css',
    }),
    new HtmlWebpackPlugin({
      filename: 'index.html',
      template: 'src/client/html/index.html',
    }),
  ],
};
The most important lines here are:
src/client/index.js— this is the entry point for the JavaScript (JS) client. Webpack will start here and recursively look for other imported files.- The output JS of our Webpack build will be located in the directory
dist/. I will refer to this file as our JS bundle. - We leverage , particularly the configuration for transpiling our JS code for older browsers.
- We use a plugin to extract all the CSS referred to by the JS files and combine them in one place. I will call it our CSS bundle.
You might have noticed strange file names for the bundles '[name].[contenthash].ext'. They contain Webpack: [name] will be replaced with the entry point's name (in our case, it's game), and [contenthash] will be replaced with the content hash of the file. We do this to — we can instruct browsers to infinitely cache our JS bundles because if the bundle changes, then so does its file name (the contenthash). The final result will be a file name like game.dbeee76e91a97d0c7207.js.
File webpack.common.js — this is the basic configuration file that we import into the development and production configurations. Here’s, for example, the development configuration:
webpack.dev.js
const merge = require('webpack-merge');
const common = require('./webpack.common.js');

module.exports = merge(common, {
  mode: 'development',
});
For efficiency, we use in the development process webpack.dev.js, and it switches to webpack.prod.js, to optimize the bundle sizes when deploying to production.
Local setup
I recommend setting up the project on your local machine so that you can follow the steps outlined in this post. The setup is simple: first, make sure you have and . Then execute
$ git clone https://github.com/vzhou842/example-.io-game.git
$ cd example-.io-game
$ npm install
Are you ready to get started! To launch the development server, simply run
$ npm run developand go to your web browser at . The development server will automatically rebuild the JS and CSS packages as you modify your code — just refresh the page to see all the changes!
3. Client Entry Points
Let's dive into the game's code. First, we will need a page index.html, which will be loaded first when visiting the site. Our page will be quite simple:
index.html
<!DOCTYPE html>
<html>
<head>
  <title>An example .io game</title>
  <link type="text/css" rel="stylesheet" href="/game.bundle.css">
</head>
<body>
  <canvas id="game-canvas"></canvas>
  <script async src="/game.bundle.js"></script>
  <div id="play-menu" class="hidden">
    <input type="text" id="username-input" placeholder="Username" />
    <button id="play-button">PLAY</button>
  </div>
</body>
</html>
This code example is slightly simplified for clarity, and I will do the same with many other examples in this post. The complete code can always be found at .
We have:
- (
<canvas>), which we will use to render the game. <link>to include our CSS package.<script>to include our JavaScript package.- Main menu with username
does not supportand a "PLAY" button ().
After loading the homepage, the JavaScript code will begin execution, starting with the entry point JS file: src/client/index.js.
index.js
import { connect, play } from './networking';
import { startRendering, stopRendering } from './render';
import { startCapturingInput, stopCapturingInput } from './input';
import { downloadAssets } from './assets';
import { initState } from './state';
import { setLeaderboardHidden } from './leaderboard';

import './css/main.css';

const playMenu = document.getElementById('play-menu');
const playButton = document.getElementById('play-button');
const usernameInput = document.getElementById('username-input');

Promise.all([
  connect(),
  downloadAssets(),
]).then(() => {
  playMenu.classList.remove('hidden');
  usernameInput.focus();
  playButton.onclick = () => {
    // Play!
    play(usernameInput.value);
    playMenu.classList.add('hidden');
    initState();
    startCapturingInput();
    startRendering();
    setLeaderboardHidden(false);
  };
});
This may seem complicated, but not much is happening here:
- Importing several other JS files.
- Importing CSS (so Webpack knows to include it in our CSS package).
- Start
connect()for establishing a connection to the server and startingdownloadAssets()to download the images needed for rendering the game. - Once stage 3 is complete the main menu is displayed (
playMenu). - Setting up the click handler for the "PLAY" button. When the button is clicked, the code initializes the game and notifies the server that we are ready to play.
The core of our client-server logic resides in the files imported by the index.jsfile. Now, we will go through them one by one.
4. Data Exchange between Client
In this game, we use the well-known library to communicate with the server. . Socket.io has built-in support , which are well-suited for two-way communication: we can send messages to the server and the server can send messages back to us over the same connection.
We will have one file src/client/networking.js, which will handle all communications with the server:
networking.js
import io from 'socket.io-client';
import { processGameUpdate } from './state';

const Constants = require('../shared/constants');

const socket = io(`ws://${window.location.host}`);
const connectedPromise = new Promise(resolve => {
  socket.on('connect', () => {
    console.log('Connected to server!');
    resolve();
  });
});

export const connect = onGameOver => (
  connectedPromise.then(() => {
    // Register callbacks
    socket.on(Constants.MSG_TYPES.GAME_UPDATE, processGameUpdate);
    socket.on(Constants.MSG_TYPES.GAME_OVER, onGameOver);
  })
);

export const play = username => {
  socket.emit(Constants.MSG_TYPES.JOIN_GAME, username);
};

export const updateDirection = dir => {
  socket.emit(Constants.MSG_TYPES.INPUT, dir);
};
This code is also slightly shortened for clarity.
In this file, three main actions occur:
- We attempt to connect to the server.
connectedPromiseis resolved only when we establish a connection. - If the connection is successfully established, we register callback functions (
processGameUpdate()andonGameOver()) for messages that we can receive from the server. - We export
play()andupdateDirection(), so that they can be used by other files.
5. Rendering the Client
It's time to display an image on the screen!
…but before we can do that, we need to download all the images (resources) that are necessary for this. Let's write a resource manager:
assets.js
const ASSET_NAMES = ['ship.svg', 'bullet.svg'];

const assets = {};
const downloadPromise = Promise.all(ASSET_NAMES.map(downloadAsset));

function downloadAsset(assetName) {
  return new Promise(resolve => {
    const asset = new Image();
    asset.onload = () => {
      console.log(`Downloaded ${assetName}`);
      assets[assetName] = asset;
      resolve();
    };
    asset.src = `/assets/${assetName}`;
  });
}

export const downloadAssets = () => downloadPromise;
export const getAsset = assetName => assets[assetName];
Managing resources isn't that hard! The main idea is to store an object assets, which will bind a file name key to the object value Image. When a resource is loaded, we save it in the object assets for quick access in the future. When downloading each individual resource is allowed (that is, the resources are loaded), we resolve all downloadPromise Once the resources are downloaded, we can proceed to rendering. As mentioned earlier, for drawing on the web page, we use.
HTML5 Canvas (<canvas>). Our game is quite simple, so we only need to render the following:
- Background
- Player's Ship
- Other players in the game
- Projectiles
Here are the important fragments src/client/render.js, which render the aforementioned four points:
render.js
import { getAsset } from './assets';
import { getCurrentState } from './state';

const Constants = require('../shared/constants');
const { PLAYER_RADIUS, PLAYER_MAX_HP, BULLET_RADIUS, MAP_SIZE } = Constants;

// Get the canvas graphics context
const canvas = document.getElementById('game-canvas');
const context = canvas.getContext('2d');

// Make the canvas fullscreen
canvas.width = window.innerWidth;
canvas.height = window.innerHeight;

function render() {
  const { me, others, bullets } = getCurrentState();
  if (!me) {
    return;
  }

  // Draw background
  renderBackground(me.x, me.y);

  // Draw all bullets
  bullets.forEach(renderBullet.bind(null, me));

  // Draw all players
  renderPlayer(me, me);
  others.forEach(renderPlayer.bind(null, me));
}

// ... Helper functions here excluded

let renderInterval = null;
export function startRendering() {
  renderInterval = setInterval(render, 1000 / 60);
}
export function stopRendering() {
  clearInterval(renderInterval);
}
This code is also simplified for clarity.
render() is the main function of this file. startRendering() and stopRendering() manage the activation of the rendering loop at 60 FPS.
Specific implementations of individual rendering helper functions (like renderBullet()) are not as crucial, but here’s a simple example:
render.js
function renderBullet(me, bullet) {
  const { x, y } = bullet;
  context.drawImage(
    getAsset('bullet.svg'),
    canvas.width / 2 + x - me.x - BULLET_RADIUS,
    canvas.height / 2 + y - me.y - BULLET_RADIUS,
    BULLET_RADIUS * 2,
    BULLET_RADIUS * 2,
  );
}
Note that we use the method getAsset(), which we saw earlier in asset.js!
If you’re interested in exploring other rendering helper functions, read the rest of .
6. Client Input
It's time to make the game playable! The control scheme will be very simple: to change the direction of movement, you can use the mouse (on a computer) or touch the screen (on a mobile device). To implement this, we will register for Mouse and Touch events.
All of this will be handled by src/client/input.js:
input.js
import { updateDirection } from './networking';

function onMouseInput(e) {
  handleInput(e.clientX, e.clientY);
}

function onTouchInput(e) {
  const touch = e.touches[0];
  handleInput(touch.clientX, touch.clientY);
}

function handleInput(x, y) {
  const dir = Math.atan2(x - window.innerWidth / 2, window.innerHeight / 2 - y);
  updateDirection(dir);
}

export function startCapturingInput() {
  window.addEventListener('mousemove', onMouseInput);
  window.addEventListener('touchmove', onTouchInput);
}

export function stopCapturingInput() {
  window.removeEventListener('mousemove', onMouseInput);
  window.removeEventListener('touchmove', onTouchInput);
}
onMouseInput() and onTouchInput() are the Event Listeners that trigger updateDirection() (from networking.js) upon input events (for instance, when moving the mouse). updateDirection() exchanges messages with the server, which processes the input event and updates the game state accordingly.
7. Client State
This section is the most complex in the first part of the post. Don't be discouraged if you don't understand it on your first read! You can even skip it and come back later.
The last piece of the puzzle needed to complete the client-server code is state. Remember the code snippet from the "Client Rendering" section?
render.js
import { getCurrentState } from './state';

function render() {
  const { me, others, bullets } = getCurrentState();

  // Do the rendering
  // ...
}
getCurrentState() must be able to provide us the current game state on the client at any point in time based on the updates received from the server. Here is an example of a game update that the server might send:
{
  "t": 1555960373725,
  "me": {
    "x": 2213.8050880413657,
    "y": 1469.370893425012,
    "direction": 1.3082443894581433,
    "id": "AhzgAtklgo2FJvwWAADO",
    "hp": 100
  },
  "others": [],
  "bullets": [
    {
      "id": "RUJfJ8Y18n",
      "x": 2354.029197099604,
      "y": 1431.6848318262666
    },
    {
      "id": "ctg5rht5s",
      "x": 2260.546457727445,
      "y": 1456.8088728920968
    }
  ],
  "leaderboard": [
    {
      "username": "Player",
      "score": 3
    }
  ]
}
Each game update contains five identical fields:
- t: a timestamp from the server indicating when this update was created.
- me: information about the player receiving this update.
- others: an array of information about other players participating in the same game.
- bullets: an array of information about the bullets in the game.
- leaderboard: the current data of the leaderboard. We won’t consider them in this post.
7.1 Naïve Client State
Naive implementation getCurrentState() can only directly return the data of the most recently received game update.
naive-state.js
let lastGameUpdate = null;

// Handle a newly received game update.
export function processGameUpdate(update) {
  lastGameUpdate = update;
}

export function getCurrentState() {
  return lastGameUpdate;
}
Nice and clear! But if only it were that simple. One of the reasons why such implementation is problematic is that: it limits the rendering frame rate to the server tick rate.
Frame Rate: the number of frames (i.e., calls
render()) per second, or FPS. In games, the goal is usually to achieve at least 60 FPS.
Tick Rate: the rate at which the server sends game updates to clients. It is often lower than the frame rate. In our game, the server operates at a rate of 30 ticks per second.
If we simply render the last game update, then the FPS will essentially never exceed 30, because we never receive more than 30 updates per second from the server.Even if we call render() 60 times per second, half of those calls will simply redraw the same thing, essentially doing nothing. Another problem with naive implementation is that it is prone to delays.With perfect internet speed, the client would receive the game update exactly every 33 ms (30 per second):

Unfortunately, nothing is perfect. A more realistic scenario would be:

Naive implementation is practically the worst-case scenario when it comes to delays. If the game update is received with a delay of 50 ms, then the client lags for an extra 50 ms, because it is still rendering the game state from the previous update. Imagine how inconvenient this is for the player: due to arbitrary lags, the game will feel choppy and unstable.
7.2 Improved Client State
We will introduce some improvements to the naive implementation. First, we use a rendering delay of 100 ms. This means that the 'current' state of the client will always lag behind the server's game state by 100 ms. For example, if the server time is 150, then the state rendering on the client will be from the time 50:

This gives us a buffer of 100 ms, allowing us to withstand unpredictable game update receiving times:

The trade-off for this will be a constant of 100 ms. This is a minor sacrifice for a smooth gaming experience — most players (especially casual ones) won't even notice this delay. It's much easier for people to adapt to a constant 100 ms delay than to play with unpredictable delays.
We can also use another technique called which effectively reduces perceived delays, but this post will not cover it.
Another improvement we use is linear interpolation.Due to the rendering delay, we usually lead the current time in the client by at least one update. When the getCurrentState()is called, we can perform between game updates immediately before and after the current time in the client:

This resolves the frame rate issue: we can now render unique frames at any desired frequency!
7.3 Implementation of Enhanced Client State
Example implementation in src/client/state.js uses both render delay and linear interpolation, but this won't last long. Let's break the code into two parts. Here's the first one:
state.js, part 1
const RENDER_DELAY = 100;

const gameUpdates = [];
let gameStart = 0;
let firstServerTimestamp = 0;

export function initState() {
  gameStart = 0;
  firstServerTimestamp = 0;
}

export function processGameUpdate(update) {
  if (!firstServerTimestamp) {
    firstServerTimestamp = update.t;
    gameStart = Date.now();
  }
  gameUpdates.push(update);

  // Keep only one game update before the current server time
  const base = getBaseUpdate();
  if (base > 0) {
    gameUpdates.splice(0, base);
  }
}

function currentServerTime() {
  return firstServerTimestamp + (Date.now() - gameStart) - RENDER_DELAY;
}

// Returns the index of the base update, the first game update before
// current server time, or -1 if N/A.
function getBaseUpdate() {
  const serverTime = currentServerTime();
  for (let i = gameUpdates.length - 1; i >= 0; i--) {
    if (gameUpdates[i].t <= serverTime) {
      return i;
    }
  }
  return -1;
}
First, we need to figure out what currentServerTime()does. As we saw earlier, each game update includes a server timestamp. We want to use a render delay to render the picture lagging behind the server by 100 ms, but we will never know the current time on the server, because we can't know how long it took for any of the updates to reach us. The internet is unpredictable and its speed can vary greatly!
To circumvent this issue, we can use a reasonable approximation: we pretend that the first update arrived instantly. If this were true, we would know the server time at that specific moment! We store the server timestamp in firstServerTimestamp and keep our local (client) timestamp at the same moment in gameStart.
Oh, wait a minute. Shouldn't the server time equal the client time? Why do we distinguish between 'server timestamp' and 'client timestamp'? That's a great question! It turns out they are not the same. Date.now() will return different timestamps on the client and server, depending on local factors for those machines. Never assume that timestamps will be the same on all machines.
Now we understand what currentServerTime()does: it returns the server timestamp of the current rendering time.. In other words, this is the current server time (firstServerTimestamp < + (Date.now() - gameStart)) minus the render delay (RENDER_DELAY).
. Now let's understand how we process game updates. When an update is received from the server, processGameUpdate()we call it and save the new update in the array gameUpdates. Then, to check memory usage, we remove all old updates up to the base update, because they are no longer needed.
So, what is a 'base update'? It is the first update we find moving back from the current server time. Remember this scheme?

The game update directly to the left of the 'Client Render Time' is the base update.
What is the base update used for? Why can we discard updates before the base? To figure that out, let's finally look at the implementation of getCurrentState():
state.js, part 2
export function getCurrentState() {
  if (!firstServerTimestamp) {
    return {};
  }

  const base = getBaseUpdate();
  const serverTime = currentServerTime();

  // If base is the most recent update we have, use its state.
  // Else, interpolate between its state and the state of (base + 1).
  if (base < 0) {
    return gameUpdates[gameUpdates.length - 1];
  } else if (base === gameUpdates.length - 1) {
    return gameUpdates[base];
  } else {
    const baseUpdate = gameUpdates[base];
    const next = gameUpdates[base + 1];
    const r = (serverTime - baseUpdate.t) / (next.t - baseUpdate.t);
    return {
      me: interpolateObject(baseUpdate.me, next.me, r),
      others: interpolateObjectArray(baseUpdate.others, next.others, r),
      bullets: interpolateObjectArray(baseUpdate.bullets, next.bullets, r),
    };
  }
}
We handle three cases:
base < 0means that there are no updates before the current render time (see the above implementation ofgetBaseUpdate()). This can happen right at the beginning of the game due to render delay. In this case, we use the latest received update.base— this is the most recent update we have. This can occur due to network latency or poor Internet connection. In this case, we also use the latest update we have.- We have updates both before and after the current render time, so we can interpolate!
All that remains in state.js — is the implementation of linear interpolation, which involves simple (but boring) math. If you want to study it on your own, take a look at state.js to .
Part 2. Backend Server
In this part, we will discuss the Node.js backend that manages our .
1. Server Entry Point
To manage the web server, we will use a popular web framework for Node.js called . Its setup will be handled by our server entry point file src/server/server.js:
server.js, part 1
const express = require('express');
const webpack = require('webpack');
const webpackDevMiddleware = require('webpack-dev-middleware');
const webpackConfig = require('../../webpack.dev.js');

// Setup an Express server
const app = express();
app.use(express.static('public'));

if (process.env.NODE_ENV === 'development') {
  // Setup Webpack for development
  const compiler = webpack(webpackConfig);
  app.use(webpackDevMiddleware(compiler));
} else {
  // Static serve the dist/ folder in production
  app.use(express.static('dist'));
}

// Listen on port
const port = process.env.PORT || 3000;
const server = app.listen(port);
console.log(`Server listening on port ${port}`);
Remember, in the first part we discussed Webpack? This is where we will use our Webpack configurations. We will apply them in two ways:
- Use for automatically rebuilding our development packages, or
- statistically serving the folder
dist/, where Webpack will write our files after production build.
Another important task server.js is setting up the server , which simply connects to the Express server:
server.js, part 2
const socketio = require('socket.io');
const Constants = require('../shared/constants');

// Setup Express
// ...
const server = app.listen(port);
console.log(`Server listening on port ${port}`);

// Setup socket.io
const io = socketio(server);

// Listen for socket.io connections
io.on('connection', socket => {
  console.log('Player connected!', socket.id);

  socket.on(Constants.MSG_TYPES.JOIN_GAME, joinGame);
  socket.on(Constants.MSG_TYPES.INPUT, handleInput);
  socket.on('disconnect', onDisconnect);
});
After successfully establishing a socket.io connection with the server, we set up event handlers for the new socket. The event handlers process messages received from clients by delegating to the singleton object game:
server.js, part 3
const Game = require('./game');

// ...

// Setup the Game
const game = new Game();

function joinGame(username) {
  game.addPlayer(this, username);
}

function handleInput(dir) {
  game.handleInput(this, dir);
}

function onDisconnect() {
  game.removePlayer(this);
}
We're creating a .io game, so we only need a single instance of Game ('Game') – all players play on the same arena! In the next section, we will look at how this class works. Game.
2. Game server
Class Game contains the most important server-side logic. It has two main tasks: managing players and simulating the game.
Let's start with the first task – managing players.
game.js, part 1
const Constants = require('../shared/constants');
const Player = require('./player');

class Game {
  constructor() {
    this.sockets = {};
    this.players = {};
    this.bullets = [];
    this.lastUpdateTime = Date.now();
    this.shouldSendUpdate = false;
    setInterval(this.update.bind(this), 1000 / 60);
  }

  addPlayer(socket, username) {
    this.sockets[socket.id] = socket;

    // Generate a position to start this player at.
    const x = Constants.MAP_SIZE * (0.25 + Math.random() * 0.5);
    const y = Constants.MAP_SIZE * (0.25 + Math.random() * 0.5);
    this.players[socket.id] = new Player(socket.id, username, x, y);
  }

  removePlayer(socket) {
    delete this.sockets[socket.id];
    delete this.players[socket.id];
  }

  handleInput(socket, dir) {
    if (this.players[socket.id]) {
      this.players[socket.id].setDirection(dir);
    }
  }

  // ...
}
In this game, we will identify players by their id socket.io field (if you're confused, refer back to server.js). Socket.io automatically assigns a unique idID to each socket, so we don't have to worry about that. I will refer to it as the Player ID.
Keeping this in mind, let's look at the instance variables in the class Game:
sockets— this is an object that ties the player ID to the socket associated with that player. It allows us to access sockets by their player IDs in constant time.players— this is an object that binds the player ID to a code>Player object.
bullets — this is an array of objects Bullet, which has no specific order.
lastUpdateTime — this is a timestamp for the moment of the last game update. Soon we will see how it is used.
shouldSendUpdate — this is a helper variable. We will also see its use shortly.
Methods addPlayer(), removePlayer() and handleInput() need no explanation, they are used in server.js. If you need a refresher, scroll back up a little.
The last line constructor() triggers the game update loop (at a rate of 60 updates/sec): game.js, part 2
game.js, part 2
const Constants = require('..\/shared\/constants');
const applyCollisions = require('.\/collisions');

class Game {
  \/\/ ...

  update() {
    \/\/ Calculate time elapsed
    const now = Date.now();
    const dt = (now - this.lastUpdateTime) / 1000;
    this.lastUpdateTime = now;

    \/\/ Update each bullet
    const bulletsToRemove = [];
    this.bullets.forEach(bullet => {
      if (bullet.update(dt)) {
        \/\/ Destroy this bullet
        bulletsToRemove.push(bullet);
      }
    });
    this.bullets = this.bullets.filter(
      bullet => !bulletsToRemove.includes(bullet),
    );

    \/\/ Update each player
    Object.keys(this.sockets).forEach(playerID => {
      const player = this.players[playerID];
      const newBullet = player.update(dt);
      if (newBullet) {
        this.bullets.push(newBullet);
      }
    });

    \/\/ Apply collisions, give players score for hitting bullets
    const destroyedBullets = applyCollisions(
      Object.values(this.players),
      this.bullets,
    );
    destroyedBullets.forEach(b => {
      if (this.players[b.parentID]) {
        this.players[b.parentID].onDealtDamage();
      }
    });
    this.bullets = this.bullets.filter(
      bullet => !destroyedBullets.includes(bullet),
    );

    \/\/ Check if any players are dead
    Object.keys(this.sockets).forEach(playerID => {
      const socket = this.sockets[playerID];
      const player = this.players[playerID];
      if (player.hp  {
        const socket = this.sockets[playerID];
        const player = this.players[playerID];
        socket.emit(
          Constants.MSG_TYPES.GAME_UPDATE,
          this.createUpdate(player, leaderboard),
        );
      });
      this.shouldSendUpdate = false;
    } else {
      this.shouldSendUpdate = true;
    }
  }

  \/\/ ...
}
Element.getAnimations() update() contains, probably, the most crucial part of the server-side logic. Let's list everything it does in order:
- Calculates how much time
dthas passed since the last timeupdate(). - Updates each bullet and destroys them if necessary. We will see the implementation of this functionality later. For now, it's enough to know that
bullet.update()brings backtrue, if the bullet needs to be destroyed (it has gone out of arena bounds). - Updates each player and creates a bullet if necessary. We will also see this implementation later —
player.update()can return an objectBullet. - Checks for collisions between bullets and players using
applyCollisions(), which returns an array of bullets that hit players. For each returned bullet, we increase the score of the player who fired it (throughplayer.onDealtDamage()), and then remove the bullet from the arraybullets. - Notifies and removes all dead players.
- Sends a game update to all players every second time during the call
update(). This helps us keep track of the aforementioned helper variableshouldSendUpdate. Sinceupdate()it's called 60 times per second, we send game updates 30 times per second. Thus, the clock frequency of the server is 30 ticks per second (we discussed clock frequency in the first part).
Why send game updates only every other time? ? To save bandwidth. 30 game updates per second is a lot!
Then why not simply call
update()30 times per second? To improve the game's simulation. The more frequently it's called,update()the more accurate the game simulation will be. However, one should not get carried away with the number of calls,update()because it's a computationally intensive task — 60 per second is quite sufficient.
The remaining part of the class Game consists of helper methods used in update():
game.js, part 3
class Game {
  // ...

  getLeaderboard() {
    return Object.values(this.players)
      .sort((p1, p2) => p2.score - p1.score)
      .slice(0, 5)
      .map(p => ({ username: p.username, score: Math.round(p.score) }));
  }

  createUpdate(player, leaderboard) {
    const nearbyPlayers = Object.values(this.players).filter(
      p => p !== player && p.distanceTo(player)  b.distanceTo(player)  p.serializeForUpdate()),
      bullets: nearbyBullets.map(b => b.serializeForUpdate()),
      leaderboard,
    };
  }
}
getLeaderboard() is quite simple – it sorts players by score, takes the top five, and returns the username and score for each.
createUpdate() is used in update() to create game updates sent to players. Its main task is to call the methods serializeForUpdate(),implemented for the classes Player. and BulletNote that it only sends data about nearby players and bullets to each player – there’s no need to send information about game objects far from the player!
3. Game objects on the server
In our game, bullets and players are actually very similar: they are abstract circular movable game objects. To take advantage of the similarities between players and bullets, let's start by implementing a base class Object:
object.js
class Object {
  constructor(id, x, y, dir, speed) {
    this.id = id;
    this.x = x;
    this.y = y;
    this.direction = dir;
    this.speed = speed;
  }

  update(dt) {
    this.x += dt * this.speed * Math.sin(this.direction);
    this.y -= dt * this.speed * Math.cos(this.direction);
  }

  distanceTo(object) {
    const dx = this.x - object.x;
    const dy = this.y - object.y;
    return Math.sqrt(dx * dx + dy * dy);
  }

  setDirection(dir) {
    this.direction = dir;
  }

  serializeForUpdate() {
    return {
      id: this.id,
      x: this.x,
      y: this.y,
    };
  }
}
Nothing complicated happens here. This class will serve as a good foundation for expansion. Let’s look at how the class Bullet use Object:
bullet.js
const shortid = require('shortid');
const ObjectClass = require('./object');
const Constants = require('../shared/constants');

class Bullet extends ObjectClass {
  constructor(parentID, x, y, dir) {
    super(shortid(), x, y, dir, Constants.BULLET_SPEED);
    this.parentID = parentID;
  }

  // Returns true if the bullet should be destroyed
  update(dt) {
    super.update(dt);
    return this.x  Constants.MAP_SIZE || this.y  Constants.MAP_SIZE;
  }
}
Implementation Bullet is very short! We have added to Object only the following extensions:
- Using the package for random generation
idof bullets. - Adding the field
parentID, so that we can track the player who created this bullet. - Adding a return value to
update(), which equalstrue, if the bullet is out of bounds (remember we discussed this in the previous section?).
Let’s move on to Player.:
player.js
const ObjectClass = require('./object');
const Bullet = require('./bullet');
const Constants = require('../shared/constants');

class Player extends ObjectClass {
  constructor(id, username, x, y) {
    super(id, x, y, Math.random() * 2 * Math.PI, Constants.PLAYER_SPEED);
    this.username = username;
    this.hp = Constants.PLAYER_MAX_HP;
    this.fireCooldown = 0;
    this.score = 0;
  }

  // Returns a newly created bullet, or null.
  update(dt) {
    super.update(dt);

    // Update score
    this.score += dt * Constants.SCORE_PER_SECOND;

    // Make sure the player stays in bounds
    this.x = Math.max(0, Math.min(Constants.MAP_SIZE, this.x));
    this.y = Math.max(0, Math.min(Constants.MAP_SIZE, this.y));

    // Fire a bullet, if needed
    this.fireCooldown -= dt;
    if (this.fireCooldown <= 0) {
      this.fireCooldown += Constants.PLAYER_FIRE_COOLDOWN;
      return new Bullet(this.id, this.x, this.y, this.direction);
    }
    return null;
  }

  takeBulletDamage() {
    this.hp -= Constants.BULLET_DAMAGE;
  }

  onDealtDamage() {
    this.score += Constants.SCORE_BULLET_HIT;
  }

  serializeForUpdate() {
    return {
      ...(super.serializeForUpdate()),
      direction: this.direction,
      hp: this.hp,
    };
  }
}
Players are more complex than bullets, so this class should store a few more fields. Its method update() does more work, specifically returning a newly created bullet if there is no remaining fireCooldown (remember we discussed this in the previous section?). It also overrides the method serializeForUpdate(),, because we need to include additional fields for the player in the game update.
Having a base class Object is an important step to avoid code duplication. For example, without the class Object each game object would need to have the same implementation of distanceTo(), and synchronizing the copy-pasted implementations across multiple files would be a nightmare. This becomes especially important for large projects, where the number of extending Object classes increases.
4. Collision detection
The only thing left for us is to recognize when projectiles hit players! Remember this snippet of code from the method update() in the class Game:
game.js
const applyCollisions = require('./collisions');

class Game {
  // ...

  update() {
    // ...

    // Apply collisions, give players score for hitting bullets
    const destroyedBullets = applyCollisions(
      Object.values(this.players),
      this.bullets,
    );
    destroyedBullets.forEach(b => {
      if (this.players[b.parentID]) {
        this.players[b.parentID].onDealtDamage();
      }
    });
    this.bullets = this.bullets.filter(
      bullet => !destroyedBullets.includes(bullet),
    );

    // ...
  }
}
We need to implement the method applyCollisions(), which returns all projectiles that hit players. Fortunately, this is not too difficult to do because
- All colliding objects are circles, which makes collision detection a simple shape to implement.
- We already have the method
distanceTo(), which we implemented in the previous section in the classObject.
Here’s what our collision detection implementation looks like:
collisions.js
const Constants = require('../shared/constants');

// Returns an array of bullets to be destroyed.
function applyCollisions(players, bullets) {
  const destroyedBullets = [];
  for (let i = 0; i < bullets.length; i++) {
    // Look for a player (who didn't create the bullet) to collide each bullet with.
    // As soon as we find one, break out of the loop to prevent double counting a bullet.
    for (let j = 0; j < players.length; j++) {
      const bullet = bullets[i];
      const player = players[j];
      if (
        bullet.parentID !== player.id &&
        player.distanceTo(bullet) <= Constants.PLAYER_RADIUS + Constants.BULLET_RADIUS
      ) {
        destroyedBullets.push(bullet);
        player.takeBulletDamage();
        break;
      }
    }
  }
  return destroyedBullets;
}
This simple collision detection is based on the fact that two circles collide if the distance between their centers is less than the sum of their radii.Here’s a case where the distance between the centers of two circles is exactly the sum of their radii:

We also need to pay close attention to a couple of aspects:
- A projectile must not hit the player that created it. This can be achieved by comparing
bullet.parentIDwithplayer.id. - A projectile should only hit once in the limiting case of simultaneous collisions with multiple players. We will solve this task using the operator
break: as soon as a player colliding with the projectile is found, we stop searching and move to the next projectile.
End
That's it! We have covered everything you need to know to create a .io genre web game. What's next? Build your own .io game!
The entire example code is open source and posted on .
Source: habr.com
