

3CX v16 Pro and Enterprise editions offer full integration with Office 365 applications. Specifically, it includes:
- Synchronization of Office 365 users and extensions (users) in 3CX.
- Synchronization of personal contacts of Office users and the personal address book in 3CX.
- Synchronization of the status (availability) of the Office 365 user's calendar and the status of the 3CX extension.
To make outbound calls from the Office applications web interface, 3CX uses the extension for browsers. and You can also use keyboard shortcuts in the .
To get started, you will need a 3CX Office 365 subscription and administrator credentials for the Office portal with 'Global Administrator' privileges.
Some Office 365 subscriptions have limited integration capabilities with 3CX or do not support it at all:
- Subscriptions without user management, i.e., all 'home' subscriptions.
- Subscriptions without Exchange cannot synchronize contacts and the calendar (Office 365 Business and Office 365 Pro Plus).
Office 365 servers must have a direct connection to your 3CX server for real-time status updates. If a constant connection is not possible, 3CX will still perform daily synchronization.
Please note that synchronization occurs only one way — from Office 365 to 3CX. For successful synchronization, Office 365 users must have the 'UserType' attribute set to 'Member' (set in Active Directory). If a user synchronized from Office 365 is deleted or modified through the 3CX interface, they revert to their previous state during the next manual or automatic synchronization.
Microsoft Azure Authentication App
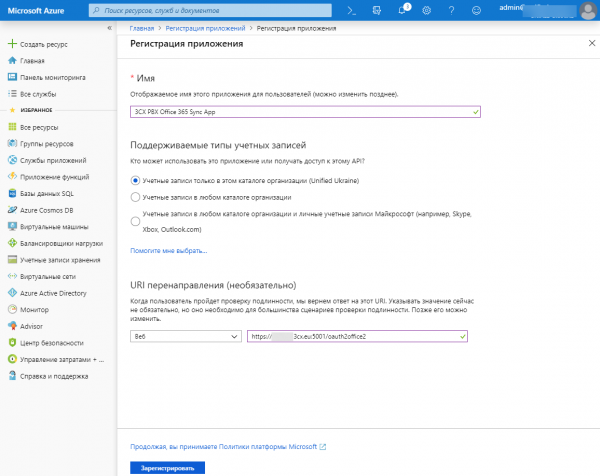
The first step in connecting is to create a custom application in your account for authorizing the integration.
- In the 3CX management interface, go to Options — Office 365 — the Settings tab — Section Step 3 and copy the Redirect URL.
- Log in to the Office 365 portal with Global Administrator credentials and go to the .
- Click New Registration and specify the app name, for example, 3CX PBX Office 365 Sync App.
- In the Supported account types section, leave the default option for Accounts in this organizational directory only.
- In the URI redirect section (optional), specify the Web type and insert the redirect URI from the 3CX interface: Settings > Office 365 Integration > Settings tab > Step 3. Platform and permissions, for example, :5001/oauth2office2
- Click Register, and the application will be created.
- A page will open with the settings of the created application. Copy the Application ID (client) value and paste it into the corresponding field in the 3CX management interface, Settings > Office 365 Integration > Settings tab > Step 1. Configure the App ID.
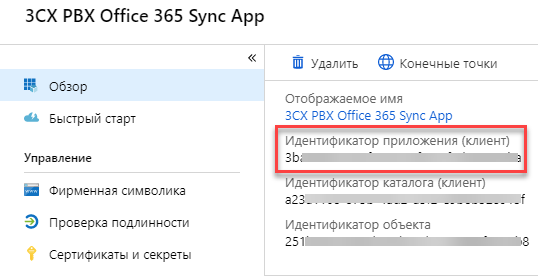
Authentication keys
You now need to establish a trust relationship with the public key between your 3CX v16 system and the created application in the Office 365 portal.
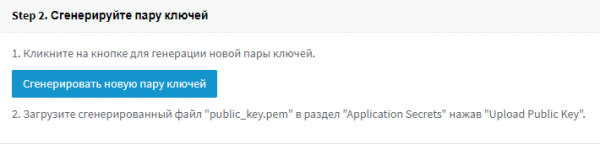
- In the 3CX interface (Settings > Office 365 Integration > Settings tab), click Generate new key pair and save the public_key.pem key.
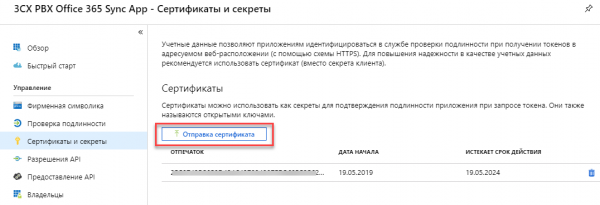
- Go to the application settings page under Certificates and secrets. Click Upload certificate and upload the created key.
Application permissions
The final setup step is to set API permissions in the API permissions section. These permissions define the access rules of your 3CX system to the Office 365 account.
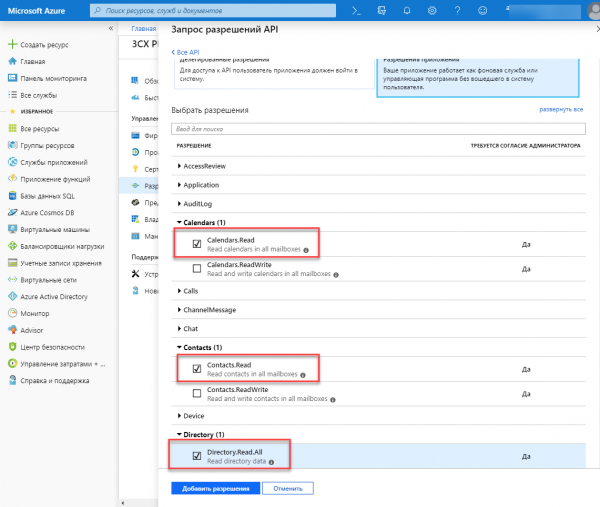
- Go to the API permissions section, click Add permission, and select Microsoft Graph.
- Add API permissions in the Application permissions section: Calendars > Calendars.Read, Contacts > Contacts.Read, Directory > Directory.Read.All and click Add permissions.
- In the Grant consent section, click Grant admin consent for … to activate the permissions.
- Wait about 10 minutes for the changes to take effect properly.
- Switch to the 3CX interface and in the Office 365 Integration section click Sign in to Office 365. Confirm the permissions for the created application, and the connection between the systems will be established.
Sync capabilities
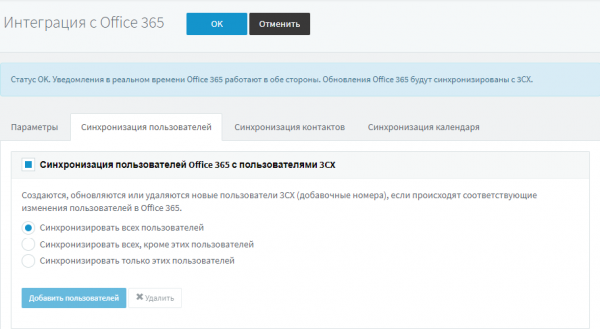
Synchronization between 3CX and Office 365 is configured in three tabs:
- User synchronization — Office 365 users are synchronized with users (additional numbers) in 3CX. The synchronized users are placed in the Azure AD organizational group in the 3CX management interface.
- Contact synchronization — personal contacts from Office 365 are synchronized with the 3CX address book. Users see these contacts in 3CX apps across all platforms.
- Calendar synchronization — automatic updates of the 3CX extension status depending on the availability in the Office 365 calendar:
After an event ends in the Office 365 calendar, the user's 3CX status also synchronizes and reverts to its previous state.
All synchronization elements can be configured for all Office 365 users or selected users.
This completes the integration.
Source: habr.com
