

JPEG images are ubiquitous in our digital lives, but behind this veil of familiarity are algorithms that eliminate details imperceptible to the human eye. This results in the highest visual quality at the smallest file size—but how exactly does it all work? Let’s explore what our eyes do not see!

It’s easy to take for granted the ability to send a photo to a friend without worrying about what device, browser, or operating system they are using—but it wasn’t always this way. By the early 1980s, computers could store and display digital images, but there were many competing ideas about the best way to do it. You couldn’t simply send an image from one computer to another and expect everything to work.
To address this issue, an expert committee was formed in 1986 called “” (JPEG), established under a collaborative effort by the International Organization for Standardization (ISO) and the International Electrotechnical Commission (IEC)—two international standardization organizations headquartered in Geneva, Switzerland.
A group of individuals known as JPEG created the JPEG digital image compression standard in 1992. Anyone who has used the internet has likely encountered images encoded in JPEG. It is the most common method for encoding, transmitting, and storing images. From web pages to emails and social media, JPEG is used billions of times a day—almost every time we view or send an image online. Without JPEG, the web would be less vibrant, slower, and likely have fewer cat photos!
This article is about how to decode a JPEG image. In other words, it discusses what is needed to convert the compressed data stored on a computer into an image displayed on the screen. This is important not only for understanding the technology we use daily but also because by revealing the levels of compression, we gain better insights into perception and vision, as well as what details our eyes are most sensitive to.
Moreover, playing with images this way is quite fascinating.
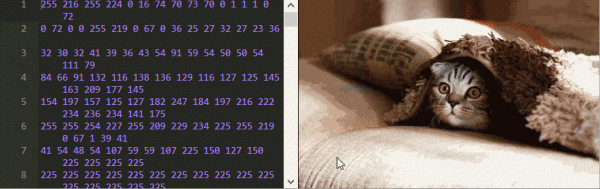
Looking Inside JPEG
On a computer, everything is stored as a sequence of binary digits. These bits, zeros and ones, are usually grouped by eight to form bytes. When you open a JPEG image on your computer, something (a browser, the operating system, or something else) has to decode the bytes, reconstructing the original image as a list of colors that can be displayed.
If you download this adorable and open it in a text editor, you will see a bunch of meaningless characters.
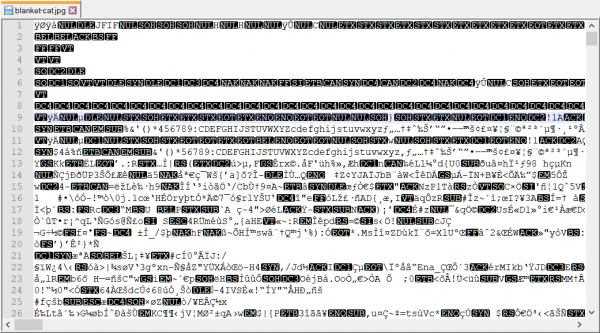
Here I'm using Notepad++ to explore the file's content since regular text editors, like Windows Notepad, will corrupt the binary file after saving, causing it to no longer conform to the JPEG format.
Opening an image in a text editor confuses your computer just like it confuses your brain when you rub your eyes and start to see colored spots!
Those spots you see are known as , and they are not the result of light stimulus or hallucinations created by the mind. They occur because your brain assumes that any electrical signals in the optic nerves convey information about light. The brain needs to make such assumptions since there is no way to determine whether a signal is sound, a vision, or something else. All nerves in the body transmit exactly the same electrical impulses. By pressing on your eyes, you send signals that are not visual but activate the eye receptors, which your brain misinterprets – in this case, incorrectly – as something visual. You are literally capable of seeing pressure!
It's amusing to think about how computers are similar to the brain; however, this is also a useful analogy illustrating how much the meaning of data—whether transmitted through nerves or stored on a computer—depends on its interpretation. All binary data consists of zeros and ones, the basic components capable of transmitting any type of information. Your computer often guesses how to interpret them using hints, such as file extensions. And now we are making it interpret them as text, as this is what a text editor expects.
To understand how to decode JPEG, we need to see the original signals—the binary data. This can be done using a hexadecimal editor or directly on the ! There is an image next to which all its bytes (except the header) are provided in decimal form in a text field. You can change them, and the script will re-encode and output a new image on the fly.

You can learn a lot just by playing with this editor. For example, can you tell in what order the pixels are stored?
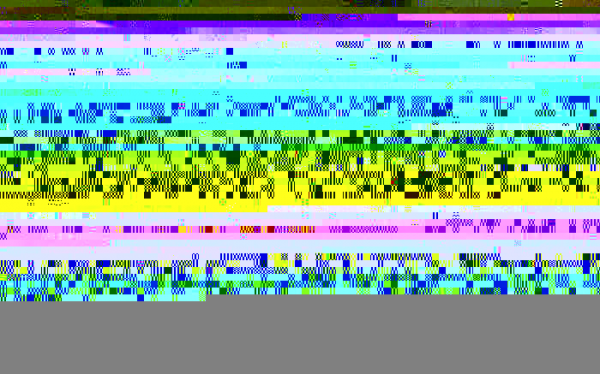
In this example, it is strange that changing some numbers doesn't affect the image at all, while, for instance, if you replace the number 17 with 0 in the first row, the picture will be completely ruined!
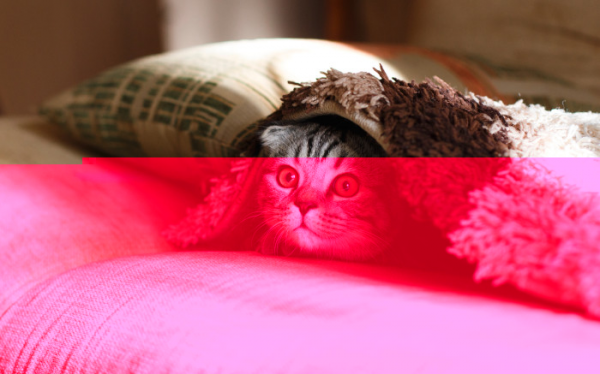
Other changes, like replacing 7 in row 1988 with the number 254, changes the color, but only of the subsequent pixels.
Perhaps the most bizarre thing is that some numbers change not only the color but also the shape of the image. Change 70 in line 12 to 2 and look at the top row of the image to see what I mean.

And regardless of which JPEG you use, you will always find these mysterious chess patterns when editing bytes.
Playing with the editor, it is hard to understand how the photo is reconstructed from these bytes, as JPEG compression consists of three different technologies applied sequentially at different levels. We will study each of them separately to uncover the mysterious behavior we observe.
Three levels of JPEG compression:
- .
- .
- , and
To give you an idea of the scale of compression, note that the image above consists of 79,819 numbers, or about 79 KB. If we stored it uncompressed, it would require three numbers per pixel – for the red, green, and blue components. This would total 917,700 numbers, or approximately 917 KB. As a result of JPEG compression, the final file size was reduced by more than 10 times!
In fact, this image can be compressed even further. Below are two images side by side – the photo on the right has been compressed to 16 KB, which is 57 times smaller than the uncompressed version!
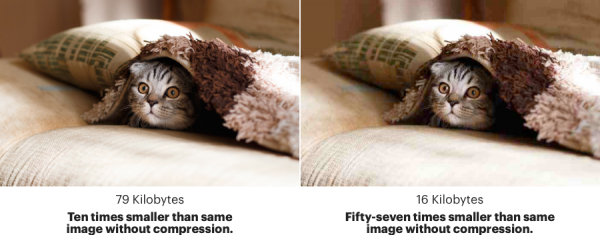
Upon closer inspection, you'll see that these images are not identical. Both are JPEG compressed images, but the right one is significantly smaller in size. It also looks slightly worse (check out the squares of background colors). Therefore, JPEG is also referred to as lossy compression; during the compression process, the image changes and loses some details.
1. Color Subsampling
Here is an image using only the first level of compression.

(Interactive version – in the article). Removing one number distorts all colors. However, if you remove exactly six numbers, it hardly affects the image.
Now, the numbers are a bit easier to decode. It's almost a simple list of colors, where each byte modifies exactly one pixel, and yet it is already half the size of the uncompressed image (which would occupy about 300 KB in this reduced form). Can you guess why?
You can see that these numbers do not represent the standard red, green, and blue components, because if you replace all the numbers with zeros, we get a green image (not a white one).

This is because these bytes represent Y (luminance),

Cb (chroma blue),

and Cr (chroma red) of the image.

Why not use RGB? After all, that's how most modern displays operate. Your monitor can showcase any color, including varying intensities of red, green, and blue for each pixel. White is produced by turning all three to full brightness, while black is achieved by turning them off.
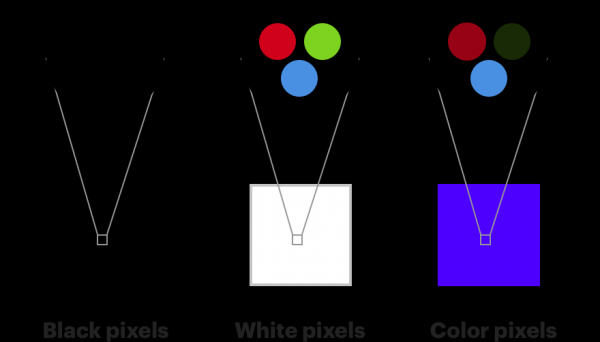
This also closely resembles how the human eye functions. The color receptors in our eyes are called “They are divided into three types, each of which is more sensitive to either red, green, or blue colors [S-type cones are sensitive to violet-blue (S stands for Short — short-wavelength spectrum), M-type to green-yellow (M stands for Medium — medium-wavelength), and L-type to yellow-red (L stands for Long — long-wavelength) parts of the spectrum. The presence of these three types of cones (and rods that are sensitive to emerald-green parts of the spectrum) gives humans color vision. / translated note]. , another type of photoreceptors in our eyes, capable of detecting changes in brightness but is much more sensitive to color. There are about 120 million rods and only 6 million cones in our eyes.
Therefore, our eyes are much better at noticing changes in brightness than changes in color. If you separate color from brightness, you can reduce some color, and no one will notice. Color subdiscretization is the process of representing color components of an image at a lower resolution compared to brightness components. In the example above, each pixel has exactly one Y component, while each group of four pixels has exactly one Cb and one Cr component. Hence, the image contains four times less color information than the original.
The YCbCr color space is used not only in JPEG. It was originally conceived in 1938 for television broadcasts. Not everyone had color televisions, so separating color and brightness allowed everyone to receive the same signal, while colorless TVs used only the brightness component.
Therefore, removing one number from the editor completely disrupts all colors. The components are stored as Y Y Y Y Cb Cr (in fact, not necessarily in this order – the storage order is specified in the file header). Removing the first number will cause the first Cb value to be interpreted as Y, Cr as Cb, and overall, it will create a domino effect that switches all colors in the image.
The JPEG specification does not require you to use YCbCr. However, it is used in most files because it provides better quality images after subsampling compared to RGB. But you don’t have to take my word for it. Check for yourself in the table below how the subsampling of each individual component looks in both RGB and YCbCr.
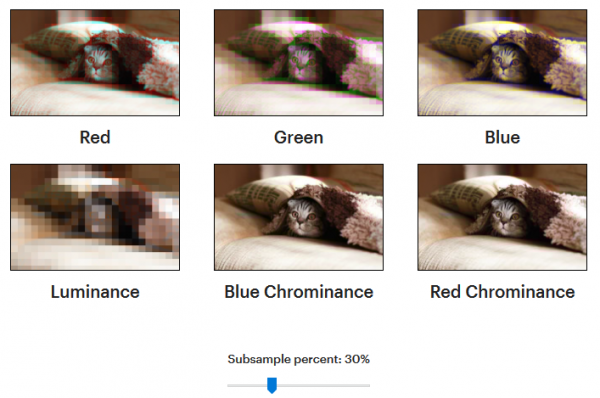
(Interactive version – in the articles).
The removal of blue is less noticeable than red or green. This is because out of the six million cones in your eyes, about 64% are sensitive to red, 32% to green, and 2% to blue.
The subsampling of the Y component (shown in the lower left) is most visible. Even a slight change is noticeable.
Converting an image from RGB to YCbCr does not reduce the file size, but it makes it easier to identify less noticeable details that can be removed. Lossy compression occurs in the next stage. It is based on the idea of representing data in a more compressible form.
2. Discrete Cosine Transform and Subsampling
This level of compression largely defines the essence of JPEG. After converting colors to YCbCr, the components are compressed separately, allowing us to focus solely on the Y component. Here’s how the bytes of the Y component look after applying this level.
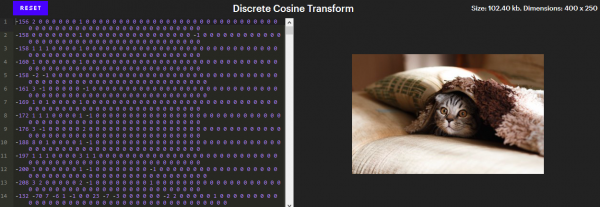
(Interactive version – in the articles). In the interactive version, clicking on a pixel scrolls the editor to the line that indicates it. Try removing numbers from the end or adding a few zeros to a specific number.
At first glance, it looks like very poor compression. In an image with 100,000 pixels, 102,400 numbers are required to represent their brightness (Y components) — this is worse than not compressing at all!
However, note that most of these numbers are zero. Moreover, all these zeros at the end of the lines can be removed without changing the image. About 26,000 numbers remain, which is almost four times less!
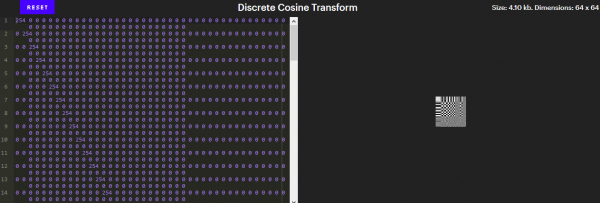
At this level lies the secret of chess patterns. Unlike other effects we have seen, the appearance of these patterns is not a glitch. They are the building blocks of the entire image. Each line in the editor contains exactly 64 numbers, the coefficients of the Discrete Cosine Transform (DCT), corresponding to the intensities of 64 unique patterns.
These patterns are formed based on the cosine graph. Here’s what some of them look like:

8 out of 64 coefficients
Below is an image demonstrating all 64 patterns.
(Interactive version – in the articles).
These patterns are significant because they form the basis of images sized 8x8. If you're not familiar with linear algebra, this means that any image sized 8x8 can be constructed from these 64 patterns. DCT is the process of breaking images into 8x8 blocks and transforming each block into a combination of these 64 coefficients.
That any image can be composed of 64 specific patterns seems like magic. However, it’s the same as saying that any location on Earth can be described by two numbers—latitude and longitude [with indications of the hemispheres / translator's note]. We often consider the surface of the Earth to be two-dimensional, so we need only two numbers. An 8x8 image has 64 dimensions, so we need 64 numbers.
It’s still unclear how this helps us in terms of compression. If we need 64 numbers to represent an 8x8 image, why would this method be better than simply storing 64 brightness components? We do this for the same reason we converted three RGB numbers into three YCbCr numbers: it allows us to eliminate imperceptible details.
It's hard to see which specific details are removed at this stage since JPEG applies DCT to 8x8 blocks. However, nothing prevents us from applying it to the entire picture. Here’s how DCT looks on the Y component when applied to the whole image:

You can remove over 60,000 numbers from the end practically without noticeable changes to the photo.

However, note that if we set the first five numbers to zero, the difference will be obvious.

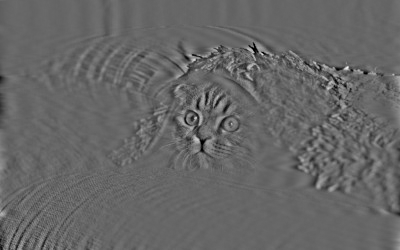
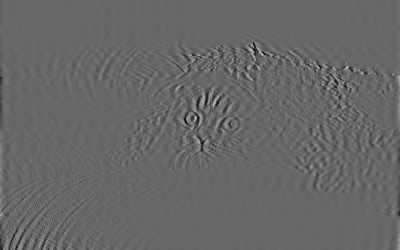
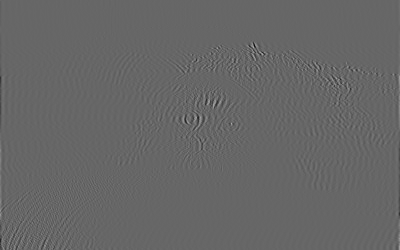
The numbers at the beginning represent changes in low frequency in the image, and our eyes detect them best. The numbers closer to the end represent high-frequency changes, which are harder to notice. To 'see what the eye cannot see,' we can isolate these high-frequency details by setting the first 5,000 numbers to zero.
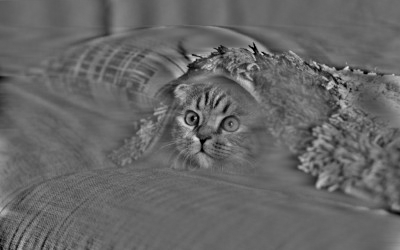
We see all areas of the image where the most significant changes occur from pixel to pixel. The cat's eyes, its whiskers, the plush blanket, and the shadows in the lower left corner stand out. We can go further by setting the first 10,000 numbers to zero:
20 000:
40 000:
60 000:

These high-frequency JPEG components are removed during the compression stage. The conversion of colors to DCT coefficients is lossless. Loss occurs at the discretization step, where high-frequency or near-zero values are discarded. When you lower the JPEG save quality, the program raises the threshold for the number of values removed, which reduces file size but makes the image more pixelated. That’s why the image in the first section, which was 57 times smaller, looked that way. Each 8x8 block was represented by a much smaller number of DCT coefficients compared to a higher quality version.
You can create a cool effect like gradual streaming of images. You can display a blurred image that becomes increasingly detailed as more coefficients are downloaded.
Just out of interest, here’s what happens when using only 24,000 numbers:

Or just 5,000:

Very blurry, but somewhat recognizable!
3. Run-length encoding, delta, and Huffman coding
So far, all compression stages have been lossy. The final stage, on the other hand, is lossless. It does not discard information, but it significantly reduces file size.
How can you compress something without discarding information? Imagine how we would describe a simple black rectangle 700 x 437.
JPEG uses 5,000 numbers for this, but much better results can be achieved. Can you imagine a coding scheme that describes such an image with as few bytes as possible?
The minimal scheme I could come up with uses four: three to denote the color, and the fourth to tell how many pixels are that color. The idea of representing repeating values in such a compressed way is called run-length encoding. It is lossless since we can restore the encoded data to its original state.
The size of a JPEG file with a black rectangle is much larger than 4 bytes – remember that at the DCT level, compression is applied to blocks of 8x8 pixels. Therefore, at least one DCT coefficient is needed for every 64 pixels. We need one because instead of storing one DCT coefficient followed by 63 zeros, run-length encoding allows us to store one number and indicate that 'all the others are zeros'.
Delta coding is a technique where each byte contains a difference from a certain value instead of an absolute value. Therefore, editing certain bytes changes the color of all other pixels. For example, instead of storing
12 13 14 14 14 13 13 14
We could start with 12 and then simply indicate how much to add or subtract to get the next number. This sequence in delta coding takes the form of:
12 1 1 0 0 -1 0 1
The transformed data isn't smaller than the original, but compressing it is already easier. Applying delta coding before run-length encoding can greatly help while still being lossless compression.
Delta coding is one of the few techniques applied outside of 8x8 blocks. Out of 64 DCT coefficients, one is simply a constant wave function (solid color). It represents the average brightness of each block for the brightness components, or the average blueness for the Cb components, and so on. The first value of each DCT block is called the DC value, and each DC value undergoes delta coding in relation to the previous one. Therefore, changing the brightness of the first block will affect all blocks.
The final mystery remains: how does changing a single number completely ruin the entire picture? So far, such properties have not been present in compression levels. The answer lies in the JPEG header. The first 500 bytes contain metadata about the image – width, height, and so on, and until we work with them, we can't proceed.
Without the header, it is practically impossible (well, or very difficult) to decode a JPEG. It would be like trying to describe a painting to you, and I start inventing words to convey my impression. The description will likely be quite compressed, since I can create words with exactly the meaning I want to convey, but for everyone else, they may not make sense.
It may sound silly, but that's exactly how it works. Each JPEG image is compressed with codes specific to it. The code dictionary is stored in the header. This technique is called 'Huffman coding', and the dictionary is known as the Huffman table. In the header, the table is marked by two bytes – 255 followed by 196. Each color component can have its own table.
Changes to the tables will drastically affect any image. A good example is changing the 1 to 12 on line 15.
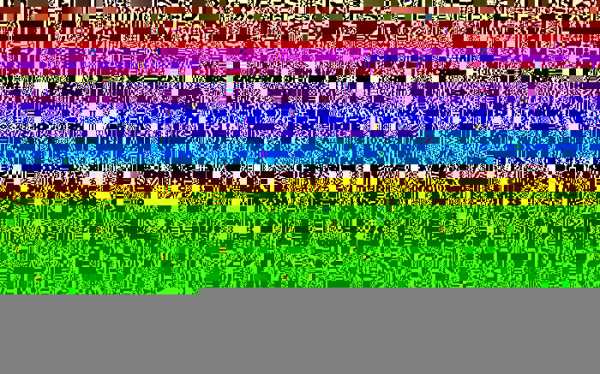
This happens because the tables specify how to read individual bits. So far, we have only worked with binary numbers in decimal form. But this hides the fact that if you want to store the number 1 in a byte, it will look like 00000001, since each byte must contain exactly eight bits, even if you only need one of them.
Potentially, this is a significant waste of space if you have many small numbers. Huffman coding is a technique that allows us to ease this requirement that each number must occupy eight bits. This means that if you see two bytes:
234 115
Then, depending on the Huffman table, these could represent three numbers. To extract them, you first need to break them down into individual bits:
11101010 01110011
Then you refer to the table to understand how to group them. For example, these could be the first six bits (111010), or 58 in decimal, followed by five bits (10011), or 19, and finally the last four bits (0011), or 3.
Therefore, it is quite difficult to make sense of the bytes at this stage of compression. Bytes do not represent what they seem. I won't delve into the details of working with the table in this article, but more information on this topic can be found online. .
One of the interesting tricks you can perform, knowing this, is to separate the header from the JPEG and store it separately. Essentially, this means only you will be able to read the file. Facebook does this to further reduce file sizes.
Another thing you can do is make slight modifications to the Huffman table. For others, it will appear as a corrupted image. Only you will know the magic trick to fix it.
To summarize, what is needed for decoding JPEG? You need to:
- Extract the Huffman table(s) from the header and decode the bits.
- Extract the discrete cosine transform coefficients for each color and brightness component for every 8x8 block, performing inverse run-length encoding and delta transformations.
- Combine the cosines based on the coefficients to obtain pixel values for each 8x8 block.
- Scale the color components if subsampling was performed (this information is in the header).
- Convert the obtained YCbCr values for each pixel to RGB.
- Display the image on the screen!
A serious task for simply viewing a picture of a kitten! However, what I like about it is how human-centric JPEG technology is. It is based on the peculiarities of our perception, allowing for much better compression than regular technologies. And now, understanding how JPEG works, one can imagine how these technologies can be applied in other fields. For example, delta encoding in video can lead to significant file size reduction since there are often whole areas that do not change from frame to frame (like the background).
, is open and contains instructions on replacing images with your own.
Source: habr.com
