

The need to provide remote access to the corporate environment is becoming increasingly frequent, whether it involves internal users or partners who require access to a specific server within your organization.
For this purpose, most companies utilize VPN technology, which has proven to be a reliably secure method for granting access to an organization's local resources.
My company is no exception, and like many others, we use this technology. We also use Cisco ASA 55xx as our remote access gateway.
As the number of remote users increases, the need to simplify the credential issuing process arises. However, this must be done without compromising security.
We found our solution in applying two-factor authentication for Cisco SSL connections, using one-time passwords. This publication will explain how to set up such a solution with minimal time investment and zero software costs (assuming you already have Cisco ASA in your infrastructure). VPNThe market is filled with boxed solutions for generating one-time passwords, offering a variety of options for their delivery, whether by sending passwords via SMS or using tokens, both hardware and software-based (for example, on a mobile phone). However, a desire to save money for my employer in the current crisis led me to find a free way to implement a one-time password generation service. This solution, despite being free, is hardly inferior to commercial offerings (it should be noted that this product does have a commercial version, but we agreed that our costs would be zero).
So, we will need:
— A Linux image with a built-in toolkit — multiOTP, FreeRADIUS, and nginx, for web access (http://download.multiotp.net/ — I used a ready-made image for VMware)
— An Active Directory server
— The Cisco ASA itself (for convenience, I use ASDM)
— Any software token that supports the TOTP mechanism (for example, I use Google Authenticator, but FreeOTP will also work fine)
— Any software token that supports the TOTP mechanism (For example, I use Google Authenticator, but FreeOTP would also work.)
I won't go into detail about deploying the image. You will end up with Debian Linux that has multiOTP and FreeRADIUS already installed, configured to work together, and a web interface for OTP administration.
Step 1. Initiate the system and configure it for your network
By default, the system comes with the credentials root root. I think everyone understands that it would be wise to change the root user's password after the first login. It's also necessary to change the network settings (by default this is ‘192.168.1.44’ with a gateway of ‘192.168.1.1’). After that, you can reboot the system.
In Active Directory, we will create a user otp, with the password MySuperPassword.
Step 2. Set up the connection and import Active Directory users
For this, we will need access to the console and the file multiotp.php, which we will use to configure the connection parameters to Active Directory.
Go to the directory /usr/local/bin/multiotp/ and sequentially execute the following commands:
./multiotp.php -config default-request-prefix-pin=0Specifies whether an additional (static) pin is required when entering a one-time pin (0 or 1)
./multiotp.php -config default-request-ldap-pwd=0Specifies whether the domain password needs to be entered when entering a one-time pin (0 or 1)
./multiotp.php -config ldap-server-type=1Indicates the type of LDAP server (0 = regular LDAP server, in our case 1 = Active Directory)
./multiotp.php -config ldap-cn-identifier="sAMAccountName"Indicates the format for representing the username (this value will output only the name, without the domain)
./multiotp.php -config ldap-group-cn-identifier="sAMAccountName"The same, but for the group
./multiotp.php -config ldap-group-attribute="memberOf"Specifies the method for determining user group membership
./multiotp.php -config ldap-ssl=1Specify whether to use a secure connection to the LDAP server (of course — yes!)
./multiotp.php -config ldap-port=636Port for connecting to the LDAP server
./multiotp.php -config ldap-domain-controllers=adSRV.domain.localAddress of your Active Directory server
./multiotp.php -config ldap-base-dn="CN=Users,DC=domain,DC=local"Specifies where to start searching for users in the domain
./multiotp.php -config ldap-bind-dn="otp@domain.local"Specifies the user with permission to search in Active Directory
./multiotp.php -config ldap-server-password="MySuperPassword"Specifies the password for the user connecting to Active Directory
./multiotp.php -config ldap-network-timeout=10Set the timeout for connecting to Active Directory
./multiotp.php -config ldap-time-limit=30Set the time limit for the user import operation
./multiotp.php -config ldap-activated=1Activating the connection configuration to Active Directory
./multiotp.php -debug -display-log -ldap-users-syncImporting users from Active Directory
Step 3. Generate QR code for the token
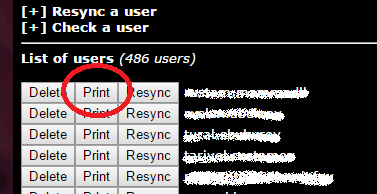
This step is quite straightforward. Open the OTP server's web interface in your browser, log in (don't forget to change the default admin password!), and click the 'Print' button:
The result of this action will be a page containing two QR codes. We can ignore the first one (despite the enticing labels Google Authenticator / Authenticator / 2 Steps Authenticator) and confidently scan the second code in the software token on the phone:
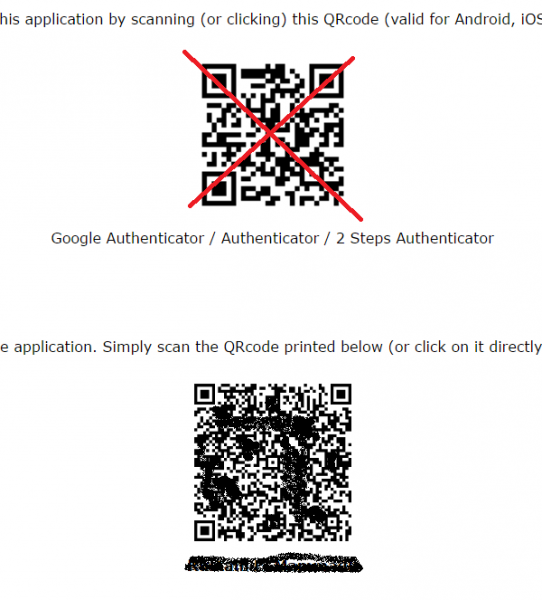
(yes, I intentionally ruined the QR code to make it unreadable).
After performing these actions, your application will generate a six-digit password every thirty seconds.
For confirmation, you can perform a check in the same interface:
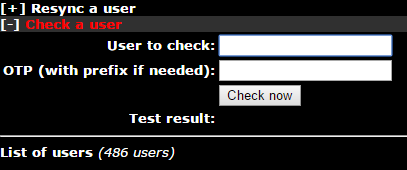
By entering the username and the one-time password from the application on your phone. Did you get a positive response? Then let’s proceed.
Step 4. Fine-tune and test FreeRADIUS operation
As I mentioned earlier, multiOTP is already configured to work with FreeRADIUS; now we just need to run tests and add information about our VPN gateway to the FreeRADIUS configuration file.
Returning to the server console, navigate to the directory /usr/local/bin/multiotp/, type:
./multiotp.php -config debug=1
./multiotp.php -config display-log=1
Thus enabling more detailed logging.
In the FreeRADIUS client configuration file (/etc/freeradius/clinets.conf) comment out all lines related to localhost and add two entries:
client localhost {
        ipaddr = 127.0.0.1
        secret = testing321
        require_message_authenticator = no
}
— for testing
client 192.168.1.254/32 {
        shortname = CiscoASA
        secret = ConnectToRADIUSSecret
}
— for our VPN gateway.
Restart FreeRADIUS and try to authenticate:
radtest username 100110 localhost 1812 testing321where username = username, 100110 = the password provided by the application on your phone, localhost = the RADIUS server address, 1812 — RADIUS server port, testing321 — RADIUS client password (which we specified in the config).
The result of this command will be output similar to the following:
Sending Access-Request of id 44 to 127.0.0.1 port 1812
        User-Name = "username"
        User-Password = "100110"
        NAS-IP-Address = 127.0.1.1
        NAS-Port = 1812
        Message-Authenticator = 0x00000000000000000000000000000000
rad_recv: Access-Accept packet from host 127.0.0.1 port 1812, id=44, length=20
Now we need to ensure that the user has successfully authenticated. For this, we will check the log of multiotp:
tail /var/log/multiotp/multiotp.logAnd if the last entry there is:
2016-09-01 08:58:17     notice  username  User    OK: User username successfully logged in from 127.0.0.1
2016-09-01 08:58:17     debug           Debug   Debug: 0 OK: Token accepted from 127.0.0.1
Then everything went smoothly, and we can proceed with
Step 5. Configuring Cisco ASA
Let’s assume we already have a configured group and policies for access via SSL VPN, set up in conjunction with Active Directory, and we need to add two-factor authentication for this profile.
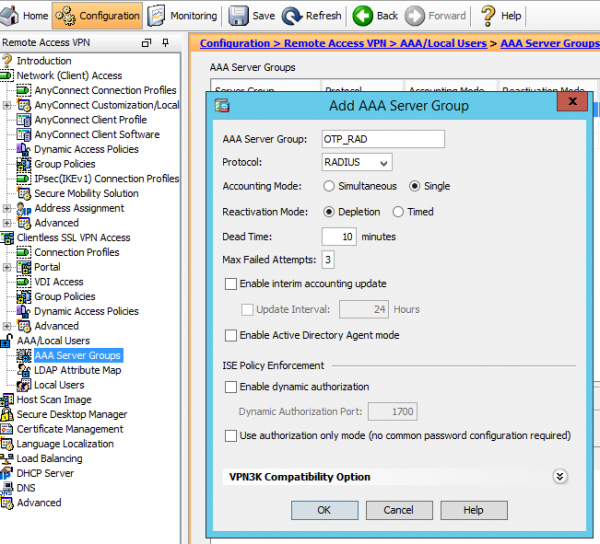
1. Adding a new group servers AAA:
2. Adding our multiOTP server to the group:
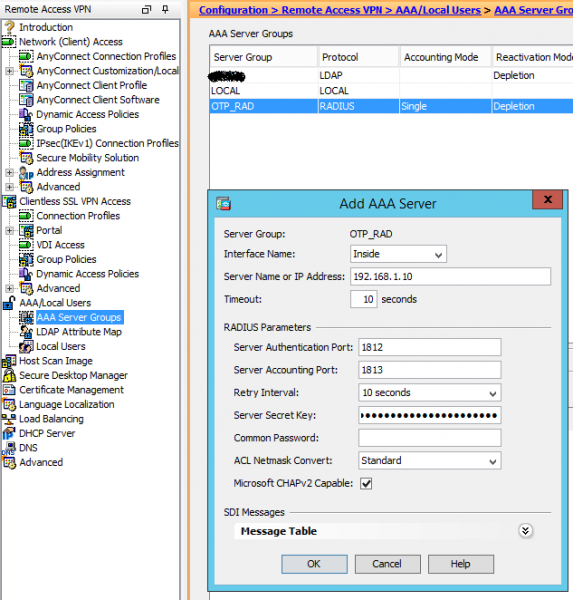
3. Editing the connection profile, setting the primary authentication server to be the Active Directory server group:
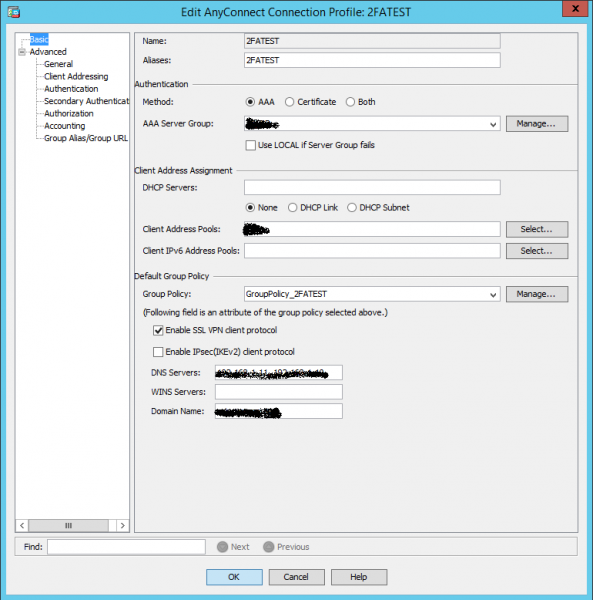
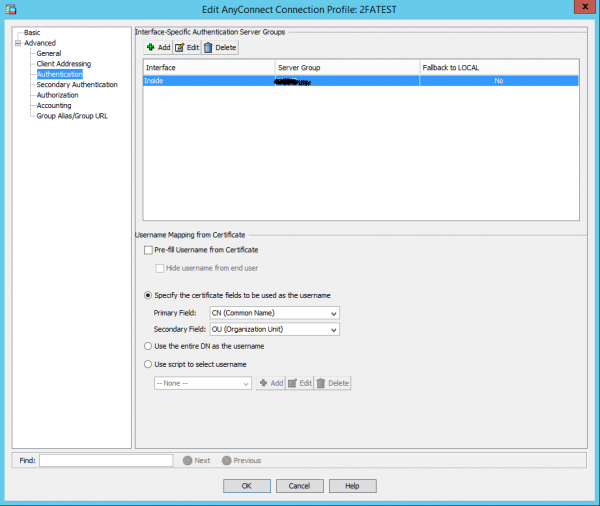
4. On the tab Advanced -> Authentication also select the Active Directory server group:
5. On the tab Advanced -> Secondary authentication select the created server group that includes the multiOTP server. Note that the Session username is inherited from the primary AAA server group:
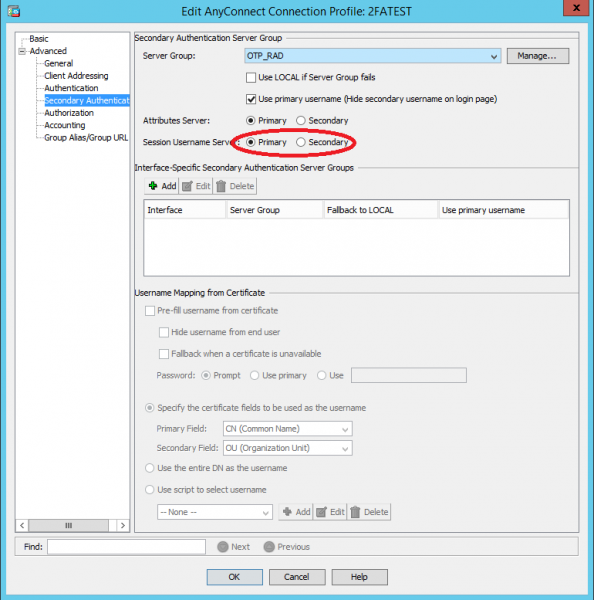
Apply the settings and
Step 6, which is also the last step
Check whether two-factor authentication works for our SSL VPN:
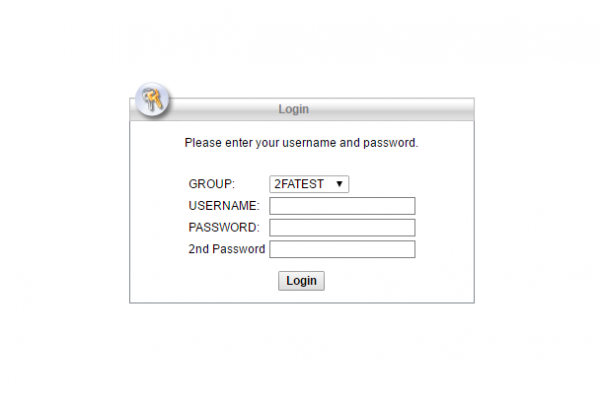
Voila! When connecting via the Cisco AnyConnect VPN Client, a second one-time password will also be requested.
I hope this article will help someone, and that it will provide food for thought on how to use this free OTP server for other tasks. Share in the comments if you would like.
Source: habr.com
