

Troubleshooting operating system boot issues on servers without KVM is a challenging task. We create KVM-over-IP through a recovery image and a virtual machine.
In case of problems with the operating system , the administrator loads a recovery image and carries out the necessary work. This method works well when the cause of the failure is known and the recovery image and the operating system installed on the server belong to the same family. If the cause of the failure is not yet known, it is necessary to observe the boot process of the operating system.
Remote KVM
Access to the server console can be achieved using built-in tools such as IPMI or Intel® vPro™, or with external devices called IP-KVM. There are situations where none of the listed technologies are available. However, this is not the end. If the server can be remotely rebooted into a recovery image based on a Linux family operating system, KVM-over-IP can be quickly organized.
The recovery image is a fully functional operating system that resides in RAM. Therefore, we can run any software, including virtual machines (VMs). This means that a VM can be launched, inside which the server's operating system will operate. Access to the VM console can be arranged, for example, via VNC.
To start the server's operating system inside a VM, you need to specify the server disks as the VM disks. In Linux family operating systems, physical disks are represented as block devices of the type /dev/sdX, which can be operated on like regular files.
Some hypervisors, such as QEMU and VirtualBox, allow storing VM data in a ‘raw’ format, which means only the storage data without hypervisor metadata. Thus, the VM can be launched using the physical disks of the server.
This method requires resources to run the recovery image and the VM within it. However, with four or more gigabytes of RAM, this will not be a problem.
Preparing the Environment
A lightweight and simple program can be used as a virtual machine , which is often not part of the recovery image, so it needs to be installed separately. The recovery image we offer to clients is based on , which uses the package manager pacman.
First, make sure that the recovery image uses the latest software versions. You can check and update all OS components with the following command:
pacman -Suy
After the update, you need to install QEMU. The command for installation via pacman will look like this:
pacman -S qemu
Let's check that qemu has been installed correctly:
root@sel-rescue ~ # qemu-system-x86_64 --version
 QEMU emulator version 4.0.0
 Copyright (c) 2003-2019 Fabrice Bellard and the QEMU Project developers
If everything is fine, the recovery image is ready to use.
Starting the virtual machine
First, determine the amount of resources allocated to the VM, and find the paths to the physical disks. In our case, we will allocate two cores and two gigabytes of RAM to the virtual machine, and the disks are located at /dev/sda and /dev/sdb. Let's start the VM:
qemu-system-x86_64
 -m 2048M
 -net nic -net user
 -enable-kvm
 -cpu host,nx
 -M pc
 -smp 2
 -vga std
 -drive file=/dev/sda,format=raw,index=0,media=disk
 -drive file=/dev/sdb,format=raw,index=1,media=disk
 -vnc :0,password
 -monitor stdio
A bit more about what each parameter means:
- -m 2048M — allocate 2 GB of RAM to the VM;
- -net nic -net user — add a simple network connection via the hypervisor using NAT (Network Address Translation);
- -enable-kvm — enable full KVM (Kernel Virtual Machine) virtualization;
- -cpu host — tell the virtual CPU to utilize all features of the server's CPU;
- -M pc — PC hardware type;
- -smp 2 — the virtual CPU should be dual-core;
- -vga std — select a standard graphic card that does not support high resolutions;
- -drive file=/dev/sda,format=raw,index=0,media=disk
- file=/dev/sdX — the path to the block device representing the server's disk;
- format=raw — indicate that all data in the specified file is in 'raw' format, that is, just like on the disk;
- index=0 — disk number, which should increase by one for each subsequent disk;
- media=disk — the virtual machine should recognize this storage as a disk;
- -vnc :0, password — start the VNC server by default on 0.0.0.0:5900, using a password for authorization;
- -monitor stdio — communication between the administrator and qemu will occur through standard input-output streams.
If everything is fine, the QEMU monitor will start:
QEMU 4.0.0 monitor - type 'help' for more information
 (qemu)
We specified that the authorization occurs by password, but we did not specify the password itself. This can be done by sending the command change vnc password in the QEMU monitor. Important note: the password cannot be longer than eight characters.
(qemu) change vnc password
 Password: ******
After this, we can connect with any VNC client, such as Remmina, using the IP address of our server along with the specified password.
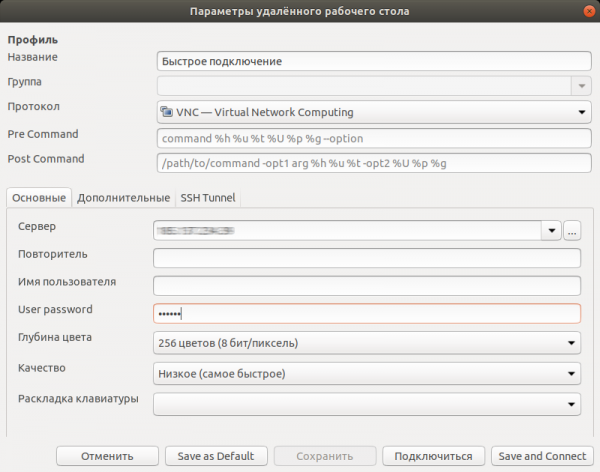
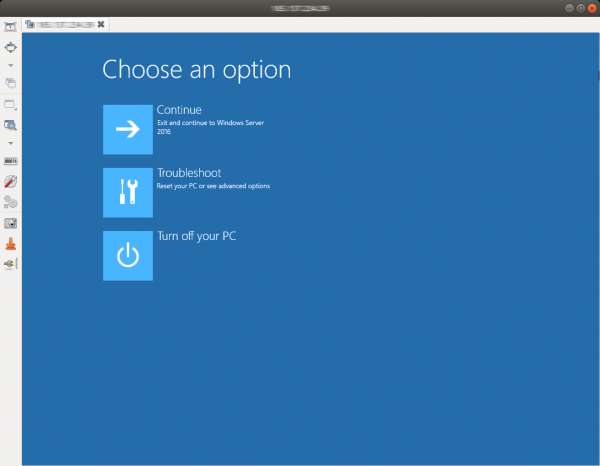
Now we can not only see possible errors during the boot stage, but also deal with them.
Upon completion of work, the virtual machine must be shut down. This can be done either from within the OS by sending a shutdown signal or by issuing a command system_powerdown in the QEMU monitor. This will be equivalent to pressing the shutdown button once: the operating system inside the virtual machine will shut down smoothly.
Installing the operating system
The virtual machine has full access to the server's disks and can therefore be used to manually install the operating system. The only limitation is the amount of RAM: the ISO image cannot always fit in memory. We will allocate four gigabytes of memory to store the image in /mnt:
mount -t tmpfs -o size=4G tmpfs /mnt
We will also download the installer image of FreeBSD 12.0:
wget -P /mnt ftp://ftp.freebsd.org/pub/FreeBSD/releases/amd64/amd64/ISO-IMAGES/12.0/FreeBSD-12.0-RELEASE-amd64-bootonly.iso
Now we can start the VM:
qemu-system-x86_64
 -m 2048M
 -net nic -net user
 -enable-kvm
 -cpu host,nx
 -M pc
 -smp 2
 -vga std
 -drive file=/dev/sda,format=raw,index=0,media=disk
 -drive file=/dev/sdb,format=raw,index=1,media=disk
 -vnc :0,password
 -monitor stdio
 -cdrom /mnt/FreeBSD-12.0-RELEASE-amd64-bootonly.iso
 -boot d
Flag -boot d it sets the boot from the CD drive. We connect using a VNC client and see the FreeBSD bootloader.
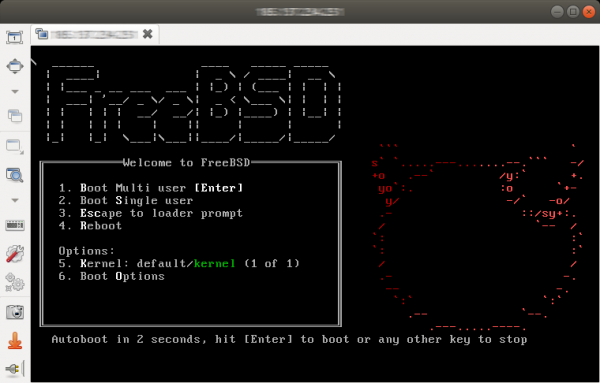
Since DHCP was used to obtain the internet address, it may be necessary to boot into the newly installed system after configuration and fix network settings. In some cases, installing network adapter drivers may be required, as the network card installed on the server and emulated in the VM differ.
Conclusion
This method of organizing remote access to the server console consumes some of the server's resources; however, it does not impose any special requirements on the server's hardware, making it feasible under virtually any conditions. Using this solution significantly facilitates the diagnosis of software issues and the recovery of the remote server's functionality.
Source: habr.com
