

In this article, I will attempt to describe step by step the process of setting up a test server for a wonderful project. to a fully operational state, and show practical techniques for working with Mikrotik: configuration through parameters, running scripts, updates, installation of additional modules, etc.
The goal of the article is to encourage colleagues to abandon the management of network devices using dreadful hacks and crutches, such as custom scripts, Dude, Ansible, etc. And, in this regard, to spark celebrations and mass rejoicing in the squares.
0. Selection
Why Freeacs and not Genie-Acs, mentioned in , as a more active option?
Because there are publications by Spanish authors on Genie-Acs with Mikrotik. Here are their and from last year's MUM. Auto-sharing in slides is cool, but I would like to move away from the concept of writing scripts to run scripts to run scripts...
1. Installing Freeacs
We will install on Centos7, and since devices transmit quite a lot of data, and ACS actively interacts with the database, we won't skimp on resources. For comfortable operation, we will allocate 2 CPU cores, 4GB RAM, and 16GB of fast SSD RAID10 storage. I will install Freeacs in a Proxmox VE LXC container, but you can work with any tool you prefer.
Don't forget to set the correct time on the ACS machine.
The system will be a test one, so we won't complicate things and will simply use the kindly provided installation script as is.
wget https://raw.githubusercontent.com/freeacs/freeacs/master/scripts/install_centos.sh
chmod +x install_centos.sh
./install_centos.sh
As soon as the script completes — you will immediately have access to the web interface via the machine's IP, with the credentials admin/freeacs.
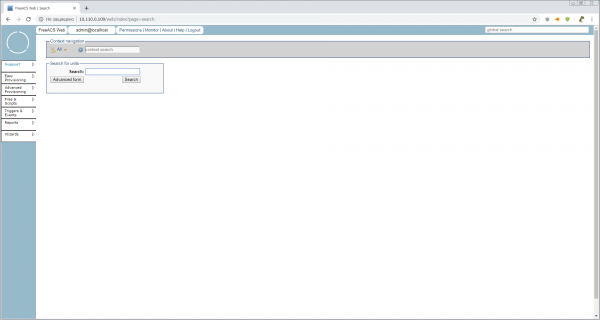
Here is such a nice minimalist interface, and how great and quickly everything turned out.
2. Initial Setup of Freeacs
The basic unit of management for ACS is the unit or CPE (Customer Premises Equipment). The most important thing we need to manage the units is their Unit Type, i.e., the model of the equipment that defines the set of configurable parameters for the unit and its software. But since we don't yet know how to properly register a new Unit Type, it's best to ask the unit itself by enabling Discovery Mode.
This mode should categorically not be used in production, but we need to start the engine and see the system's capabilities. All main configurations are stored in /opt/freeacs-*. Therefore, let's open
vi /opt/freeacs-tr069/config/application-config.conf , we find
discovery.mode = falseand change to
discovery.mode = trueAdditionally, we should increase the maximum file sizes that nginx and mysql will work with. For mysql, add the line to /etc/my.cnf
max_allowed_packet=32M, and for nginx, in /etc/nginx/nginx.conf, add
client_max_body_size 32m;to the http section. Otherwise, we will only be able to work with firmware sizes up to 1M.
We restart, and we are ready to work with devices.
And the device (CPE) will be our little workhorse .
Before the test connection, it is advisable to manually configure the CPE to the minimal working configuration so that the parameters you wish to configure in the future are not empty. For the router, at a minimum, you can enable the dhcp client on ether1, install the tr-069client package, and set passwords.
3. Connect Mikrotik
It is advisable to connect all units using a valid serial number as the login. This way, everything in the logs will be clear. Some recommend using WAN MAC — do not believe them. Some use a shared login/password for all — avoid them.
Open the tr-069 log to monitor the "conversations"
tail -f /var/log/freeacs-tr069/tr069-conversation.logOpen winbox, menu item TR-069.
ACS URL: http://10.110.0.109/tr069/prov (replace with your IP)
Username: 9249094C26CB (copy the serial number from system>routerboard)
Password: 123456 (not needed for discovery, but it should be there)
We do not change the Periodic inform interval. This setting will be provided through our ACS
Below are the settings for remote initialization of connection, but I couldn’t get Mikrotik to work with this straight away. However, with phones, the remote request works "out of the box." We will need to look into it.
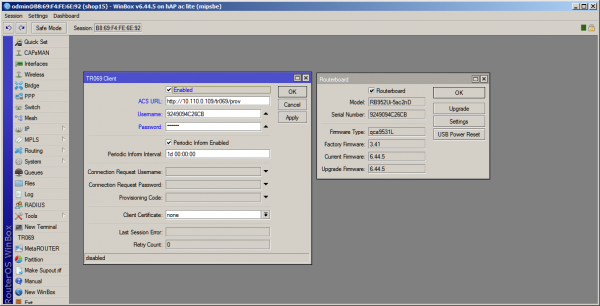
After clicking the Apply button — data exchange will start in the terminal, and in the Freeacs web interface, we will be able to see our router with the automatically created Unit Type "hAPaclite."
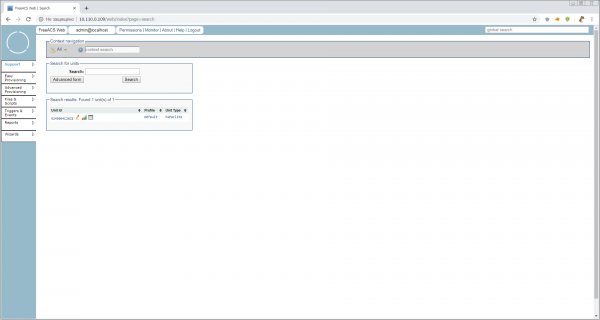
The router is connected. You can look at the automatically created Unit Type. Open Easy Provisioning > Unit Type > Unit Type Overview > hAPaclite. There isn't much there! A total of 928 parameters (I checked in the shell). Whether that’s a lot or a little — we will figure out later, but for now, let’s take a quick look. This is what the Unit Type means. It’s a list of supported parameters with keys but without values. Values are set in lower levels — Profiles and Units.
4. Configure Mikrotik
It’s time to download This manual is from 2011 — like a bottle of good, aged wine. Let’s open it and let it breathe.
Now, in the web interface, let's click on the pencil icon next to our unit and proceed to the unit configuration mode. It looks like this:
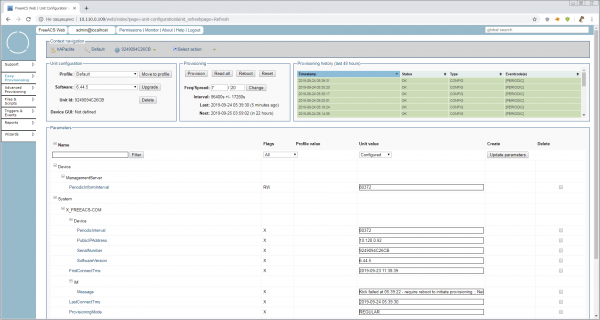
Let's briefly go over what interesting things are on this page:
Unit Configuration Block
- Profile: This is a profile within Unit Type. The hierarchy is as follows:
UnitType > Profile > Unit. This means we can create, for example, profileshAPaclite > hotspotandhAPaclite > branch, but within the device model
Provisioning Block with buttons
Hints suggest that all buttons in the Provisioning block can immediately apply configurations via ConnectionRequestURL. However, as I mentioned earlier, this does not work, so after clicking the buttons, you will need to restart the TR-069 client on the MikroTik for manual provisioning start.
- Freq/Spread: How often to deliver configuration ± %, to reduce load on the server and communication channels. By default, it is set to 7/20, i.e., every day ± 20% with a hint as to what this means in seconds. There is no need to change the delivery frequency yet, as it will create unnecessary noise in the logs and not always result in expected configuration application.
Provisioning History Block (last 48 hours)
- At first glance, the history looks like history, but clicking on the header takes you to a convenient database search tool, with regexp and other features.
Parameters Block
The largest and most important block, where the parameters for this unit are actually set and read. Currently, we see only the most important system parameters, without which the ACS cannot work with the unit. But we remember that in the Unit Type we have — 928. Let's look at all the values and decide what to do with them on the MikroTik.
4.1 Reading Parameters
In the Provisioning block, click the Read all button. In the block — there will be a red notice. A column will appear on the right CPE (current) value. In the system parameters, ProvisioningMode has changed to READALL.
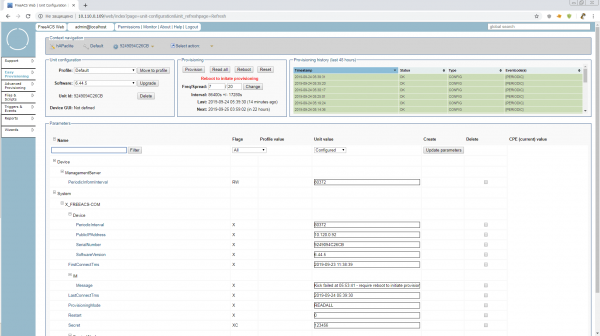
And... nothing will happen except a message in System.X_FREEACS-COM.IM.Message Kick failed at....
Restart the TR-069 client or reboot the router, and continue refreshing the browser page until you see the parameters in cheerful gray rectangles on the right.
For anyone wanting to sip on some aged content — this mode is described in the manual as 10.2 Inspection mode. It is turned on and works somewhat differently, but the essence is well-described.
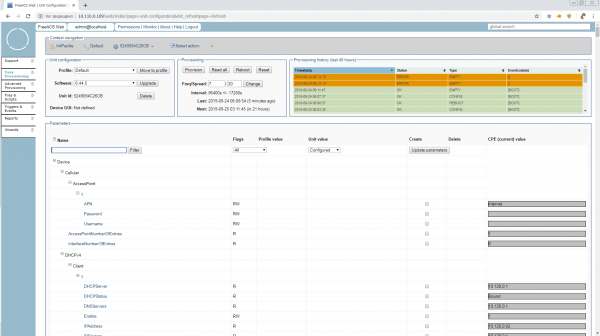
The READALL mode will turn off automatically after 15 minutes, and we will try to figure out what is useful here and what we can adjust "on the fly" while we are in this mode.
You can change IP addresses, enable/disable interfaces, firewall rules with comments (otherwise it will be a complete mess), Wi-Fi, and little things like that.
In other words, it is not yet possible to reasonably configure Mikrotik only with TR-069 tools. But you can monitor quite well. Statistics for interfaces and their status, free memory, etc. are available.
4.2 Delivering Parameters
Now let's try to deliver parameters to the router via TR-069 in a 'natural' way. The first victim will be Device.DeviceInfo.X_MIKROTIK_SystemIdentity. We find it in the unit parameters All. As you can see, it is not set. This means that any unit can have any Identity on its own. Enough of this!
We check the box in the create column, set the name Mr.White, and click the Update parameters button. You can guess what will happen next. During the next communication session with the headquarters, the router should change its Identity.
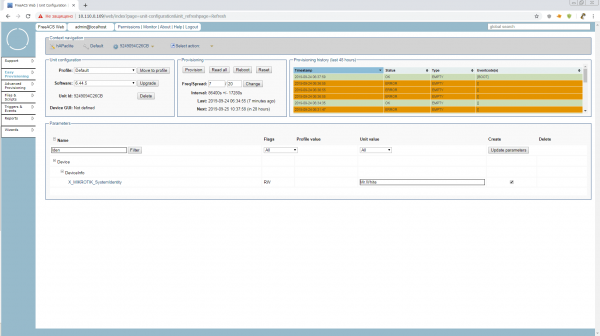
But we need more than that. Such a parameter as Identity is always good to have on hand when searching for the desired unit. We click on the parameter name and check the boxes Display(D) and Searchable(S). The parameter key changes to RWSD (Remember, names and keys are assigned at the highest level of Unit Type).
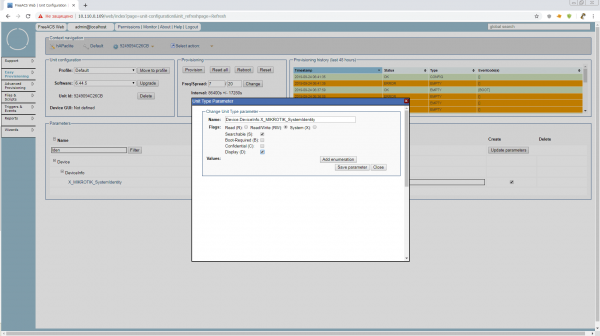
The value is now not only displayed in the general search list but also available for searching in Support > Search > Advanced form
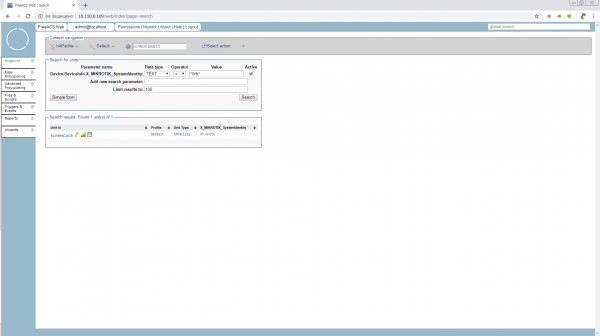
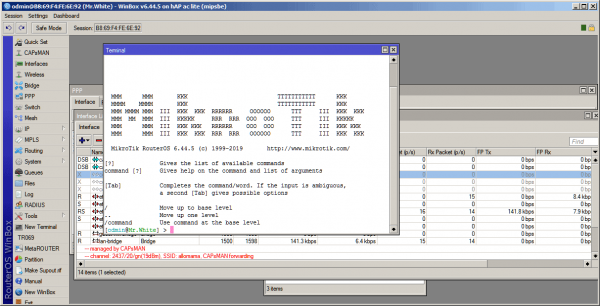
We initiate provisioning and look at the Identity. Hello, Mr.White! Now you will not be able to change your appearance yourself while the tr-069client is running.
4.3 Executing Scripts
Now that we have figured out that we cannot do without them, let's execute them.
But before we start working with files, we need to adjust the directive public.url in the file /opt/freeacs-tr069/config/application-config.conf
After all, we still have a test configuration installed by a single script. Don't forget?
# --- Public url (used for download f. ex.) ---
public.url = "http://10.110.0.109"
public.url: ${?PUBLIC_URL}
We restart the ACS and head straight to Files & Scripts.
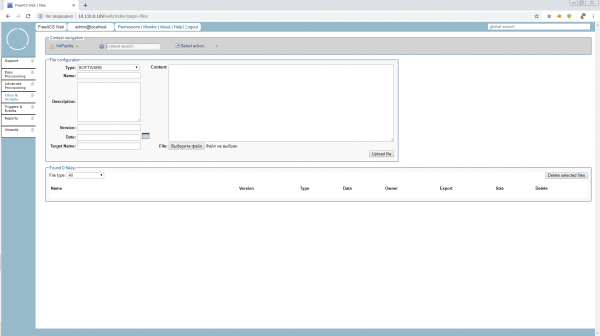
But what is opening up for us now belongs to the Unit Type, i.e. globally to all hAP ac lite routers, whether it's a branch router, hotspot, or CAPsMAN. We don't need such a high level right now, so before we work with scripts and files, we should create a profile. You can call it something like 'device position'.
Let's make our little one a time server. A worthy position with a separate software package and a few parameters. We go to Easy Provisioning > Profile > Create Profile and create a profile in Unit Type: hAPaclite timeserver. We had no parameters in the default profile, so there is nothing to copy. Copy parameters from: «don’t copy…»
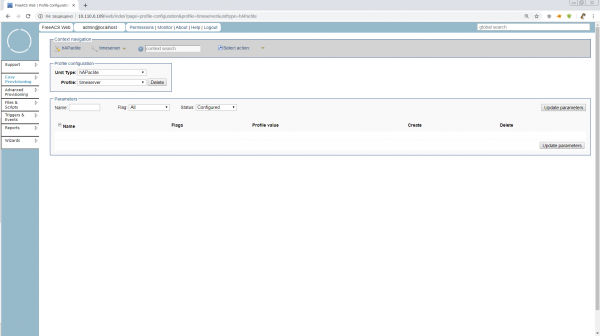
There are currently no parameters here, but we will be able to specify those that we wish to see on our time servers made from hAPaclite later. For example, the common addresses of NTP servers.
Let's move to the unit's configuration and shift it to the timeserver profile.
Finally, we head to Files & Scripts, to create scripts, and here we will find incredibly convenient features.
To execute a script on the unit, we need to select Type:TR069_SCRIPT a Name and Target Name must have the .alter extension
Unlike software, for scripts, we can either upload a ready file or simply write/edit it in the field Content. Let's try writing directly there.
And to see the result immediately, let's add a VLAN to the router on ether1.
/interface vlan
add interface=ether1 name=vlan1 vlan-id=1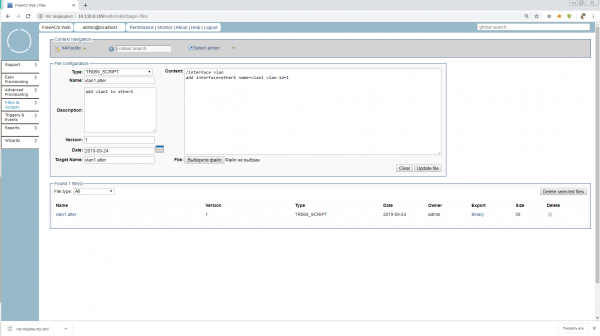
We type it in, click Upload and done. Our script vlan1.alter is waiting for its moment.
So, shall we go? No. We still need to add a group for our profile. Groups do not fall under the hardware hierarchy but are necessary for finding units in UnitType or Profile and are mandatory for executing scripts via Advanced Provisioning. Typically, groups are associated with locations and have a nested structure. Let's create a group called Russia.
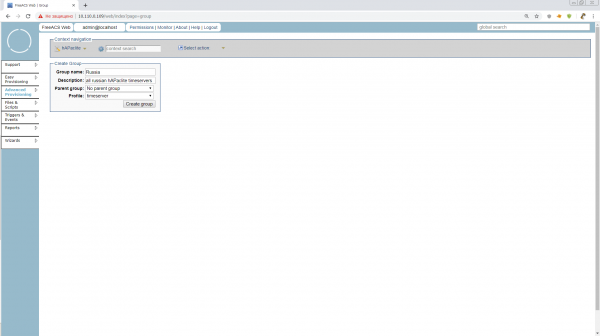
Can you imagine we just narrowed our search from "All time servers worldwide on hAPaclite" to "All time servers in Russia on hAPaclite"? There's a vast amount of interesting details regarding groups, but we don't have time for that. Let's move on to the scripts.
Advanced Provisioning > Job > Create Job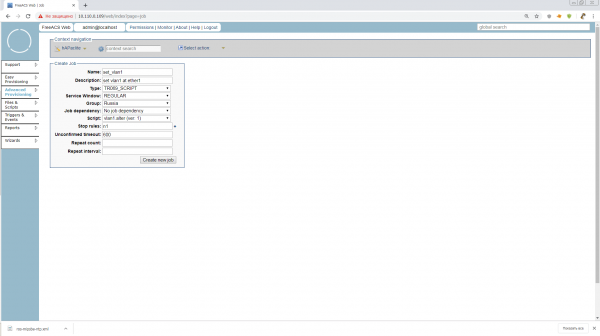
Since we are in Advanced mode, we can specify a number of different conditions for the start of the task, behaviors when errors occur, retries, and timeouts. I recommend reading all of this in the manuals or we can discuss it later during production implementation. For now, let's just set n1 in Stop rules so that the task stops as soon as it is completed on our 1 unit.
We fill in what is necessary, and it's time to launch!
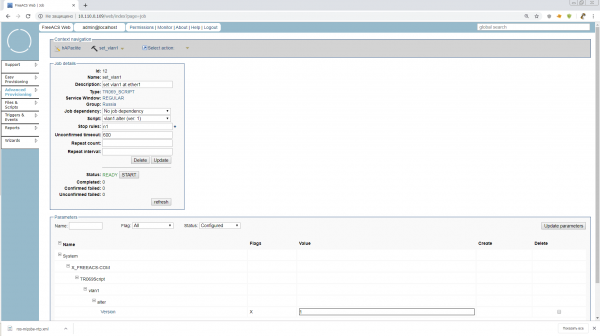
We click START and wait. The counter of devices killed by the under-tested script will now run smoothly! No, of course not. Such tasks take a long time, and that’s the difference from scripts, Ansible, etc. Units themselves request tasks on a schedule or as they appear in the network; ACS keeps track of which units have already received tasks and how they were completed, recording this in the unit parameters. In our group, there's 1 unit, but if there were 1001, the admin would have launched this task and gone fishing.
Come on. Restart the router or reboot the TR-069 client. Everything should go smoothly and Mr.White will receive a new VLAN. Our task in the Stop rule will change to PAUSED status. That means it can still be restarted or modified. If you hit FINISH, the task will be archived.
4.4 Updating the Software
This is a very important point, as the MikroTik firmware is modular, but adding modules does not change the overall firmware version of the device. Our ACS is normal, and we are not used to that.
Right now, we'll do it in a quick & dirty style and push the NTP module into the general firmware immediately, but once the device's version updates, we won't be able to add another module in the same way.
In production, it's better not to use such a trick and install optional modules for Unit Type only via scripts.
So, the first thing we need to do is prepare the software packages of the required versions and architectures, and place them on an accessible web server. For testing, any server that Mr.White can reach will do, but for production, it's better to set up an auto-updating mirror of the necessary software that can be exposed on the web.
Important! Always remember to include the tr-069client package in the updates!
As it turned out, the path length to the packages is very important! In my attempts to use something like http://192.168.0.237/routeros/stable/mipsbe/routeros-mipsbe-6.45.6.npk, MikroTik fell into a cyclic connection with the resource, sending repeating TRANSFERCOMPLETE messages in the tr-069 log. And I spent a fair amount of nerve cells trying to figure out what was wrong. So for now, let's put it in the root until we find out.
So, we should have three npk files accessible via http. I ended up with this:
http://192.168.0.241/routeros-mipsbe-6.45.6.npk
http://192.168.0.241/routeros/stable/mipsbe/ntp-6.45.6-mipsbe.npk
http://192.168.0.241/routeros/stable/mipsbe/tr069-client-6.45.6-mipsbe.npk
Now this needs to be formatted in an xml file with FileType="1 Firmware Upgrade Image" which we will feed to MikroTik. Let's name it ros.xml.
Following the instructions from :
http://192.168.0.241/routeros-mipsbe-6.45.6.npk


            http://192.168.0.241/ntp-6.45.6-mipsbe.npk


            http://192.168.0.241/tr069-client-6.45.6-mipsbe.npk
The lack of Username/Password for accessing the download server stands out. You could either try to enter this as in point A.3.2.8 of the tr-069 protocol:
http://192.168.0.237/routeros/stable/mipsbe/ntp-6.45.6-mipsbe.npk
user
pass
Or ask the official MikroTik support directly about the maximum path length to *.npk.
Let's go to the known locations Files & Scripts, and create a file of the type SOFTWARE with Name:ros.xml, Target Name:ros.xml and Version:6.45.6
Attention! The version here must be specified exactly in the format in which it is displayed on the device and sent in the parameter System.X_FREEACS-COM.Device.SoftwareVersion.
We choose our xm file for download and that’s it.
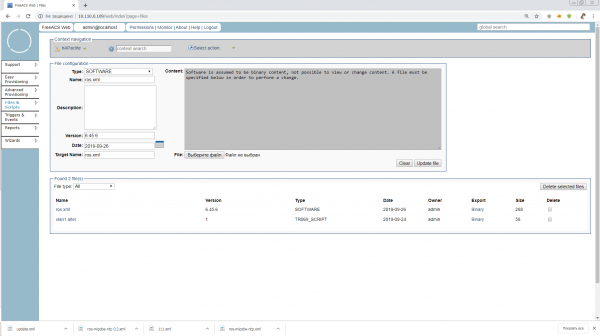
Now we have a multitude of ways to update the device. Through the Wizard in the main menu, through Advanced Provisioning and tasks of type SOFTWARE, or simply go into the unit configuration and click Upgrade. Let's choose the simplest path, as this article is already getting lengthy.
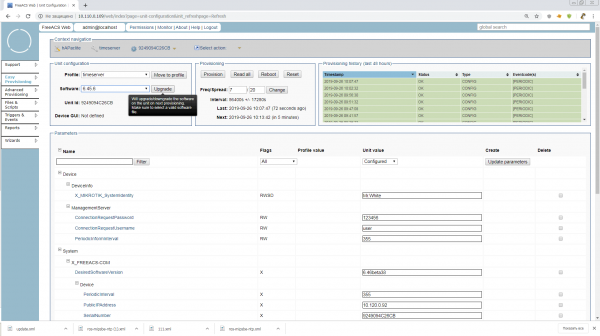
We click the button, initiate provision and that’s it. The test program is complete. Now we can do more with MikroTik.
5. Conclusion
When I started writing, I initially wanted to describe the connection of an IP phone and illustrate how great it can be when TR-069 works effortlessly. But then, as I progressed and delved into the materials, I thought that anyone who connected MikroTik would not be afraid of any phone for self-study.
In principle, FreeACS, which we tested, can already be applied in production, but for that, security must be configured, SSL must be set up, MikroTiks need to be configured for autoconfiguration after reset, the correct addition of Unit Type needs to be debugged, the operation of web services and fusion shell needs to be understood, and much more. Try it, invent, and write a continuation!
Thank you all for your attention! I would appreciate any corrections and comments!
List of materials used and useful links:
Source: habr.com
