

From November 30 to December 1, the event took place in Nizhny Novgorod. Participants were tasked with creating a prototype product solution using the Intel OpenVINO toolkit. Organizers provided a list of suggested themes to guide teams in choosing their challenges, but the final decision was left to the teams. Additionally, the use of models not included in the product was encouraged.
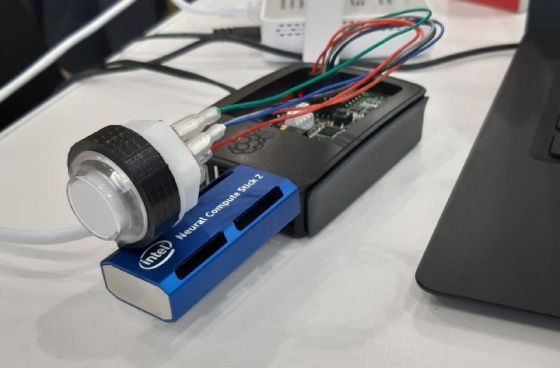
In this article, we'll discuss how we created our product prototype, which ultimately won first place.
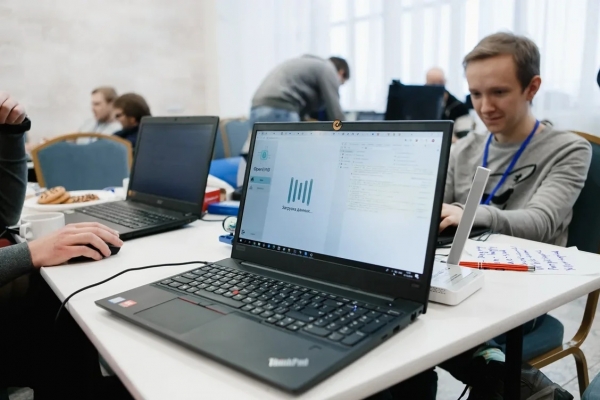
More than 10 teams participated in the hackathon. It was great to see that some of them traveled from other regions. The event took place at the "Kremlovsky na Pochayine" complex, which featured vintage photographs of Nizhny Novgorod—very picturesque! (I remind you that the central office of Intel is located in Nizhny Novgorod.) Participants had 26 hours to write code and needed to present their solution at the end. A highlight was a demo session to ensure everything envisioned was indeed implemented and not just left as ideas in the presentation. Merchandise, snacks, and food were also provided!
Additionally, Intel provided cameras, Raspberry PI, and Neural Compute Stick 2 upon request.
Choosing a Challenge
One of the most challenging parts of preparing for a hackathon with open topics is selecting a challenge. We immediately decided to come up with something that wasn’t already in the product, as the announcement stated that this was strongly encouraged.
After analyzing , which are included in the current product release, we concluded that most of them address various computer vision tasks. It is quite challenging to think of a computer vision task that cannot be solved using OpenVINO, and if such a task can be conceived, it's difficult to find pretrained models in the public domain. We decided to explore another direction—speech processing and analytics. We considered an interesting task of recognizing emotions through speech. It’s worth noting that OpenVINO already has a model that determines human emotions through facial expressions, but:
- In theory, it is possible to create a combined algorithm that will work based on both sound and images, which should improve accuracy.
- Cameras typically have a narrow field of view; to cover a larger area, more than one camera is required, whereas sound does not have such a limitation.
Let's develop the idea: we will base it on a concept for the retail segment. We can determine customer satisfaction at store checkout counters. If a customer becomes dissatisfied with the service and raises their voice, we can immediately call the manager for assistance.
In this case, we need to add voice recognition; this will allow us to distinguish store employees from customers and provide analytics for each individual. Additionally, we will be able to analyze employee behavior in the store and assess the atmosphere within the team, which sounds promising!
We are forming requirements for our solution:
- Small size of the target device
- Real-time operation
- Low cost
- Easy scalability
As a result, we choose Raspberry Pi 3 as the target device with .
It is important to point out one significant feature of the NCS — it works best with standard CNN architectures. If you need to run a model with custom layers on it, be prepared for some low-level optimization challenges.
The next step is to get a microphone. A standard USB microphone will work, although it may not look great with the RPI. But here, a solution is literally at hand. For voice recording, we decide to use the Voice Bonnet board from the which has a built-in stereo microphone.
We download Raspbian from the and flash it onto a USB drive, testing that the microphone works with the following command (it will record audio for 5 seconds and save it to a file):
arecord -d 5 -r 16000 test.wavI should note that the microphone is very sensitive and picks up noise well. To correct this, we will go into alsamixer, select Capture devices, and lower the input signal level to 50-60%.
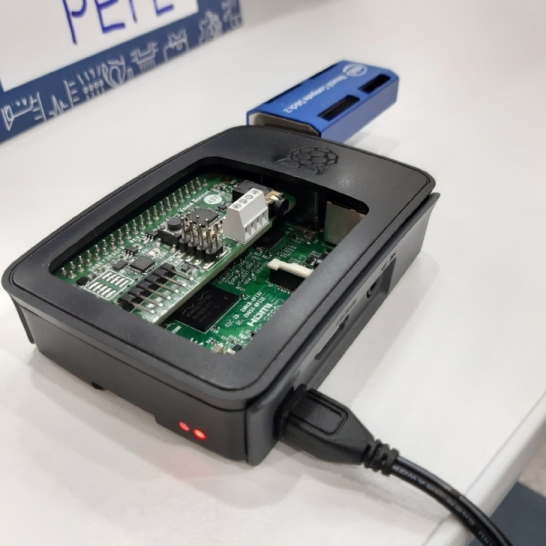
We refine the case with a file, and everything fits inside; we can even close it with a lid.
We add an indicator button.
While disassembling the AIY Voice Kit, we remember that it has an RGB button, which can be controlled programmatically. We search for 'Google AIY Led' and find the documentation:
Why not use this button to display the recognized emotion? We have seven classes, and the button has eight colors, which is just enough!
We connect the button via GPIO to the Voice Bonnet and load the required libraries (they are already included in the distribution from AIY projects).
from aiy.leds import Leds, Color
from aiy.leds import RgbLeds
Let's create a dict, where each emotion corresponds to a color in the form of an RGB tuple and an instance of the aiy.leds.Leds class, through which we will update the color:
led_dict = {'neutral': (255, 255, 255), 'happy': (0, 255, 0), 'sad': (0, 255, 255), 'angry': (255, 0, 0), 'fearful': (0, 0, 0), 'disgusted': (255, 0, 255), 'surprised': (255, 255, 0)}
leds = Leds()
And finally, after each new emotion prediction, we will update the button color according to it (by key).
leds.update(Leds.rgb_on(led_dict.get(classes[prediction])))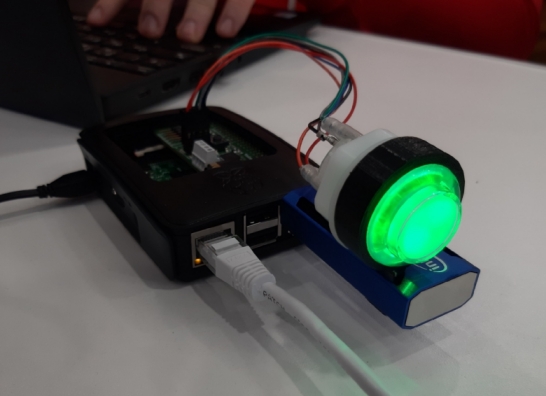
Button, light up!
Working with voice
We will use pyaudio to capture the stream from the microphone and webrtcvad to filter noise and detect voice. Additionally, we will create a queue to asynchronously add and retrieve voice snippets.
Since webrtcvad has a limitation on the size of input chunks — they must be 10/20/30 ms long, and the emotion recognition model was trained on a 48 kHz dataset, we will capture chunks of size 48000×20 ms/1000×1 (mono) = 960 bytes. Webrtcvad will return True/False for each of these chunks, indicating whether voice is present.
We will implement the following logic:
- We will add to the list those chunks where voice is present, and if there is no voice, we will increment the count of empty chunks.
- If the count of empty chunks >= 30 (600 ms), we look at the size of the accumulated chunks list. If it is >250, we add it to the queue; otherwise, we consider the length of the recording insufficient to submit to the model for speaker identification.
- If the count of empty chunks is still < 30, and the size of the accumulated chunks list exceeds 300, we will add the snippet to the queue for a more accurate prediction. (as emotions tend to change over time)
 def to_queue(frames):
    d = np.frombuffer(b''.join(frames), dtype=np.int16)
    return d

framesQueue = queue.Queue()
def framesThreadBody():
    CHUNK = 960
    FORMAT = pyaudio.paInt16
    CHANNELS = 1
    RATE = 48000

    p = pyaudio.PyAudio()
    vad = webrtcvad.Vad()
    vad.set_mode(2)
    stream = p.open(format=FORMAT,
                channels=CHANNELS,
                rate=RATE,
                input=True,
                frames_per_buffer=CHUNK)
    false_counter = 0
    audio_frame = []
    while process:
        data = stream.read(CHUNK)
        if not vad.is_speech(data, RATE):
            false_counter += 1
            if false_counter >= 30:
                if len(audio_frame) > 250:
                    framesQueue.put(to_queue(audio_frame,timestamp_start))
                    audio_frame = []
                    false_counter = 0

        if vad.is_speech(data, RATE):
            false_counter = 0
            audio_frame.append(data)
            if len(audio_frame) > 300:
                framesQueue.put(to_queue(audio_frame,timestamp_start))
                audio_frame = []
It's time to look for pretrained models available online. Let's go to GitHub, do some Googling, but remember that we have limitations on the architecture we can use. This part is quite complex because we have to test models with our input data and, in addition, convert them into OpenVINO's internal format — IR (Intermediate Representation). We tried about 5-7 different solutions from GitHub, and while the emotion recognition model worked right away, we had to spend more time on voice recognition since it uses more complex architectures.
We settle on the following:
- Voice-based emotions —
It works on the following principle: audio is sliced into segments of a certain size, and for each of these segments we extract and then feed them into the CNN - Voice recognition —
Here, instead of MFCC, we work with a spectrogram. After FFT, we feed the signal into CNN, where we obtain a vector representation of the voice.
Next, we will discuss model conversion, starting with the theory. OpenVINO includes several modules:
- Open Model Zoo, from which models can be used and integrated into your product.
- Model Optimizer, which allows you to reconvert a model from various framework formats (TensorFlow, ONNX, etc.) into the Intermediate Representation format that we will be working with.
- Inference Engine enables models in IR format to run on Intel processors, Myriad chips, and Neural Compute Stick accelerators.
- The most efficient version of OpenCV (with Inference Engine support)
Each model in IR format is described by two files: .xml and .bin.
Models are converted to IR format through the Model Optimizer as follows:python /opt/intel/openvino/deployment_tools/model_optimizer/mo_tf.py --input_model speaker.hdf5.pb --data_type=FP16 --input_shape [1,512,1000,1]--data_typeallows you to choose the data format with which the model will work. Supported formats include FP32, FP16, INT8. Choosing the optimal data type can provide a significant boost in performance.
--input_shapeindicates the dimensionality of the input data. The ability to dynamically change this seems to exist in the C++ API, but we didn't dig that deep and simply fixed it for one of the models.
Next, we will try to load the already converted model in IR format through the DNN module in OpenCV and perform a forward pass on it.import cv2 as cv emotionsNet = cv.dnn.readNet('emotions_model.bin', 'emotions_model.xml') emotionsNet.setPreferableTarget(cv.dnn.DNN_TARGET_MYRIAD)The last line in this case allows redirecting the computations to the Neural Compute Stick; by default, computations are performed on the CPU, but with Raspberry Pi this won’t work, a stick will be needed.
Next, the logic is as follows: we will divide our audio into windows of a certain size (in our case, it's 0.4 seconds), convert each of these windows into MFCC, which we will then feed into the network:
emotionsNet.setInput(MFCC_from_window)
result = emotionsNet.forward()
Afterward, we will take the most frequently occurring class for all the windows. It's a simple solution, but for a hackathon, there's no need to overthink it, unless there's time. We still have a lot of work ahead, so let's move on — we are tackling voice recognition. We need to create a database to store spectrograms of pre-recorded voices. As time is limited, we are resolving this as we can.
Namely, we create a script to record a voice sample (it works just like described above, but when interrupted from the keyboard, it will save the voice to a file).
Let's try:
python3 voice_db/record_voice.py test.wavRecording voices of several people (in our case, three team members)
Then, for each recorded voice, we perform a fast Fourier transform, obtain the spectrogram, and save it as a numpy array (.npy):for file in glob.glob("voice_db/*.wav"): spec = get_fft_spectrum(file) np.save(file[:-4] + '.npy', spec)More details in the file
create_base.py
As a result, when executing the main script, we will initially obtain embeddings from these spectrograms:for file in glob.glob("voice_db/*.npy"): spec = np.load(file) spec = spec.astype('float32') spec_reshaped = spec.reshape(1, 1, spec.shape[0], spec.shape[1]) srNet.setInput(spec_reshaped) pred = srNet.forward() emb = np.squeeze(pred)After obtaining the embedding from the received segment, we can determine whom it belongs to by calculating the cosine distance from the segment to all voices in the database (the smaller, the more probable) — for the demo, we set the threshold at 0.3):
        dist_list = cdist(emb, enroll_embs, metric="cosine")
        distances = pd.DataFrame(dist_list, columns = df.speaker)
In conclusion, I would note that the inference speed was fast and allowed us to add another 1-2 models (it took 2.5 seconds for a 7-second sample for inference). We didn't have time to add new models and focused on writing the prototype of the web application.
Web Application
An important point: we bring a router from home and set up our local network, which helps connect the device and laptops over the network.
The backend represents a continuous message channel between the front end and the Raspberry Pi, based on websocket technology (http over tcp protocol).
The first stage involves receiving processed information from the Raspberry, meaning the predictions packed in json, which are saved in the database in the middle of their journey to form statistics about the user's emotional background over a period. Then, this package is sent to the frontend, which uses a subscription and receives packets from the websocket endpoint. The entire backend mechanism is built on the Go language, chosen because it is well-suited for asynchronous tasks, with goroutines handling them effectively.
When accessing the endpoint, the user registers and is added to the structure, after which their message is received. Both the user and the message are entered into a common hub, from which messages are then sent further (to the subscribed front end), and if the user closes the connection (either Raspberry or front end), their subscription is canceled, and they are removed from the hub.
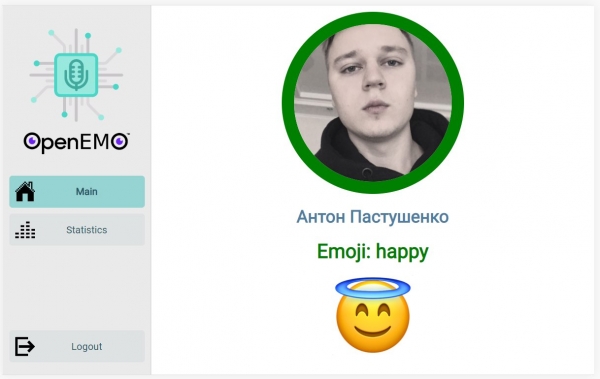
Waiting for a connect with the backendThe front-end is a web application written in JavaScript using the React library to accelerate and simplify the development process. The purpose of this application is to visualize data obtained from algorithms running on the back-end side and directly on the Raspberry Pi. The page has routing to different sections implemented with react-router, but the main interest lies in the home page, where a continuous stream of data from the server arrives in real-time via WebSocket. The Raspberry Pi detects voice, identifies the person from the registered database, and sends a probability list to the client. The client displays the latest relevant data, showing the avatar of the person who is most likely speaking into the microphone, along with the emotion with which they are speaking.

Home page with updated predictionsConclusion
We couldn't finish everything as planned, simply ran out of time, so our main hope was for the demo, for everything to work. In the presentation, they talked about how everything is arranged, which models were taken, and what problems were encountered. Then there was a demo part — experts walked around the hall in random order and approached each team to see the working prototype. They asked us questions, each answered their part, leaving the web running on a laptop, and everything indeed worked as expected.
I would note that the total cost of our solution was $150:
- Raspberry Pi 3 ~ $35
- Google AIY Voice Bonnet (you can use a respeaker board) ~ $15
- Intel NCS 2 ~ $100
How to improve:
- Use client-side registration — ask to read a randomly generated text
- Add a few more models: voice can help determine gender and age
- Separate voices that sound simultaneously (diarization)
Repository:

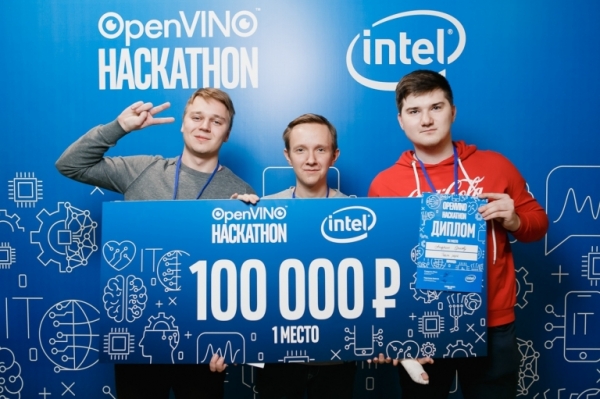
Tired but happy weIn conclusion, I would like to thank the organizers and participants. From the projects of other teams, we personally liked the solution for monitoring free parking spaces. For us, this was an incredibly cool experience in product immersion and development. I hope that more interesting events will be held in the regions, including in the AI field.
Source: habr.com
