


Continuing the discussion about ZeroTier, from the theory presented in the article "Intelligent Ethernet Switch for Planet Earth,” I move to practice, in which:
- Let's create and configure a private network controller
- Let's create a virtual network
- Let's configure and connect nodes to it
- Let's check network connectivity between them
- Let's restrict access to the network controller's GUI from the outside
Network Controller
As already mentioned, to create virtual networks, manage them, and connect nodes, the user needs a network controller, whose graphical interface (GUI) exists in two forms:
ZeroTier GUI Options
- One from the ZeroTier developer, available as a public cloud solution provided under a SaaS model, with four subscription plans, including a free but limited option in terms of the number of managed devices and level of support.
- The second one is from an independent developer, somewhat simplified in functionality, but available as a private open source solution, for on-premise or cloud resource use.
In my experience, I have used both and ultimately settled on the second. This was due to the developer's warnings.
"Network controllers serve as certification centers for ZeroTier virtual networks. Files containing the controller's secret keys must be carefully protected and securely archived. Their compromise allows unauthorized attackers to create fraudulent network configurations, and loss leads to the inability to control and manage the network, effectively rendering it unusable."
And also, signs of my own cybersecurity paranoia 🙂
- Even if CheburNet comes, I must retain access to my network controller;
- Only I should use the network controller. If necessary, providing access to my trusted individuals;
- There should be a possibility to restrict access to the network controller from the outside.
I see no particular reason to dwell separately on how to deploy a network controller and GUI for it on on-premise physical or virtual resources in this article. There are three reasons for this as well:
- there will be more letters than planned
- this has already been discussed on the developer's GitHub page
- the topic of the article is different
Therefore, choosing the path of least resistance, I will use a network controller with a GUI based on VDS, created from a template, kindly developed by my colleagues at ProHoster.
The initial setup
based on the BTRFS file system, execute the following commands: server from the specified template, the user accesses the Web-GUI of the controller through a browser at the address httрs://:3443
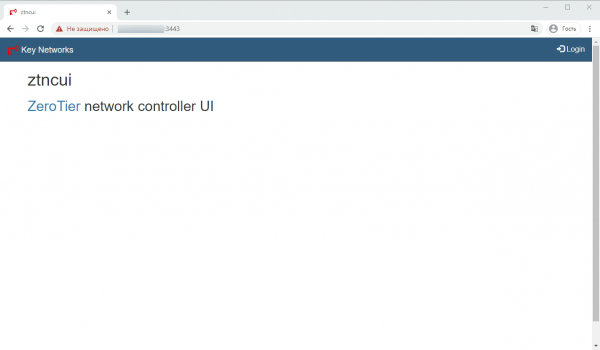
the net/http server already contains a pre-created self-signed TLS/SSL certificate. This is sufficient for me, as I restrict access from the outside. For those who wish to use different types of certificates, there is installation instructions on the developer's GitHub page.
When the user logs into the system for the first time Login with the default login and password — admin and password:
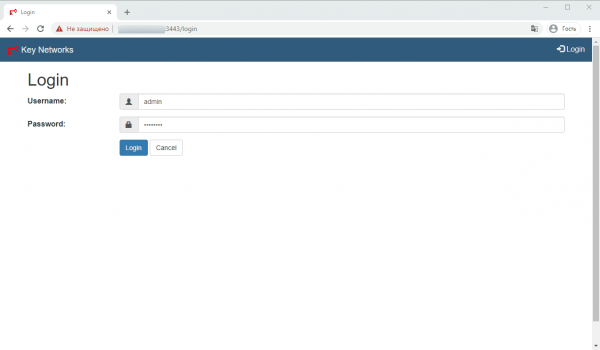
It prompts to change the default password to a custom one.
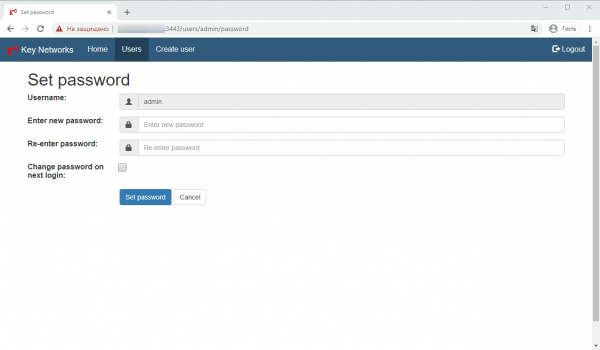
I do it a little differently — I don't change the password for the existing user, but create a new one — Create User.
I set the new user's name — Username:
I set a new password — Enter new password:
I confirm the new password — Re-enter password:
The characters entered are case-sensitive — be careful!
The checkbox confirming the password change on the next login — Change password on next login: I do not check it.
To confirm the entered data, I click on Set password:
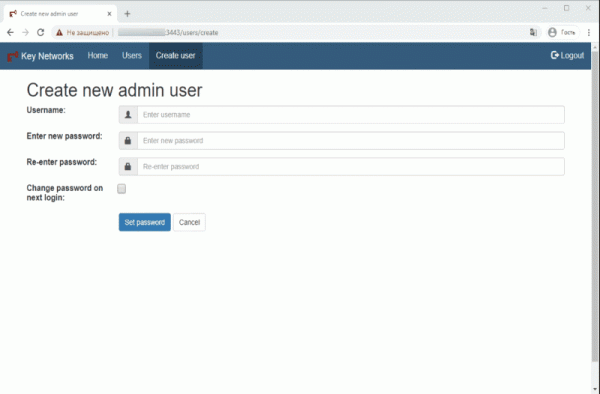
Then: I log in again — Logout / Login, already with the new user's credentials:
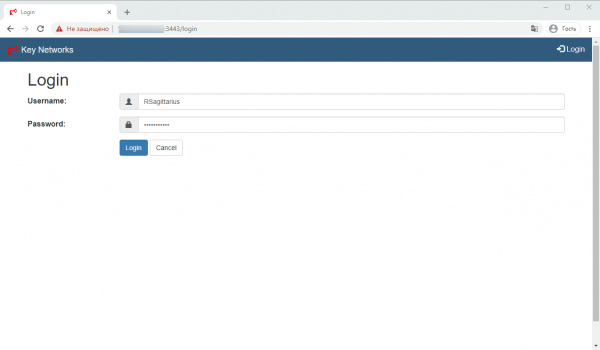
Next, I go to the users tab — Users and delete the user admin, clicking on the trash bin icon located to the left of their name.
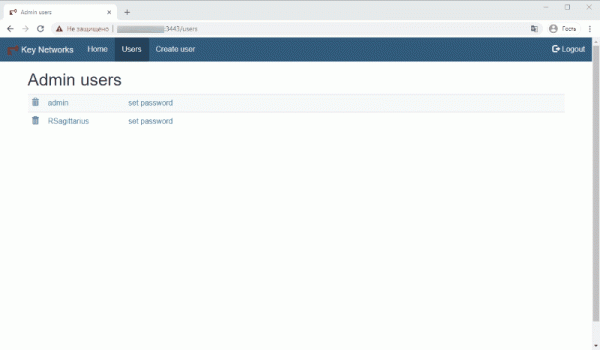
In the future, to change a user's password, you can click either on their name or on set password.
Creating a virtual network
To create a virtual network, the user needs to go to the tab Add network. From the item User this can be done through the page Home — the main page of the Web-GUI, which displays the ZeroTier address of this network controller and contains a link to the page listing the networks created through it.
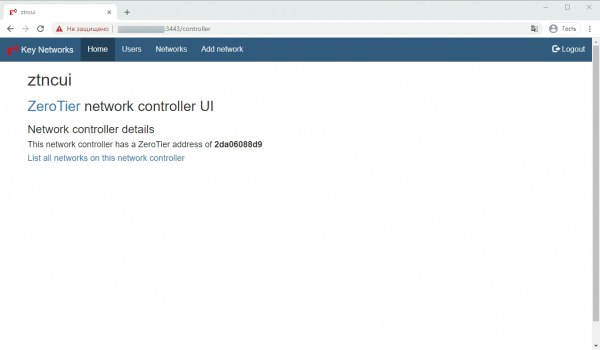
On the page Add network the user assigns a name to the newly created network.
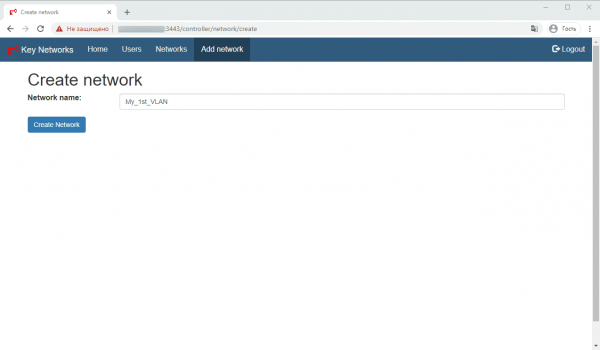
When applying the entered data — Create Network The user is directed to a page with a list of networks, which includes:
Network name — the name of the network in the form of a link, by clicking on which it can be changed
Network ID — the identifier of the network
detail — a link to the page with detailed network parameters
easy setup — a link to the page for easy configuration
members — a link to the node management page
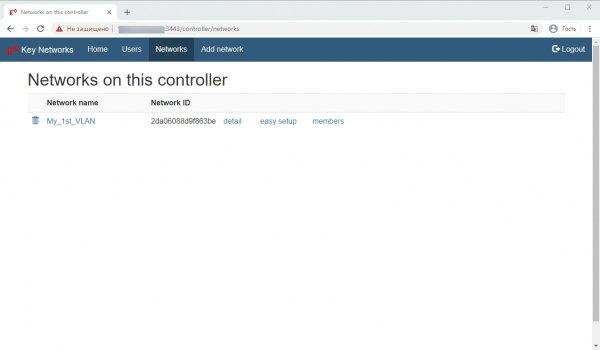
For further setup, proceed by clicking the link easy setup. On the opened page, the user sets the range of IPv4 addresses for the created network. This can be done automatically by pressing the button Generate network address or manually by entering the network mask in the corresponding field CIDR.
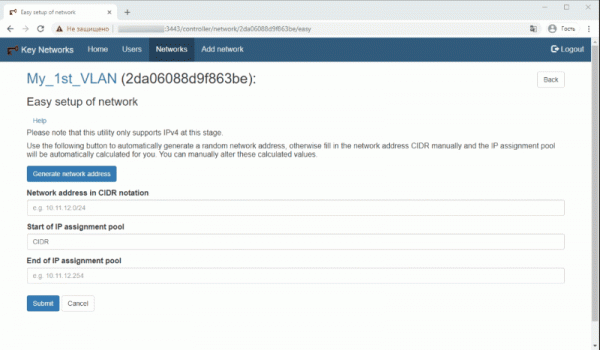
Upon confirming the successful input of data, the user must return to the page with the list of networks by using the Back button. At this point, the main setup of the network can be considered complete.
Connecting network nodes
- To begin, the node that the user wishes to connect to the network must have the ZeroTier One service installed.What is ZeroTier One?ZeroTier One — a service that works on laptops, desktops, servers, virtual machines, and containers, which provides connections to a virtual network through a virtual network port, similar to a VPN client. After installation and starting the service, connections to virtual networks can be made using their 16-digit addresses. Each network appears as a virtual network port in the system, behaving like a regular Ethernet port.
Links to distributions and installation commands can be found on the manufacturer's page. The installed service can be managed via the command line interface (CLI) with admin/root rights. In Windows/MacOS, it can also be managed through the graphical interface. In Android/iOS, it is only via GUI. - Checking if the service is installed successfully:CLI:
zerotier-cli statusResult:
200 info ebf416fac1 1.4.6 ONLINE
GUI:The presence of the application running and the line with Node ID showing the node address.
- Connecting the node to the network:CLI:
zerotier-cli joinResult:
200 join OKGUI:
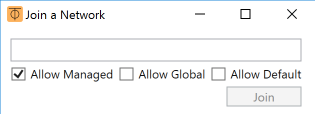
Windows: by right-clicking on the icon ZeroTier One in the system tray and selecting the option — Join Network.

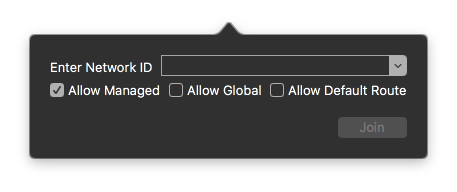
MacOS: Launch the application ZeroTier One from the bar menu, if it is not already running. Click on the icon ⏁ and select Join Network.Android/iOS: + (plus image) in the application

In the field that appears, enter the address specified in the GUI of the network controller Network ID, and press Join / Add Network. - Assign an IP address to the node
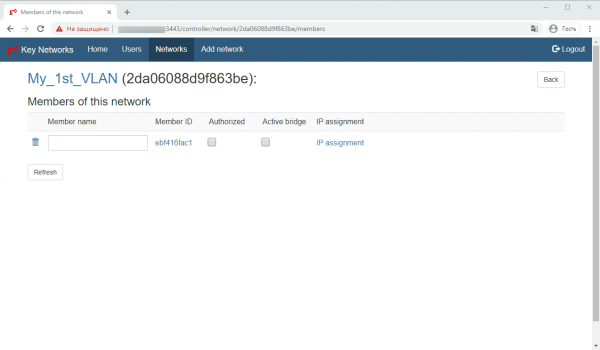
Now, let's return to the network controller and go to the list of networks by clicking the link members. If you see an image like this on the screen, it means your network controller has received a connection confirmation request from the connecting node.
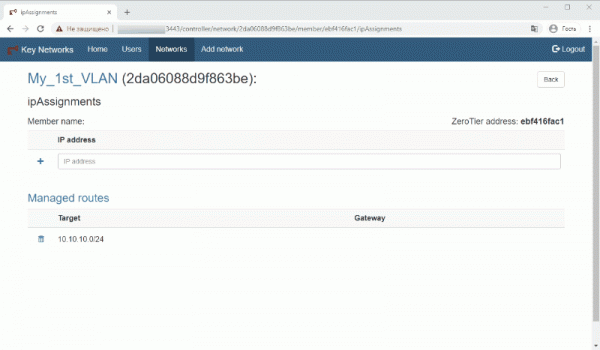
On this page, we will leave everything as it is and click the link IP assignment and navigate to the page to assign an IP address to the node:
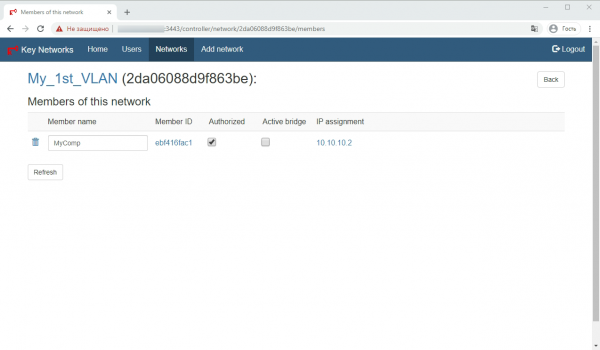
After assigning the address, click the button Back to return to the list of connected nodes and set the name — Member name and check the box for authorizing the node in the network — Authorized. By the way, this checkbox is a very convenient feature for enabling/disabling the node from the network later.
Save the changes using the button Refresh. - Checking the connection status of the node to the network:
To check the connection status on the node itself, execute:
CLI:zerotier-cli listnetworksResult:
200 listnetworks
 200 listnetworks 2da06088d9f863be My_1st_VLAN be:88:0c:cf:72:a1 OK PRIVATE ethernet_32774 10.10.10.2/24
GUI:The network status should be OK
To connect the other nodes, repeat steps 1-5 for each of them.
Checking network connectivity of the nodes
I do this by executing the command ping on the device connected to the network that I am currently managing.
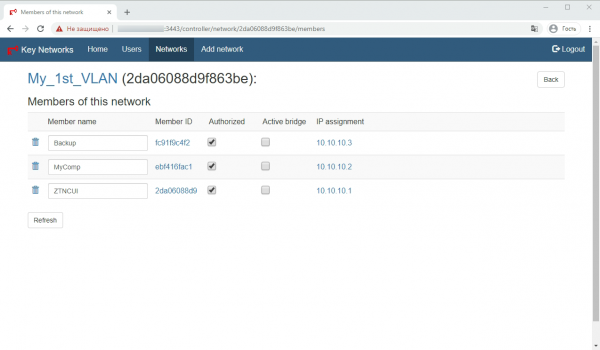
In the screenshot of the Web-GUI of the controller, you can see three nodes connected to the network:
- ZTNCUI — 10.10.10.1 — my network controller with GUI — VDS in one of ProHoster's data centers. For normal operation, there is no need to add it to the network, but I did this because I want to restrict access to the web interface from the outside. More on that later.
- MyComp — 10.10.10.2 — my work computer — a physical PC
- Backup — 10.10.10.3 — VDS in another data center.
Therefore, from my work computer, I check the accessibility of other nodes with the commands:
ping 10.10.10.1Pinging 10.10.10.1 with 32 bytes of data:
Reply from 10.10.10.1: bytes=32 time=14ms TTL=64
Reply from 10.10.10.1: bytes=32 time=4ms TTL=64
Reply from 10.10.10.1: bytes=32 time=7ms TTL=64
Reply from 10.10.10.1: bytes=32 time=2ms TTL=64
Ping statistics for 10.10.10.1:
Packets: Sent = 4, Received = 4, Lost = 0 (0% loss),
Approximate round trip times in milliseconds:
Minimum = 2ms, Maximum = 14ms, Average = 6ms
ping 10.10.10.3Pinging 10.10.10.3 with 32 bytes of data:
Reply from 10.10.10.3: bytes=32 time=15ms TTL=64
Reply from 10.10.10.3: bytes=32 time=4ms TTL=64
Reply from 10.10.10.3: bytes=32 time=8ms TTL=64
Reply from 10.10.10.3: bytes=32 time=4ms TTL=64
Ping statistics for 10.10.10.3:
Packets: Sent = 4, Received = 4, Lost = 0 (0% loss),
Approximate round trip times in milliseconds:
Minimum = 4ms, Maximum = 15ms, Average = 7ms
Users have the right to use other tools to check the availability of nodes in the network, both built into the OS and those like NMAP, Advanced IP Scanner, etc.
Hiding access to the GUI of the network controller from the outside.
In general, to reduce the likelihood of unauthorized access to the VDS, where my network controller is located, I can use the firewall tools in the ProHoster personal account. This topic is more suitable for a separate article. Therefore, here I will show how to ensure access to the controller's GUI only from the network that I created in this article.
To do this, connect via SSH to the VDS where the controller is located, and open the configuration file using the command:
nano /opt/key-networks/ztncui/.envIn the opened file, after the line "HTTPS_PORT=3443" which contains the port address for the GUI, you need to add an additional line with the address from which the GUI will be accessible — in my case, this is HTTPS_HOST=10.10.10.1.
Then I will save the file
Ctrl+C
 Y
 Enter
and execute the command:
systemctl restart ztncuiAnd that's it, now the GUI of my network controller is accessible only to nodes on the network 10.10.10.0/24.
In conclusion
I want to conclude the first part of the practical guide on creating virtual networks based on ZeroTier here. I look forward to your comments.
In the meantime, to pass the time before the publication of the next part, in which I will explain how to bridge a virtual network with a physical one, how to set up a 'road warrior' mode, and something else, I suggest you try to set up your own virtual network using a private network controller with a GUI based on a VDS from the marketplace on the website ProHoster. Moreover, all new clients can take advantage of a free trial period — 3 days!
P.S. Oh! I almost forgot! You can remove a node from the network using a command in that node's CLI.
zerotier-cli leave200 leave OK
or using the Delete command in the client GUI on the node.
-> Introduction. Theoretical Part. Intelligent Ethernet Switch for Planet Earth
-> Practical Guide to Building Virtual Networks. Part 1
-> Practical Guide to Building Virtual Networks. Part 2

Source: habr.com
