


To fully work with a Docker project in WSL, you need to install WSL 2. At the time of writing, its use is possible only within the Windows Insider Program (WSL 2 is available in build 18932 and higher). It is also important to mention that Windows 10 Pro is required for the installation and setup of Docker Desktop.
First Steps
After joining the Insider Program and installing updates, you need to install a Linux distribution (in this example, Ubuntu 18.04) and Docker Desktop with WSL 2 Tech Preview:
In both cases, follow all instructions for installation and configuration.
Installing Ubuntu 18.04 Distribution
Before starting Ubuntu 18.04, you need to enable Windows WSL and Windows Virtual Machine Platform by executing two commands in PowerShell:
Enable-WindowsOptionalFeature -Online -FeatureName Microsoft-Windows-Subsystem-Linux(will require a restart of the computer)Enable-WindowsOptionalFeature -Online -FeatureName VirtualMachinePlatform
After that, you need to ensure that we will use WSL v2. To do this, run the following commands in the WSL terminal or PowerShell:
wsl -l -v— check which version is currently installed. If it is 1, proceed down the listwsl --set-version ubuntu 18.04 2— to upgrade to version 2wsl -s ubuntu 18.04— set Ubuntu 18.04 as the default distribution
Now you can launch Ubuntu 18.04, perform the setup (specify username and password).
Installing Docker Desktop
During the installation process, follow the instructions. The computer will require a restart after installation and during the first launch to enable Hyper-V (the version of Windows 10 Pro is required for this).
Important! If Docker Desktop reports a firewall blockage, go to your antivirus settings and make the following changes to the firewall rules (in this example, Kaspersky Total Security is used as the antivirus):
- Go to Settings -> Protection -> Firewall -> Configure Network Rules -> Local Service (TCP) -> Edit
- From the list of local ports, remove port 445
- Save
After starting Docker Desktop, select the WSL 2 Tech Preview option from its context menu.
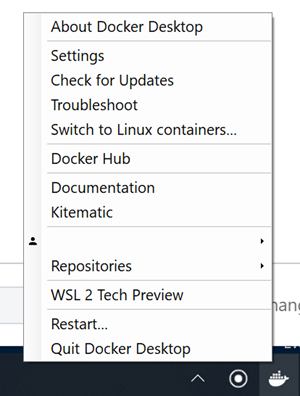
In the opened window, click the Start button.
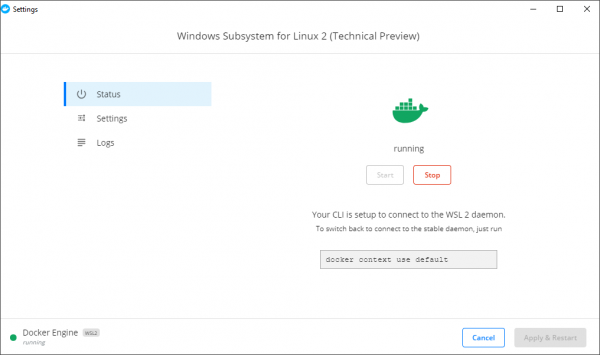
Now docker and docker-compose are available inside the WSL distribution.
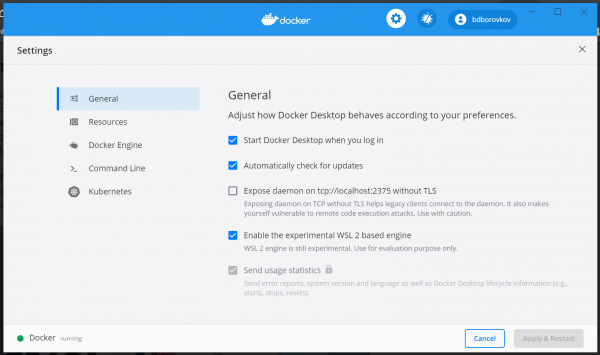
Important! In the updated Docker Desktop, there is now a tab with WSL inside the settings window. There you can enable WSL support.
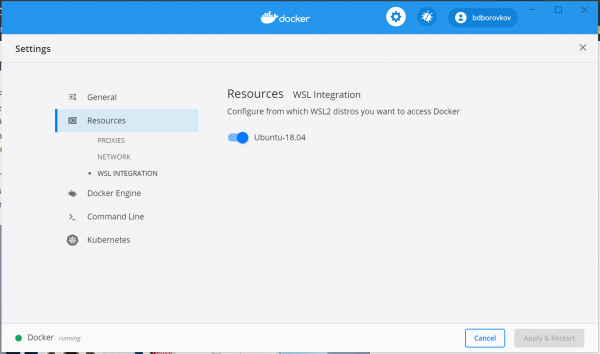
Important! In addition to enabling WSL, you also need to activate your WSL distribution in the Resources -> WSL Integration tab.
Start
One of the surprises were the many issues that arose when attempting to bring up project containers located in the Windows user directory.
Various errors related to running bash scripts (which usually start during container builds to install necessary libraries and distributions) and other typical Linux development tasks made me consider placing projects directly in the Ubuntu 18.04 user directory.
.
From the solution to the previous problem follows the next: how to work with project files through an IDE installed on Windows. The only 'best practice' I found for myself is working through VSCode (although I am a fan of PhpStorm).
After downloading and installing VSCode, don't forget to install the extension .
After installing the aforementioned extension, simply execute the command code . in the project directory while VSCode is running.
In this example, to access the containers through the browser, nginx is required. Installing it via sudo apt-get install nginx turned out to be not so straightforward. Initially, it was necessary to update the WSL distribution by running sudo apt update && sudo apt dist-upgrade, and only after that start the nginx installation.
Important! All local domains are not listed in the /etc/hosts file of the Linux distribution (it doesn't even exist there), but in the hosts file (usually located at C:\Windows\System32\drivers\etc\hosts) of Windows 10.
file — continuous reading of events from one or more local files;
A more detailed description of each step can be found here:
Source: habr.com
