


Hello everyone. We are gradually stepping out of the shadows and continuing our series of articles about our product. After the overview article, we received a lot of feedback (mostly positive), suggestions, and bug reports. Today we will show you the application in action, allowing you to fully appreciate some features of our app. For a more complete immersion, I recommend checking our documentation at . So, let's go!
Installation
Let's start with the basics. The application is available and can be tested on three platforms — Linux, Windows, and MacOS. You can download the installer for your desired OS from . For Linux users, there is an option to install . We hope to soon add it to the Microsoft Store and App Store (but do we really need that? What do you think?).
Test Scenario
As a test case, we have chosen the following standard scenario:
- let's log in: user — admin, password — password
- let's add a new record
- let's check the correct addition of the record
We will be testing on . This is a regular , which is perfectly suited for testing such applications. We have only added token authorization to all routes of the json-server and created a login method to obtain that token. We will proceed step by step, gradually improving our project.
Creating a Project and Attempting to Create an Entity Without Authorization
First, let’s create a new project (File->New project). If you are launching the application for the first time, a new project will open automatically. First, let's try to make a request to create a new record (perhaps creating records is available without authorization). In the context menu of the Project node, select the items Add node -> RequestStep. We will set the name of the node to create-post. As a result, a new node will be created in the tree and the tab for this node will open. We’ll set the following request parameters:
- Request type: POST
- URL:
- Request body: json with the value
{"title": "New testmace quick start post"}
If you did everything correctly, the interface will look as follows:
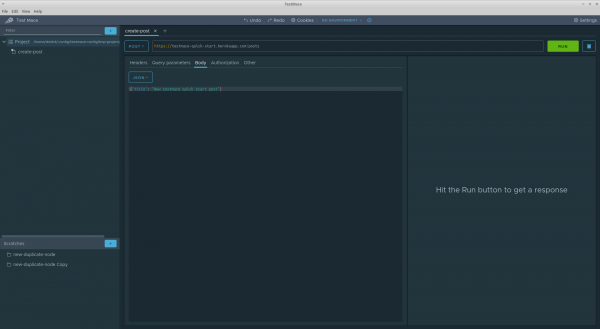
However, if we try to execute the request, the server will return a 401 code, and without authorization, we won't get anywhere on that server. Well, that’s to be expected).
Adding an Authorization Request
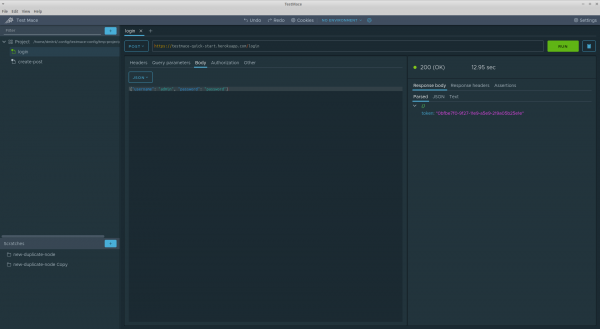
As mentioned, we have a POST endpoint /login, which accepts a json body in the following format: {"username": "", "password": ""}, where username and password (again, from the introductory section) have values admin and password accordingly. In response, this endpoint returns JSON of the following format {"token": ""}. We'll use it for authentication. Let's create RequestStep a node named login, with Project as its parent node. Drag and drop this node in the tree above the node create-post. We'll set the following parameters for the newly created request:
- Request type: POST
- URL:
- Request body: json with the value
{"username": "admin", "password": "password"}
We will execute the request and receive a 200 status code with the token in the response. Something like this:
Refactoring: removing domain duplication
Currently, the requests are not linked into a single scenario. But that's not the only downside. If we look closely, we can notice that at least the domain is duplicated in both requests. Not good. It's time to refactor this part of the future scenario, and variables will help us with this.
In the first approximation, variables serve the same role as in other similar tools and programming languages — eliminating duplication, enhancing readability, etc. You can read more about variables in . In this case, we will need user-defined variables.
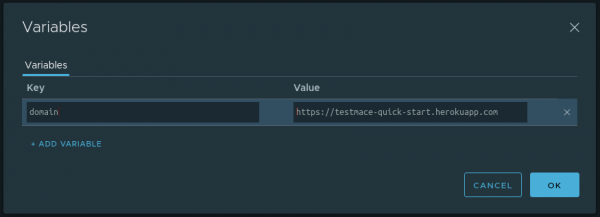
Let's define a variable at the Project level for the node domain, with the value https://testmace-quick-start.herokuapp.com. To do this, we need to
- Open the tab for this node and click the calculator icon at the top right
- Click on + ADD VARIABLE
- Enter the name and value of the variable
In our case, the dialog with the added variable will look like this:
OK. Now, due to inheritance, we can use this variable in descendants of any level of nesting. In our case, these are the nodes login and create-post. To use the variable in the text field, you need to write ${}. For example, the login URL becomes ${domain}/login, consequently for create-post the node, the URL will look like ${domain}/posts.
Thus, adhering to the DRY principle, we slightly improved the scenario.
Let's save the token in a variable
Since we're on the topic of variables, let's expand on this a bit. At this point, in the case of a successful login, we receive an authorization token from the server, which we'll need in subsequent requests. Let's save this token in a variable. Since the value of the variable will be determined at runtime, we will use a special mechanism for this — .
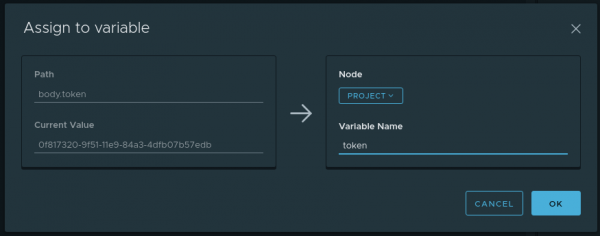
First, let's execute the login request. In the tab Parsed To see the response, hover over the token and in the context menu (triggered either by the right mouse button or by pressing the button …) select the item Assign to variable. A dialog with the following fields will appear:
- Path — which part of the response is taken (in our case it is
body.token) - Current value — what value lies along the Path (in our case this is the token value)
- Variable name — the name of the variable where Current value it will be saved. In our case, this will be
the access token that you will see in the console. Copy it and paste it on the page, then click - Node — in which ancestor the variable will be created Variable name. We will select Project
The filled dialog looks as follows:
Now, each time the node is executed login the dynamic variable the access token that you will see in the console. Copy it and paste it on the page, then click will be updated with the new value from the response. And this variable will be stored in Project the node and will be available to descendants due to inheritance.
To access dynamic variables, you need to use $dynamicVar. For example, to reach the saved token, you need to call ${$dynamicVar.token}.
Passing the authorization token in requests
In the previous steps, we obtained the authorization token, and all we need to do is add a header Authorization with the value Bearer to all requests requiring authorization, including in create-post. There are several ways to do this:
- Manually copy the token and add the authorization header to the relevant requests. This method works, but its application is limited to one-off requests only. It won't be suitable for multiple scenario executions.
- Utilize the .
- Use
Using the second method seems obvious, but in the context of this article, such an approach... is uninteresting. Well, really: the authorization mechanism is more or less familiar to you from other tools (even though we have things like ) and is unlikely to raise questions.
The default headers are another matter! In brief, default headers are inherited from ancestors HTTP headers that are added to a request by default unless explicitly disabled. Using this function, for example, you can implement custom authorization or simply avoid duplication in scenarios. We'll apply this feature to pass the token in headers.
Previously, we prudently saved the token in a dynamic variable $dynamicVar.token at the Project node level. The following steps remain:
- Define the default header
Authorizationwith the valueBearer ${$dynamicVar.token}at the Project node level. To do this, in the Project node interface, you need to open the dialog for default headers (button Headers in the upper right corner) and add the corresponding header. The dialog with filled values will look as follows:

- Disable this header from the login request. This is understandable: at the time of login, we do not yet have a token, and we will establish it with this request. Therefore, in the interface of the login request, on the tab Headers in the area Inherited we will uncheck the Authorization header.
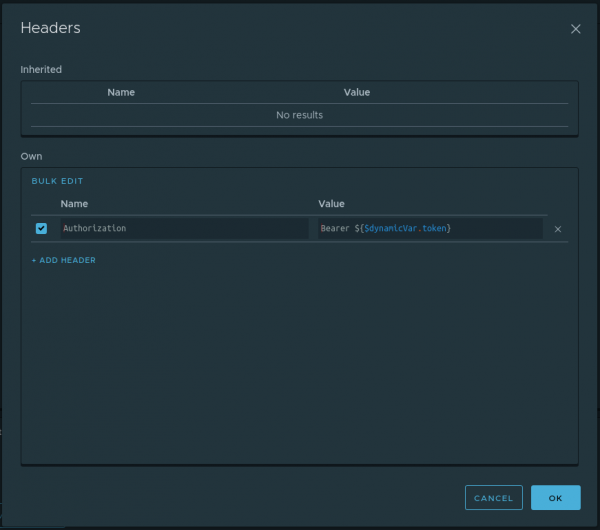
That's it. Now the authorization header will be added to all requests that are descendants of the Project node, except for the login node. Thus, at this stage, we already have a script ready, and we just need to run it. The script can be started by selecting the item Run in the context menu of the Project node.
Verifying the post creation correctness
At this stage, our script can log in, and using the authorization token, create a post. However, we need to ensure that the newly created post has the correct name. Essentially, the following steps remain:
- Send a request to get the post by id,
- Check that the name returned from the server matches the name provided during post creation
Let's consider the first step. Since the id value is determined during the script execution, we need to create a dynamic variable (let's call it postId) from the node create-post at the Project node level. We already know how to do this; just refer to the section Let's save the token in a variable. The only thing left is to create a request to get the post by this id. For this, we will create a RequestStep get-post with the following parameters:
- Request type: GET
- URL: ${domain}/posts/${$dynamicVar.postId}
To implement the second step, we need to familiarize ourselves with the node. The Assertion node — this is a node that allows writing checks on certain requests. Each Assertion node can contain several statements (checks). You can read more about all types of assertions in our . We will use Compare assertion with the operator equal. There are several ways to create assertions:
- Long. Manually create an Assertion node from the context menu of the RequestStep node. In the created Assertion node, add the desired assertion and fill in the fields.
- Fast. Create an Assertion node along with the assertion from the RequestStep node using the context menu
Let's use the second method. Here's how it will look for our case.
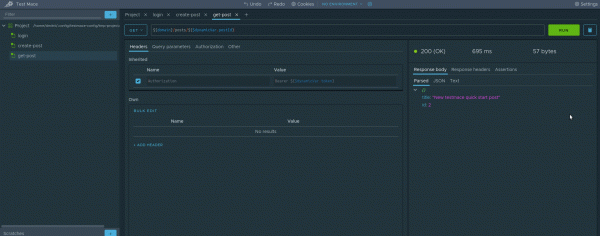
For those who didn't understand, here's what happens:
- Make a request in the node get-post
- In the tab Parsed right-click to open the context menu and select Create assertion -> Compare -> Equal
Congratulations, we've created our first test! Simple, isn't it? Now you can run the script completely and enjoy the result. Just a little bit left to refactor and extract title into a separate variable. But we'll leave that for you as homework)
Conclusion
In this guide, we've created a complete script while also reviewing some features of our product. Of course, we didn't use all the functionality, and in the following articles, we'll conduct a detailed review of TestMace's capabilities. Stay tuned for updates!
P.S. For those who are too lazy to reproduce all the steps, we've kindly prepared with the project from the article. You can open it via File -> Open project and select the Project folder.
Source: habr.com
