

Translation of the article from engineer George Hilliard
Clickable
I am an embedded systems engineer. In my free time, I often look for things that can be used in designing future systems or things related to my interests.
One of those areas is cheap computers capable of running Linux, and the cheaper, the better. That's why I dug deep into the rabbit hole of obscure processors.
I thought, "These processors are so cheap that they could practically be given away." After a while, the idea came to me to make a bare card for Linux in the business card form factor.
As soon as I thought of it, I decided it would be really cool to do. I had already up to , and they had various interesting features, like emulating flash drives, blinking lights, or even wireless data transmission. However, I had never seen business cards that supported Linux.
So I made one for myself.
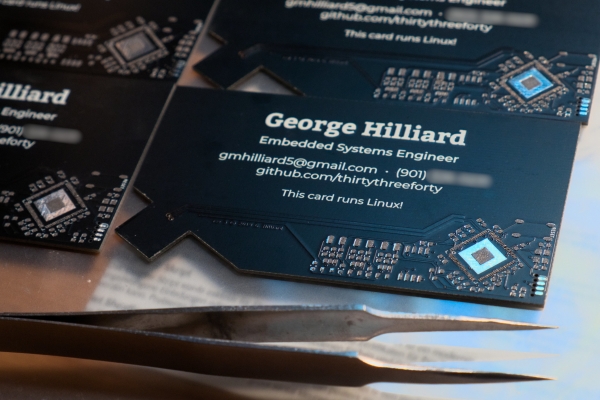
This is the finished version of the product. A fully functional minimal computer on ARM, running my special version of Linux, created with Buildroot.
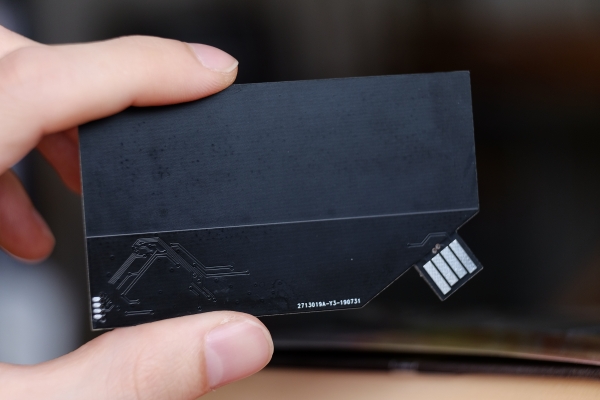
In the corner, it has a USB port. If you connect it to a computer, it boots in about 6 seconds and is recognized as a flash drive and a virtual serial port, allowing you to access the card's shell. On the flash drive, there is a README file, a copy of my resume, and several of my photos. The shell includes a few games, classics from Unix like fortune and rogue, a small version of the game 2048, and a MicroPython interpreter.
All of this is done using a very small 8 MB flash chip. The bootloader fits in 256 KB, the kernel takes up 1.6 MB, and the entire root filesystem is 2.4 MB. Therefore, there is plenty of space left for the virtual flash drive. There is also a home directory available for writing—if someone does something they want to save. That is all saved on the flash chip as well.
The entire device costs less than $3. It's cheap enough to be given away. If you received such a device from me, it means I'm likely trying to impress you.
Design and assembly
I designed and assembled everything myself. This is my work, and I enjoy it, and most of the challenges were in finding sufficiently cheap parts for such a hobby.
Choosing the processor was the most important decision impacting the project's cost and feasibility. After extensive research, I opted for the F1C100s, a relatively obscure processor from Allwinner, optimized for cost (i.e., incredibly cheap). Both RAM and CPU are housed in a single case. I purchased the processors on Taobao. All other components were sourced from LCSC.
I ordered the boards from JLC. For $8, I had 10 copies made. Their quality is impressive, especially for the price; not as precise as those from OSHPark, but still look good.
I made the first batch matte black. They looked nice but were very prone to fingerprints.
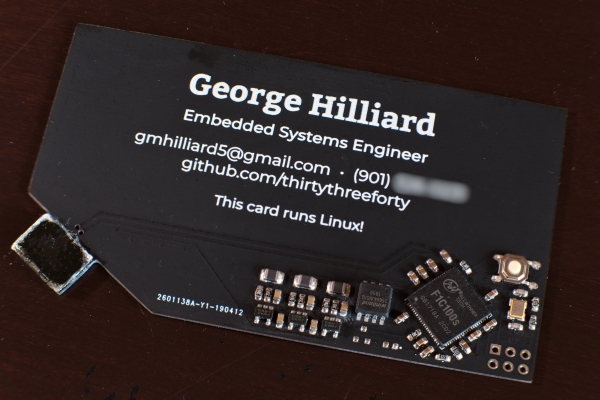
There were a couple of issues with the first batch. Firstly, the USB connector was not long enough to securely fit into any USB ports. Secondly, the traces for the flash were incorrectly made, but I worked around it by bending the contacts.
After testing everything in operation, I ordered a new batch of boards; you can see a photo of one of them at the beginning of the article.
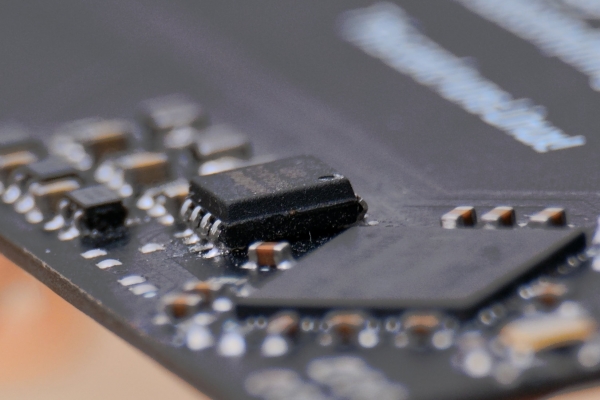
Due to the small size of all these tiny components, I decided to use reflow soldering with I have access to a laser cutter, so I cut out a soldering stencil from laminating film. The stencil turned out quite well. The holes for the processor contacts, with a diameter of 0.2 mm, required particular care for high-quality production – it was critically important to properly focus the laser and adjust its power.
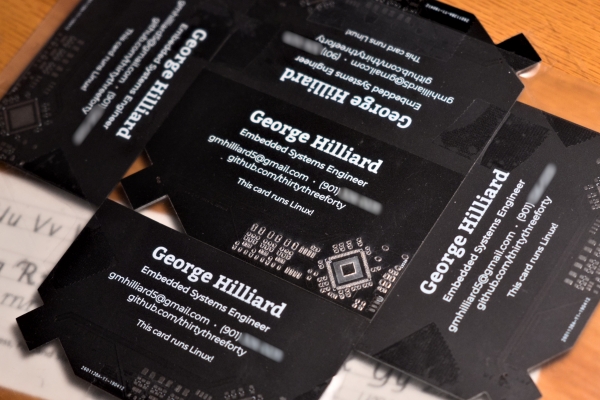
To hold the board in place while applying the paste, other boards work well.
I applied solder paste and positioned the components manually. I made sure that no lead was used anywhere in the process – all boards, components, and paste comply with the standard – so I wouldn't feel guilty when distributing them to people.
I slightly miscalculated with this batch, however, solder paste forgives mistakes, and everything assembled normally.
It took about 10 seconds to position each component, so I tried to minimize their quantity. More details about the board design can be found in another .
Materials list and costs
I stuck to a tight budget. The business card turned out exactly as I envisioned – I don't mind giving it away! Of course, I won't be handing it out to everyone, as making each copy takes time, and my time isn't factored into the cost of the card (it's essentially free).
Component
Price
F1C100s
$1.42
PCB
$0.80
8MB flash
$0.17
All other components
$0.49
Total
$2.88
Naturally, there are additional costs that are hard to calculate, like shipping (since it was distributed among components intended for multiple projects). However, this price is definitely very low for a board with Linux support. This breakdown also provides a good idea of what companies are spending to produce devices in the lowest price segment: you can be assured that it's even cheaper for the companies than it is for me!
Capabilities
What can I say? The card boots a heavily trimmed-down version of Linux in 6 seconds. Due to the form factor and cost, the card lacks I/O, network support, or serious storage space for running heavy applications. Nevertheless, I managed to pack a lot of interesting stuff into the firmware image.
USB
There were many interesting possibilities with USB, but I chose the simplest option to ensure that people are more likely to succeed if they decide to try my business card. Linux allows the card to behave like a "device" with support for . I took some drivers from previous projects involving this processor, so I have access to all the functionality of the USB gadget framework. I decided to emulate a pre-generated flash drive and provide access to the shell via a virtual serial port.
Shell
After logging in as the root user on the serial console, the following programs can be launched:
- rogue: a classic Unix dungeon adventure game;
- 2048: a simple 2048 game in console mode;
- fortune: displays various witty sayings. I decided not to include the entire quote database here to leave room for other functions;
- : a very small Python interpreter.
Flash Drive Emulation
During compilation, the build tools generate a small FAT32 image and include it as one of the UBI partitions. The Linux gadget subsystem presents it to the PC as a storage device.
If you're interested in seeing what's on the flash drive, the easiest way to do that is to check out . It also contains several photos and my resume.
Resources
Source files
My Buildroot tree is available on GitHub — . It includes the code for generating a NOR flash image, which can be installed using the USB download mode of the processor. It also contains all the package definitions for games and other programs that I incorporated into Buildroot once everything was operational. If you want to use F1C100s in your project, this will be a great starting point (feel free to ).
I used Linux v4.9 for F1C100s by Icenowy, slightly modified. My card runs almost the standard v5.2. It’s available on GitHub — .
I think I have the best U-Boot port for F1C100s in the world today, and it is partially based on Icenowy's work as well (surprisingly, getting U-Boot to work properly turned out to be quite a challenge). It's also available on GitHub — .
Documentation for F1C100s
I found the documentation for F1C100s quite sparse, and I am posting it here:
- – general information and pinout.
- – register definitions for F1C600, which is essentially the same as F1C100s but rebranded with claimed Linux support (ha!).
- I actively borrowed information from the schematic by – the development board I used for software setup.
For the curious, I'm uploading .

Conclusion
I learned a lot while developing this project – this is my first project where I used a reflow soldering oven. I also learned how to find resources for components with poor documentation.
I leveraged my experience with embedded Linux and board development. The project is not without flaws, but it effectively showcases all my skills.
For those interested in details about working with embedded Linux, I recommend reading my series of articles on this topic: . In it, I detail how to create software and hardware from scratch for tiny and inexpensive Linux systems, similar to this business card of mine.
Source: habr.com
