

Amid the whirlwind of holidays and the various events that followed the break, it could easily have been overlooked that the long-awaited release of Veeam Availability Suite version 10.0 will be launched very soon—this February.
A wealth of materials has been released about the new features, including presentations at online and offline conferences, blog posts, and various community discussions in different languages. For those who haven't yet had the chance to review them, and for everyone interested in industry innovations, I will briefly enumerate the new capabilities of Veeam Backup & Replication today and elaborate on one of the key features.
So, welcome to the details.
“All works are good—choose according to taste”
Indeed, all the development teams have contributed to this anniversary release. There is a set of features for every potential client that is necessary for their infrastructure. Here is just a partial list of the innovations:
- Backup for NAS and file shares
- Data Integration API
- Linux VIX and backup proxy for Linux
- Support for block cloning on XFS
- Updated Cloud Tier and S0BR repository
- Backup repository on NFS
- Working with NetApp ONTAP SVM
- RMAN Plugin for Solaris
- Archiving backups of transaction logs (transaction logs backup copy job)
- Jobs with GFS Retention Policy for Primary Backup Jobs
- Enhanced WAN accelerator
- Improved backup for virtual infrastructures on the Nutanix AHV platform
And these are just the innovations in Veeam Backup & Replication! The upcoming version of Veeam Availability Suite implies a new Veeam ONE and new Veeam Agents. We are undoubtedly looking forward to many interesting developments—but let's begin in order.
Backup for NAS and file shares
This functionality has been anticipated for a long time, and our engineers have worked hard on it for several months. Users will receive a toolkit with very flexible options for backing up and restoring files and folders, all built on an understandable and scalable architecture and in a familiar interface.
With the kind permission of our Vanguard, Evgeny Elizarov (), who attended the Veeam Vanguards forum at the end of 2019, I am sharing a link to his about this feature.
I will also briefly discuss the operation scheme and the procedure for configuring this type of backup.
How It Works
The overall operation scheme is shown below:
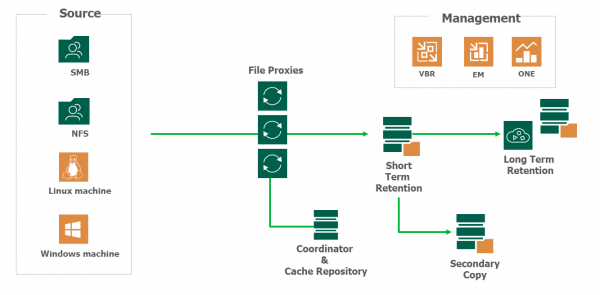
As we can see, the following components are involved in the backup process:
- Source file storage (NAS, SMB share)
- Veeam Backup & Replication server, responsible for management
- File Backup Proxy auxiliary proxy server, which performs data transfer during backup, including enumeration, reading, writing, compression, decompression, encryption, and decryption. (This component is identical to the well-known backup proxy.)
- Backup repository where backups and metadata files are stored, describing the original structure of the share and the location of the corresponding files and folders in backups.
- Cache repository: this holds a snapshot of the file tree taken during the last backup run. This speeds up incremental passes significantly, as there's no need to compare each source folder with what's included in the backup. It also accelerates the file recovery process. This repository can be hosted on a directly connected physical or virtual Windows or Linux server, or you can also use NAS (or SMB share). It is recommended to place such a repository on SSD, closer to the share.
Note: In this role, you can use an existing Veeam repository in the infrastructure that stores virtual machine backups. However, note that SOBR/Deduplication storage/Cloud repository cannot be used as such a repository.
- Archive repository, if there is a need — and there's often a need — for long-term storage. Here, you can employ inexpensive storage systems and set up regular archiving of backups from the main repository, as will be shown below.
Note: Rotated drives are not supported as repositories.
The main stages of the process briefly look like this:
- Veeam Backup & Replication initiates enumeration and builds the folder and file tree in the source share.
- These actions are performed by the file proxy, which transmits the constructed structure to the cache repository for storage.
- When the file proxy receives a new structure, it compares it with the previous one stored in the repository. If changes are detected, the cache repository sends a request for its resources to the backup repository.
- The file proxy begins reading new data from the source share and transmitting it to the backup repository. They are sent, being "packed" into BLOBs: each BLOB contains backup data in the form of files sized at 64 Mb. Metadata files are also saved.
Let's see how all this can be configured in the interface.
Configuring file backup in the Veeam console
First, you need to configure the necessary components: proxy, file share, and repository.
Configuring the file proxy
A Windows server can be used as a proxy for file backups — it just needs to be x64, and preferably running Windows 2012R2 or later if you want to back up CIFS shares using VSS.
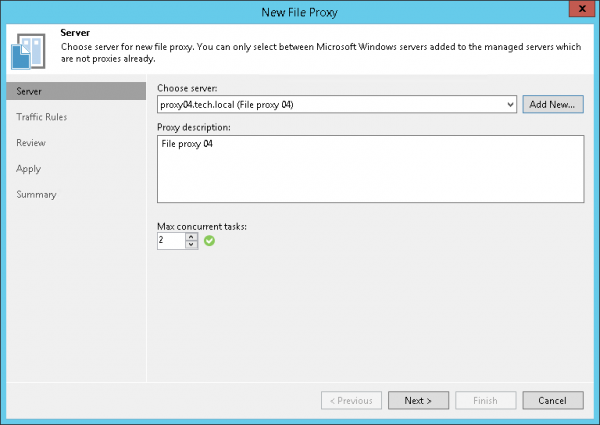
This machine should already be included in the backup infrastructure, or you can add a new server — to do this in the view, Backup Infrastructure you need to right-click on the node Backup Proxies and select the command Add file backup proxy. Then, we go through the steps of the wizard, indicating:
- The name of the new proxy
- Maximum concurrent tasks (1 task = 1 source share). The default value is calculated automatically based on available resources.
At this step Traffic Rules set up rules for processing network traffic, just as we normally do for proxies.
Adding the source share
In the view Inventory a new node has appeared — File Shares, as well as corresponding commands:
- Add file share — add a new share
- Create job — create a backup job
- Restore — perform recovery from backup
We add the file share to the infrastructure in the following way:
- After clicking on the node File Shares you need to select the command Add file share.
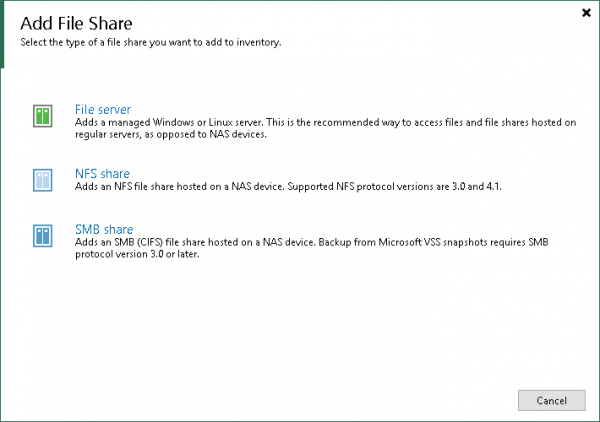
- We choose the type of object that we will be adding.

You can select as the source file storage:- A Windows or Linux file server.
- An NFS share — versions 3.0 and 4.1 are supported.
- An SMB (CIFS) share, with backups supported from Microsoft VSS snapshots for SMB3.
For example, let's choose the SMB share option.
Note: When specifying an account for accessing the source share, ensure that this account has at least read permissions (and write permissions if you want to restore). Also, do not forget that the used proxy servers should also have read permissions.
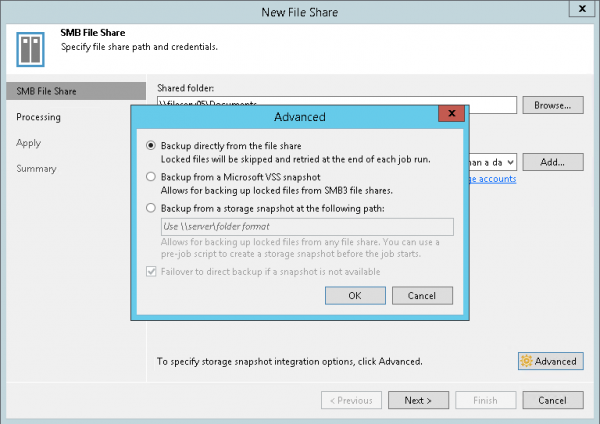
- If you want to use snapshots for backup, then you should click Advanced and specify what type of snapshots to use — VSS or storage.
Note: VSS support requires proper configuration of the File Backup Proxy. If you want to use storage snapshots, you will need to configure their creation on your storage side.

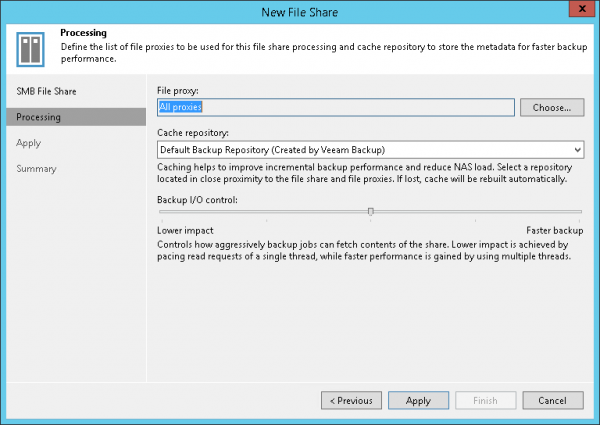
- The next step is to set the processing settings:
- Specify which file proxy we plan to use — by default, all available proxies will be used (All proxies).
- Specify the path to the cache repository — Cache repository. Remember that SOBR/Deduplication/Cloud cannot be used as such a repository.

- Using the setting Backup I/O control, we select the preferred characteristic for performing operations during backup.
- Lower impact (least impact on your NAS) — processing read requests will be single-threaded;
- Faster backup (high speed) — accordingly, multithreading; applicable to high-performance storages.
Which option is better to use in your infrastructure can be determined through testing. However, the general principle is as follows: if you have a storage system designed for enterprise infrastructures, you can confidently set Faster backup, but if you have a modest home-level NAS, then, of course, we focus on Lower impact.
- Then we say Apply, complete the steps of the wizard — and see our file share in the Veeam Backup infrastructure tree.
Creating a backup job
Now we need to create a backup job. From the menu Backup Job Clone File share.
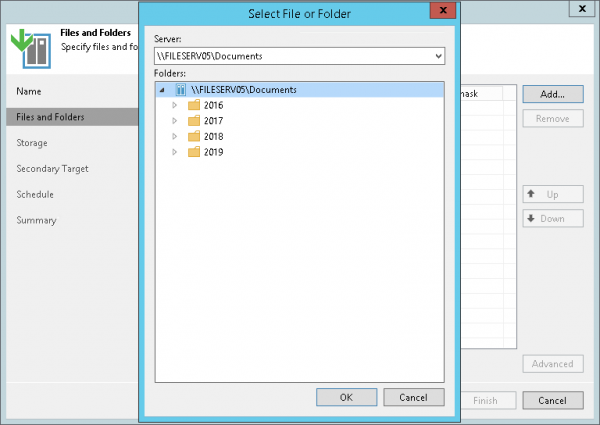
The job setup wizard starts. In it, we first specify the name of the new job, and then at the step Files and Folders — what we specifically want to back up.
If we want to set include/exclude filters, we click the button Advanced. By default, all contents will be backed up.
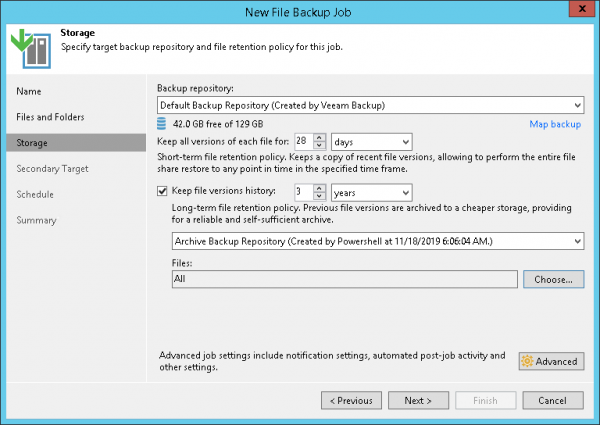
Then we proceed to the step Storage, where we set storage settings:
- Backup repository — path to the repository
- Keep all versions of each file for N days — short-term storage period, i.e. how long to keep all versions of backed-up files in the repository in case recovery is necessary (by default, 28 days — yes, for files we count not 'restore points', but just days).
- If long-term storage is also needed, check the box Keep file versions history and specify how long to keep old versions of files, which ones and where (here you can specify not the main, but rather an auxiliary storage, which can be configured in the next step).
To choose which files to organize for long-term storage, click on Choose:
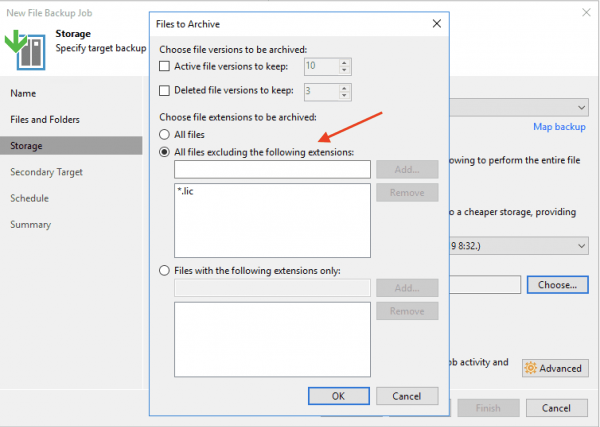
Here, in addition to the inclusive/exclusive mask filter, you can also separately adjust how many versions to keep for active files and for deleted files (fields Active file versions to keep and Deleted file versions to keep, respectively). Of course, all these settings need to be aligned with your data availability policy.
Click OK and return to the wizard step.
Familiar notification settings, custom scripts, etc., are available by clicking on Advanced.
If you need long-term storage on a secondary archival repository, proceed to step Secondary Target. Data archiving will start after the backup completes.
This is also a small innovation. In fact, these are the known Backup Copy tasks, but now integrated into the main process, meaning there’s no need to create a separate one.
If you want to additionally configure the storage policy, encryption, and duration of the archiving window for a specific repository, select the repository from the list and click Edit.
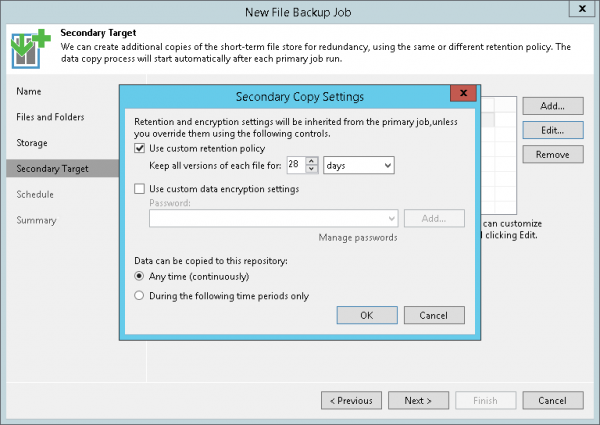
Next, configure the schedule — everything is as usual here.
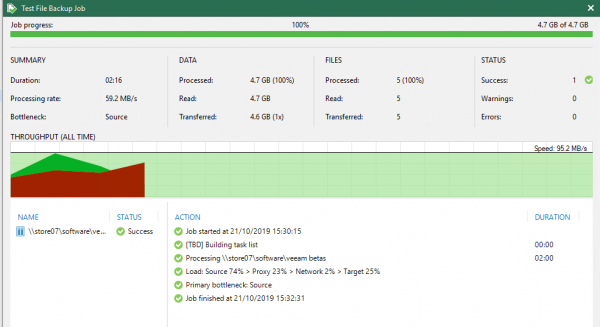
And on the last step, verify the settings and, if necessary, select immediate start (Run the job when I click Finish), after which you can monitor the backup process:
Recovery options
Recovery is possible in three modes: you can restore the entire share to a specific point in time, choose specific files for recovery, or restore all files that have changed since the backup.
- The file share is restored completely to the state it was in when it was backed up and reached the selected restore point. All files and folders will be restored; you can recover them to the original or a different location:
- Rollback to the selected point in time by restoring only changed files: it’s understandable — first, select the desired point in time, then the files/folders you want to restore.
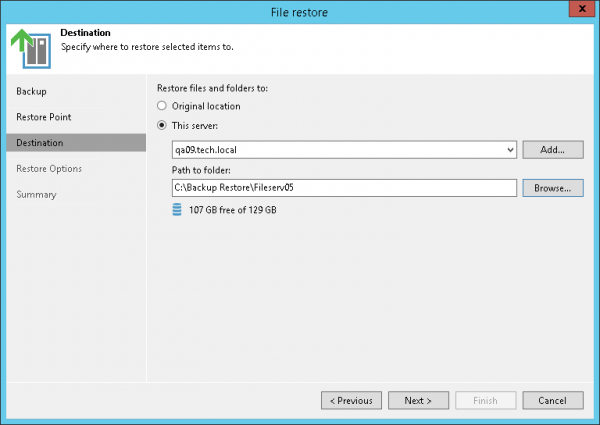
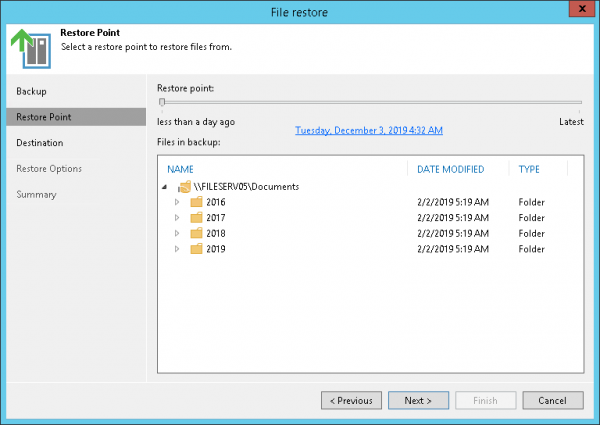
The logic for choosing the restore point has slightly changed. After starting the recovery wizard, you can select:
- Latest Restore Point — recovery from the latest backup in the selected mode.
- Selected restore point — if you missed the restore point, you can now select it again directly in the wizard (previously, you had to go back to the main interface for this).
- All Time — in this mode, you can see the entire history of backups for the share, plus you can restore from the archival storage.
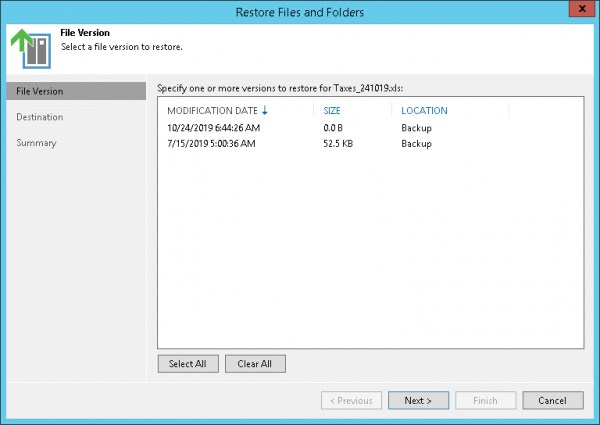
Additionally, you can specify the version of the object being restored:
For today, that's all. But stay tuned for more!
Additional materials
Source: habr.com
