

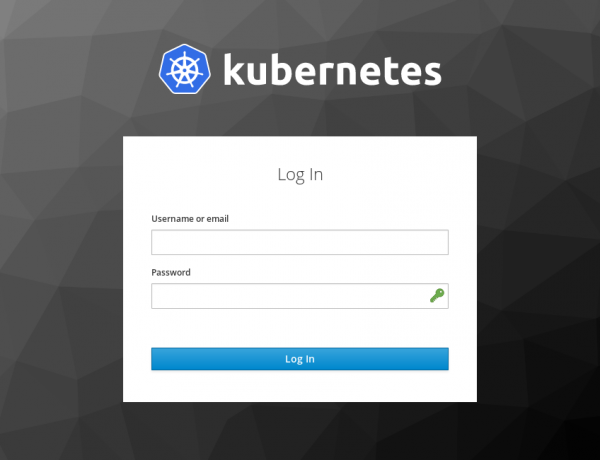
A short guide on how to link Kubernetes with your LDAP server using Keycloak and set up user and group imports. This will allow you to configure RBAC for your users and use auth-proxy to secure the Kubernetes Dashboard and other applications that cannot authenticate on their own.
Installing Keycloak
Assuming you already have an LDAP server. This can be Active Directory, FreeIPA, OpenLDAP, or something else. If you don't have an LDAP server, you can create users directly in the Keycloak interface or use public OIDC providers (Google, GitHub, GitLab); the result will be almost the same.
First, we'll install Keycloak itself; installation can be done separately or directly in the Kubernetes cluster. Generally, if you have multiple Kubernetes clusters, it would be easier to install it separately. On the other hand, you can always use and install it directly in your cluster.
To store Keycloak data, you will need a database. By default, it uses h2 (all data is stored locally), but you can also use postgres, mysql or mariadb.
If you decide to install Keycloak separately, you will find more detailed instructions in .
Setting Up Federation
First, let's create a new realm. A realm is the space for our application. Each application can have its own realm with different users and authorization settings. The master realm is used by Keycloak itself, and it is not appropriate to use it for anything else.
Click Add realm
Option
Value
Name
kubernetes
Display Name
Kubernetes
HTML Display Name
<img src="https://kubernetes.io/images/nav_logo.svg" width="400" >
Kubernetes checks whether the user's email is verified by default. Since we are using our own LDAP server, this check will almost always return false. Let's disable the display of this parameter in Kubernetes:
Client scopes —> Email —> Mappers —> Email verified (Delete)
Now let's configure federation; for this, we will go to:
User federation —> Add provider… —> ldap
Here's an example configuration for FreeIPA:
Option
Value
Console Display Name
freeipa.example.org
Vendor
Red Hat Directory Server
UUID LDAP attribute
ipauniqueid
Connection URL
ldaps://freeipa.example.org
Users DN
cn=users,cn=accounts,dc=example,dc=org
Bind DN
uid=keycloak-svc,cn=users,cn=accounts,dc=example,dc=org
Bind Credential
<password>
Allow Kerberos authentication:
on
Kerberos Realm:
EXAMPLE.ORG
Server Principal:
HTTP/freeipa.example.org@EXAMPLE.ORG
KeyTab:
/etc/krb5.keytab
The user keycloak-svc needs to be pre-created on our LDAP server.
In the case of Active Directory, simply select Vendor: Active Directory and the necessary settings will automatically populate the form.
Click Save
Now let's proceed:
User federation —> freeipa.example.org —> Mappers —> First Name
Option
Value
Ldap attribute
givenName
Now we will enable group mapping:
User federation —> freeipa.example.org —> Mappers —> Create
Option
Value
Name
groups
Mapper type
group-ldap-mapper
LDAP Groups DN
cn=groups,cn=accounts,dc=example,dc=org
User Groups Retrieve Strategy
GET_GROUPS_FROM_USER_MEMBEROF_ATTRIBUTE
With this, the federation setup is complete; let's move on to client configuration.
Client Configuration
We'll create a new client (the application that will receive users from Keycloak). Let's go to:
Clients —> Create
Option
Value
Client ID
kubernetes
Access Type
confidential
Root URL
http://kubernetes.example.org/
Valid Redirect URIs
http://kubernetes.example.org/*
Admin URL
http://kubernetes.example.org/
We will also create a scope for groups:
Client Scopes —> Create
Option
Value
Template
No template
Name
groups
Full group path
false
And we'll configure the mapper for them:
Client Scopes —> groups —> Mappers —> Create
Option
Value
Name
groups
Mapper Type
Group membership
Token Claim Name
groups
Now we need to enable group mapping in our client scope:
Clients —> kubernetes —> Client Scopes —> Default Client Scopes
Select groups downward API support (simultaneously with this in Available Client Scopes, click Add selected
Now let's configure the authentication of our application by going to:
Clients —> kubernetes
Option
Value
Authorization Enabled
ON
Click save and this completes the client configuration. Now on the tab
Clients —> kubernetes —> Credentials
you will be able to obtain Secret which we will use later.
Kubernetes Configuration
Configuring Kubernetes for OIDC authorization is quite straightforward and not overly complex. All you need to do is place the CA certificate of your OIDC server in /etc/kubernetes/pki/oidc-ca.pem and add the necessary options for kube-apiserver.
To do this, update /etc/kubernetes/manifests/kube-apiserver.yaml on all your masters:
...
spec:
  containers:
  - command:
    - kube-apiserver
...
    - --oidc-ca-file=/etc/kubernetes/pki/oidc-ca.pem
    - --oidc-client-id=kubernetes
    - --oidc-groups-claim=groups
    - --oidc-issuer-url=https://keycloak.example.org/auth/realms/kubernetes
    - --oidc-username-claim=email
...
Also update the kubeadm config in the cluster to avoid losing these settings during upgrades:
kubectl edit -n kube-system configmaps kubeadm-config...
data:
ClusterConfiguration: |
apiServer:
extraArgs:
oidc-ca-file: /etc/kubernetes/pki/oidc-ca.pem
oidc-client-id: kubernetes
oidc-groups-claim: groups
oidc-issuer-url: https://keycloak.example.org/auth/realms/kubernetes
oidc-username-claim: email
...With this, the Kubernetes setup is complete. You can repeat these actions across all your Kubernetes clusters.
Initial Authorization
After these steps, you will have a Kubernetes cluster configured with OIDC authorization. The only thing is that your users do not yet have a configured client or their own kubeconfig. To resolve this issue, automatic kubeconfig issuance for users after successful authorization must be set up.
You can use special web applications that allow user authentication and then download the ready kubeconfig. One of the most convenient is , which allows you to describe all Kubernetes clusters in one config and easily switch between them.
To set up Kuberos, it is enough to describe the template for kubeconfig and run it with the following parameters:
kuberos https://keycloak.example.org/auth/realms/kubernetes kubernetes /cfg/secret /cfg/templateFor more detailed information, see on Github.
You can also use if you want to perform authentication directly on the user's computer. In this case, a browser will open for the user with an authorization form on localhost.
The resulting kubeconfig can be checked on the website . Just copy the value users[].user.auth-provider.config.id-token from your kubeconfig into the form on the site and you will immediately receive the decoding.
RBAC Configuration
When configuring RBAC, you can refer to both the username (field name in the jwt token) and the user group (field groups in the jwt token). Here is an example of permission settings for the group kubernetes-default-namespace-admins:
kubernetes-default-namespace-admins.yaml
apiVersion: rbac.authorization.k8s.io/v1
kind: Role
metadata:
  name: default-admins
  namespace: default
rules:
- apiGroups:
  - '*'
  resources:
  - '*'
  verbs:
  - '*'
---
apiVersion: rbac.authorization.k8s.io/v1
kind: RoleBinding
metadata:
  name: kubernetes-default-namespace-admins
  namespace: default
roleRef:
  apiGroup: rbac.authorization.k8s.io
  kind: Role
  name: default-admins
subjects:
- apiGroup: rbac.authorization.k8s.io
  kind: Group
  name: kubernetes-default-namespace-admins
More examples for RBAC can be found in
auth-proxy Configuration
There is a wonderful project , which allows you to protect any application by providing the user with the ability to authenticate on the OIDC server. I will show how to configure it using the example of Kubernetes Dashboard:
dashboard-proxy.yaml
apiVersion: extensions/v1beta1
kind: Deployment
metadata:
  name: kubernetes-dashboard-proxy
spec:
  replicas: 1
  template:
    metadata:
      labels:
        app: kubernetes-dashboard-proxy
    spec:
      containers:
      - args:
        - --listen=0.0.0.0:80
        - --discovery-url=https://keycloak.example.org/auth/realms/kubernetes
        - --client-id=kubernetes
        - --client-secret=
        - --redirection-url=https://kubernetes-dashboard.example.org
        - --enable-refresh-tokens=true
        - --encryption-key=ooTh6Chei1eefooyovai5ohwienuquoh
        - --upstream-url=https://kubernetes-dashboard.kube-system
        - --resources=uri=*/
        image: keycloak/keycloak-gatekeeper
        name: kubernetes-dashboard-proxy
        ports:
        - containerPort: 80
          livenessProbe:
            httpGet:
              path: /oauth/health
              port: 80
            initialDelaySeconds: 3
            timeoutSeconds: 2
          readinessProbe:
            httpGet:
              path: /oauth/health
              port: 80
            initialDelaySeconds: 3
            timeoutSeconds: 2
---
apiVersion: v1
kind: Service
metadata:
  name: kubernetes-dashboard-proxy
spec:
  ports:
  - port: 80
    protocol: TCP
    targetPort: 80
  selector:
    app: kubernetes-dashboard-proxy
  type: ClusterIP
Source: habr.com
