

This guide outlines the steps needed to prepare remote access to virtual desktops using the technology provided by Citrix.
It will be useful for those who are new to desktop virtualization technology, as it is a compilation of useful commands gathered from approximately 10 manuals, many of which are available on Citrix, Nvidia, and Microsoft websites after authentication.
This implementation includes the steps for preparing remote access to virtual machines (VMs) with Nvidia Tesla M60 graphic accelerators and Centos 7 operating system.
So, let's get started.
Preparing the hypervisor for hosting virtual machines
How to download and install XenServer 7.4?
How to add XenServer to Citrix XenCenter?
How to download and install the Nvidia driver?
How to change the mode of Nvidia Tesla M60?
How to mount storage?
XenServer 7.4
Download link is available after logging into the site .
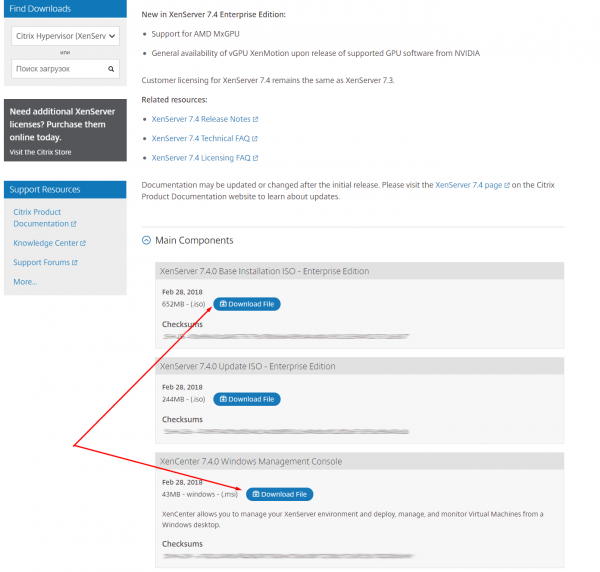
We will install XenServer.iso on the server with 4x NVIDIA Tesla M60 using the standard method. In my case, the iso is mounted via IPMI. For Dell servers, controller management is done through IDRAC. The installation steps are almost identical to installing Linux-like OS.
My XenServer with GPU address is 192.168.1.100
We will install XenCenter.msi on the local computer from which we will manage hypervisors and virtual machines. We will add the server with GPU and XenServer by clicking on the 'Server' tab, then 'Add'. We enter the root login and password specified during the XenServer installation.
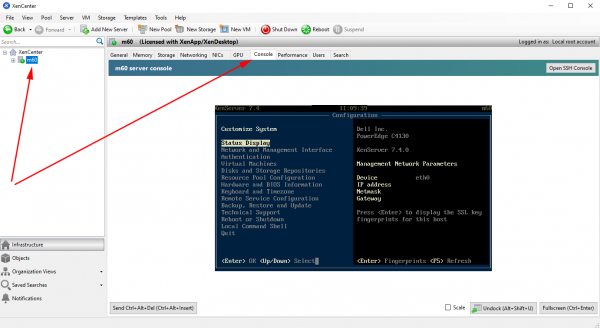
In XenCenter, after clicking on the name of the added hypervisor, the 'Console' tab will be available. In the menu, we will select 'Remote Service Configuration' and enable SSH authentication — 'Enable/Disable Remote Shell'.
Nvidia driver
I must express my feelings and say that during all my work with vGPU, I have never accessed the site on the first try. If authentication does not work, I recommend using Internet Explorer.
We will download the zip file with vGPU, as well as the GPUMode Change Utility:
NVIDIA-GRID-XenServer-7.4-390.72-390.75-391.81.zip
NVIDIA-gpumodeswitch-2020-01.zip
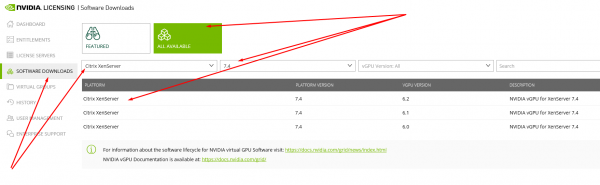
We keep an eye on the versions. The name of the downloaded archive specifies the version of compatible NVIDIA drivers that can be further installed on the virtual machines. In my case, it is 390.72.
We transfer the zips to XenServer and unpack them.
We will change the GPU mode and install the vGPU driver
$ cd NVIDIA-gpumodeswitch-2020-01
$ gpumodeswitch --listgpumodes
$ gpumodeswitch --gpumode graphics
$ cd ../NVIDIA-GRID-XenServer-7.4-390.72-390.75-391.81
$ yum install NVIDIA-vGPU-xenserver-7.4-390.72.x86_64.rpm
$ reboot 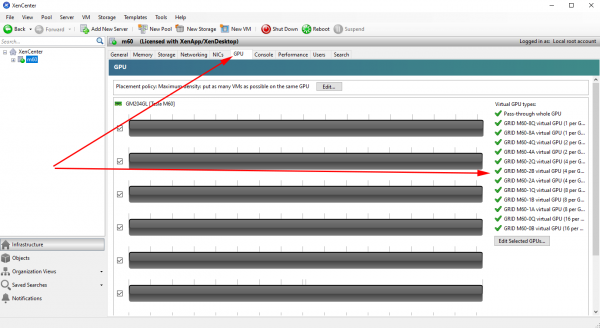
Mount storage
We will configure a shared directory using NFS on any computer in the network.
$ yum install epel-release
$ yum install nfs-utils libnfs-utils
$ systemctl enable rpcbind
$ systemctl enable nfs-server
$ systemctl enable nfs-lock
$ systemctl enable nfs-idmap
$ systemctl start rpcbind
$ systemctl start nfs-server
$ systemctl start nfs-lock
$ systemctl start nfs-idmap
$ firewall-cmd --permanent --zone=public --add-service=nfs
$ firewall-cmd --permanent --zone=public --add-service=mountd
$ firewall-cmd --permanent --zone=public --add-service=rpc-bind
$ firewall-cmd --reload
$ mkdir -p /nfs/store1
$ chmod -R 777 /nfs/store1
$ touch /nfs/store1/forcheck
$ cat /etc/exports
  ...
  /nfs/store1 192.168.1.0/24(rw,async,crossmnt,no_root_squash,no_all_squash,no_subtree_check)
$ systemctl restart nfs-server
In XenCenter, we will select XenServer and on the 'Storage' tab, choose 'New SR'. We will specify the storage type as NFS ISO. The path should point to the shared NFS directory.
Citrix Master Image based on CentOS 7
How to create a virtual machine with CentOS 7?
How to prepare a virtual machine for creating a directory?
CentOS 7 image
Using XenCenter, we will create a virtual machine with GPU. On the 'VM' tab, we will click 'New VM'.
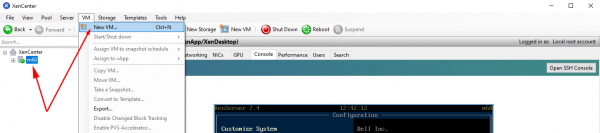
We select the necessary parameters:
VM template — Other install media
Name — template
Install from ISO library — CentOS 7 (), selected from the mounted NFS ISO storage.
Number of vCPUs — 4
Topology — 1 socket with 4 cores per socket
Memory — 30 Gb
GPU type — GRID M60-4Q
Use this virtual disk — 80 Gb
Network
After creation, the virtual machine will appear in the vertical list on the left. We will click on it and go to the 'Console' tab. We will wait for the CentOS 7 installer to load and perform the necessary steps to install the OS with the GNOME shell.
Image preparation
Preparing the image with CentOS 7 took a lot of my time. Subsequently, it resulted in a set of scripts that simplify the initial setup of Linux and allow creating a directory of virtual machines using Citrix Machine Creation Services (MCS).
The DHCP server installed on ws-ad assigned the new virtual machine the IP address 192.168.1.129.
Next, I will outline the main settings.
$ hostnamectl set-hostname template
$ yum install -y epel-release
$ yum install -y lsb mc gcc
$ firewall-cmd --permanent --zone=dmz --remove-service=ssh
$ firewall-cmd --permanent --zone=external --remove-service=ssh
$ firewall-cmd --permanent --zone=home --remove-service=ssh
$ firewall-cmd --permanent --zone=home --remove-service=mdns
$ firewall-cmd --permanent --zone=home --remove-service=samba-client
$ firewall-cmd --permanent --zone=home --remove-service=dhcpv6-client
$ firewall-cmd --permanent --zone=internal --remove-service=dhcpv6-client
$ firewall-cmd --permanent --zone=internal --remove-service=samba-client
$ firewall-cmd --permanent --zone=internal --remove-service=mdns
$ firewall-cmd --permanent --zone=internal --remove-service=ssh
$ firewall-cmd --permanent --zone=public --remove-service=ssh
$ firewall-cmd --permanent --zone=public --remove-service=dhcpv6-client
$ firewall-cmd --permanent --zone=work --remove-service=dhcpv6-client
$ firewall-cmd --permanent --zone=work --remove-service=ssh
$ firewall-cmd --permanent --zone=public --add-service=ssh
$ firewall-cmd --complete-reload
In XenCenter, in the 'Console' tab, we will mount guest-tools.iso to the DVD drive of the virtual machine and install XenTools for Linux.
$ mount /dev/cdrom /mnt
$ /mnt/Linux/install.sh
$ reboot
When configuring XenServer, we used the archive NVIDIA-GRID-XenServer-7.4-390.72-390.75-391.81.zip downloaded from the NVIDIA website, which contains the NVIDIA driver for XenServer and the necessary NVIDIA driver for vGPU clients. We will download and install it on the VM.
$ cat /etc/default/grub
  GRUB_TIMEOUT=5
  GRUB_DISTRIBUTOR="$(sed 's, release .*$,,g' /etc/system-release)"
  GRUB_DEFAULT=saved
  GRUB_DISABLE_SUBMENU=true
  GRUB_TERMINAL_OUTPUT="console"
  GRUB_CMDLINE_LINUX="rhgb quiet modprobe.blacklist=nouveau"
  GRUB_DISABLE_RECOVERY="true"
$ grub2-mkconfig -o /boot/grub2/grub.cfg
$ wget http://vault.centos.org/7.6.1810/os/x86_64/Packages/kernel-devel-3.10.0-957.el7.x86_64.rpm
$ yum install kernel-devel-3.10.0-957.el7.x86_64.rpm
$ reboot
$ init 3
$ NVIDIA-GRID-XenServer-7.4-390.72-390.75-391.81/NVIDIA-Linux-x86_64-390.75-grid.run
$ cat /etc/nvidia/gridd.conf
  ServerAddress=192.168.1.111
  ServerPort=7070
  FeatureType=1
$ reboot
We will download the Linux Virtual Delivery Agent 1811 (VDA) for Centos 7. Download link is available after logging into the site .
$ yum install -y LinuxVDA-1811.el7_x.rpm
$ cat /var/xdl/mcs/mcs.conf
  #!/bin/bash
  dns1=192.168.1.110
  NTP_SERVER=some.ntp.ru
  AD_INTEGRATION=winbind
  SUPPORT_DDC_AS_CNAME=N
  VDA_PORT=80
  REGISTER_SERVICE=Y
  ADD_FIREWALL_RULES=Y
  HDX_3D_PRO=Y
  VDI_MODE=Y
  SITE_NAME=domain.ru
  LDAP_LIST=ws-ad.domain.ru
  SEARCH_BASE=DC=domain,DC=ru
  START_SERVICE=Y
$ /opt/Citrix/VDA/sbin/deploymcs.sh
$ echo "exclude=kernel* xorg*" >> /etc/yum.conf
In Citrix Studio, we will create a Machine Catalog and Delivery group. Before that, it is necessary to install and configure Windows Server.
Windows Server with Domain Controller
How to download and install Windows Server 2016?
How to install Windows Server components?
How to configure Active Directory, DHCP, and DNS?
Windows Server 2016
Since the virtual machine (VM) with Windows Server does not need GPUs, we will use a server without a GPU as the hypervisor. Following the description above, we will install another XenServer to host the system virtual machines.
After that, we will create a virtual machine for Windows Server with Active Directory.
We will download Windows Server 2016 from the website. It is better to follow the link using Internet Explorer.
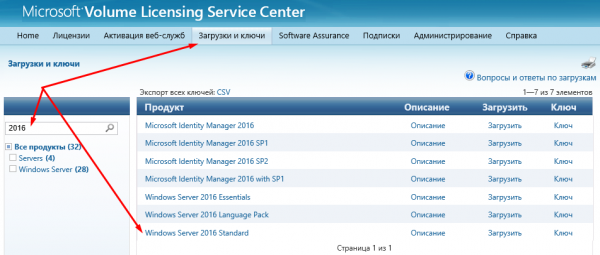
Using XenCenter, we will create a virtual machine. In the 'VM' tab, click 'New VM'.
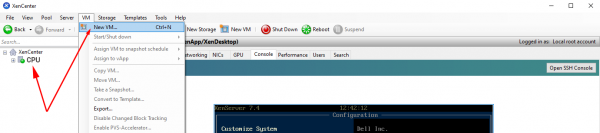
We select the necessary parameters:
VM template — Windows Server 2016 (64-bit)
Name — ws-ad.domain.ru
Install from ISO library — WindowsServer2016.iso, select from the mounted NFS ISO storage.
Number of vCPUs — 4
Topology — 1 socket with 4 cores per socket
Memory — 20 Gb
GPU type — none
Use this virtual disk — 100 Gb
Network
After creation, the virtual machine will appear in the vertical list on the left. We will click on it and go to the 'Console' tab. We will wait for the Windows Server installer to load and follow the necessary steps to install the OS.
We will install XenTools in the VM. Right-click on the VM, then 'Install Citrix VM Tools…'. After this, an image will be mounted that needs to be started and installed for XenTools. After the installation is completed, the VM will require a reboot.
We will configure the network adapter:
IP address — 192.168.1.110
Subnet mask — 255.255.255.0
Gateway — 192.168.1.1
DNS1 — 8.8.8.8
DNS2 — 8.8.4.4
If Windows Server is not activated, we will proceed with the activation. The key can be obtained from where you downloaded the image.
[PowerShell]$ slmgr -ipk xxxxx-xxxxx-xxxxx-xxxxx-xxxxxWe will configure the computer name. In my case, it is ws-ad.
Installing components
In Server Manager, we will select 'Add roles and features'. We will check to install DHCP server, DNS server, and Active Directory Domain Services. We will check the box 'Restart automatically'.
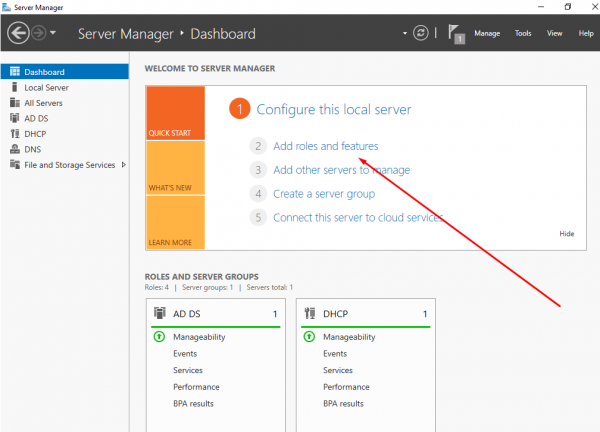
Configuring Active Directory
After the VM reboots, we click 'Promote this server to a domain controller' and add a new forest domain.ru.
Configuring DHCP Server
In the top panel of Server Manager, we click on the exclamation mark to save the changes during the DHCP server installation.
We will proceed to the DHCP server settings.
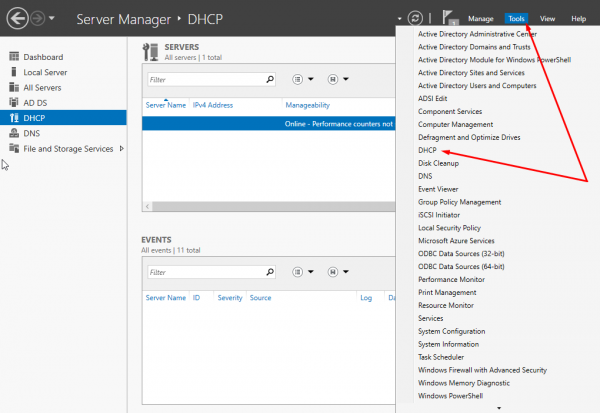
We will create a new scope 192.168.1.120-130. Leave the rest unchanged. We will choose 'Configure DHCP options now' and enter the IP address ws-ad (192.168.1.110) as the gateway and DNS that will be specified in the network adapter settings of the virtual machines from the directory.
Configuring DNS Server
We will proceed to the DNS server settings.
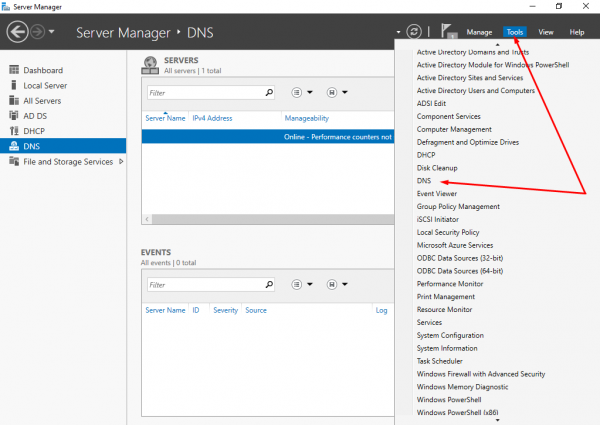
We will create a new forward lookup zone — primary zone, for all DNS servers in the domain domain.ru. We will not change anything else.
We will create a new reverse lookup zone, selecting similar parameters.
In the DNS server properties, under the 'Advanced' tab, we will check the box 'Disable recursion'.
Creating a test user
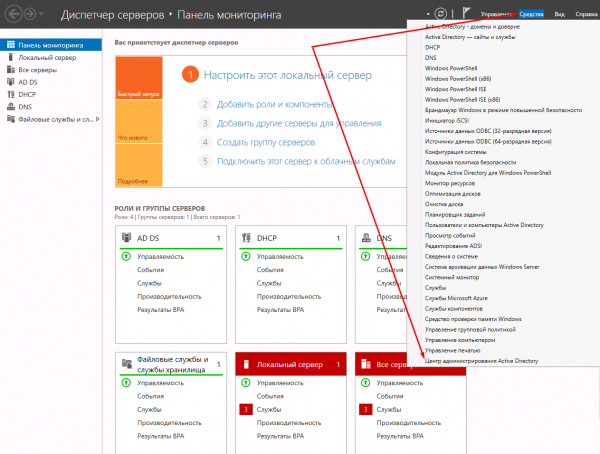
We will go to the 'Active Directory Admin Center'.
In the 'Users' section on the right, we will click 'Create'. We will enter a name, for example test, and click 'OK' at the bottom.
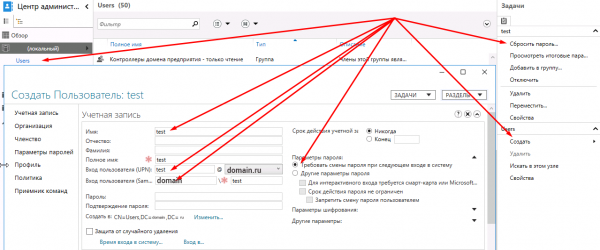
Select the created user and in the vertical menu on the right, choose 'Reset Password'. Leave the checkbox 'Require password change on next login' selected.
Windows Server with Citrix Delivery Controller
How to download and install Windows Server 2016?
How to download and install Citrix Delivery Controller?
How to install and configure Citrix License Manager?
How to install and configure NVIDIA License Manager?
Windows Server 2016
Since the virtual machine (VM) with Windows Server does not require a GPU, we will use a server without a GPU as the hypervisor.
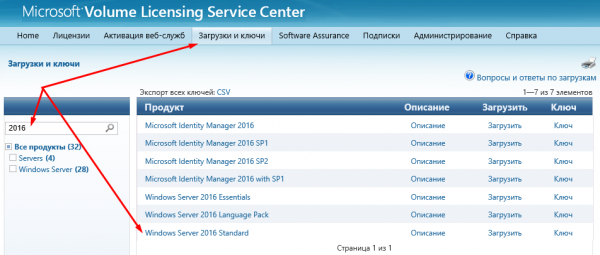
We will download Windows Server 2016 from the website. It is better to follow the link using Internet Explorer.
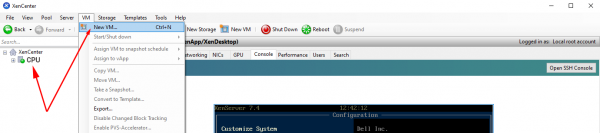
Using XenCenter, we will create a virtual machine. In the 'VM' tab, click 'New VM'.
We select the necessary parameters:
VM template — Windows Server 2016 (64-bit)
Name — ws-dc
Install from ISO library — WindowsServer2016.iso, select from the mounted NFS ISO storage.
Number of vCPUs — 4
Topology — 1 socket with 4 cores per socket
Memory — 20 Gb
GPU type — none
Use this virtual disk — 100 Gb
Network
After creation, the virtual machine will appear in the vertical list on the left. We will click on it and go to the 'Console' tab. We will wait for the Windows Server installer to load and perform the necessary steps to install the OS.
We will install XenTools in the VM. Right-click on the VM, then 'Install Citrix VM Tools…'. After this, an image will be mounted that needs to be started and installed for XenTools. After the installation is completed, the VM will require a reboot.
We will configure the network adapter:
IP address — 192.168.1.111
Subnet mask — 255.255.255.0
Gateway — 192.168.1.1
DNS1 — 8.8.8.8
DNS2 — 8.8.4.4
If Windows Server is not activated, we will proceed with the activation. The key can be obtained from where you downloaded the image.
[PowerShell]$ slmgr -ipk xxxxx-xxxxx-xxxxx-xxxxx-xxxxxLet's configure the computer name. In my case, it's ws-dc.
We will add the VM to the domain domen.ru, restart, and log in with the domain administrator account DOMENAdministrator.
Citrix delivery controller
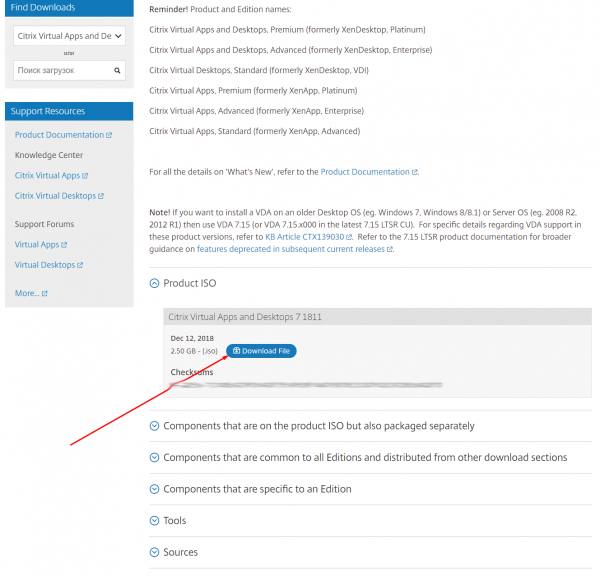
Let's download Citrix Virtual Apps and Desktops 1811 to ws-dc.domain.ru. Download link is available after logging into the site .
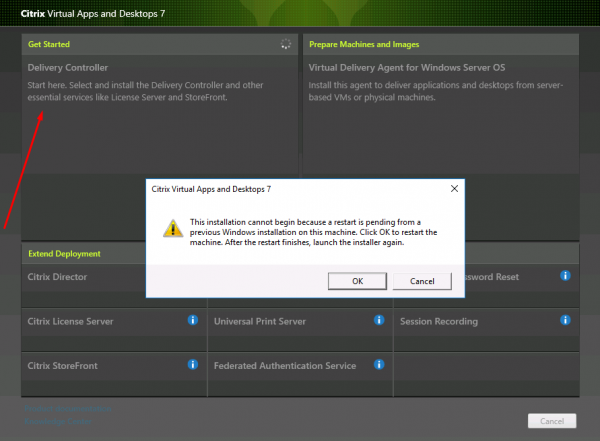
We will mount the downloaded ISO and launch it. Choose 'Citrix Virtual Apps and Desktops 7'. Then click 'Get started'. A reboot might be required.
In my case, it is sufficient to select the following components for installation:
Delivery Controller
Studio
License Server
StoreFront
We do not change anything else and click 'Install'. A reboot will likely be required multiple times, after which the installation will continue.
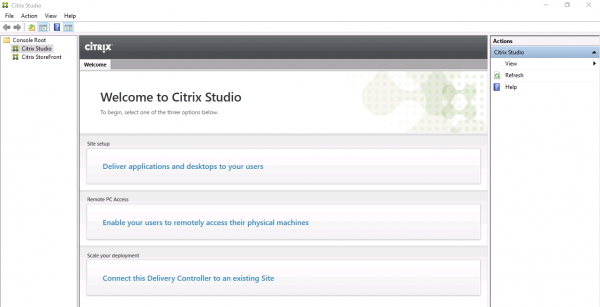
Once the installation is complete, Citrix Studio will launch — the management environment for all Citrix resources.
Configuring Citrix Site
We will select the first section of three — Site setup. During setup, we will specify the Site Name — domain.
In the 'Connection' section, we will provide data for connecting the hypervisor with GPU:
Connection address —
User name — root
Password — yourpassword
Connection Name — m60
Store management — Use storage local to the hypervisor.
Name for these resources — m60.
Select networks.
Select a GPU type and group — GRID M60-4Q.
Configuring Citrix Machine Catalogs
During the setup of the second section — Machine Catalogs, we will select Single-session OS (Desktop OS).
Master Image — we will choose the prepared image of the virtual machine and version Citrix Virtual Apps and Desktops — 1811.
We will specify the number of virtual machines in the catalog, for example, 4.
We will define a scheme by which the virtual machines will be assigned names, in my case it is desktop##. In this case, 4 VMs will be created with names desktop01-04.
Machine Catalog name — m60.
Machine Catalog description — m60.
After creating the Machine Catalog with four VMs, they can be found in the vertical list of XenCenter on the left.
Citrix Delivery Group
The third section begins with selecting the number of VMs to which access should be granted. I will specify all four.
In the 'Desktops' section, we will click 'Add' to create a VM group to which we will provide access. Display name — m60.
Delivery group name — m60.
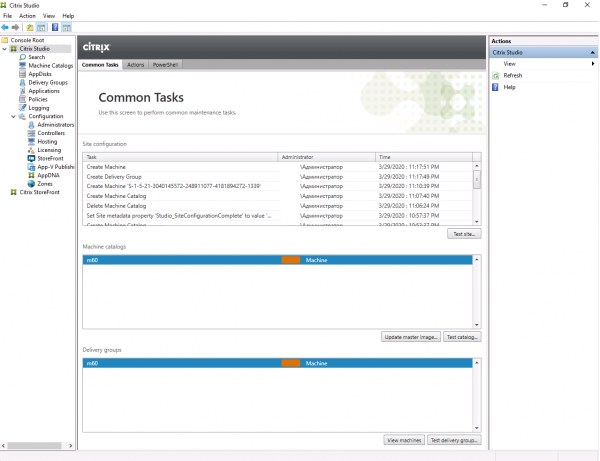
After configuring the three main sections, the main window of Citrix Studio will look something like this.
Citrix license manager
We will download the license file through the personal account on the website. .
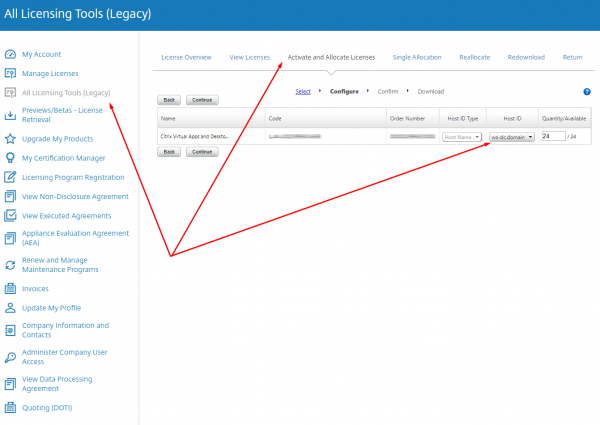
In the vertical list on the left, we will select All Licensing Tools (Legacy). We will go to the 'Activate and Allocate Licenses' tab. We will select Citrix VDA licenses and click 'Continue'. We will specify the name of our Delivery Controller — ws-dc.domain.ru and the number of licenses — 4. Click 'Continue'. We will download the generated license file to ws-dc.domain.ru.
In the left vertical list of Citrix Studio, we will select the 'Licensing' section. In the right vertical list, we will click 'License Management Console'. In the opened browser window, we will enter the domain user credentials DOMENAdministrator.
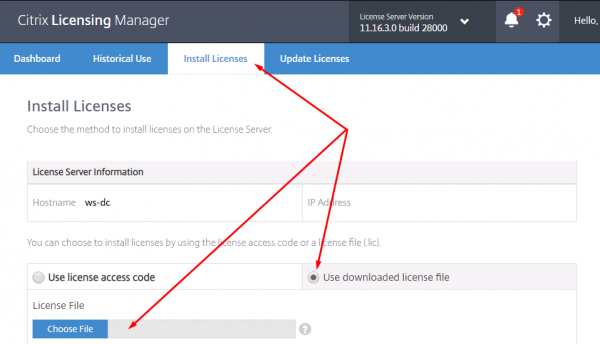
In Citrix Licensing Manager, we will go to the 'Install License' tab. To add the license file, we need to select 'Use downloaded license file'.
Installing Citrix components involves using several virtual machines, one component per VM. In my case, all Citrix system services function within one VM. Accordingly, I will note one bug that was particularly difficult for me to fix.
If there are various issues after rebooting ws-dc, I recommend first checking the running services. Below is a list of Citrix services that should automatically start after rebooting the VM:
SQL Server (SQLEXPRESS)
Citrix Configuration Service
Citrix Delegated Administration Service
Citrix Analytics
Citrix Broker Service
Citrix Configuration Logging Service
Citrix AD Identity Service
Citrix Host Service
Citrix App Library
Citrix Machine Creation Service
Citrix Monitor Service
Citrix Storefront Service
Citrix Trust Service
Citrix Environment Test Service
Citrix Orchestration Service
FlexNet License Server -nvidia
I encountered a problem that arises when installing various Citrix services on one VM. After rebooting, not all services start. It was tedious to start the entire chain individually. The solution was difficult to find via Google, so I am providing it here — it is necessary to change two parameters in the registry:
HKEY_LOCAL_MACHINE\SYSTEM\CurrentControlSet\Control
Name: ServicesPipeTimeout
Value: 240000

Name: WaitToKillServiceTimeout
Value: 20000
Nvidia license manager
We will download the NVIDIA license manager for Windows through the personal account on the website. . It's better to access it through Internet Explorer.
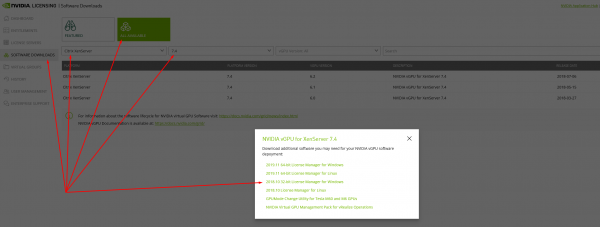
We will install it on ws-dc. First, we will need to install and add the JAVA_HOME environment variable. After that, we can run setup.exe to install the NVIDIA License Manager.
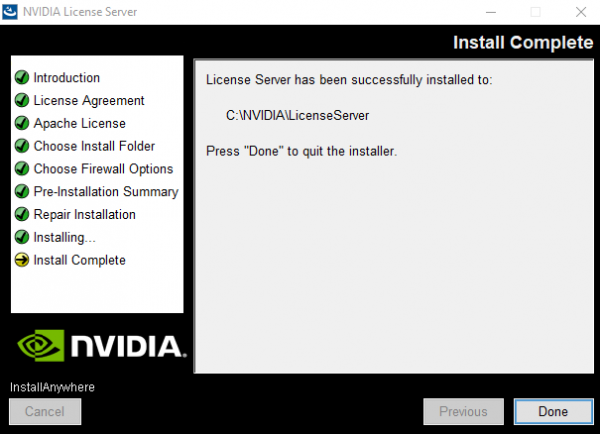
We will create a server, generate and download the license file in the personal account on the website . We will transfer the license file to ws-dc.

Using a browser, we will log in to the web interface of the NVIDIA License Manager, available at :8080/licserver and add the license file.

Active sessions using vGPU can be viewed in the 'Licensed Clients' section.
Remote access to the Citrix machine catalog
How to install Citrix Receiver?
How to connect to a virtual desktop?
On the workstation, we will open the browser, in my case it’s Chrome, and navigate to the Citrix StoreWeb web interface
http://192.168.1.111/Citrix/StoreWebIf Citrix Receiver is not yet installed, we will click 'Detect Receiver'
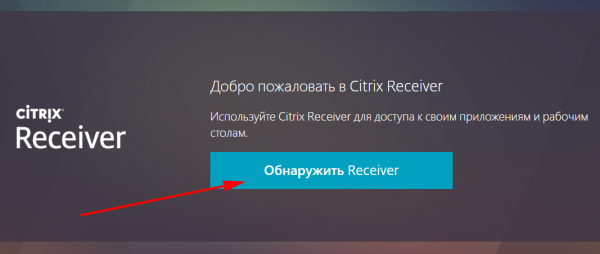
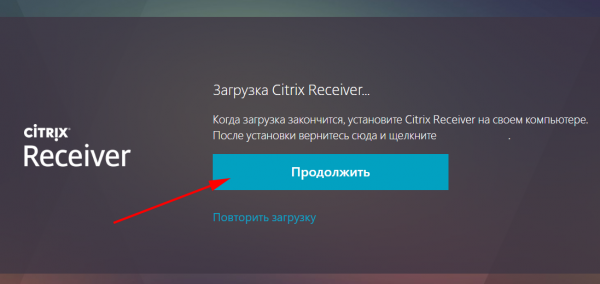
We will carefully read the license agreement, download, and install Citrix Receiver
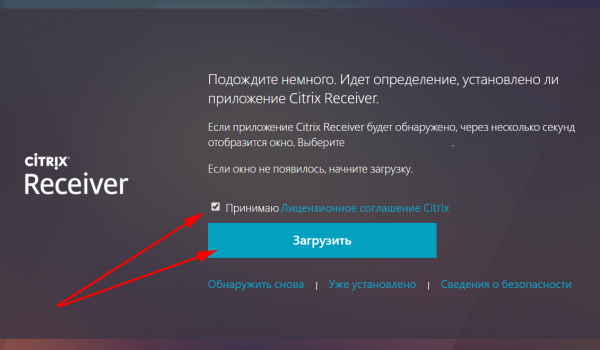
After the installation, we will return to the browser and click 'Continue'
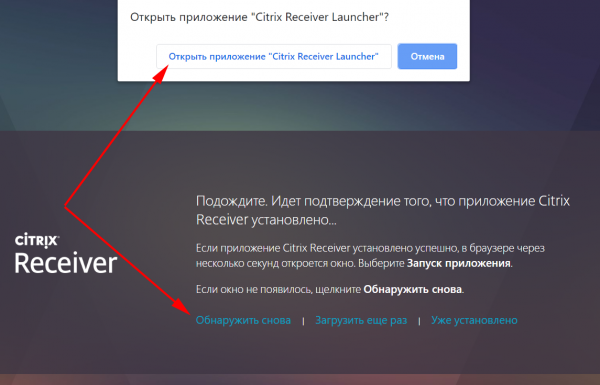
Next, in Chrome a notification will appear, click 'Open Citrix Receiver Launcher', then 'Detect Again' or 'Already Installed'
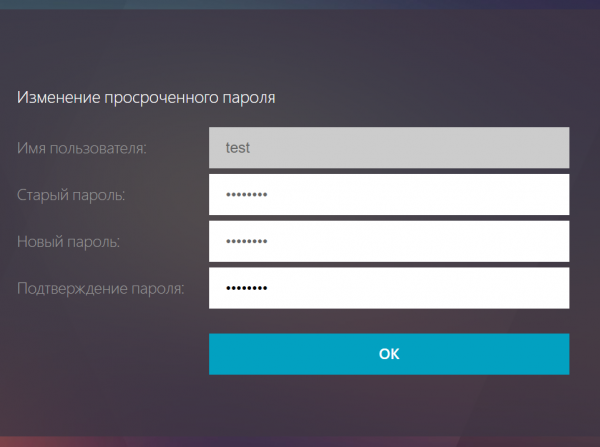
During the first connection, we will use the test user's credentials. We will change the temporary password to a permanent one.
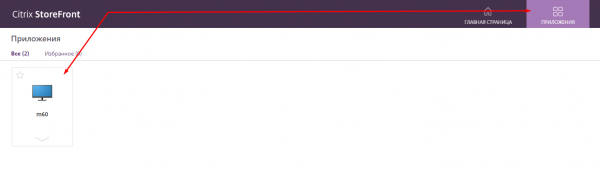
After authorization, we will go to the 'Applications' tab and select the 'M60' catalog
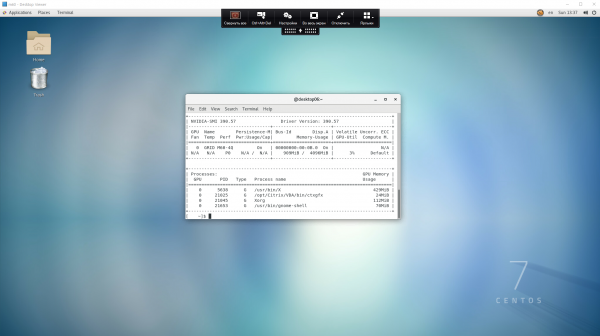
We will download the proposed file with the .ica extension. After double-clicking it, a window in Desktop Viewer will open with the CentOS 7 desktop
Source: habr.com
