

Hello everyone in this blog, and welcome to the fourth post in the Quarkus series!

covered how Quarkus brings together MicroProfile and Spring. Let's remember that it is positioned as "super-fast subatomic Java," also known as "Kubernetes-oriented Java stack tailored for GraalVM and OpenJDK HotSpot, built from the best libraries and standards." Today, we will show how to modernize existing Java applications using Quarkus capabilities, exemplified by , which utilizes technologies supported by Quarkus, namely CDI and Servlet 3.
It is important to note that both Quarkus and JBoss EAP focus on using tools that are predominantly built on standards. Don't have an application running on JBoss EAP? No problem, it's easy to migrate from the current application server to JBoss EAP using . After which, the final and operational version of the modernized code will be available in the repository , in the module .
While writing this post, the , primarily and Building a .
Acquiring the Code
First, we will create a local clone of the repository :
$ git clone https://github.com/jboss-developer/jboss-eap-quickstarts.git
Cloning into 'jboss-eap-quickstarts'...
remote: Enumerating objects: 148133, done.
remote: Total 148133 (delta 0), reused 0 (delta 0), pack-reused 148133
Receiving objects: 100% (148133/148133), 59.90 MiB | 7.62 MiB/s, done.
Resolving deltas: 100% (66476/66476), done.
$ cd jboss-eap-quickstarts/helloworld/
Let's see how the original helloworld works
The essence of this application is clear from its name, but we will modernize its code in a strictly scientific manner. Therefore, let's first look at this application in its original form.
Running helloworld
1. Open a terminal and navigate to the root folder of JBoss EAP (you can download it ), that is, to the EAP_HOME folder.
2. Start the JBoss EAP server with the default profile:
$ EAP_HOME/bin/standalone.sh
Note: on Windows, use the script EAP_HOME\bin\standalone.bat to start.
Within a few seconds, the log should show something like:
[org.jboss.as] (Controller Boot Thread) WFLYSRV0025: JBoss EAP 7.2.0.GA (WildFly Core 6.0.11.Final-redhat-00001) started in 3315ms - Started 306 of 527 services (321 services are lazy, passive or on-demand)
3. Open a browser at :8080 and see this:
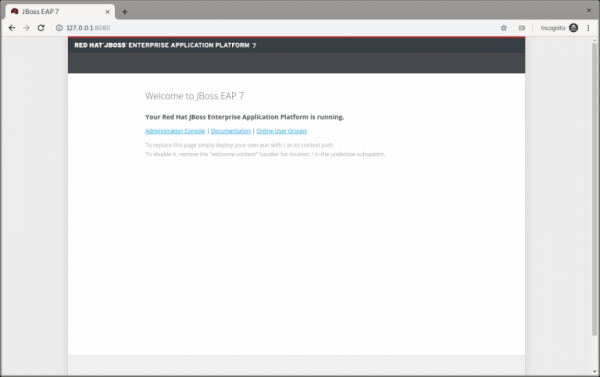
Fig. 1. JBoss EAP homepage.
4. Follow the instructions in the guide : we deploy helloworld and execute the following command (from the root folder of the project):
$ mvn clean install wildfly:deploy
After successfully executing this command, we will see approximately the following in the log:
[INFO] ------------------------------------------------------------------------
[INFO] BUILD SUCCESS
[INFO] ------------------------------------------------------------------------
[INFO] Total time: 8.224 s
Thus, the first deployment of the helloworld application on JBoss EAP took just over 8 seconds.
Testing helloworld
Following the guide strictly , open in the browser :8080/helloworld and we see the following:
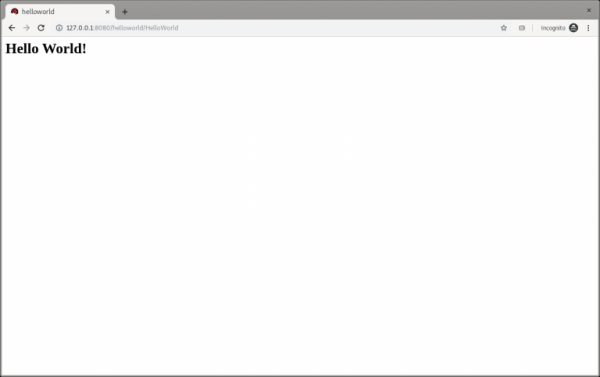
Fig. 2. Original Hello World from JBoss EAP.
Making changes
We change the input parameter createHelloMessage(String name) from World to Marco:
writer.println("<h1>" + helloService.createHelloMessage("Marco") + "</h1>");
We execute the following command again:
$ mvn clean install wildfly:deploy
Then we refresh the page in the browser and see that the text has changed:
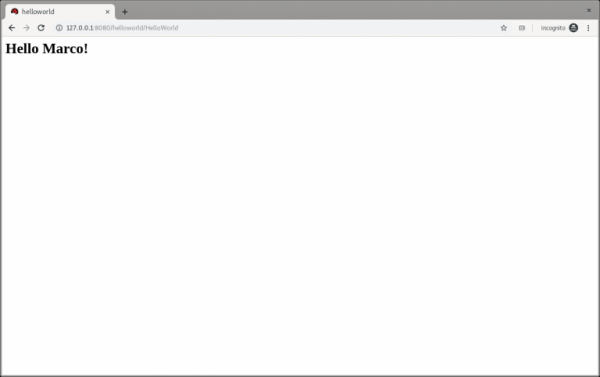
Fig. 3. Hello Marco in JBoss EAP.
Rolling back the helloworld deployment and shutting down JBoss EAP
This is optional, but if you want to rollback the deployment, you can do so with the following command:
$ mvn clean install wildfly:undeploy
To shut down the JBoss EAP instance, simply press Ctrl+C in the terminal window.
Upgrading helloworld
Now let's focus on upgrading the original helloworld application.
Creating a new branch
We create a new working branch after the quickstart project has finished:
$ git checkout -b quarkus 7.2.0.GA
Modifying the pom.xml file
We will start modifying the application from the pom.xml file. To allow Quarkus to insert XML blocks into it, we will execute the following command in the helloworld folder:
$ mvn io.quarkus:quarkus-maven-plugin:0.23.2:create
The version 0.23.2 was used while writing this article. Quarkus frequently releases new versions; you can find the latest version on the site .
The command above will insert the following elements into pom.xml:
- The property , specifying the version of Quarkus being used.
- The block to import Quarkus BOM (bill of materials), so that you don't have to add the version for each Quarkus dependency.
- The quarkus-maven-plugin that is responsible for packaging the application and providing development mode.
- A native profile for creating executable application files.
Additionally, we manually make the following changes in pom.xml:
- We extract the tag from the block and place it above the tag. Since we will remove the block in the next step, we need to keep .
- We are removing the block because this application will no longer need a parent pom from JBoss when working with Quarkus.
- We are adding the tag and placing it under the tag. You can specify whatever version number you want.
- We are removing the tag because this application is no longer a WAR, but a regular JAR.
- We are modifying the following dependencies:
- We are changing the dependency javax.enterprise:cdi-api to io.quarkus:quarkus-arc, removing provided since (according to the documentation) this Quarkus extension provides CDI dependency injection.
- We are changing the dependency org.jboss.spec.javax.servlet:jboss-servlet-api_4.0_spec to io.quarkus:quarkus-undertow, removing provided since (according to the documentation) this Quarkus extension supports servlets.
- We are removing the dependency org.jboss.spec.javax.annotation:jboss-annotations-api_1.3_spec because it comes packaged with the dependencies we just modified.
The version of the pom.xml file with all the changes is located at .
Note that the above command mvn io.quarkus:quarkus-maven-plugin:0.23.2:create not only changes the pom.xml file but also adds a number of components to the project, specifically the following files and folders:
- The mvnw and mvnw.cmd files and the .mvn folder: the Maven Wrapper allows you to run Maven projects with a specified version of Maven without installing that version.
- The docker folder (in the src/main/ directory): it contains example Dockerfile files for native and jvm modes (along with a .dockerignore file).
- The resources folder (in the src/main/ directory): it contains an empty application.properties file and a sample Quarkus index.html startup page (see more in Run the modernized helloworld).
Let's run helloworld
To test the application, we use quarkus:dev, which starts Quarkus in development mode (see this section in the guide for more). ).
Note: This step will result in an error, as we have not made all the necessary changes yet.
Now let's run the command to see how it will work:
$ ./mvnw compile quarkus:dev
[INFO] Scanning for projects...
[INFO]
[INFO] --------------------------------
[INFO] Building Quickstart: helloworld quarkus
[INFO] --------------------------------[ war ]---------------------------------
[INFO]
[INFO] --- maven-resources-plugin:2.6:resources (default-resources) @ helloworld ---
[INFO] Using 'UTF-8' encoding to copy filtered resources.
[INFO] Copying 2 resources
[INFO]
[INFO] --- maven-compiler-plugin:3.1:compile (default-compile) @ helloworld ---
[INFO] Nothing to compile - all classes are up to date
[INFO]
[INFO] --- quarkus-maven-plugin:0.23.2:dev (default-cli) @ helloworld ---
Listening for transport dt_socket at address: 5005
INFO  [io.qua.dep.QuarkusAugmentor] Beginning quarkus augmentation
INFO  [org.jbo.threads] JBoss Threads version 3.0.0.Final
ERROR [io.qua.dev.DevModeMain] Failed to start quarkus: java.lang.RuntimeException: io.quarkus.builder.BuildException: Build failure: Build failed due to errors
	[error]: Build step io.quarkus.arc.deployment.ArcProcessor#validate threw an exception: javax.enterprise.inject.spi.DeploymentException: javax.enterprise.inject.UnsatisfiedResolutionException: Unsatisfied dependency for type org.jboss.as.quickstarts.helloworld.HelloService and qualifiers [@Default]
	- java member: org.jboss.as.quickstarts.helloworld.HelloWorldServlet#helloService
	- declared on CLASS bean [types=[javax.servlet.ServletConfig, java.io.Serializable, org.jboss.as.quickstarts.helloworld.HelloWorldServlet, javax.servlet.GenericServlet, javax.servlet.Servlet, java.lang.Object, javax.servlet.http.HttpServlet], qualifiers=[@Default, @Any], target=org.jboss.as.quickstarts.helloworld.HelloWorldServlet]
	at io.quarkus.arc.processor.BeanDeployment.processErrors(BeanDeployment.java:841)
	at io.quarkus.arc.processor.BeanDeployment.init(BeanDeployment.java:214)
	at io.quarkus.arc.processor.BeanProcessor.initialize(BeanProcessor.java:106)
	at io.quarkus.arc.deployment.ArcProcessor.validate(ArcProcessor.java:249)
	at sun.reflect.NativeMethodAccessorImpl.invoke0(Native Method)
	at sun.reflect.NativeMethodAccessorImpl.invoke(NativeMethodAccessorImpl.java:62)
	at sun.reflect.DelegatingMethodAccessorImpl.invoke(DelegatingMethodAccessorImpl.java:43)
	at java.lang.reflect.Method.invoke(Method.java:498)
	at io.quarkus.deployment.ExtensionLoader$1.execute(ExtensionLoader.java:780)
	at io.quarkus.builder.BuildContext.run(BuildContext.java:415)
	at org.jboss.threads.ContextClassLoaderSavingRunnable.run(ContextClassLoaderSavingRunnable.java:35)
	at org.jboss.threads.EnhancedQueueExecutor.safeRun(EnhancedQueueExecutor.java:2011)
	at org.jboss.threads.EnhancedQueueExecutor$ThreadBody.doRunTask(EnhancedQueueExecutor.java:1535)
	at org.jboss.threads.EnhancedQueueExecutor$ThreadBody.run(EnhancedQueueExecutor.java:1426)
	at java.lang.Thread.run(Thread.java:748)
	at org.jboss.threads.JBossThread.run(JBossThread.java:479)
Caused by: javax.enterprise.inject.UnsatisfiedResolutionException: Unsatisfied dependency for type org.jboss.as.quickstarts.helloworld.HelloService and qualifiers [@Default]
	- java member: org.jboss.as.quickstarts.helloworld.HelloWorldServlet#helloService
	- declared on CLASS bean [types=[javax.servlet.ServletConfig, java.io.Serializable, org.jboss.as.quickstarts.helloworld.HelloWorldServlet, javax.servlet.GenericServlet, javax.servlet.Servlet, java.lang.Object, javax.servlet.http.HttpServlet], qualifiers=[@Default, @Any], target=org.jboss.as.quickstarts.helloworld.HelloWorldServlet]
	at io.quarkus.arc.processor.Beans.resolveInjectionPoint(Beans.java:428)
	at io.quarkus.arc.processor.BeanInfo.init(BeanInfo.java:371)
	at io.quarkus.arc.processor.BeanDeployment.init(BeanDeployment.java:206)
	... 14 more
So, it doesn’t work… Why?
The UnsatisfiedResolutionException indicates the HelloService class, which is a member of the HelloWorldServlet class (java member: org.jboss.as.quickstarts.helloworld.HelloWorldServlet#helloService). The issue is that HelloWorldServlet requires an injected instance of HelloService, but it cannot be found (even though both classes are in the same package).
It's time to return to and read about how this works in Quarkus , and therefore, also (CDI). Therefore, let's open the Contexts and Dependency Injection guide and read in the section that "A bean class without a defining bean annotation is not discovered."
Looking at the HelloService class, it indeed lacks such an annotation. Therefore, it needs to be added so that Quarkus can search for and find the bean. Since this is a stateless object, we can easily add the @ApplicationScoped annotation as follows:
@ApplicationScoped
public class HelloService {
Note: here the development environment may prompt you to add the required package (see the line below), and you will need to do this manually like this:
import javax.enterprise.context.ApplicationScoped;
If you are unsure which scope to use when the original bean's scope is not specified at all, study the documentation .
Now let's try to run the application again with the command .\/mvnw compile quarkus:dev:
$ .\/mvnw compile quarkus:dev
[INFO] Scanning for projects...
[INFO]
[INFO] --------------------------------
[INFO] Building Quickstart: helloworld quarkus
[INFO] --------------------------------[ war ]---------------------------------
[INFO]
[INFO] --- maven-resources-plugin:2.6:resources (default-resources) @ helloworld ---
[INFO] Using 'UTF-8' encoding to copy filtered resources.
[INFO] Copying 2 resources
[INFO]
[INFO] --- maven-compiler-plugin:3.1:compile (default-compile) @ helloworld ---
[INFO] Changes detected - recompiling the module!
[INFO] Compiling 2 source files to \/home\/mrizzi\/git\/forked\/jboss-eap-quickstarts\/helloworld\/target\/classes
[INFO]
[INFO] --- quarkus-maven-plugin:0.23.2:dev (default-cli) @ helloworld ---
Listening for transport dt_socket at address: 5005
INFO  [io.qua.dep.QuarkusAugmentor] (main) Beginning quarkus augmentation
INFO  [io.qua.dep.QuarkusAugmentor] (main) Quarkus augmentation completed in 576ms
INFO  [io.quarkus] (main) Quarkus 0.23.2 started in 1.083s. Listening on: http:\/\/0.0.0.0:8080
INFO  [io.quarkus] (main) Profile dev activated. Live Coding activated.
INFO  [io.quarkus] (main) Installed features: [cdi]
Now everything runs without errors.
Let's run the upgraded helloworld
As noted in the log, open in your browser :8080 (the default Quarkus start page) and we see the following:
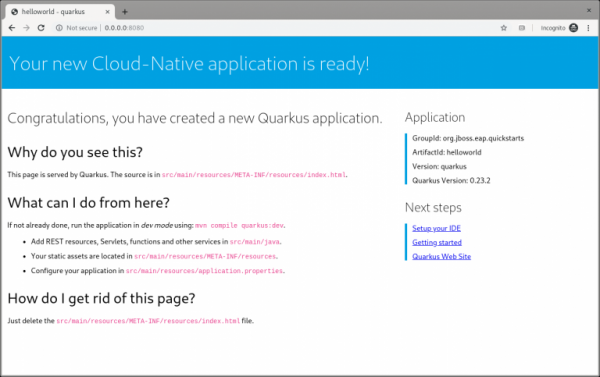
Fig. 4. The Quarkus dev start page.
In the WebServlet annotation of this application, the following context definition is specified:
@WebServlet("\/HelloWorld")
public class HelloWorldServlet extends HttpServlet {
So, we go to the browser at :8080/HelloWorld and see the following:
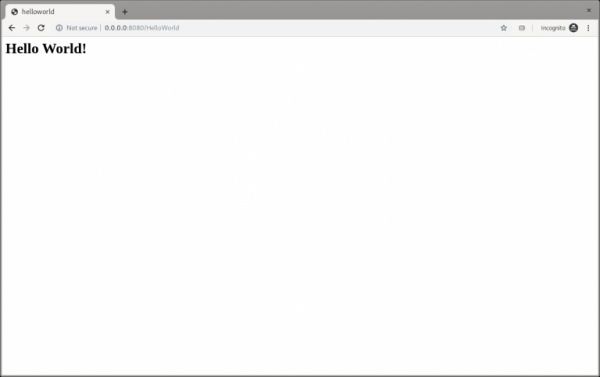
Fig. 5: The Quarkus dev page for the Hello World application.
Well, it all works.
Now, let's make changes to the code. Note that the command ./mvnw compile quarkus:dev is still running, and we don't intend to stop it. Now, let's try to apply the same trivial changes to the code itself and see how Quarkus makes developers' lives easier:
writer.println("<h1>" + helloService.createHelloMessage("Marco") + "</h1>");
We save the file and then refresh the web page to see the message Hello Marco, as shown in the screenshot below:
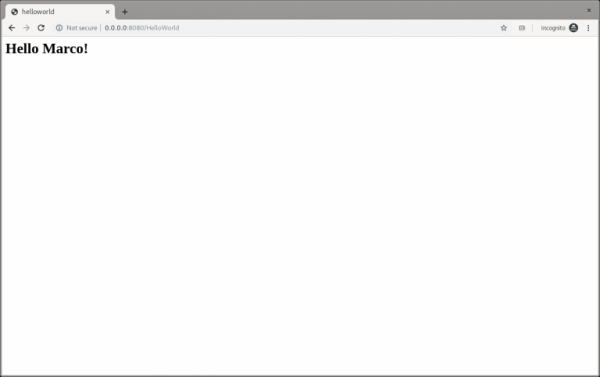
Fig. 6: The Hello Marco page in Quarkus dev.
Now let's check the output in the terminal:
INFO  [io.qua.dev] (vert.x-worker-thread-3) Changed source files detected, recompiling [/home/mrizzi/git/forked/jboss-eap-quickstarts/helloworld/src/main/java/org/jboss/as/quickstarts/helloworld/HelloWorldServlet.java]
INFO  [io.quarkus] (vert.x-worker-thread-3) Quarkus stopped in 0.003s
INFO  [io.qua.dep.QuarkusAugmentor] (vert.x-worker-thread-3) Beginning quarkus augmentation
INFO  [io.qua.dep.QuarkusAugmentor] (vert.x-worker-thread-3) Quarkus augmentation completed in 232ms
INFO  [io.quarkus] (vert.x-worker-thread-3) Quarkus 0.23.2 started in 0.257s. Listening on: http://0.0.0.0:8080
INFO  [io.quarkus] (vert.x-worker-thread-3) Profile dev activated. Live Coding activated.
INFO  [io.quarkus] (vert.x-worker-thread-3) Installed features: [cdi]
INFO  [io.qua.dev] (vert.x-worker-thread-3) Hot replace total time: 0.371s
Refreshing the page triggered the detection of changes in the source code, and Quarkus automatically performed a 'stop-start' procedure. All this was completed in just 0.371 seconds (here it is, the so-called 'super-fast subatomic Java').
Building helloworld into a JAR package
Now that the code works as expected, let's package it with the following command:
$ ./mvnw clean package
This command creates two JAR files in the /target folder: the file helloworld-.jar, which is the standard artifact compiled by the Maven command along with the project classes and resources. And the file helloworld-runner.jar, which is the executable JAR.
Note that this is not an uber-jar, as all dependencies are simply copied to the /target/lib folder (rather than packed into the JAR file). Therefore, to run this JAR from another folder or on another host, you need to copy both the JAR file itself and the /lib folder, considering that the Class-Path entry in the MANIFEST.MF file inside the JAR contains an explicit listing of the JARs from the lib folder.
To learn how to create uber-jar applications, refer to the guide .
Running helloworld packaged in a JAR
Now we can run our JAR using the standard java command:
$ java -jar ./target/helloworld--runner.jar
INFO  [io.quarkus] (main) Quarkus 0.23.2 started in 0.673s. Listening on: http://0.0.0.0:8080
INFO  [io.quarkus] (main) Profile prod activated.
INFO  [io.quarkus] (main) Installed features: [cdi]
After completing all this, open your browser at :8080 and check that everything is working as expected.
Building helloworld into a native executable
So, our helloworld is running as a standalone Java application using Quarkus dependencies. But we can take it further and turn it into a native executable.
Installing GraalVM
First, you need to install the required tools:
1. Download GraalVM 19.2.0.1 from .
2. Extract the downloaded archive:
$ tar xvzf graalvm-ce-linux-amd64-19.2.0.1.tar.gz
3. Navigate to the untar folder.
4. Run the command below to download and add the native image:
$ ./bin/gu install native-image
5. Set the folder created in step 2 as the GRAALVM_HOME environment variable:
$ export GRAALVM_HOME={untar-folder}/graalvm-ce-19.2.0.1
Additional information and installation instructions for other operating systems can be found in the guide .
Building helloworld into a native executable
Read the guide : "Now let's create a native executable for our application to reduce its startup time and disk size. The executable will include everything necessary to run the application, including a JVM (more specifically, a trimmed-down version containing only what is needed to execute the application) and our application itself."
To create a native executable, you need to enable the native profile in Maven:
$ ./mvnw package -Pnative
Our build took one minute and 10 seconds, and the final file helloworld-runner was created in the /target folder.
Running the native executable helloworld
In the previous step, we obtained the executable /target/helloworld-runner. Now let's run it:
$ ./target/helloworld--runner
INFO  [io.quarkus] (main) Quarkus 0.23.2 started in 0.006s. Listening on: http://0.0.0.0:8080
INFO  [io.quarkus] (main) Profile prod activated.
INFO  [io.quarkus] (main) Installed features: [cdi]
Again, open in the browser :8080 and check that everything is working as expected.
To be continued!
We believe that the method of modernizing Java applications using Quarkus capabilities discussed in this post (even through a simple example) should be actively implemented in real life. However, you will likely encounter a number of issues, the solutions to which we will partially address in the next post, where we will discuss how to measure memory consumption to assess performance improvements, an important aspect of the entire application modernization process.
Source: habr.com
