


Issues
Just recently, many were unaware of what it was like to work from home. The pandemic drastically changed the situation worldwide, as everyone began to adapt to the circumstances, particularly to the fact that leaving home became unsafe. Many had to quickly organize remote work for their employees.
However, a lack of a thoughtful approach in choosing remote work solutions can lead to irreversible losses. User passwords may be stolen, allowing an attacker to connect unchecked to the network and IT resources of the enterprise.
This is why there is now an increased demand for creating reliable corporate VPN networks. I will tell you about a reliable, secure and simple to use VPN network.
It operates on the IPsec/L2TP scheme, using non-extractable keys and certificates stored on tokens for client authentication and transmits data over the network in encrypted form.
The demonstration setups for the configuration used a server with CentOS 7 (address: centos.vpn.server.ad) and clients with Ubuntu 20.04 and Windows 10.
System Description
The VPN will work using the IPSec + L2TP + PPP scheme. The protocol Point-to-Point Protocol (PPP) operates at the data link layer of the OSI model and provides user authentication and encryption of transmitted data. Its data is encapsulated in L2TP protocol data, which actually provides the connection within the VPN network but does not offer authentication and encryption.
L2TP data is encapsulated within the IPSec protocol, which also provides authentication and encryption, but unlike PPP, authentication and encryption occur at the device level rather than the user level.
This feature allows user authentication only from specific devices. We will use the IPSec protocol as given and allow user authentication from any device.
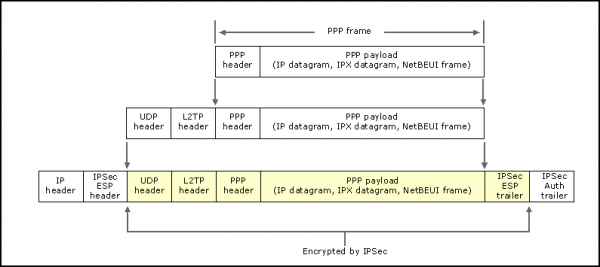
User authentication using smart cards will occur at the PPP protocol level via the EAP-TLS protocol.
More detailed information about how this scheme works can be found in .
Why this scheme meets all three requirements of a good VPN network
- The reliability of this scheme has stood the test of time. It has been used for deploying VPN networks since 2000.
- User authentication is secured by the PPP protocol. does not provide a sufficient level of security, as authentication typically uses a login and password at best. We all know that login-password combinations can be observed, guessed, or stolen. However, the developer downward API support (simultaneously with this in this protocol addressed this issue and added the ability to use authentication protocols based on asymmetric encryption, such as EAP-TLS. Additionally, he included support for smart cards for authentication, making the system more secure.
Currently, active negotiations are underway for the merger of these two projects, and it is certain that it will happen sooner or later. For example, a patched version of PPP that uses secure protocols for authentication has long been available in the Fedora repositories. - Just recently, this network could only be used by Windows users, but our colleagues from Moscow State University, Vasily Shokov and Alexander Smirnov, found and enhanced it. Through collaborative efforts, we fixed numerous bugs and shortcomings of the client, simplified installation and system configuration, even when building from source. The most significant of these include:
- Compatibility issues of the old client with the interface of new versions of openssl and qt have been resolved.
- The transmission of the pppd token PIN code through a temporary file has been removed.
- The incorrect launch of the password request program through the graphical interface has been fixed by setting the correct environment for the xl2tpd service.
- The building of the L2tpIpsecVpn daemon is now done alongside the building of the client itself, simplifying the process of assembly and configuration.
- For easier development, the Azure Pipelines system has been integrated for testing the correctness of the build.
- The ability to forcibly lower In the context of OpenSSL. This is useful for the proper support of new operating systems where the standard security level is set to 2, with VPN networks that use certificates not meeting the security requirements of this level. This option will be beneficial for working with existing legacy VPN networks.
The corrected version can be found in .
This client supports the use of smart cards for authentication and maximally hides all the complexities of configuring this scheme under Linux, making the client setup as simple and quick as possible.
Of course, for convenient communication between PPP and the GUI client, some additional adjustments were necessary for each of the projects, but nonetheless, they were minimized:
- Fixed
- Fixed . This error prevented loading from the local /etc/ppp/openssl.cnf file with configuration anything other than information about OpenSSL engines for working with smart cards, which created serious inconvenience if, for example, in addition to information about the engines we wanted to specify something else. For instance, to fix the security level when establishing a connection.
Now we can proceed with the configuration.
Server Configuration
Let's install all necessary packages.
Installing strongSwan (IPsec)
First, we will configure the firewall for IPsec
sudo firewall-cmd --permanent --add-port=1701/{tcp,udp}
sudo firewall-cmd --permanent --add-service=ipsec
sudo firewall-cmd --reload
Then we will proceed with the installation
sudo yum install epel-release ipsec-tools dnf
sudo dnf install strongswan
After installation, it is necessary to set up the configuration for strongSwan (one of the implementations of IPSec). For this purpose, we will edit the file /etc/strongswan/ipsec.conf :
config setup
    nat_traversal=yes
    virtual_private=%v4:10.0.0.0/8,%v4:192.168.0.0/16,%v4:172.16.0.0/12
    oe=off
    protostack=netkey

conn L2TP-PSK-NAT
    rightsubnet=vhost:%priv
    also=L2TP-PSK-noNAT

conn L2TP-PSK-noNAT
    authby=secret
    pfs=no
    auto=add
    keyingtries=3
    rekey=no
    ikelifetime=8h
    keylife=1h
    type=transport
    left=%any
    leftprotoport=udp/1701
    right=%any
    rightprotoport=udp/%any
    ike=aes128-sha1-modp1536,aes128-sha1-modp1024,aes128-md5-modp1536,aes128-md5-modp1024,3des-sha1-modp1536,3des-sha1-modp1024,3des-md5-modp1536,3des-md5-modp1024
    esp=aes128-sha1-modp1536,aes128-sha1-modp1024,aes128-md5-modp1536,aes128-md5-modp1024,3des-sha1-modp1536,3des-sha1-modp1024,3des-md5-modp1536,3des-md5-modp1024
We will also set a common password for login. This password must be known to all network participants for authentication. This method is inherently unreliable, as this password can easily become known to individuals we do not want to grant access to the network.
However, even this fact will not affect the security of the network organization, as the main encryption of data and user authentication is carried out by the PPP protocol. To be fair, it's worth noting that strongswan supports more secure authentication technologies, for example, using private keys. Additionally, strongswan provides the ability to authenticate using smart cards, but currently, it only supports a limited range of devices, making authentication with Rutoken tokens and smart cards challenging. Let's set the common password through a file. /etc/strongswan/ipsec.secrets:
# ipsec.secrets - strongSwan IPsec secrets file
%any %any : PSK "SECRET_PASSPHRASE"
Let's restart strongswan:
sudo systemctl enable strongswan
sudo systemctl restart strongswan
Installing xl2tp
sudo dnf install xl2tpdLet's configure it through a file. /etc/xl2tpd/xl2tpd.conf:
[global]
force userspace = yes
listen-addr = 0.0.0.0
ipsec saref = yes

[lns default]
exclusive = no
; defines the static server address in the virtual network
local ip = 100.10.10.1
; sets the range of virtual addresses
ip range = 100.10.10.1-100.10.10.254
assign ip = yes
refuse pap = yes
require authentication = yes
; this option can be disabled after successful network setup
ppp debug = yes
length bit = yes
pppoptfile = /etc/ppp/options.xl2tpd
; specifies the server address in the network
name = centos.vpn.server.ad
Let's restart the service:
sudo systemctl enable xl2tpd
sudo systemctl restart xl2tpd
PPP Configuration
It is advisable to install the latest version of pppd. To do this, we will execute the following sequence of commands:
sudo yum install git make gcc openssl-devel
git clone "https://github.com/jjkeijser/ppp"
cd ppp
./configure --prefix /usr
make -j4
sudo make install
Write the following in the file: /etc/ppp/options.xl2tpd next (if there are any existing values, they can be removed):
ipcp-accept-local
ipcp-accept-remote
ms-dns 8.8.8.8
ms-dns 1.1.1.1

noccp
auth
crtscts
idle 1800
mtu 1410
mru 1410
nodefaultroute
debug
lock
proxyarp
connect-delay 5000
Issue the root certificate and the server certificate:
#директория с сертификатами пользователей, УЦ и сервера
sudo mkdir /etc/ppp/certs
#директория с закрытыми ключами сервера и УЦ
sudo mkdir /etc/ppp/keys
#запрещаем любой доступ к этой дирректории кроме администатора
sudo chmod 0600 /etc/ppp/keys/

#генерируем ключ и выписываем сертификат УЦ
sudo openssl genrsa -out /etc/ppp/keys/ca.pem 2048
sudo openssl req -key /etc/ppp/keys/ca.pem -new -x509 -out /etc/ppp/certs/ca.pem -subj "/C=RU/CN=L2TP CA"

#генерируем ключ и выписываем сертификат сервера
sudo openssl genrsa -out /etc/ppp/keys/server.pem 2048
sudo openssl req -new -out server.req -key /etc/ppp/keys/server.pem -subj "/C=RU/CN=centos.vpn.server.ad"
sudo openssl x509 -req -in server.req -CAkey /etc/ppp/keys/ca.pem -CA /etc/ppp/certs/ca.pem -out /etc/ppp/certs/server.pem -CAcreateserial
Thus, we have completed the main configuration of the server. The rest of the server configuration is related to adding new clients.
Adding a New Client
To add a new client to the network, it is necessary to record their certificate in the trusted list for this client.
If a user wants to become a member of the VPN network, they create a key pair and a certificate request for this client. If the user is trusted, this request can be signed, and the resulting certificate can be saved in the certificate directory:
sudo openssl x509 -req -in client.req -CAkey /etc/ppp/keys/ca.pem -CA /etc/ppp/certs/ca.pem -out /etc/ppp/certs/client.pem -CAcreateserialLet's add a line to the file /etc/ppp/eaptls-server to match the client name and their certificate:
"client" * /etc/ppp/certs/client.pem /etc/ppp/certs/server.pem /etc/ppp/certs/ca.pem /etc/ppp/keys/server.pem *NOTE
To avoid confusion, it is better for the Common Name, the file name of the certificate, and the username to be unique.
It is also worth checking that the username we are adding does not appear anywhere in other authentication files; otherwise, there will be issues with the user's authentication method.
This same certificate must be sent back to the user.
Generating a key pair and certificate
For successful authentication, the client needs to:
- generate a key pair;
- have the root certificate of the CA;
- have a certificate for their key pair signed by the root CA.
for clients on Linux
First, let's generate a key pair on the token and create a certificate request:
#идентификатор ключа (параметр --id) можно заменить на любой другой.
pkcs11-tool --module /usr/lib/librtpkcs11ecp.so --keypairgen --key-type rsa:2048 -l --id 45

openssl
OpenSSL> engine dynamic -pre SO_PATH:/usr/lib/x86_64-linux-gnu/engines-1.1/pkcs11.so -pre ID:pkcs11 -pre LIST_ADD:1 -pre LOAD -pre MODULE_PATH:librtpkcs11ecp.so
...
OpenSSL> req -engine pkcs11 -new -key 45 -keyform engine -out client.req -subj "/C=RU/CN=client"
Send the created request client.req to the CA. Once you receive the certificate for your key pair, write it to the token with the same id as that of the key:
pkcs11-tool --module /usr/lib/librtpkcs11ecp.so -l -y cert -w ./client.pem --id 45for Windows and Linux clients (a more universal method)
This method is more universal as it allows generating a key and certificate that will be successfully recognized by Windows and Linux users, but it requires having a machine on Windows for the key generation procedure.
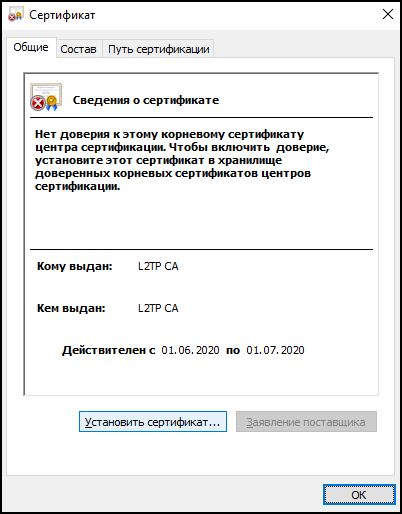
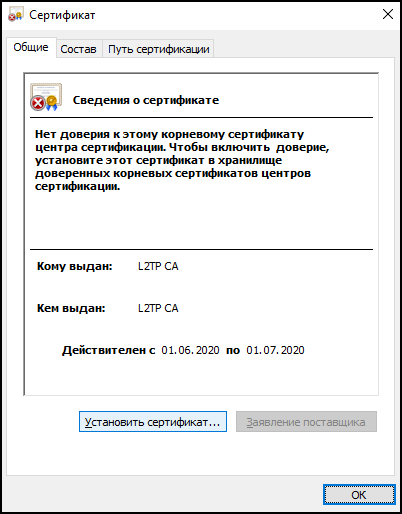
Before generating requests and importing certificates, it is necessary to add the root certificate of the VPN network to the trusted list. To do this, open it and in the window that appears, select the option 'Install Certificate':
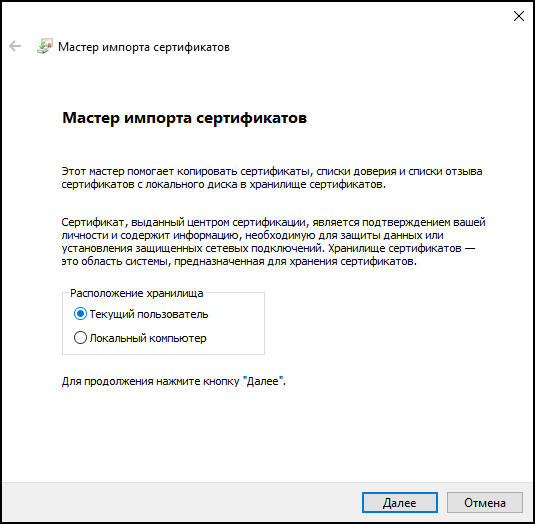
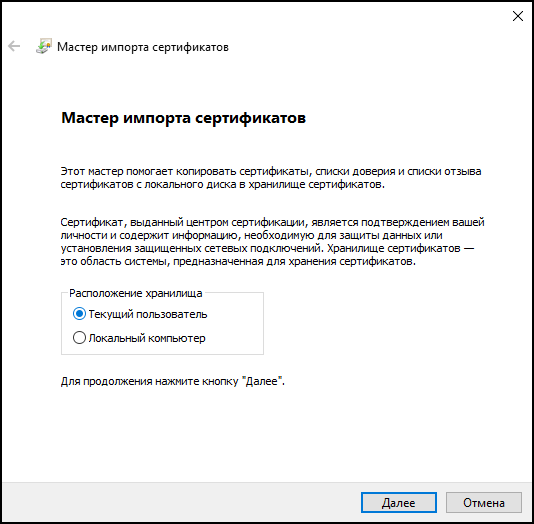
In the window that appears, choose to install the certificate for the local user:
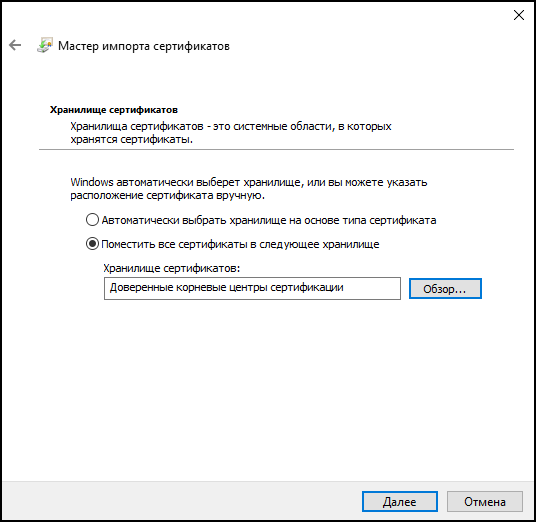
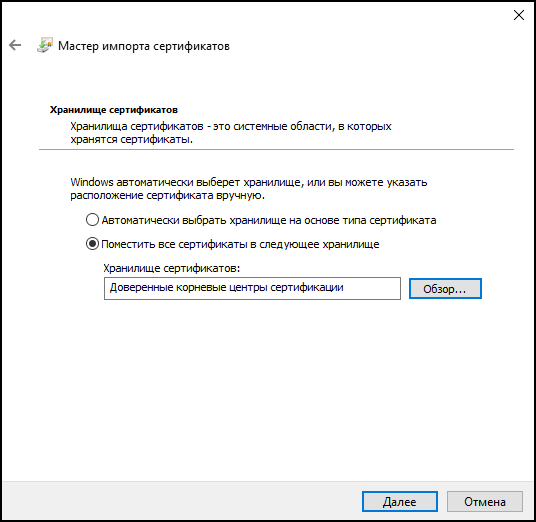
Install the certificate in the trusted root CA certificate store:
After all these actions, agree to all subsequent points. Now the system is configured.
Create a file cert.tmp with the following content:
[NewRequest]
Subject = "CN=client"
KeyLength = 2048
KeySpec = "AT_KEYEXCHANGE"
ProviderName = "Microsoft Base Smart Card Crypto Provider"
KeyUsage = "CERT_KEY_ENCIPHERMENT_KEY_USAGE"
KeyUsageProperty = "NCRYPT_ALLOW_DECRYPT_FLAG"
RequestType = PKCS10
SMIME = FALSE
After this, we will generate a key pair and create a certificate request. For this, open PowerShell and enter the following command:
certreq.exe -new -pin $PIN .cert.tmp .client.reqSend the created request client.req to your CA and wait for the certificate client.pem to be issued. It can be written to a token and added to the Windows certificate store using the following command:
certreq.exe -accept .client.pemIt is worth noting that similar actions can be performed using the graphical interface of the mmc program, but this method is more time-consuming and less programmable.
Configuring the Ubuntu Client
NOTE
Currently, configuring the client on Linux is quite time-consuming, as it requires building individual programs from the source. We will strive to ensure that all changes make it into the official repositories soon.
To ensure an IPSec connection to the server, the strongswan package and the xl2tp daemon are used. To simplify the connection to the network using smart cards, we will use the l2tp-ipsec-vpn package, which provides a graphical interface for easier connection setup.
We will begin assembling the components step by step, but first, let's install all the necessary packages for VPN functionality:
sudo apt-get install xl2tpd strongswan libp11-3Installing Software for Token Interaction
Install the latest version of the librtpkcs11ecp.so library from , as well as libraries for working with smart cards:
sudo apt-get install pcscd pcsc-tools opensc libengine-pkcs11-opensslConnect the Rutoken and check that it is recognized by the system:
pkcs11-tool --module /usr/lib/librtpkcs11ecp.so -O -lInstalling Patched PPP
sudo apt-get -y install git make gcc libssl-dev
git clone "https://github.com/jjkeijser/ppp"
cd ppp
./configure --prefix /usr
make -j4
sudo make install
Installing the L2tpIpsecVpn Client
Currently, the client also needs to be built from source. This is done using the following sequence of commands:
sudo apt-get -y install git qt5-qmake qt5-default build-essential libctemplate-dev libltdl-dev
git clone "https://github.com/Sander80/l2tp-ipsec-vpn"
cd l2tp-ipsec-vpn
make -j4
sudo make install
Configuring the L2tpIpsecVpn Client
Launch the installed client:
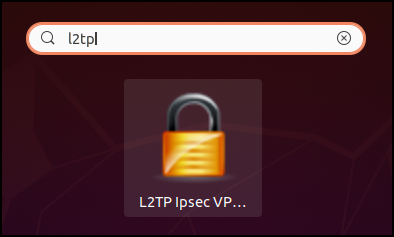
After launching, the L2tpIpsecVPN applet should open for you. Right-click on it and set up the connection:
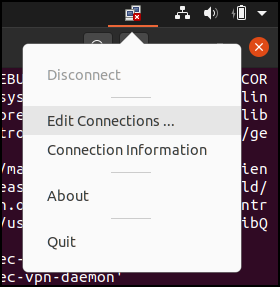
To work with tokens, we will first specify the path to the OpenSSL engine and the PKCS#11 library. To do this, open the 'Preferences' tab to configure the OpenSSL settings:
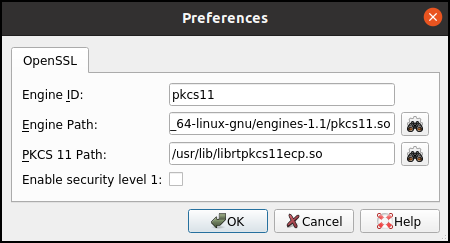 .
.
We will close the OpenSSL settings window and proceed to configure the network. Add a new network by clicking the Add… button in the settings panel and enter the network name:
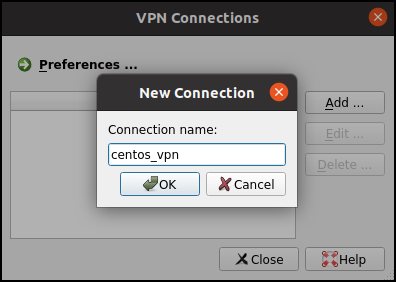
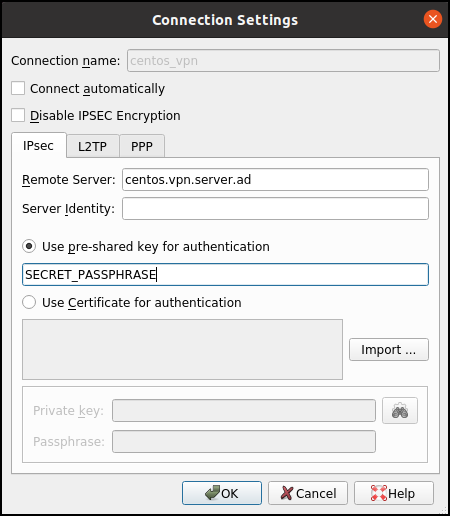
After this, the new network will be available in the settings panel. Double-click the new network with the right mouse button to configure it. On the first tab, we need to configure the IPsec settings. Specify the server address and the shared key:
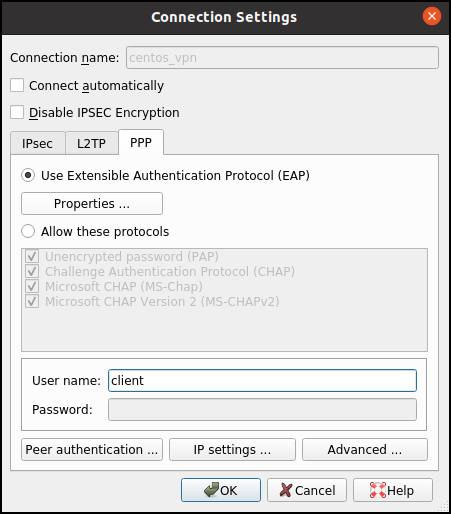
Next, switch to the PPP settings tab and specify the username with which we want to connect to the network:
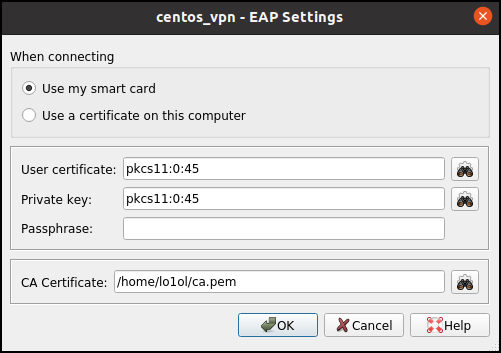
After that, we will open the Properties tab and specify the path to the key, client certificate, and CA:
Close this tab and perform the final setup by opening the 'IP settings' tab and checking the option 'Obtain DNS server address automatically':
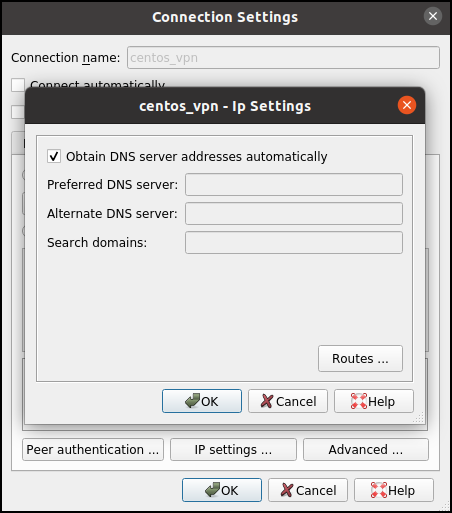
This option will allow the client to receive a personal IP address from the server within the network.
After all settings, we will close all tabs and restart the client:
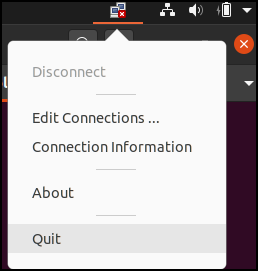
Network connection
After the settings, you can connect to the network. To do this, open the applet tab and choose the network you want to connect to:
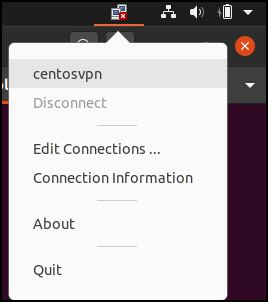
During the connection process, the client will ask you to enter the PIN code for the Rutoken:
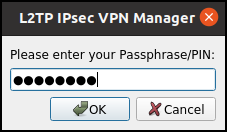
If a notification appears in the status bar indicating that the connection has been successfully established, the configuration was completed successfully:

If not, we need to investigate why the connection was not established. To do this, check the program log by selecting the 'Connection information' option in the applet:
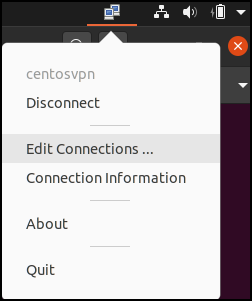
Windows client configuration
Configuring the client in Windows is much easier than in Linux, as all the necessary software is already built into the system.
System Setup
We will install all necessary drivers for working with Rutokens by downloading them from .
Importing the root certificate for authentication
Download the server's root certificate and install it in the system. To do this, open it and select the 'Install Certificate' option in the pop-up window:
In the opened window, choose to install the certificate for the local user. If you want the certificate to be accessible to all users on the computer, select the installation of the certificate for the local computer:
Install the certificate in the trusted root CA certificate store:
After all these actions, agree to all subsequent points. Now the system is configured.
VPN connection setup
To set up a VPN connection, go to the control panel and select the option to create a new connection.
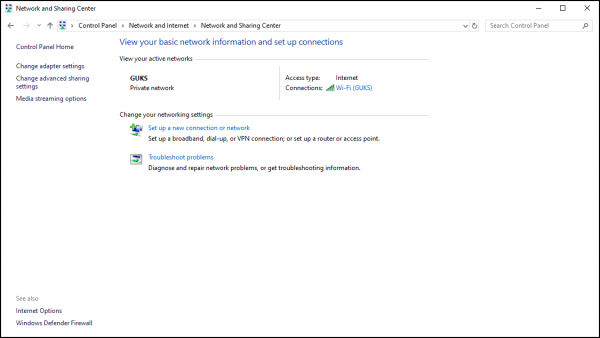
In the pop-up window, choose the connection creation option to connect to the workplace:

In the next window, select the VPN connection:

and enter the VPN connection details, as well as specify the option to use a smart card:

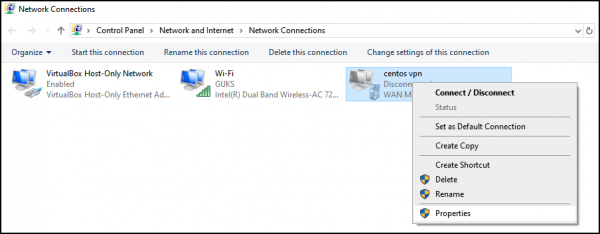
This configuration is not yet complete. You need to specify the shared key for the IPsec protocol. For this, go to the 'Network connection settings' tab and then navigate to the 'Properties for this connection' tab:
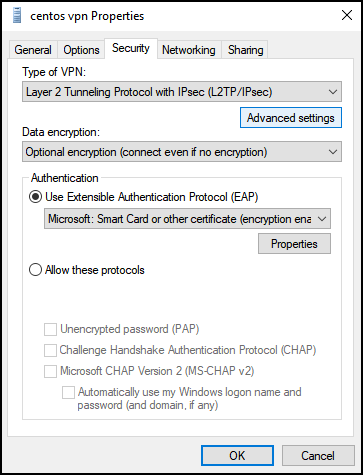
In the opened window, go to the 'Security' tab, specify 'L2TP/IPsec Network' as the network type, and select 'Advanced settings':
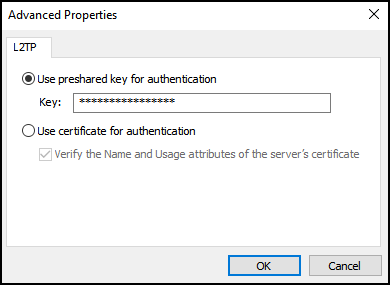
In the opened window, specify the IPsec shared key:
Connection
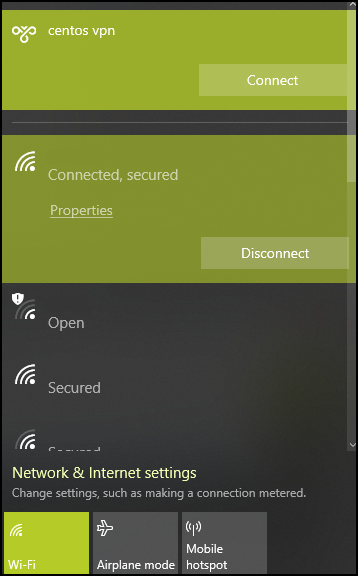
After finishing the configuration, you can try to connect to the network:
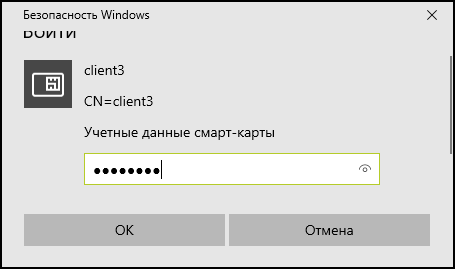
During the connection process, we will be prompted to enter the token PIN code:
We have set up a secure VPN network and verified that it is not difficult.
Acknowledgments
I would like to thank our colleagues Vasily Shokov and Alexander Smirnov once again for their collaborative efforts to simplify the creation of VPN connections for Linux clients.
Source: habr.com
