


What is ?
This is a system for managing various hardware and software.
TANGO currently supports 4 platforms: Linux, Windows NT, Solaris, and HP-UX.
Here we will describe working with Linux (Ubuntu 18.04)
What is it for?
Simplifies working with various hardware and software.
- You don't need to think about how to store data in the database; it's already done for you.
- You only need to describe the polling mechanism for the sensors.
- Consolidates all your code into a single standard.
Where to get it?
I couldn't run it from source; I used the ready-made TangoBox 9.3 image.
The instructions describe how to install from packages.
What is it made of?
- JIVE — serves to view and edit the TANGO database.
- POGO — a code generator for TANGO device servers.
- Astor — a software manager for the TANGO system.
We will only be interested in the first two components.
Supported programming languages
- C
- C++
- Java.
- JavaScript
- Python
- Matlab
- LabVIEW
I worked with it in Python & C++. C++ will be used as an example here.
Now let's describe how to connect a device to TANGO and how to work with it. The example will use the board GPS neo-6m-0-001:
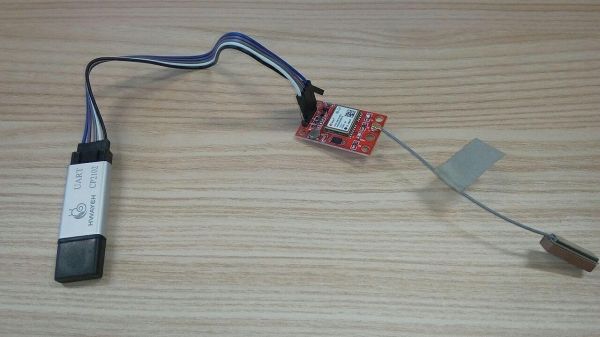
As seen in the picture, the board is connected to the PC via UART CP2102. When connected to the PC, a device appears /dev/ttyUSB[0-N], usually /dev/ttyUSB0.
POGO
Now let's run pogo, and we generate the skeleton code to work with our board.
pogo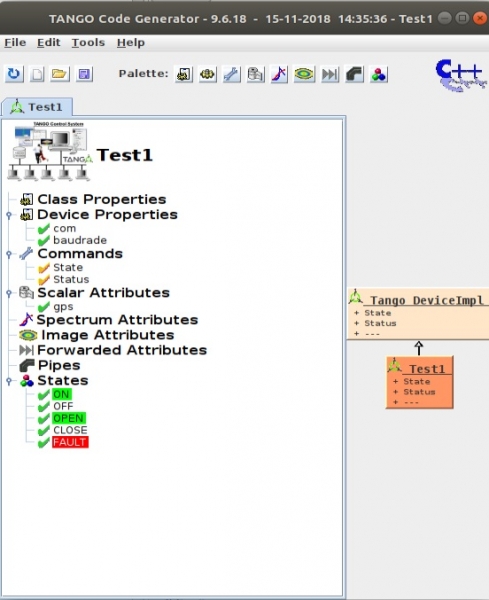
I already created the code; let's create it again File->New.
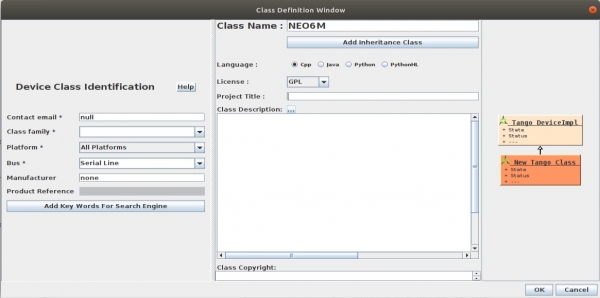
We get the following:
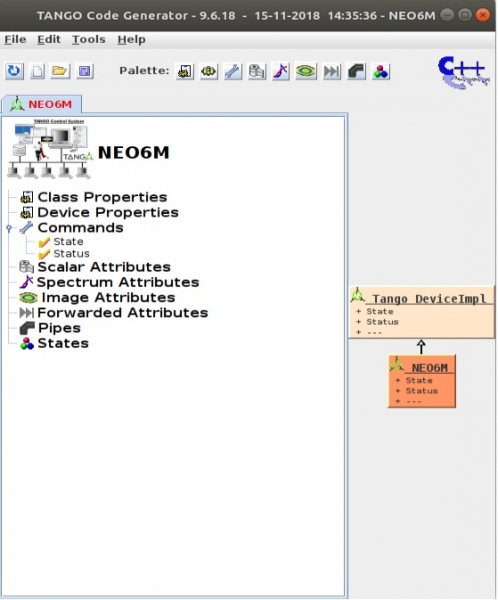
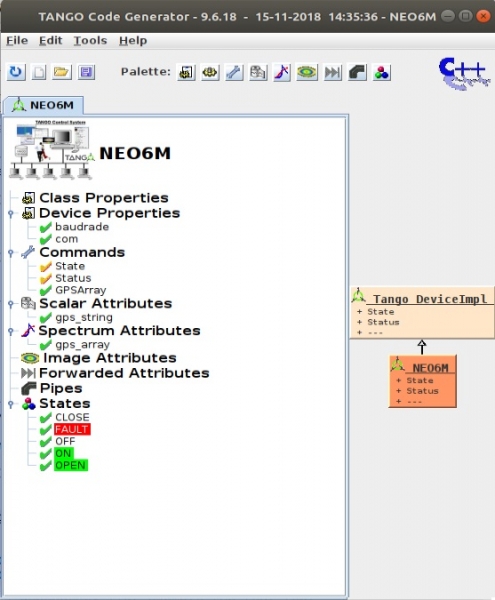
Our device (by 'device' we will refer to the software part) is blank and has two control commands: State & Status.
It needs to be filled with the necessary attributes:
Device Property — default values that we pass to the device for its initialization, for the GPS board, we need to pass the board name in the system com="/dev/ttyUSB0" and the speed of the COM port baudrade=9600
Commands — control commands for our device, which can have arguments and return values.
- STATE — returns the current state, from States
- STATUS — returns the current status; this is a string addition to STATE
- GPSArray — returns gps a string in the form of DevVarCharArray
Next, we define the attributes of the device that can be read/written from/to it.
Scalar Attributes — simple attributes (char, string, long, etc.)
Spectrum Attributes — one-dimensional arrays
Image Attributes — two-dimensional arrays
States — the states in which our device resides.
- OPEN — the device is open.
- CLOSE — the device is closed.
- FAILT — error.
- ON — receiving data from the device.
- OFF — no data from the device.
Example of adding an attribute gps_string:
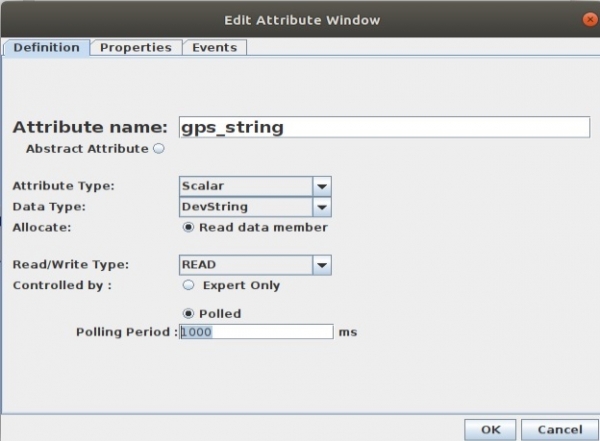
Polling period time in ms, how often the value of gps_string will be updated. If the update time is not specified, the attribute will only be updated on request.
Result:
Now we need to generate the code File->Generate
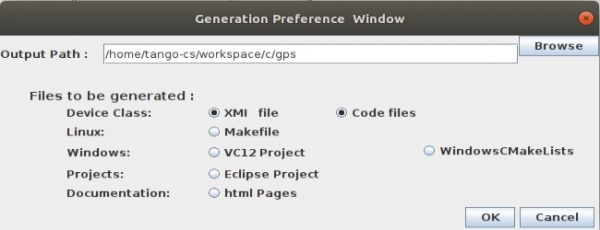
By default, the Makefile is not generated; the first time you need to check the box to create it. This is done so that changes made to it are not deleted during new generations. Once created and configured for your project (specifying compilation keys, additional files), you can forget about it.
Now let's move directly to programming. Pogo has generated the following:
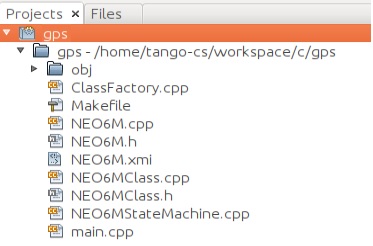
We will be interested in NEO6M.cpp & NEO6M.h. Let's take a look at the class constructor as an example:
NEO6M::NEO6M(Tango::DeviceClass *cl, string &s)
 : TANGO_BASE_CLASS(cl, s.c_str())
{
    /*----- PROTECTED REGION ID(NEO6M::constructor_1) ENABLED START -----*/
    init_device();

    /*----- PROTECTED REGION END -----*/    //  NEO6M::constructor_1
}
What is here and what is the main point? Memory allocation for our attributes occurs in the init_device() function: gps_string & gps_array, but that's not important. The most important thing here, are the comments:
/*----- PROTECTED REGION ID(NEO6M::constructor_1) ENABLED START -----*/
    .......
/*----- PROTECTED REGION END -----*/    //  NEO6M::constructor_1
Everything within this comment block will not be deleted during subsequent code generations in pogo!. Everything outside the blocks will be! These are places where we can program and make our changes.
Now, what main functions does the class NEO6M:
void always_executed_hook();
void read_attr_hardware(vector &attr_list);
void read_gps_string(Tango::Attribute &attr);
void read_gps_array(Tango::Attribute &attr);
When we want to read the attribute value gps_string, the functions will be called in the following order: always_executed_hook, read_attr_hardware and read_gps_string. In read_gps_string, the gps_string will be filled with a value.
void NEO6M::read_gps_string(Tango::Attribute &attr)
{
    DEBUG_STREAM << "NEO6M::read_gps_string(Tango::Attribute &attr) entering... " <attr_gps_string_read = Tango::string_dup(this->gps.c_str());

    attr.set_value(attr_gps_string_read);

    /*----- PROTECTED REGION END -----*/    //  NEO6M::read_gps_string
}
Compilation
Let's go to the source folder and:
makeThe program will compile in the folder ~/DeviceServers.
tango-cs@tangobox:~/DeviceServers$ ls
NEO6M
JIVE
jive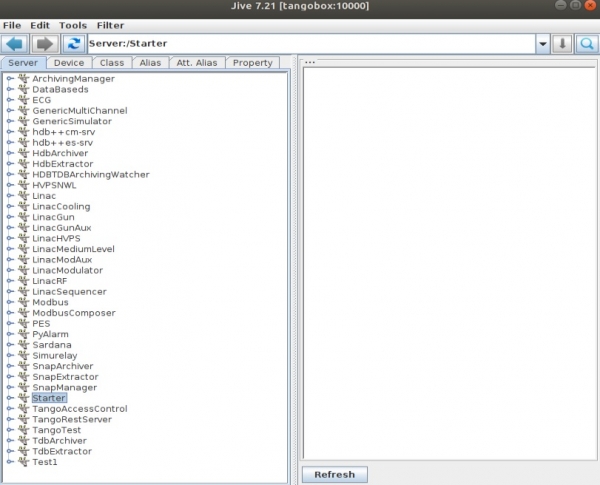
There are already some devices in the DB, let's create ours now. Edit->Create Server
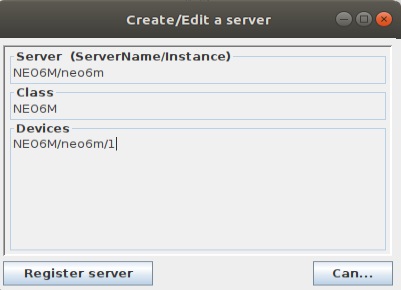
Now let's try to connect to it:
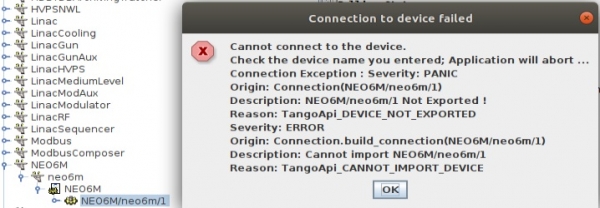
Nothing will work, first we need to start our program:
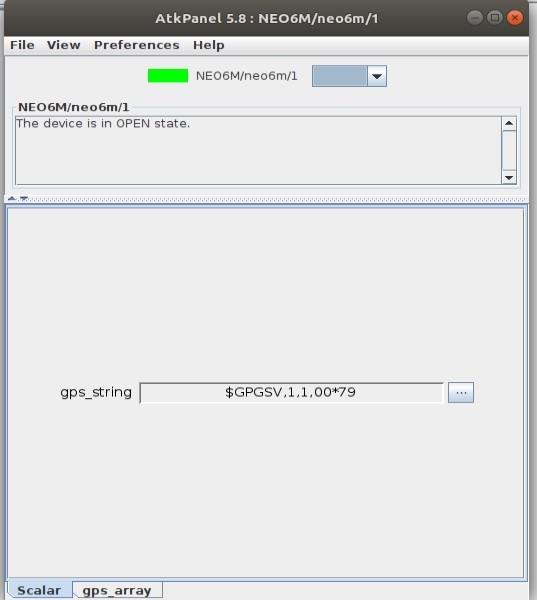
sudo ./NEO6M neo6m -v2Connecting to the com port can only be done with permissions root-a. v - logging level.
We can now connect:
Client
Looking at images in the graph is nice, but we need something more useful. Let's write a client that will connect to our device and retrieve readings from it.
#include <tango.h>
using namespace Tango;

int main(int argc, char **argv) {
    try {

        //
        // create a connection to a TANGO device
        //

        DeviceProxy *device = new DeviceProxy("NEO6M/neo6m/1");

        //
        // Ping the device
        //

        device->ping();

        //
        // Execute a command on the device and extract the reply as a string
        //

        vector<Tango::DevUChar> gps_array;

        DeviceData cmd_reply;
        cmd_reply = device->command_inout("GPSArray");
        cmd_reply >> gps_array;

        for (int i = 0; i < gps_array.size(); i++) {
            printf("%c", gps_array[i]);
        }
        puts("");

        //
        // Read a device attribute (string data type)
        //

        string spr;
        DeviceAttribute att_reply;
        att_reply = device->read_attribute("gps_string");
        att_reply >> spr;
        cout << spr << endl;

        vector<Tango::DevUChar> spr2;
        DeviceAttribute att_reply2;
        att_reply2 = device->read_attribute("gps_array");
        att_reply2.extract_read(spr2);

        for (int i = 0; i < spr2.size(); i++) {
            printf("%c", spr2[i]);
        }

        puts("");

    } catch (DevFailed &e) {
        Except::print_exception(e);
        exit(-1);
    }
}
How to compile:
g++ gps.cpp -I/usr/local/include/tango -I/usr/local/include -I/usr/local/include -std=c++0x -Dlinux -L/usr/local/lib -ltango -lomniDynamic4 -lCOS4 -lomniORB4 -lomnithread -llog4tango -lzmq -ldl -lpthread -lstdc++Result:
tango-cs@tangobox:~/workspace/c$ ./a.out
$GPRMC,,V,,,,,,,,,,N*53

$GPRMC,,V,,,,,,,,,,N*53

$GPRMC,,V,,,,,,,,,,N*53
We received the result as a return from the command, fetching the string attributes and character array.
Links
I wrote this article for myself, because after some time I tend to forget how and what to do.
Thank you for your attention.
Source: habr.com
