


The mechanism for developing a custom application and uploading it to the module is available for both Linux and Windows operating systems. In this article, we will take a detailed look at how to utilize examples from the provided SDK. to compile and upload a custom application to the module.
Before writing this article, a friend of mine, who is unfamiliar with Linux development, asked me to detail the process of developing a custom application for the SIM7600E-H module as clearly as possible. The criterion for the clarity of the material was the phrase ‘so that I understand it.’
I invite you to check out the results.
The article is regularly updated and supplemented.
Prelude
Typically, cellular modules are used only for data transmission, voice calls, SMS, and similar tasks. All of this is done using AT commands sent from an external controlling microcontroller. However, there is a category of modules that allow the execution of user code uploaded externally. In some cases, this significantly reduces the overall budget of the device, allowing for a simpler (and thus more budget-friendly) microcontroller to be placed on the board or even doing away with it altogether. With the advent of LTE modules powered by Android or Linux, and their powerful resources, it is possible to tackle any tasks that popular processors can handle. This article will focus on the SIM7600E-H, which is managed by Linux. We will explore how to upload and run an executable application.
Much of the material is based on the document 'SIM7600 Open Linux Development Guide', but some additions, particularly the Russian version, will be useful. The article will help those who are just starting to learn the module reach the point of uploading a demonstration application and will provide the necessary skills for subsequent work.
A brief overview of who SIM7600E-H is.
The SIM7600E-H is a module built on the ARM Cortex-A7 1.3GHz processor from Qualcomm, featuring a Linux operating system (kernel 3.18.20) and capable of operating within European (including Russian) frequency bands 2G/3G/LTE, supporting Cat.4, providing a maximum download speed of up to 150Mbps and upload speed of up to 50Mbps. With rich peripherals, an industrial temperature range, and built-in GPS/GLONASS navigation, it meets all modern modular solution requirements in the M2M context.
System Overview
The SIM7600E-H module is based on the Linux operating system (kernel 3.18.20). The file system, in turn, is built on the journaling file system UBIFS (Unsorted Block Image File System).
Key features of this file system include:
- support for partitions, allowing for creation, deletion, or resizing;
- ensures data alignment across the entire storage capacity;
- handles bad blocks;
- minimizes the risk of data loss during power outages or other failures;
- logging capabilities.
Description taken from , which further elaborates on this type of file system.
This type of file system is ideally suited for the harsh operating conditions of the module and potential power issues. However, this does not mean that unstable power conditions are an expected operational mode for the module; it only indicates greater device durability.
Memory
The memory area distribution is organized as follows:
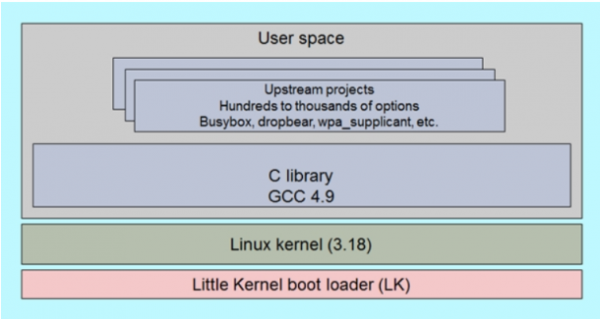
Three main areas need to be allocated:
ubi0:rootfs – read-only and contains the Linux kernel itself
ubi0:usrfs – primarily used for user program and data storage
ubi0:cachefs – reserved for FOTA updates. If there is insufficient available space for loading an update, the system will delete unused files to free up space. However, for security reasons, it is not advisable to store your files there.
All three partitions are distributed as follows:
Filesystem
Size
Used
Available
Use%
Mounted on
ubi0:rootfs
40.7M
36.2M
4.4M
89%
/
ubi0:usrfs
10.5M
360K
10.1M
3%
/data
ubi0:cachefs
50.3M
20K
47.7M
0%
/cache
Available functionality
As mentioned earlier, the module is based on the Cortex A7 chipset from Qualcomm. It would be remiss not to provide such a high-performance core for handling user applications and offloading some of the main processor's tasks to the module.
For the user application, the following peripheral operating modes will be available:
Pin No.
Name
Sys GPIO No.
Default action
Func1
Func2
Pull
Wakeup interrupt
6
SPI_CLK
—
UART1_RTS
—
—
B-PD
—
7
SPI_MISO
—
UART1_Rx
—
—
B-PD
—
8
SPI_MOSI
—
UART1_Tx
—
—
B-PD
—
9
SPI_CS
—
UART1_CTS
—
—
B-PD
—
21
SD_CMD
—
SD-Card
—
—
B-PD
—
22
SD_DATA0
—
SD-Card
—
—
B-PD
—
23
SD_DATA1
—
SD-Card
—
—
B-PD
—
24
SD_DATA2
—
SD-Card
—
—
B-PD
—
25
SD_DATA3
—
SD-Card
—
—
B-PD
—
26
SD_CLK
—
SD-Card
—
—
B-PN
—
27
SDIO_DATA1
—
WLAN
—
—
B-PD
—
28
SDIO_DATA2
—
WLAN
—
—
B-PD
—
29
SDIO_CMD
—
WLAN
—
—
B-PD
—
30
SDIO_DATA0
—
WLAN
—
—
B-PD
—
31
SDIO_DATA3
—
WLAN
—
—
B-PD
—
32
SDIO_CLK
—
WLAN
—
—
B-PN
—
33
GPIO3
GPIO_1020
MIFI_POWER_EN
GPIO
MIFI_POWER_EN
B-PU
—
34
GPIO6
GPIO_1023
MIFI_SLEEP_CLK
GPIO
MIFI_SLEEP_CLK
B-PD
—
46
ADC2
—
ADC
—
—
—
—
47
ADC1
—
ADC
—
—
B-PU
—
48
SD_DET
GPIO_26
GPIO
GPIO
SD_DET
B-PD
X
49
STATUS
GPIO_52
Status
GPIO
Status
B-PD
X
50
GPIO43
GPIO_36
MIFI_COEX
GPIO
MIFI_COEX
B-PD
—
52
GPIO41
GPIO_79
BT
GPIO
BT
B-PD
X
55
SCL
—
I2C_SCL
—
—
B-PD
—
56
SDA
—
I2C_SDA
—
—
B-PU
—
66
RTS
—
UART2_RTS
—
—
B-PD
—
67
CTS
—
UART2_CTS
—
—
B-PD
—
68
RxD
—
UART2_Rx
—
—
B-PD
—
69
RI
—
GPIO(RI)
—
—
B-PD
—
70
DCD
—
GPIO
—
—
B-PD
—
71
TxD
—
UART2_Tx
—
—
B-PD
—
72
DTR
—
GPIO(DTR)
—
—
B-PD
X
73
PCM_OUT
—
PCM
—
—
B-PD
—
74
PCM_IN
—
PCM
—
—
B-PD
—
75
PCM_SYNC
—
PCM
—
—
B-PD
—
76
PCM_CLK
—
PCM
—
—
B-PU
—
87
GPIO77
GPIO77
BT
GPIO
BT
B-PD
—
Agree that the list is impressive, and please note: part of the peripherals is used for operating the module as a router. That is, such a module can serve as a small router distributing internet over Wi-Fi. By the way, there is already a ready-made solution called SIM7600E-H-MIFI, which is a miniPCIe card with a soldered SIM7600E-H module and several antenna outputs, one of which serves as a Wi-Fi antenna. However, that is a topic for a separate material.
Environment (not a day of the week)
allows developers to choose the most familiar development environment under Linux or Windows. If it's about a single executable application on the module, it's better to choose Windows, as it will be quicker and easier. If a complex application architecture and subsequent upgrades are anticipated, it's better to use Linux. We will also require Linux for compiling executable files for subsequent loading into the module, and for compiling, a virtual machine will suffice.
From what you will need that is not available for free download – SDK, which can be requested from your distributor.
Installing utilities for working with the module
Here and elsewhere, we will be working under Windows as the most familiar OS for most users.
We will need to install the necessary software in just a few easy steps for further mastering the operation of the module:
- GNU/Linux
- Cygwin
- Drivers
- ADB
Installing GNU/Linux
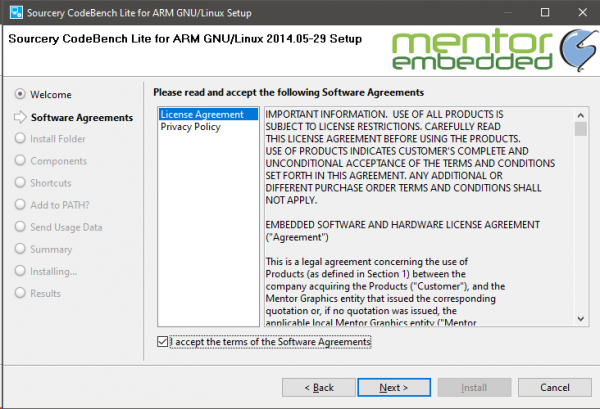
You can use any ARM-Linux compatible compiler to build the application. We will use Sourcery CodeBench Lite ARM GNU/Linux translator available for download at .
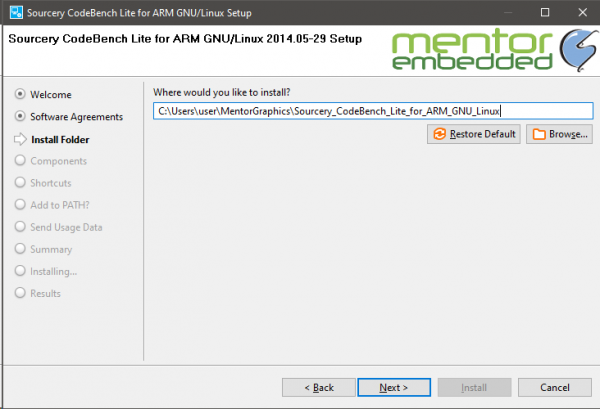
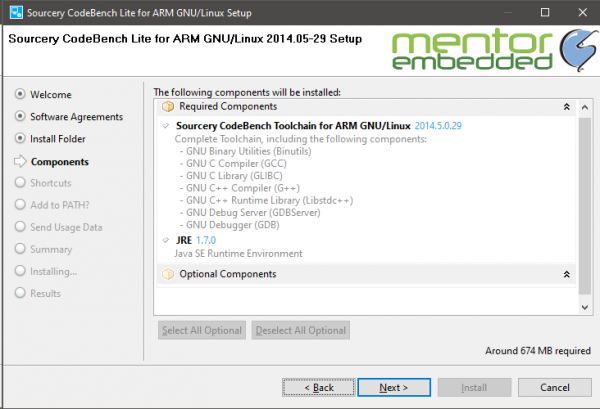
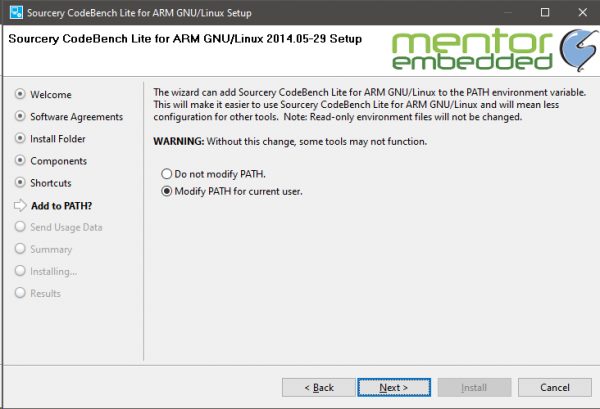
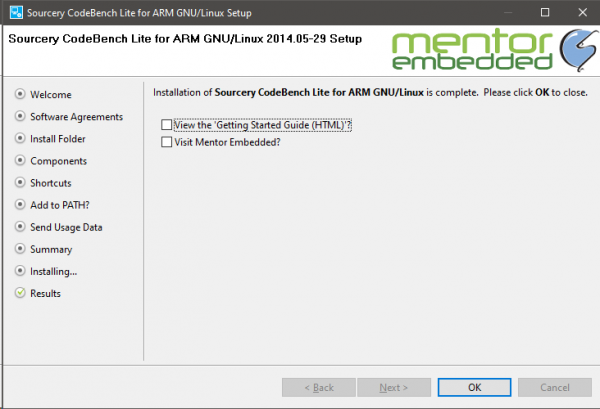
To ensure all components are installed correctly, I will provide a few screenshots of the installation process. In general, there is nothing complicated about the installation.
To ensure all components are installed correctly, I will provide a few screenshots of the installation process. In general, there is nothing complicated about the installation.
- Accept the license agreement

- Specify the installation folder
- Leave the required components unchanged
- Leave as is
- A few ‘Next’, ‘Install’, and that’s basically it
Installing Cygwin
Next, for development, you will need a set of libraries and utilities from the package provided by . It's straightforward, the current version of Cygwin can be downloaded for free from the official project website; at the time of writing, version 3.1.5 was available, which we used in preparing the material.
There is nothing complicated about installing Cygwin; the only thing you need to choose is a mirror from which the installer will download the necessary files. You can select any mirror and install, as well as the set of utilities and libraries; keep all available libraries and utilities selected.
Installing drivers
After the module is connected to the PC, you will need to install the drivers. They can be requested from your distributor (recommended). I do not recommend searching the Internet independently, as it may take a long time to find what caused the device conflicts.
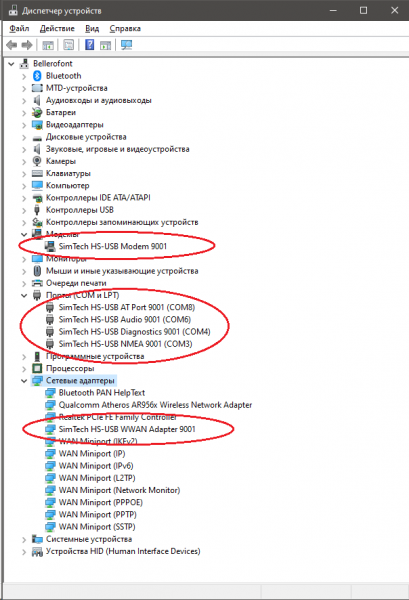
Among the allocated ports, we see the following:
Windows
Linux
Description
SimTech HS-USB Diagnostics
USB Serial
Diagnostic Interface
SimTech HS-USB NMEA
USB Serial
GPS NMEA Interface
SimTech HS-USB AT Port
USB Serial
AT port Interface
SimTech HS-USB Modem
USB Serial
Modem port Interface
SimTech HS-USB Audio
USB Serial
USB Audio Interface
SimTech HS-USB WWAN Adapter
USB Net
NDIS wwan Interface
Android Composite ADB Interface
USB ADB
Android add debug port
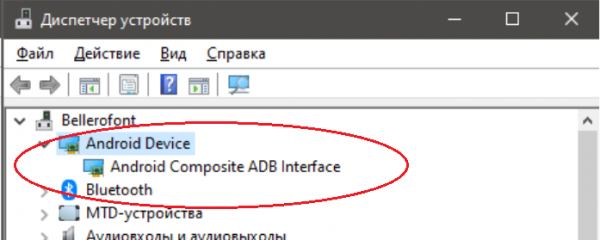
As you may have noticed, there is no USB ADB port among the ports in the screenshot; this is because the ADB port in the module is closed by default and needs to be enabled by sending the command ‘AT+CUSBADB=1’ to the module's AT port and rebooting it (this can be done with the command ‘AT+CRESET’).
As a result, we will get the required interface in the device manager:
We have finished with the drivers; let's move on to ADB.
Installing ADB
Go to the official Android Developer website at . We will not download the bulky Android Studio; the command line suffices, which is available for download via the link ‘Download SDK Platform-Tools for Windows’.
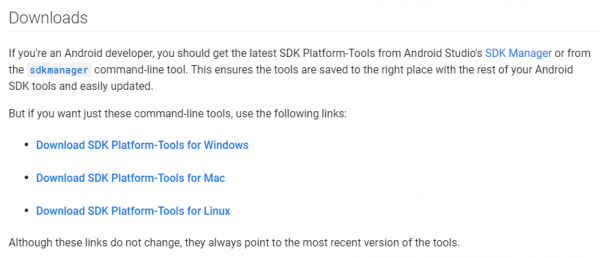
Download and unpack the resulting archive to the root of drive C.
Environment variables
After installing Cygwin, you will need to add the path Cygwin/bin/ to the development environment variables (Control Panel → System → Advanced system settings → Advanced → Environment Variables → System variables → Path → Edit) as shown in the screenshot below:
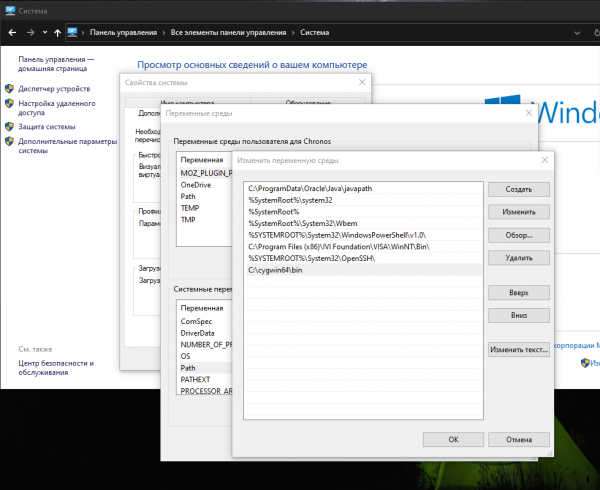
Similarly, add the path to the downloaded and extracted ADB archive to the root of drive C.
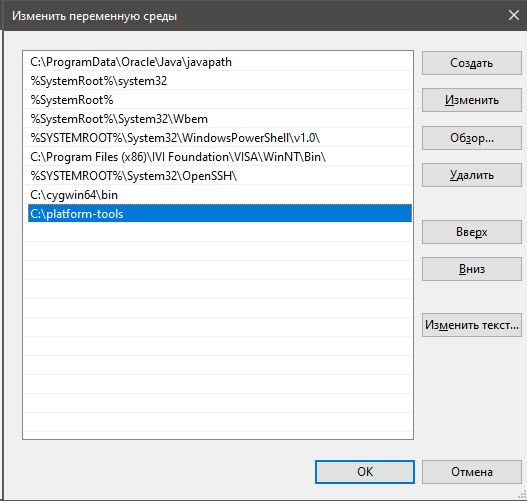
Click OK several times and restart your computer.
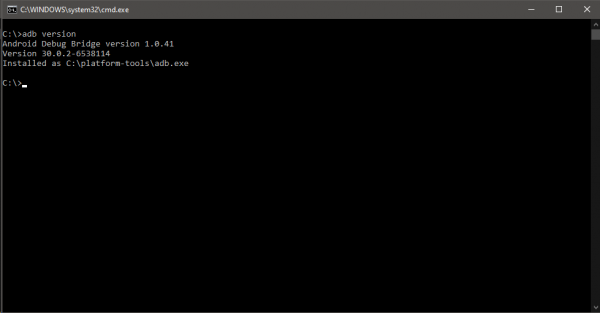
After rebooting, you can easily check if ADB is working correctly by opening the command prompt (Win+R → cmd) and typing the command ‘adb version’. You should get a result similar to this:
Connect the module to the PC (if you happened to disconnect it) and check if ADB can see it using the command ‘adb devices’:
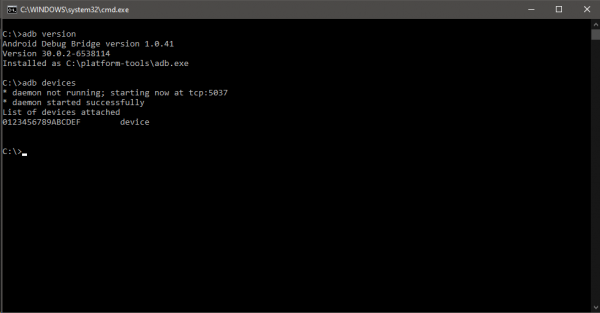
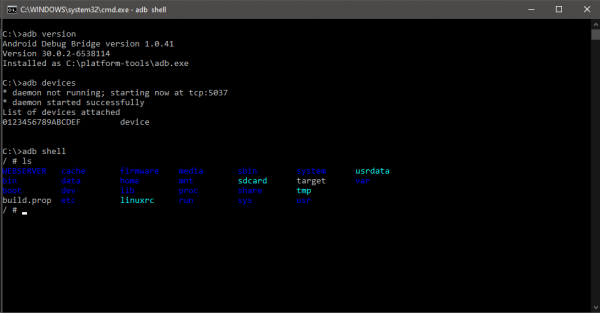
Done, the connection setup to the module is complete and we can launch the shell to work with the module.
Unpacking and Compiling the SDK
Now that we have access to the shell and can start using the module's command line, let's try to compile our first application for uploading to the module.
Many may face difficulties with this! Since the module operates on a Linux operating system, to avoid compilation collisions under Windows, it’s best to compile in its native environment – Linux.
We won’t detail how to run Linux without wanting to install it on your machine. We will instead install it on a virtual machine. We will use VirtualBox, install Ubuntu version 20.04 (the current version at the time of writing this article), and from there we will start working with compilers, SDK, etc.
Let's switch to the Linux environment and unpack the archive received from the distributor.
simcom@VirtualBox:~/Desktop/OpenLinux$ sudo tar -xzf MDM9x07_OL_2U_22_V1.12_191227.tar.gz Next, navigate to the sim_open_sdk directory and set up the environment:
simcom@VirtualBox:~/Desktop/OpenLinux/sim_open_sdk$ cd sim_open_sdk
simcom@VirtualBox:~/Desktop/OpenLinux/sim_open_sdk$ source sim_crosscompile/sim-crosscompile-env-init
Stay in this folder and execute the subsequent commands while in it.
Install the libncurses5-dev library if it has not been installed yet:
simcom@VirtualBox:~/Desktop/OpenLinux/sim_open_sdk$ sudo apt-get update && sudo apt-get install libncurses5-dev -yPython, if it has not been installed yet:
simcom@VirtualBox:~/Desktop/OpenLinux/sim_open_sdk$ sudo apt-get install python -yand gcc:
simcom@VirtualBox:~/Desktop/OpenLinux/sim_open_sdk$ sudo apt-get install gccCompilation:
Now we will need to compile several files, executing the following commands sequentially.
If a kernel configuration window pops up during compilation, simply select Exit and return to the console; we don't need to configure the kernel right now.
Execute:
simcom@VirtualBox:~/Desktop/OpenLinux/sim_open_sdk$ makeCompiling the bootloader:
simcom@VirtualBox:~/Desktop/OpenLinux/sim_open_sdk$ make abootCompiling the kernel:
simcom@VirtualBox:~/Desktop/OpenLinux/sim_open_sdk$ make kernel_menuconfig
simcom@VirtualBox:~/Desktop/OpenLinux/sim_open_sdk$ make kernel
Compiling the root filesystem:
simcom@VirtualBox:~/Desktop/OpenLinux/sim_open_sdk$ make rootfsFor Linux users, it is relevant to compile the module driver:
simcom@VirtualBox:~/Desktop/OpenLinux/sim_open_sdk$ make kernel_moduleLet's compile the demo:
simcom@VirtualBox:~/Desktop/OpenLinux/sim_open_sdk$ make demoAfter this, several new files will appear in the sim_open_sdk/output directory:
simcom@VirtualBox:~/Desktop/OpenLinux/sim_open_sdk$ ls output/
appsboot.mbn  boot.img  demo_app  helloworld  system.img
Demo
Let's try loading the demo into our module and see what happens.
Booting
In the sim_open_sdk directory, we can see the file demo_app. We will copy it to the root of drive C on the PC to which the module is connected. After that, we will launch the Windows command line (Win+R -> cmd) and enter:
C:>adb push C:demo_app /data/The console will inform us:
C:demo_app: 1 file pushed, 0 skipped. 151.4 MB/s (838900 bytes in 0.005s)This means that the file has been successfully sent to the module, and we only need to run it. Let's not delay.
Execute:
C:>adb shellExpanding the permissions of the uploaded file:
/ # cdhmod 777 /data/demo_appAnd run:
/ # /data/demo_appIn the same console, the module will inform us of the following:
SDK_VER : SIM_SDK_VER_20191205
DEMO_VER: SIM_SDK_VER_20191205

Please select an option to test from the items listed below.

1. WIFI                       2. VOICE CALL
3. DATA CALL                  4. SMS
5. WDS(APN)                   6. NAS
7. AT                         8. OTA
9. TTS                        10. GPIO
11. GPS                       12. Bluetooth
13. TCP/UDP                   14. Timer
15. ADC                       16. I2C
17. UIM(SimCard)              18. DMS(IMEI,MEID)
19. UART                      20. SPI
21. Version                   22. Ethernet
23. FTP                       24. SSL
25. HTTP(S)                   26. FTP(S)
27. MQTT(S)                   28. ALSA
29. DEV                       30. AUDIO
31. JSON                      32. LBS
99. EXIT
Option >
Let's check the module's IMEI, enter 7 (switch to command mode), and then enter 5:
Please select an option to test from the items listed below.

1. WIFI                       2. VOICE CALL
3. DATA CALL                  4. SMS
5. WDS(APN)                   6. NAS
7. AT                         8. OTA
9. TTS                        10. GPIO
11. GPS                       12. Bluetooth
13. TCP/UDP                   14. Timer
15. ADC                       16. I2C
17. UIM(SimCard)              18. DMS(IMEI,MEID)
19. UART                      20. SPI
21. Version                   22. Ethernet
23. FTP                       24. SSL
25. HTTP(S)                   26. FTP(S)
27. MQTT(S)                   28. ALSA
29. DEV                       30. AUDIO
31. JSON                      32. LBS
99. EXIT
Option > 7

Please select an option to test from the items listed below.

1. get Module Version         2. get CSQ
3. get CREG                   4. get ICCID
5. get IMEI                   6. get CIMI
99. back
Option > 5
IMEI: 867584030090489

Please select an option to test from the items listed below.

1. get Module Version         2. get CSQ
3. get CREG                   4. get ICCID
5. get IMEI                   6. get CIMI
99. back
Option >
This way we will see the module's IMEI.
In conclusion
I hope we have provided a general understanding of how to get started with the module. In the following articles, we will take a closer look at the capabilities offered by the SIM7600E-H platform, as well as how to remotely update your application in the module.
I invite you to ask questions in the comments, as well as indicate which aspect of the module's capabilities should be reflected in subsequent articles.
Source: habr.com
