


In one of the episodes about the Proxmox VE hypervisor, we’ve already discussed how to perform backups using built-in tools. Today we will show how to use the excellent Veeam® Backup & Replication™ 10 for the same purpose.
“Backups have a clear quantum nature. Until you attempt to restore from a backup, it exists in superposition. It is simultaneously successful and not.” (found online)
Disclaimer:
This article is a free and expanded translation on the topic of , published on the Veeam forum. If you follow the original guide strictly, you'll encounter an error even at the first stage of installing the pve headers, as the system simply won’t know where to find them. There are plenty of non-obvious aspects.
No, I’m not saying this is the perfect backup method. No, it cannot be recommended for production. No, I do not guarantee the perfect integrity of the created backups.
However, this all works and is quite suitable for many users and novice system administrators who are taking their first steps in learning virtualization and backup systems.
Backup is arguably one of the most crucial processes on which any company's operation depends. There is nothing more valuable than the data stored in corporate information systems, and nothing worse than the inability to restore it in case of failure.
It often happens that the need for a backup and the choice of a tool are only considered after an incident related to the loss of critical data has already occurred. As virtualization technologies advance, applications for backup have begun to focus on close interaction with hypervisors. The Veeam® Backup & Replication™ product is no exception, offering extensive capabilities for backup in virtualized environments. Today, we will explain how to set it up to work with Proxmox VE.
Configuring the Hypervisor
We will use the latest version of Proxmox at the time of writing this article — 6.2-1. This version was released on May 12, 2020, and includes many useful changes that we will discuss in one of the upcoming articles. For now, let's start preparing the hypervisor. The main task is to install Veeam® Agent for Linux on the host with Proxmox that we want to back up. But before that, we will take a few steps.
System Preparation
We will install the utility sudo, which is missing from the system if Proxmox was not installed in an existing Linux system but as a standalone OS from . We will also need the pve kernel headers. Let's log into the server via SSH and add the repository that works without a support subscription (officially, it is not recommended for production, but it contains the packages we need):
echo "deb http://download.proxmox.com/debian/pve buster pve-no-subscription" >> /etc/apt/sources.listapt updateapt install sudo pve-headersAfter this procedure, be sure to reboot the server.
Installing Veeam® Agent
Download Veeam® Agent for Linux from the official website (an account is required), we will use an SFTP client to upload the downloaded deb package to the server. We install the package and update the list of programs in the repositories that this package adds:
dpkg -i veeam-release-deb_1.x.x_amd64.debWe update the repositories again:
apt updateWe install the agent itself:
apt install veeamWe check that everything is installed correctly:
dkms statusThe response will be approximately as follows:
veeamsnap, 4.0.0.1961, 5.4.41-1-pve, x86_64: installedConfiguring Veeam® Backup&Replication™
Adding a repository
Of course, backups can be stored directly on the server with Veeam® Backup&Replication™ deployed, but it is more convenient to use external storage.
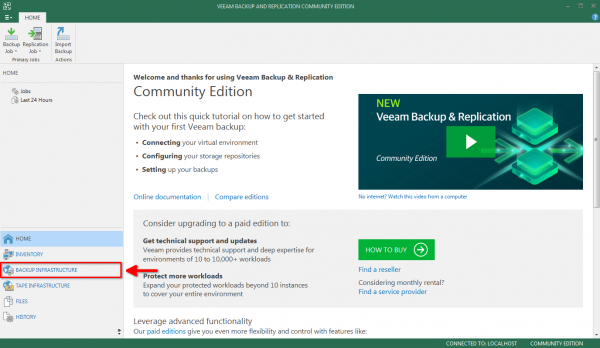
Let's go to the section BACKUP INFRASTRUCTURE:
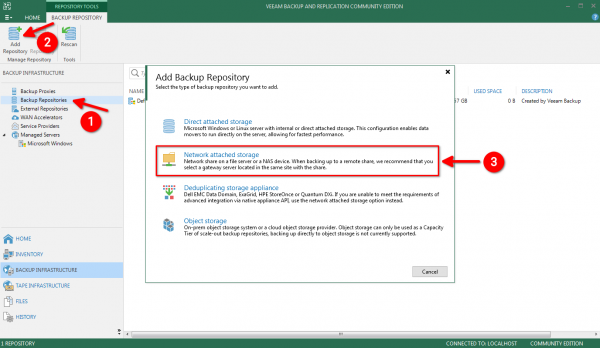
We choose the option Backup Repositories, click the button Add Repository and in the pop-up window select Network attached storage:
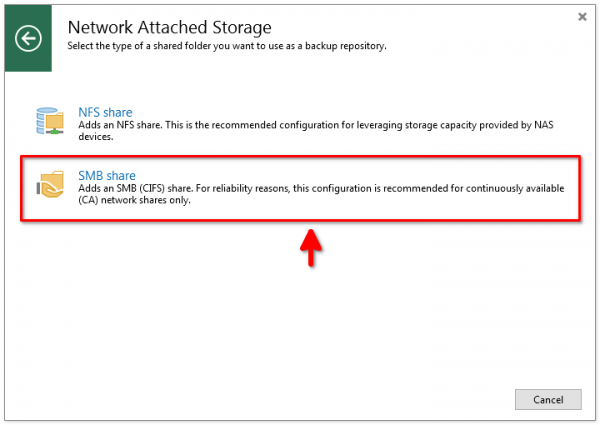
For example, we will take a test SMB storage; I have a regular QNAP:
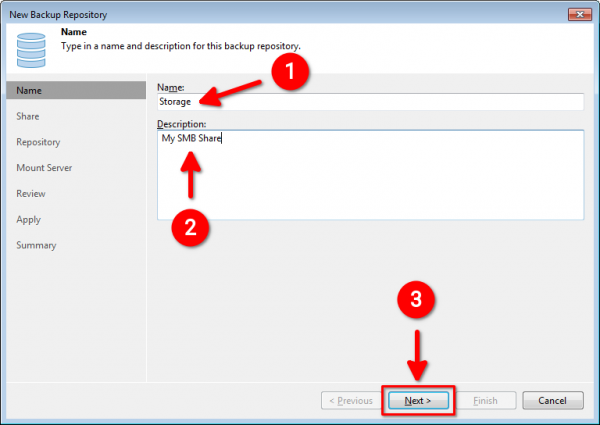
We fill in the name and description, then click the button Next:
We enter the SMB storage address and, if it requires authentication, click Add to add access credentials:
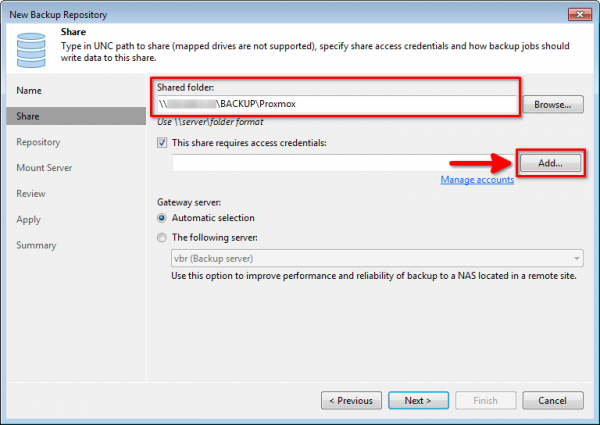
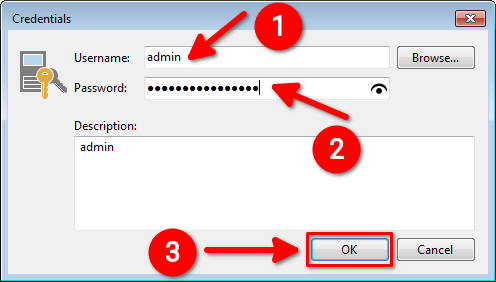
We fill in the username and password for accessing the SMB storage, and then click the button OK and, returning to the previous window, — Next:
If everything is done correctly, the program will connect to the storage, request information about the available disk space, and display the following dialog. In it, specify additional parameters (if necessary) and click the button Next:
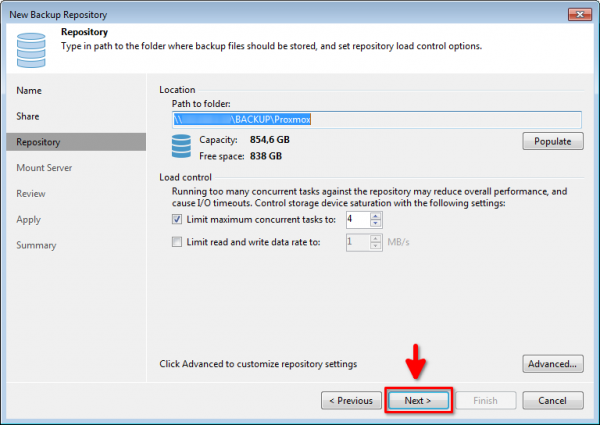
In the next window, you can leave all parameters as default and also click Next:

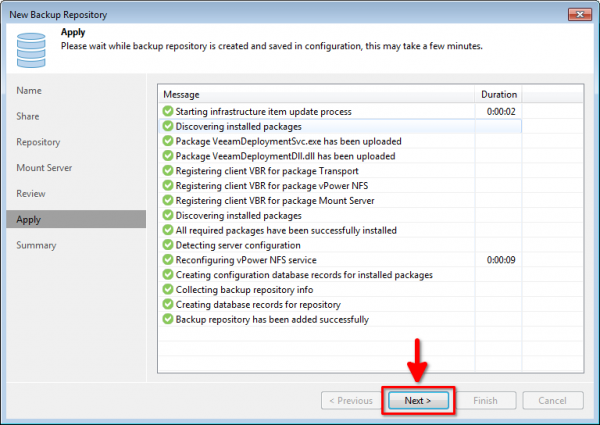
Checking that the necessary components are installed and in status already exists, and click the button Apply:
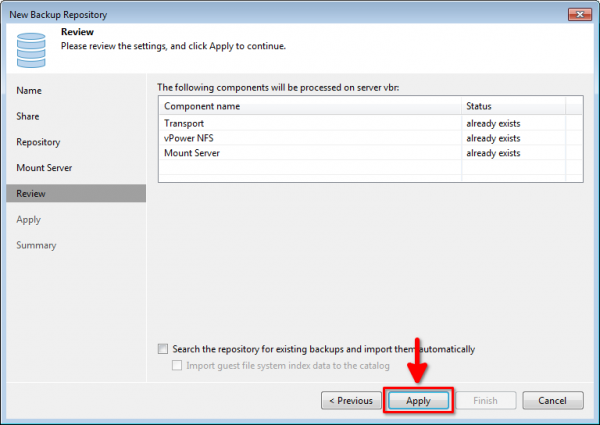
At this stage, Veeam® Backup & Replication™ will connect to the storage again, determine the necessary parameters, and create the repository. Click Next:
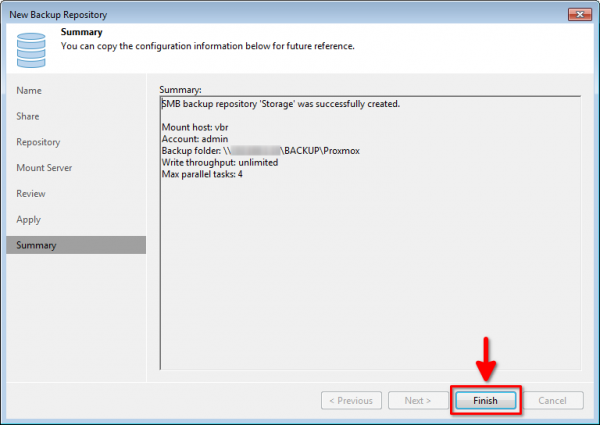
Check the summary information for the added repository and click the button Finish:
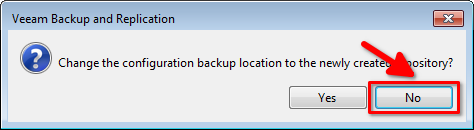
The program will automatically suggest saving its configuration files in the new repository. We do not need this, so we respond No:
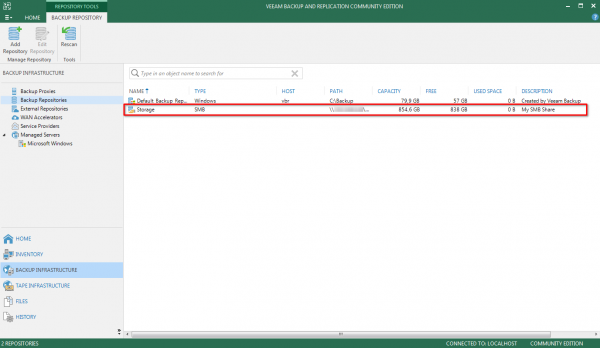
Repository successfully added:
Creating a backup job
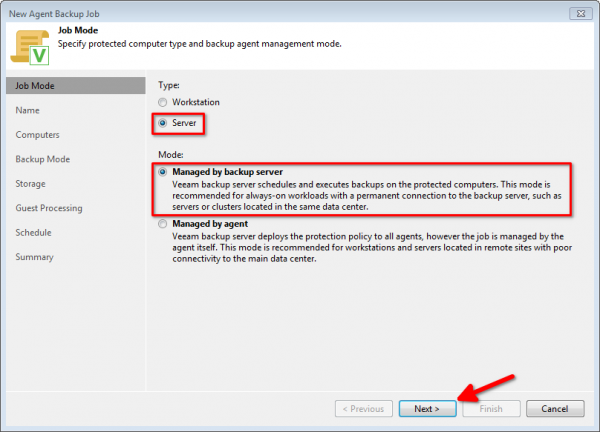
In the main window of Veeam® Backup & Replication™, click Backup Job — Linux computer. Choose the type Server and mode Managed by backup server:
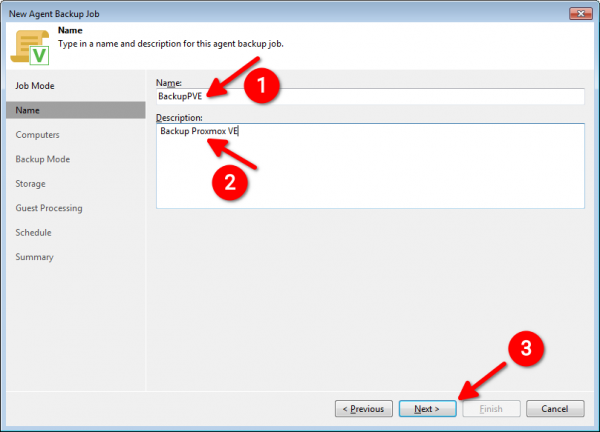
Give the job a name and optionally add a description. Then click Next:
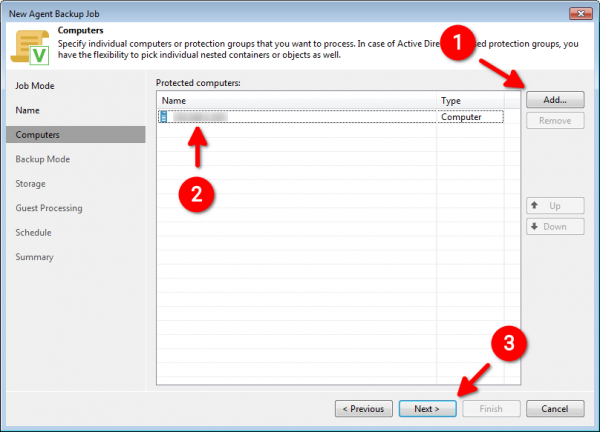
Next, we need to add all the Proxmox servers that we will back up. To do this, click Add — Individual computer. Enter the hostname or IP address of the server and access credentials. This way, we form the list of Protected computers and click Next:
Now, a very important moment, namely choosing the data to be included in the backup. This will depend on where your virtual machines are located. If you want to add only a specific logical volume, then the mode needed is Volume level backup and select the path to the logical volume or device, for example /dev/pve. All other actions are identical.
In this article, we will show how the mode works File level backup:

In the next window, form a list of directories for the backup. Click Add and specify the directories where the configuration files of the virtual machines are stored. By default, this is the directory /etc/pve/nodes/pve/qemu-server/. If you are using not only virtual machines but also LXC containers, then add the directory /etc/pve/nodes/pve/lxc/. In my case, this is also the directory /data.
Having thus formed the list of directories, we click Next:

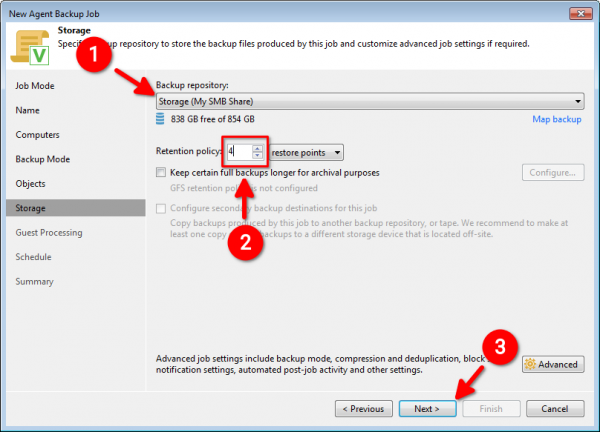
From the drop-down list of repositories, select Storage, created earlier. Specify the length of the chain for incremental backup. The more points there are in Retention policy, the more space you will save. However, this will reduce the reliability of the backup. I prioritize reliability over storage space, so I rated it 4 points. You can use the default value. 7. Let's continue setting up the task by clicking Next:
Here we leave the parameters unchanged, just proceed to the next window:

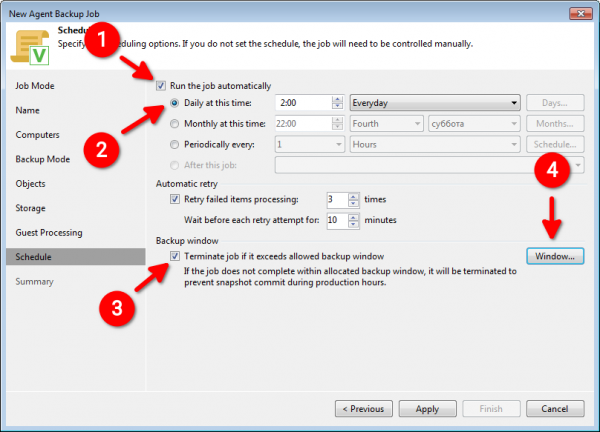
We are configuring the scheduler. This is one of the coolest features that makes a system administrator's life easier. In this example, I have chosen to automatically run the backup every day at 2 a.m. Another great feature is the ability to abort the backup task if we exceed the time limit of the allocated 'backup window'. Its exact schedule is formed through the button Window:
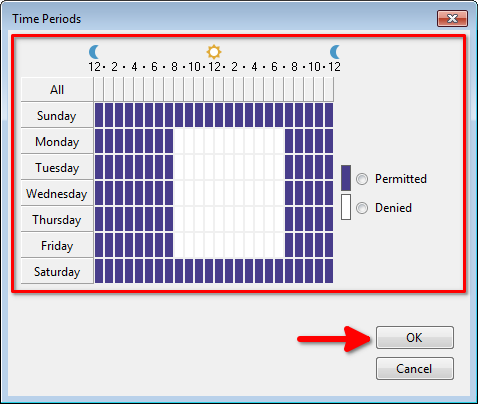
Again, for example, let's assume that we perform backups only during non-working hours on weekdays, and on weekends we are not limited in time at all. We create such a nice table, return to the previous window, and click Apply:
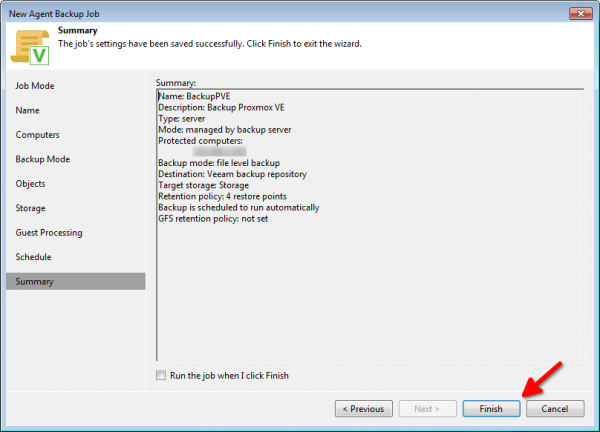
We just need to check the summary information about the task and click the button Finish:
This completes the creation of the backup task.
Performing backup
It's quite simple here. In the main program window, we select the created task and click Start. The system will automatically connect to our server (or multiple servers), check the availability of storage, and reserve the necessary amount of disk space. Then, the actual backup process will begin, and upon completion, we will receive comprehensive information about the process.
If an issue arises during the backup launch with the message Failed to load module [veeamsnap] with parameters [zerosnapdata=1 debuglogging=0], then the module needs to be rebuilt veeamsnap according to the .
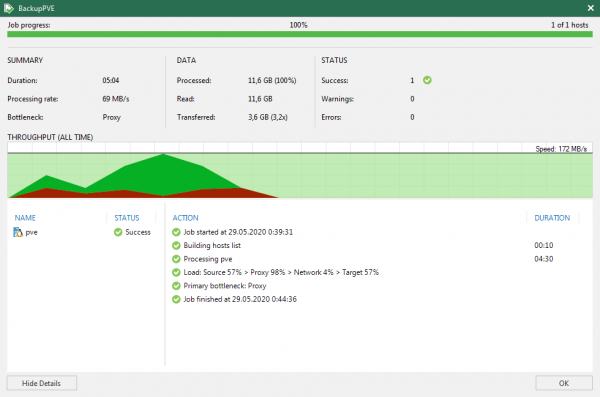
What is especially interesting is that on the server itself, we can view not only the list of all completed backup tasks but also monitor the process in real-time using the command veeam:
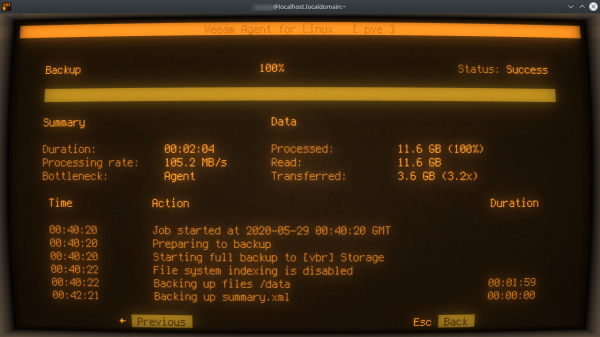
Foreseeing the question as to why the console looks so strange, I will say right away: I really like how the console looks on the screen of a warm, vintage CRT monitor. This is achieved through a terminal emulator .
Data Recovery
Now, the most important question. How do we recover data if something irreparable happens? For example, if the wrong virtual machine was accidentally deleted. In the Proxmox GUI, it has completely disappeared, and there’s nothing left in the storage of the machine.
The recovery process is straightforward. We access the Proxmox console and enter the command:
veeamWe will see a list of completed backups. We select the desired one using the arrow keys and press the key R. Next, we select the recovery point and press Enter:
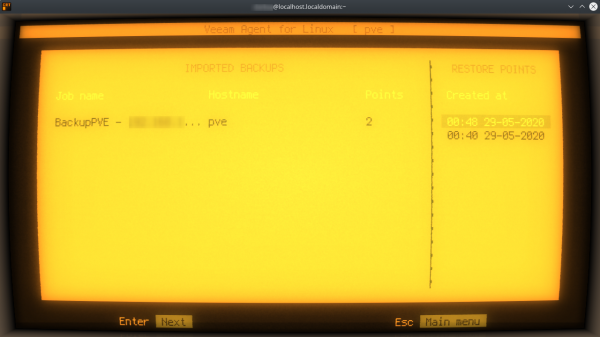
After a few seconds, the recovery point will be mounted in the directory /mnt/backup.
All that’s left is to copy the virtual disks and configuration files of the virtual machines back to their places, after which the 'deleted' machine will automatically appear in the Proxmox VE GUI. You will be able to start it in the usual way.
To unmount the recovery point, do not do this manually; instead, press the key U in the utility veeam.
That's all.
May the Force be with you!
Previous articles on the topic of the Proxmox VE hypervisor:
Source: habr.com
