

Which came first — the chicken or the egg? Quite a strange start for an article about Infrastructure-as-Code, isn't it?
What is an egg?
Most often, Infrastructure-as-Code (IaC) is a declarative way of representing infrastructure. In it, we describe the state we want to achieve, from the hardware to the software configuration. Thus, IaC is used for:
- Resource Provisioning. This includes VMs, S3, VPC, etc. The main tools for working are: and .
- . The main tools are: , Chef, etc.
Any code resides in git repositories. Sooner or later, the team lead will decide that it's time to bring some order to them. And they will refactor. They will create a certain structure. And they will find that this is good.
It's also good that there already exists and -a provider for Terraform (and this is Software Configuration). With their help, you can manage the entire project: team members, CI/CD, git-flow, etc.
Where did the egg come from?
Here we gradually approach the main question.
First of all, you need to start with the repository that describes the structure of other repositories, including itself. And of course, within the GitOps framework, you need to add CI for changes to be executed automatically.
What if Git hasn't been created yet?
- How to store it in Git?
- How to integrate CI?
- What if we are also deploying GitLab using IaC, and it's in Kubernetes?
- And GitLab Runner is also in Kubernetes?
- Is Kubernetes in a cloud provider?
Which came first: GitLab, where I will upload my code, or the code that describes what kind of GitLab I need?
Chicken with Eggs
«3 with a dinosaur» []
Let’s try to prepare a dish using the cloud provider .
TL;DR
Can we do it all in one command?
$ export MY_SELECTEL_TOKEN=
$ curl https://gitlab.com/chicken-or-egg/mks/make/-/snippets/2002106/raw | bash
Ingredients:
- An account from my.selectel.ru;
- Token from the account;
- Kubernetes skills;
- Helm skills;
- Terraform skills;
- Helm chart for GitLab;
- Helm chart for GitLab Runner.
Recipe:
- Get MY_SELECTEL_TOKEN from the panel my.selectel.ru.
- Create a Kubernetes cluster, passing the account token to it.
- Get the KUBECONFIG from the created cluster.
- Install GitLab in Kubernetes.
- Get the GitLab-token from the created GitLab for the user. root.
- Create the project structure in GitLab using the GitLab-token.
- Push the existing code to GitLab.
- ???
- Profit!
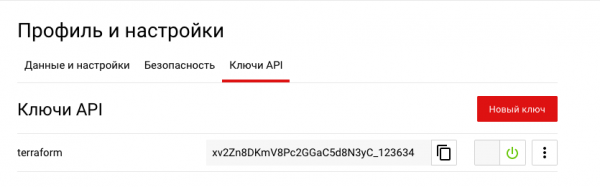
Step 1. The token can be acquired in the section .
 Step 2We are preparing our Terraform for 'baking' a cluster of 2 nodes. If you are sure that you have enough resources, you can enable autoscaling:
provider "selectel" {
 token = var.my_selectel_token
}

variable "my_selectel_token" {}
variable "username" {}
variable "region" {}


resource "selectel_vpc_project_v2" "my-k8s" {
 name = "my-k8s-cluster"
 theme = {
   color = "269926"
 }
 quotas {
   resource_name = "compute_cores"
   resource_quotas {
     region = var.region
     zone = "${var.region}a"
     value = 16
   }
 }
 quotas {
   resource_name = "network_floatingips"
   resource_quotas {
     region = var.region
     value = 1
   }
 }
 quotas {
   resource_name = "load_balancers"
   resource_quotas {
     region = var.region
     value = 1
   }
 }
 quotas {
   resource_name = "compute_ram"
   resource_quotas {
     region = var.region
     zone = "${var.region}a"
     value = 32768
   }
 }
 quotas {
   resource_name = "volume_gigabytes_fast"
   resource_quotas {
     region = var.region
     zone = "${var.region}a"
     # (20 * 2) + 50 + (8 * 3 + 10)
     value = 130
   }
 }
}

resource "selectel_mks_cluster_v1" "k8s-cluster" {
 name         = "k8s-cluster"
 project_id   = selectel_vpc_project_v2.my-k8s.id
 region       = var.region
 kube_version = "1.17.9"
}

resource "selectel_mks_nodegroup_v1" "nodegroup_1" {
 cluster_id        = selectel_mks_cluster_v1.k8s-cluster.id
 project_id        = selectel_mks_cluster_v1.k8s-cluster.project_id
 region            = selectel_mks_cluster_v1.k8s-cluster.region
 availability_zone = "${var.region}a"
 nodes_count       = 2
 cpus              = 8
 ram_mb            = 16384
 volume_gb         = 15
 volume_type       = "fast.${var.region}a"
 labels            = {
   "project": "my",
 }
}
Adding a user to the project:
resource "random_password" "my-k8s-user-pass" {
 length = 16
 special = true
 override_special = "_%@"
}

resource "selectel_vpc_user_v2" "my-k8s-user" {
 password = random_password.my-k8s-user-pass.result
 name = var.username
 enabled  = true
}

resource "selectel_vpc_keypair_v2" "my-k8s-user-ssh" {
 public_key = file("~/.ssh/id_rsa.pub")
 user_id    = selectel_vpc_user_v2.my-k8s-user.id
 name = var.username
}

resource "selectel_vpc_role_v2" "my-k8s-role" {
 project_id = selectel_vpc_project_v2.my-k8s.id
 user_id    = selectel_vpc_user_v2.my-k8s-user.id
}
Output:
output "project_id" {
 value = selectel_vpc_project_v2.my-k8s.id
}

output "k8s_id" {
 value = selectel_mks_cluster_v1.k8s-cluster.id
}

output "user_name" {
 value = selectel_vpc_user_v2.my-k8s-user.name
}

output "user_pass" {
 value = selectel_vpc_user_v2.my-k8s-user.password
}
Starting:
$ env
TF_VAR_region=ru-3
TF_VAR_username=diamon
TF_VAR_my_selectel_token=
terraform plan -out planfile

$ terraform apply -input=false -auto-approve planfile 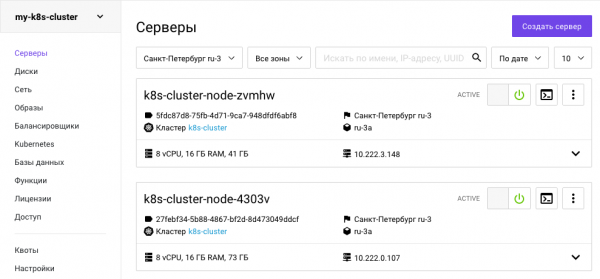
Step 3Obtaining the kubeconfig.
To programmatically download KUBECONFIG, you need to get a token from OpenStack:
openstack token issue -c id -f value > tokenThen use this token to make a request to the Managed Kubernetes Selectel API. k8s_id returns terraform:
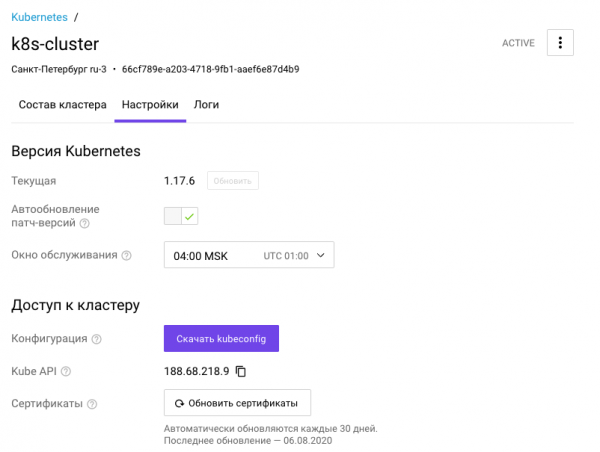
curl -XGET -H "x-auth-token: $(cat token)" "https://ru-3.mks.selcloud.ru/v1/clusters/$(cat k8s_id)/kubeconfig" -o kubeConfig.yamlThe kubeconfig can also be obtained via the panel.
Step 4After the cluster has been baked and we have access to it, we can add yaml on top as desired.
I prefer to add:
- namespace,
- storage class,
- pod security policy, and more.
For Selectel, you can take from .
Since I initially chose a cluster in the zone ru-3a, I also need the Storage Class from this zone.
kind: StorageClass
apiVersion: storage.k8s.io/v1
metadata:
 name: fast.ru-3a
 annotations:
   storageclass.kubernetes.io/is-default-class: "true"
provisioner: cinder.csi.openstack.org
parameters:
 type: fast.ru-3a
 availability: ru-3a
allowVolumeExpansion: true
Step 5. We will set up a load balancer.
We will use the standard one for many nginx-ingress. There are already plenty of instructions on how to install it, so we won't dwell on that.
$ helm repo add nginx-stable https://helm.nginx.com/stable
$ helm upgrade nginx-ingress nginx-stable/nginx-ingress -n ingress --install -f ../internal/K8S-cluster/ingress/values.yml
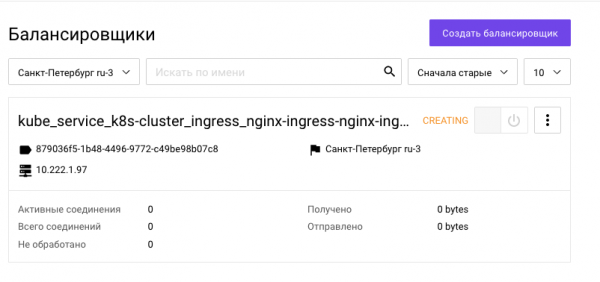
We wait for it to obtain an external IP, which takes about 3-4 minutes:
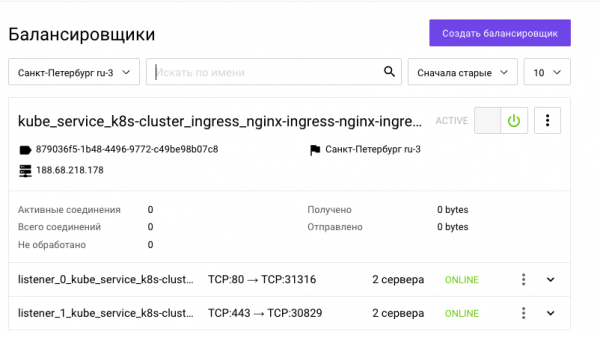
Received external IP:
Step 6. Now we install GitLab.
$ helm repo add gitlab https://charts.gitlab.io
$ helm upgrade gitlab gitlab/gitlab -n gitlab --install -f gitlab/values.yml --set "global.hosts.domain=gitlab.$EXTERNAL_IP.nip.io"
Again, we wait until all the pods are up.
kubectl get po -n gitlab
NAME                                      	READY   STATUS  	RESTARTS   AGE
gitlab-gitaly-0                           	0/1 	Pending 	0      	0s
gitlab-gitlab-exporter-88f6cc8c4-fl52d    	0/1 	Pending 	0      	0s
gitlab-gitlab-runner-6b6867c5cf-hd9dp     	0/1 	Pending 	0      	0s
gitlab-gitlab-shell-55cb6ccdb-h5g8x       	0/1 	Init:0/2	0      	0s
gitlab-migrations.1-2cg6n                 	0/1 	Pending 	0      	0s
gitlab-minio-6dd7d96ddb-zd9j6             	0/1 	Pending 	0      	0s
gitlab-minio-create-buckets.1-bncdp       	0/1 	Pending 	0      	0s
gitlab-postgresql-0                       	0/2 	Pending 	0      	0s
gitlab-prometheus-server-6cfb57f575-v8k6j 	0/2 	Pending 	0      	0s
gitlab-redis-master-0                     	0/2 	Pending 	0      	0s
gitlab-registry-6bd77b4b8c-pb9v9          	0/1 	Pending 	0      	0s
gitlab-registry-6bd77b4b8c-zgb6r          	0/1 	Init:0/2	0      	0s
gitlab-shared-secrets.1-pc7-5jgq4         	0/1 	Completed   0      	20s
gitlab-sidekiq-all-in-1-v1-54dbcf7f5f-qbq67   0/1 	Pending 	0      	0s
gitlab-task-runner-6fd6857db7-9x567       	0/1 	Pending 	0      	0s
gitlab-webservice-d9d4fcff8-hp8wl         	0/2 	Pending 	0      	0s
Waiting gitlab
./wait_gitlab.sh ../internal/gitlab/gitlab/.pods
waiting for pod...
waiting for pod...
waiting for pod...
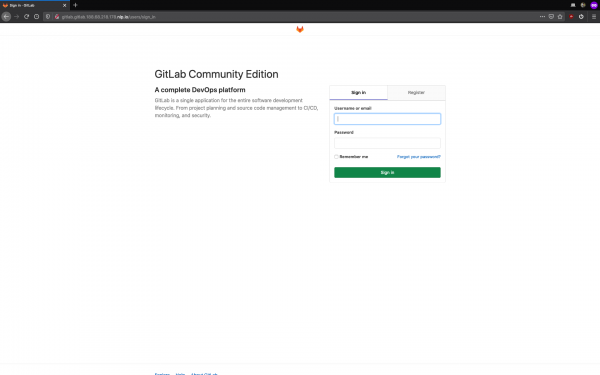
Pods are up:
Step 7. We are obtaining the GitLab token.
First, we find out the login password:
kubectl get secret -n gitlab gitlab-gitlab-initial-root-password -o jsonpath='{.data.password}' | base64 --decodeNow we authenticate and get the token:
python3 get_gitlab_token.py root $GITLAB_PASSWORD http://gitlab.gitlab.$EXTERNAL_IP.nip.ioStep 8. We organize the Git repositories into the correct hierarchy using the Gitlab Provider.
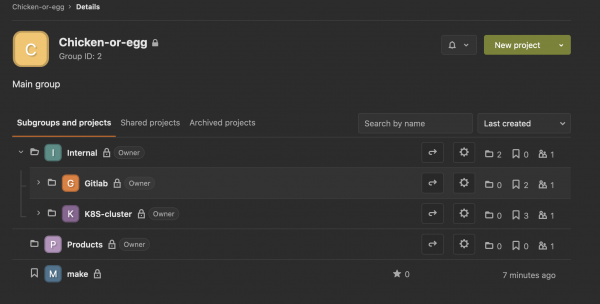
cd ../internal/gitlab/hierarchy && terraform apply -input=false -auto-approve planfileUnfortunately, there is a floating . Therefore, you will need to manually delete the conflicting projects to fix the tf.state. Then restart the command `$ make all`
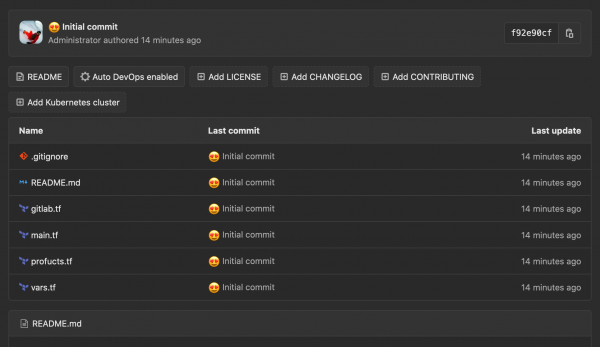
Step 9. We transfer local repositories to the server.
$ make push

[master (root-commit) b61d977]  Initial commit
 3 files changed, 46 insertions(+)
 create mode 100644 .gitignore
 create mode 100644 values.yml
Enumerating objects: 5, done.
Counting objects: 100% (5/5), done.
Delta compression using up to 8 threads
Compressing objects: 100% (5/5), done.
Writing objects: 100% (5/5), 770 bytes | 770.00 KiB/s, done.
Total 5 (delta 0), reused 0 (delta 0)
Done:
Conclusion
We have achieved the ability to declaratively manage everything from our local machine. Now we want to move all these tasks into CI and just press buttons. For this, we need to transfer our local states (Terraform state) to CI. How to do this will be explained in the next part.
Subscribe to our , so you won't miss the release of new articles!
Source: habr.com
