

In We have covered the launch of a VNC server on a virtual machine of any type. This option has many drawbacks, the main one being high requirements for data transfer bandwidth. Today, we will try to connect to a graphical desktop on Linux via RDP (Remote Desktop Protocol). The VNC system is based on transmitting pixel arrays over the RFB (Remote Framebuffer) protocol, while RDP allows for the transmission of more complex graphical primitives and high-level commands. It is usually used for remote desktop services in Windows, but servers for Linux are also available.
Table of Contents:
Installing the Graphical Environment
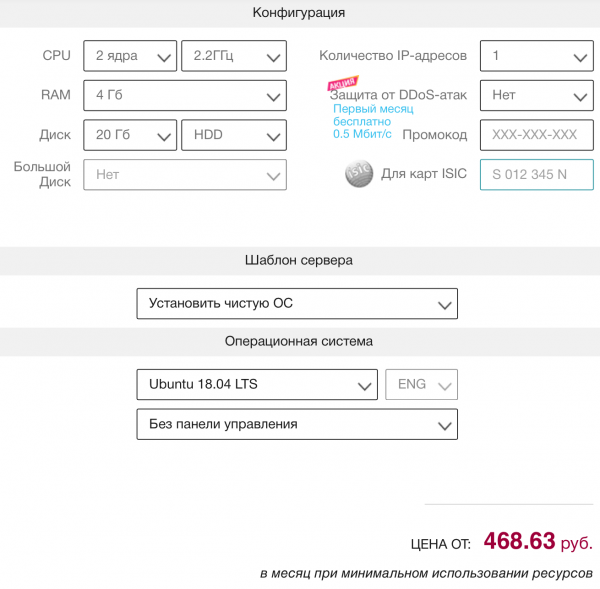
We will take a virtual machine with Ubuntu Server 18.04 LTS, featuring two CPU cores, four gigabytes of RAM, and a twenty-gigabyte hard drive (HDD). A weaker configuration isn't well-suited for a graphical desktop, though it depends on the tasks at hand. Don’t forget to use the promo code Habrahabr10 to get a 10% discount on your order.
The installation of the desktop environment with all dependencies is done using the following command:
sudo apt-get install xfce4 xfce4-goodies xorg dbus-x11 x11-xserver-utilsAs in the previous case, we chose XFCE due to its relatively low resource requirements.
Localizing the Server and Installing Software
Often, virtual machines are deployed only with English localization. A Russian desktop may be needed, which is easy to configure. First, let's install translations for system programs:
sudo apt-get install language-pack-ruLet's set the localization:
sudo update-locale LANG=ru_RU.UTF-8The same effect can be achieved by manually editing the file /etc/default/locale.
For localizing GNOME and KDE, there are packages in the repository: language-pack-gnome-ru and language-pack-kde-ru — you will need them if you use programs from these desktop environments. In XFCE, translations are installed along with the applications. Next, you can install dictionaries:
# Словари для проверки орфографии
sudo apt-get install hunspell hunspell-ru

# Тезаурус для LibreOffice
sudo apt-get install mythes-ru

# Англо-русский словарь в формате DICT
sudo apt-get install mueller7-dict
Additionally, installing translations may be required for some applications:
# Браузер Firefox
sudo apt-get install firefox firefox-locale-ru

# Почтовый клиент Thunderbird
sudo apt-get install thunderbird thunderbird-locale-ru

# Офисный пакет LibreOffice
sudo apt-get install libreoffice libreoffice-l10n-ru libreoffice-help-ru
This completes the setup of the desktop environment, and we just need to configure the RDP server.
Installing and Configuring the RDP Server
In the Ubuntu repositories, there is a freely distributed Xrdp server, which we will use:
sudo apt-get install xrdpIf everything went well, the server should start automatically:
sudo systemctl status xrdp 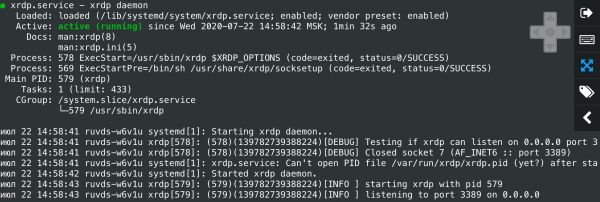
The Xrdp server runs with the user rights of xrdp and by default uses the certificate /etc/ssl/private/ssl-cert-snakeoil.key, which can be replaced with your own. To grant read access to the file, you need to add the user to the ssl-cert group:
sudo adduser xrdp ssl-certDefault settings can be found in the file /etc/default/xrdp, while all other configuration files for the server are located in the /etc/xrdp directory. The main parameters are in the xrdp.ini file, which can be left unchanged. The config is well documented and comes with the corresponding manpages:
man xrdp.ini
man xrdp
You just need to edit the script /etc/xrdp/startwm.sh, which is executed during user session initialization. First, let's create a backup of the script from the distribution:
sudo mv /etc/xrdp/startwm.sh /etc/xrdp/startwm.b
sudo nano /etc/xrdp/startwm.sh
To start the XFCE desktop environment, a script roughly like this is needed:
#!/bin/sh
if [ -r /etc/default/locale ]; then
. /etc/default/locale
export LANG LANGUAGE
fi
exec /usr/bin/startxfce4
Note: In scripts, it’s better to specify the full path to executable files — this is a good habit. We will make the script executable, and at this point, the configuration of the Xrdp server can be considered complete:
sudo chmod 755 /etc/xrdp/startwm.shLet's restart the server:
sudo systemctl restart xrdp
Configuring the Firewall
By default, Xrdp listens on TCP port 3389 on all interfaces. Depending on the configuration of the virtual server, you may need to configure the Netfilter firewall. In Linux, this is usually done using the iptables utility, but in Ubuntu, it’s better to use ufw. If the client’s IP address is known, the configuration is done with the following command:
sudo ufw allow from IP_Address to any port 3389To allow connections from any IP, you can do this:
sudo ufw allow 3389The RDP protocol supports encryption, but allowing access to the Xrdp server from public networks is a bad idea. If the client does not have a fixed IP, to increase security, the server should only listen to localhost. Access should be set up through an SSH tunnel, which will securely redirect traffic from the client computer. We used a similar approach for the VNC server.
Connecting to the RDP Server
For working with the desktop environment, it’s better to create a separate unprivileged user:
sudo adduser rdpuser 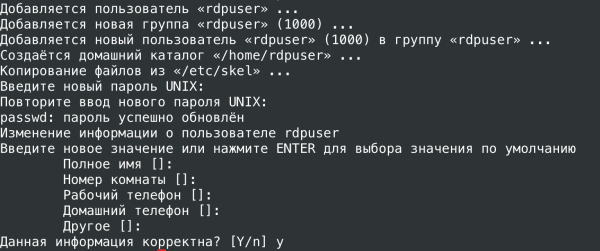
We will add the user to the sudo group so that he can perform administrative tasks. If there is no need for this, this step can be skipped:
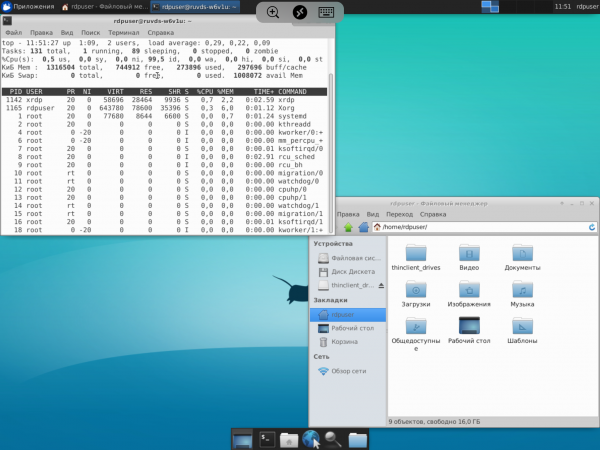
sudo gpasswd -a rdpuser sudoYou can connect to the server using any RDP client, including the built-in Remote Desktop Services client in Windows. If Xrdp is listening on the external interface, no additional steps are required. Just specify the VPS's IP address, username, and password in the connection settings. After connecting, you will see something like this:
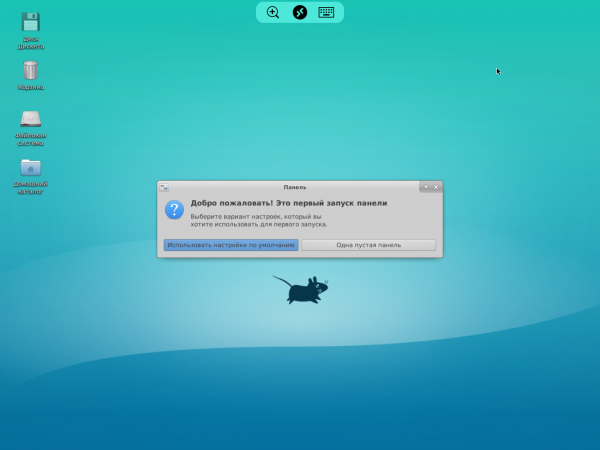
After the initial desktop environment setup, we will have a full desktop. As you can see, it doesn't consume too many resources, although everything will depend on the applications used.
If the Xrdp server is listening only on localhost, the traffic on the client computer will need to be tunneled through SSH (sshd must be running on the VPS). On Windows, you can use a graphical SSH client (like PuTTY), while UNIX systems will need the ssh utility:
ssh -L 3389:127.0.0.1:3389 -C -N -l rdpuser RDP_server_ipAfter the tunnel is initialized, the RDP client will connect not to the remote server, but to the local host.
It's more complicated with mobile devices: clients capable of establishing a tunnel need to be purchased, plus in iOS and iPadOS, the background operation of third-party applications is complicated due to overly optimized power consumption. On iPhone and iPad, establishing a tunnel in a separate application is not possible — a combination application is required, one that can establish an RDP connection over SSH by itself. Something like .
Session Manager and User Sessions
The ability to work in a multi-user environment is directly implemented in the Xrdp server and does not require additional configuration. After starting the service via systemd, one process runs in daemon mode, listens on port 3389, and interacts through localhost with the session manager.
ps aux |grep xrdp 
sudo netstat -ap |grep xrdp 
The session manager is usually not visible to users because the login and password specified in the client settings are passed to it automatically. If this does not happen or an authentication error occurs, an interactive window will appear instead of the desktop for system login.
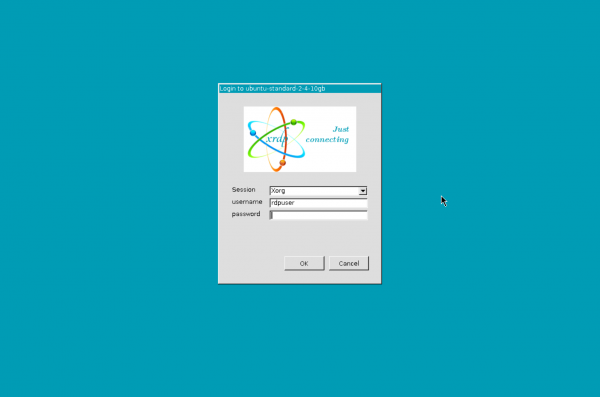
The automatic start of the session manager is defined in the file /etc/default/xrdp, and the configuration is stored in /etc/xrdp/sesman.ini. By default, it looks something like this:
[Globals]
ListenAddress=127.0.0.1
ListenPort=3350
EnableUserWindowManager=true
UserWindowManager=startwm.sh
DefaultWindowManager=startwm.sh

[Security]
AllowRootLogin=true
MaxLoginRetry=4
TerminalServerUsers=tsusers
TerminalServerAdmins=tsadmins
; When AlwaysGroupCheck=false access will be permitted
; if the group TerminalServerUsers is not defined.
AlwaysGroupCheck=false

[Sessions]
You don't need to change anything here, just disable root login (AllowRootLogin=false). For each user authorized in the system, a separate xrdp process is launched: if you disconnect without ending the session, user processes will continue to run by default, and you can reconnect to the session. Settings can be modified in the file /etc/xrdp/sesman.ini (section [Sessions]).
Switching Keyboard Layouts
There are usually no issues with bidirectional clipboard, but you'll have to do some tweaking with the Russian keyboard layout (the Russian locale must be already ). Let's edit the keyboard settings for the Xrdp server:
sudo nano /etc/xrdp/xrdp_keyboard.iniAt the end of the configuration file, you need to add the following lines:
[rdp_keyboard_ru]
keyboard_type=4
keyboard_type=7
keyboard_subtype=1
model=pc105
options=grp:alt_shift_toggle
rdp_layouts=default_rdp_layouts
layouts_map=layouts_map_ru

[layouts_map_ru]
rdp_layout_us=us,ru
rdp_layout_ru=us,ru
You just need to save the file and restart Xrdp:
sudo systemctl restart xrdpAs you can see, setting up an RDP server on a Linux VPS isn't difficult, and in we have already covered VNC configuration. In addition to these technologies, there is another interesting option: the X2Go system that uses a modified NX protocol. We'll cover that in the next post.
Source: habr.com
