

Some users rent relatively inexpensive Windows VPS to run a remote desktop service. The same can be done on Linux without housing their own hardware in a data center or renting a dedicated server. Some may need a familiar graphical environment for testing and development or a remote desktop with a high bandwidth for working from mobile devices. There are many applications for the Remote FrameBuffer (RFB) protocol-based Virtual Network Computing (VNC) system. In this brief article, we will discuss how to set it up on a virtual machine with any hypervisor.
Table of Contents:
VNC Server Selection
The VNC service can be integrated into the virtualization system, whereby the hypervisor connects it with emulated devices and no additional configuration is necessary. This option entails significant overhead and is not supported by all providers — even in a less resource-intensive implementation, where instead of emulating a real graphical device, a simplified abstraction (framebuffer) is passed to the virtual machine. Sometimes, the VNC server is bound to a running X server, but this method is more suitable for accessing physical machines and creates a number of technical complications on virtual ones. The easiest way is to install a VNC server with an integrated X server. It does not require physical devices (video adapter, keyboard, and mouse) or their emulation via the hypervisor, making it suitable for any type of VPS.
Installation and setup
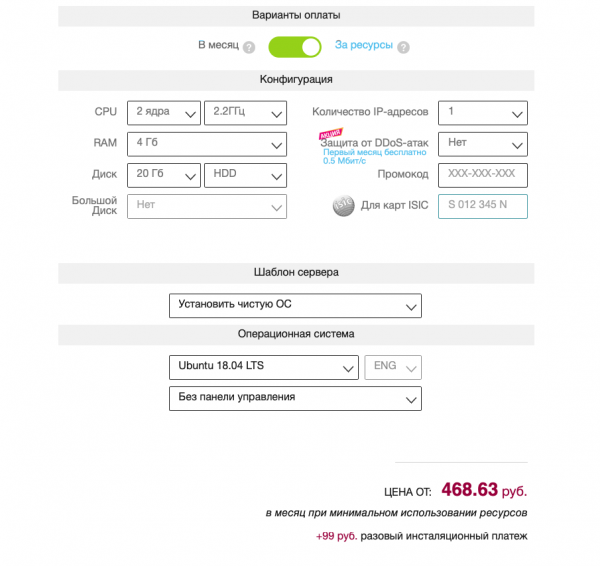
We will need a virtual machine running Ubuntu Server 18.04 LTS with the default configuration. Several VNC servers are available in the standard repositories of this distribution: , , and others. We chose TigerVNC — the current fork of the unsupported TightVNC. The configuration of other servers is performed similarly. You also need to select a desktop environment: in our opinion, XFCE is the optimal choice due to its relatively low resource requirements. Those interested can install another DE or WM: it all depends on personal preferences, but the choice of software directly impacts the need for RAM and processing cores.
The installation of the desktop environment with all dependencies is done using the following command:
sudo apt-get install xfce4 xfce4-goodies xorg dbus-x11 x11-xserver-utilsNext, you must install the VNC server:
sudo apt-get install tigervnc-standalone-server tigervnc-commonRunning it with superuser privileges is a bad idea. Let's create a user and group:
sudo adduser vnc 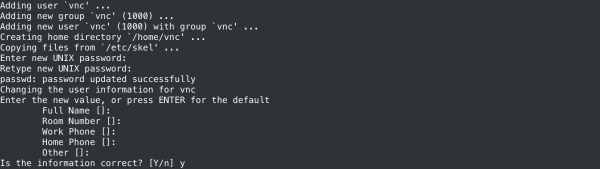
We will add the user to the sudo group so that he can perform administrative tasks. If there is no need for this, this step can be skipped:
sudo gpasswd -a vnc sudoIn the next step, we need to start the VNC server with the privileges of the user vnc to create a secure password and configuration files in the ~/.vnc/ directory. The password length can be from 6 to 8 characters (extra characters are trimmed). If needed, a view-only password can also be set, i.e., without access to the keyboard and mouse. The following commands are executed as the user vnc:
su - vnc
vncserver -localhost no 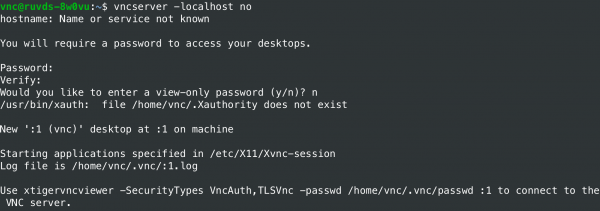
By default, the RFB protocol uses a range of TCP ports from 5900 to 5906 — these are the so-called display ports, each corresponding to an X server screen. The ports are associated with screens from :0 to :6. The instance of the VNC server we started listens on port 5901 (screen :1). Other instances can run on different ports with screens :2, :3, and so on. Before further configuration, we need to stop the server:
vncserver -kill :1The command should generate a message similar to: 'Killing Xtigervnc process ID 18105… success!'.
When TigerVNC starts, it executes the script ~/.vnc/xstartup to configure the settings. We will create our own script, first backing up the existing one if it exists:
mv ~/.vnc/xstartup ~/.vnc/xstartup.b
nano ~/.vnc/xstartup
The XFCE desktop environment session is initiated by the following xstartup script:
#!/bin/bash
unset SESSION_MANAGER
unset DBUS_SESSION_BUS_ADDRESS
xrdb $HOME/.Xresources
exec /usr/bin/startxfce4 &
The xrdb command is needed for the VNC system to read the .Xresources file in the home directory. There, the user can define various settings for the graphical desktop: font rendering, terminal colors, cursor themes, etc. The script needs to be made executable:
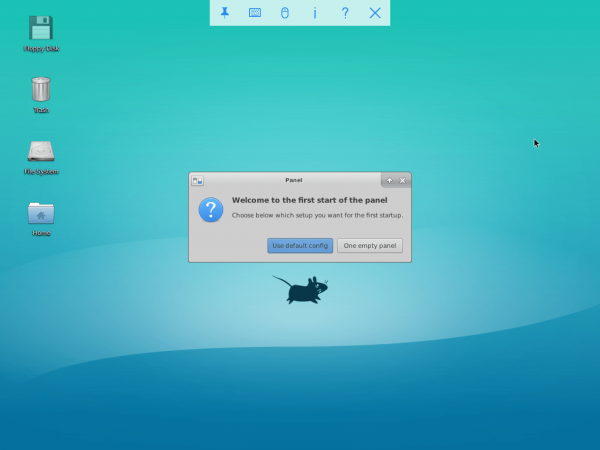
chmod 755 ~/.vnc/xstartupAt this point, the VNC server configuration is complete. If you start it with the command vncserver -localhost no (as the user vnc), you will be able to connect with the previously set password and see the following:
Starting the service via systemd
Manually starting the VNC server is not well-suited for production use, so we will set up a system service. Commands are executed as root (using sudo). First, let's create a new unit file for our server:
sudo nano /etc/systemd/system/vncserver@.serviceThe @ symbol in the name allows passing an argument for configuring the service. In our case, it sets the VNC display port. The unit file consists of several sections:
[Unit]
Description=TigerVNC server
After=syslog.target network.target

[Service]
Type=simple
User=vnc
Group=vnc
WorkingDirectory=/home/vnc
PIDFile=/home/vnc/.vnc/%H:%i.pid
ExecStartPre=-/usr/bin/vncserver -kill :%i > /dev/null 2>&1
ExecStart=/usr/bin/vncserver -depth 24 -geometry 1280x960 :%i
ExecStop=/usr/bin/vncserver -kill :%i

[Install]
WantedBy=multi-user.target
Then you need to notify systemd about the new file and activate it:
sudo systemctl daemon-reload
sudo systemctl enable vncserver@1.service
The number 1 in the name sets the screen number.
We stop the VNC server, run it as a service, and check the status:
# от имени пользователя vnc
vncserver -kill :1
# с привилегиями суперпользователя
sudo systemctl start vncserver@1
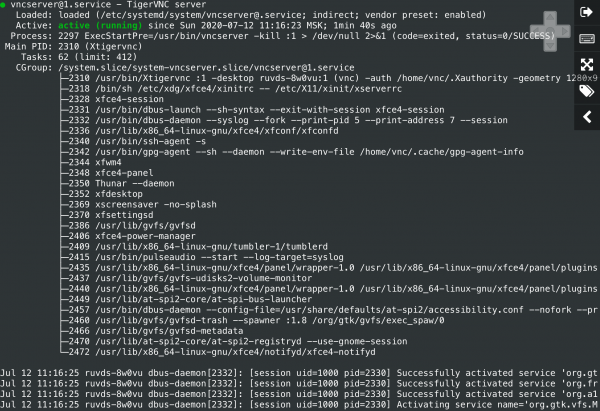
sudo systemctl status vncserver@1If the service is running, we should get a result like this.
Connecting to the desktop
Our configuration does not use encryption, so network packets can be intercepted by attackers. Moreover, vulnerabilities are often , so it's not advisable to expose them to the internet. For a secure connection on a local machine, you need to tunnel the traffic through SSH, and then set up the VNC client. On Windows, a graphical SSH client (like PuTTY) can be used. For security, TigerVNC on the server only listens on localhost and is not directly accessible from public networks:
sudo netstat -ap |more 
On Linux, FreeBSD, OS X, and other UNIX-like OSs, the tunnel from the client computer is made using the ssh utility (the VNC server must have sshd running):
ssh -L 5901:127.0.0.1:5901 -C -N -l vnc vnc_server_ipThe -L option binds port 5901 of the remote connection to port 5901 on localhost. The -C option enables compression, and -N tells the ssh utility that there is no need to execute a remote command. The -l option specifies the username for remote login.
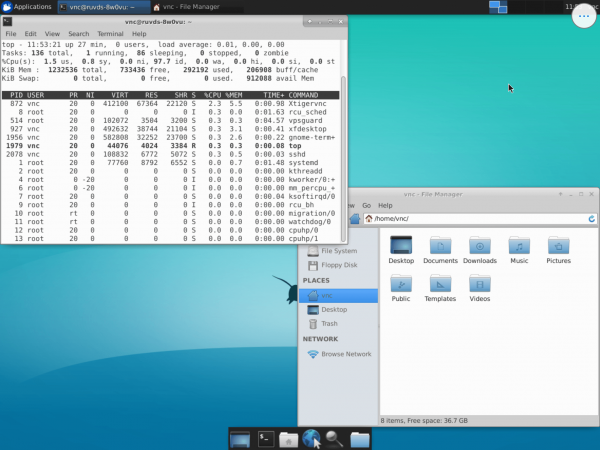
After setting up the tunnel on your local computer, you need to start the VNC client and connect to the host 127.0.0.1:5901 (localhost:5901), using the previously set password to access the VNC server. Now we can safely interact through an encrypted tunnel with the XFCE desktop environment on the VPS. The screenshot in the terminal emulator shows the top utility running to display minimal resource usage by the virtual machine. From here on, everything will depend on the user applications.
You can set up and configure a VNC server on Linux on almost any VPS. Expensive and resource-intensive configurations with video adapter emulation or the purchase of commercial software licenses are not required for this. Besides the system service option we discussed, there are other methods: running as a daemon (through /etc/rc.local) at system boot or on demand via inetd. The latter is interesting for creating multi-user configurations. The internet superserver will start the VNC server and connect it to a client, and the VNC server will create a new screen and begin the session. For authentication within it, a graphical display manager can be used (for example, ), and after the client disconnects, the session will be closed, and all programs running on the screen will be terminated.
Source: habr.com
