

TL;DR: I install Wireguard on a VPS, connect to it from my home router on OpenWRT, and gain access to my home subnet from my phone.
If you have a personal infrastructure on a home server or multiple IP-managed devices at home, you probably want to access them from work, on the bus, train, or metro. Most often, for similar tasks, you would purchase an IP from your provider, after which the ports of each service are forwarded externally.
Instead, I set up a VPN for access to my home local network. The benefits of this solution include:
- Transparency: I feel at home under any circumstances.
- Simplicity: set it up and forget it, no need to worry about forwarding each port.
- Price: I already have a VPS, for such tasks a modern VPN is nearly free on resources.
- Security: nothing is exposed externally, I can leave MongoDB without a password and no one will steal the data.
As always, there are drawbacks. Firstly, you will have to configure each client separately, including on the server side. This can be inconvenient when there are many devices from which you want to access services. Secondly, you may have a matching local network at work — you'll need to resolve that issue.
We will need:
- A VPS (in my case on Debian 10).
- A router on OpenWRT.
- A phone.
- A home server with some web service for testing.
- Skilled hands.
For the VPN technology, I will be using Wireguard. This solution also has its pros and cons, which I will not describe here. For the VPN, I use the subnet 192.168.99.0/24, while at home I have 192.168.0.0/24.
VPS Configuration
For this task, even the cheapest VPS for 30 rubles a month will suffice, if you're lucky enough to find one .
I perform all operations on the server as root on a clean machine, add `sudo` if necessary and adapt the instructions.
Wireguard hasn't made it to stable yet, so I perform `apt edit-sources` and add the backports with two lines at the end of the file:
deb http://deb.debian.org/debian/ buster-backports main
 # deb-src http://deb.debian.org/debian/ buster-backports main
The package is installed in the usual way: apt update && apt install wireguard.
Next, we generate a key pair: wg genkey | tee /etc/wireguard/vps.private | wg pubkey | tee /etc/wireguard/vps.public. Repeat this operation twice more for each device involved in the setup. Change the file paths to the keys for the other device and remember to secure the private keys.
Now let's prepare the config. In the file /etc/wireguard/wg0.conf the config is placed:
[Interface]
 Address = 192.168.99.1/24
 ListenPort = 57953
 PrivateKey = 0JxJPUHz879NenyujROVK0YTzfpmzNtbXmFwItRKdHs=
[Peer] # OpenWRT
PublicKey = 36MMksSoKVsPYv9eyWUKPGMkEs3HS+8yIUqMV8F+JGw=
AllowedIPs = 192.168.99.2/32,192.168.0.0/24
[Peer] # Smartphone
PublicKey = /vMiDxeUHqs40BbMfusB6fZhd+i5CIPHnfirr5m3TTI=
AllowedIPs = 192.168.99.3/32
In the section [Interface] the machine's settings are specified, and in [Peer] — settings for those who will connect to it. In AllowedIPs subnets to be routed to the corresponding peer are listed separated by commas. Because of this, client device peers in the VPN subnet must have a mask /32, everything else will be routed by the server. Since the home network will be routed through OpenWRT, in AllowedIPs the corresponding peer, we append the home subnet. In PrivateKey and PublicKey place the private key generated for the VPS and the public keys of peers accordingly.
On the VPS, you just need to run the command that will bring up the interface and add it to startup: systemctl enable --now wg-quick@wg0. The current status of the connections can be checked with the command wg.
OpenWRT Configuration
Everything needed for this stage is in the luci module (OpenWRT web interface). Log in and in the System menu, open the Software tab. OpenWRT does not store a cache on the machine, so you need to update the list of available packages by clicking on the green Update lists button. After completing this, type in the filter luci-app-wireguard and, looking at the window with a nice dependency tree, install this package.
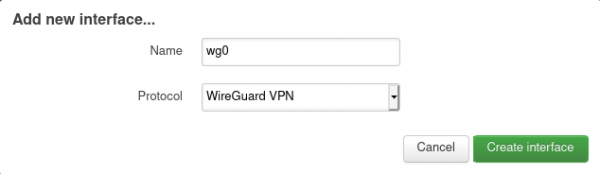
In the Networks menu, select Interfaces and click the green Add New Interface button below the existing list. After entering the name (also wg0 in my case) and selecting the WireGuard VPN protocol, a settings form with four tabs opens.
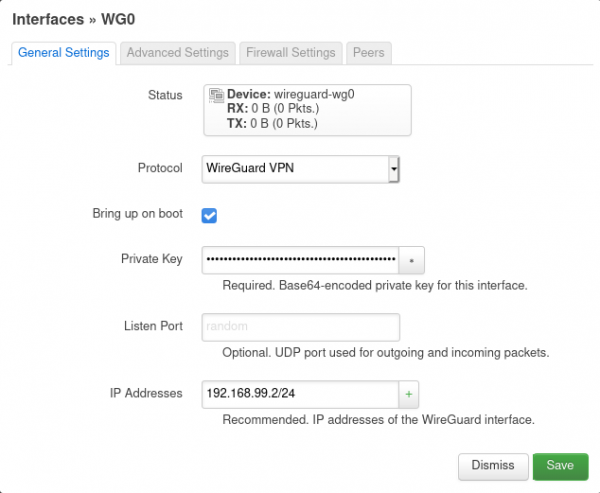
On the General Settings tab, you need to enter the private key and the IP address prepared for OpenWRT along with the subnet.
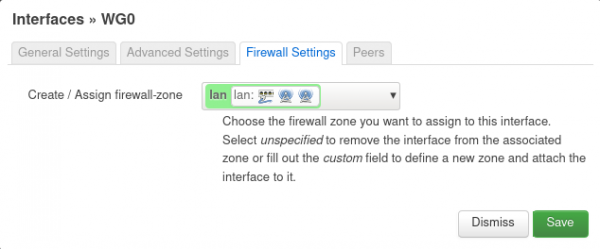
On the Firewall Settings tab, add the interface to the local network. This way, connections from the VPN will be freely accessible in the local network.
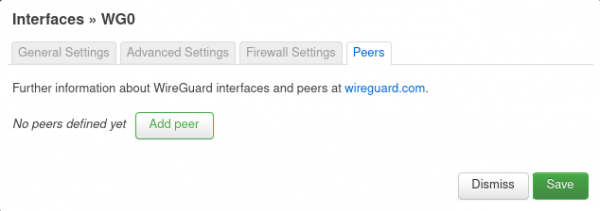
On the Peers tab, press the only button, then in the updated form fill in the VPS server data: public key, Allowed IPs (you need to route the entire VPN subnet to the server). In Endpoint Host and Endpoint Port, enter the VPS IP address and port as previously specified in the ListenPort directive. Check Route Allowed IPs to create routes. And make sure to fill in Persistent Keep Alive, otherwise, the tunnel from the VPS to the router will drop if the latter is behind NAT.
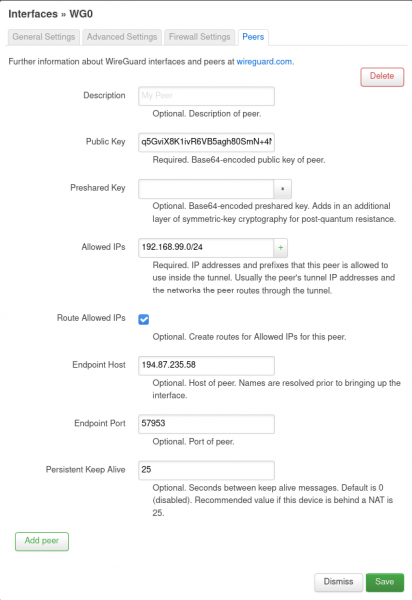
After that, you can save the settings and then press Save and apply on the interface list page. If necessary, explicitly start the interface by pressing the Restart button.
Configuring the smartphone
You will need the Wireguard client, which is available on , and the App Store. Upon opening the application, tap the plus sign and in the Interface section, enter the connection name, the private key (the public key will be generated automatically), and the phone address with the mask /32. In the Peer section, specify the public key of the VPS, the address: port pair of the VPN server as the Endpoint, and the routes to the VPN and home subnet.
Bold screenshot from the phone
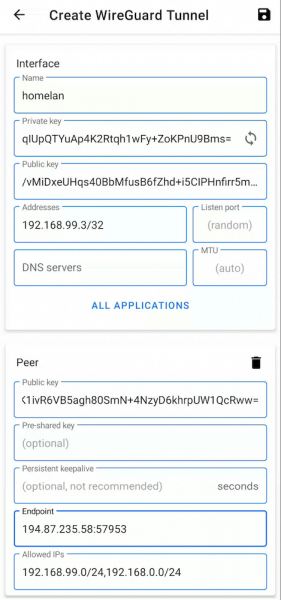
Tap on the floppy disk in the corner, turn it on, and…
Done
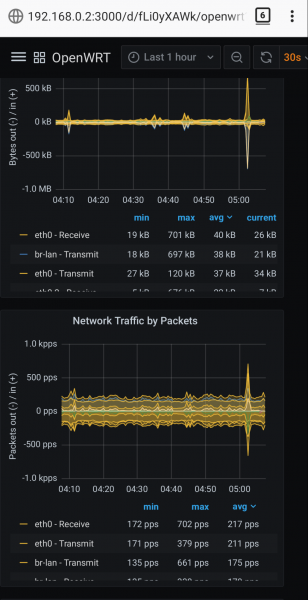
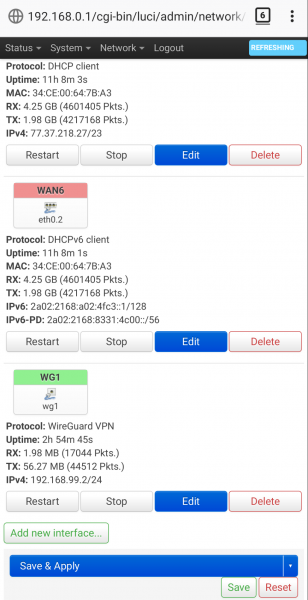
Now you can access home monitoring, change router settings, or do anything at the IP level.
Screenshots from the local network
Source: habr.com
