

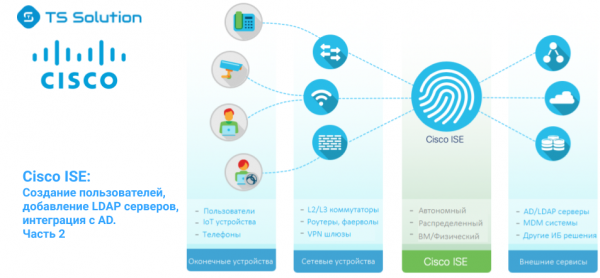
Welcome to the second publication of the series of articles dedicated to Cisco ISE. In the first one, we discussed the advantages and differences of Network Access Control (NAC) solutions from standard AAA, the uniqueness of Cisco ISE, its architecture, and the installation process of the product.
In this article, we will delve into creating user accounts, adding LDAP servers, and integrating with Microsoft Active Directory, as well as the nuances of working with PassiveID. Before reading, I highly recommend familiarizing yourself with the .
1. Some Terminology
User Identity is a user account that contains information about the user and forms their credentials for network access. The following parameters are typically specified in User Identity: username, email address, password, account description, user group, and role.
User Groups are collections of individual users who share a common set of privileges that allow them to access a specific set of services and functions within Cisco ISE.
User Identity Groups — are predefined user groups that already contain specific information and roles. The following User Identity Groups exist by default, and users and groups can be added to them: Employee, SponsorAllAccount, SponsorGroupAccounts, SponsorOwnAccounts (sponsor accounts for managing the guest portal), Guest, ActivatedGuest.
User Role — a user role is a set of permissions that defines what tasks the user can perform and which services they can access. Often, the user role is associated with a user group.
Moreover, each user and user group has additional attributes that allow for distinction and more specific identification of that user (user group). More information can be found in .
2. Creating Local Users
1) In Cisco ISE, you can create local users and use them in access policies or even assign them an administrative role for the product. Select Administration → Identity Management → Identities → Users → Add.
 Figure 1. Adding a Local User in Cisco ISE
2) In the window that appears, create a local user, set a password, and other understandable parameters.
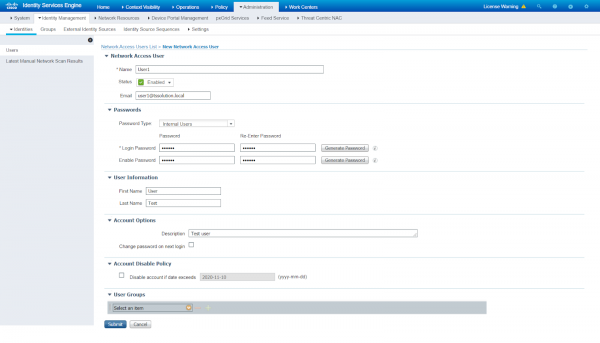 Figure 2. Creating a Local User in Cisco ISE
3) Users can also be imported. In this same tab Administration → Identity Management → Identities → Users select the option Import and upload a csv or txt file with the users. To obtain a template, select Generate a Template, then fill it with user information in the appropriate format.
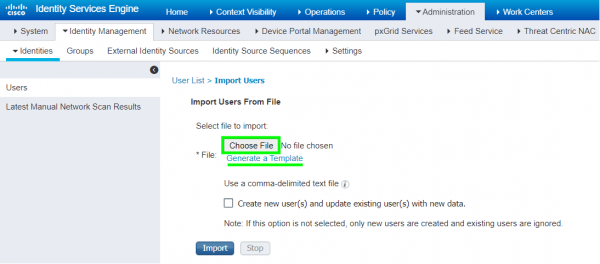 Figure 3. Importing Users into Cisco ISE
3. Adding LDAP Servers
Note that LDAP is a popular application layer protocol that allows access to information, authentication, and searching for accounts in LDAP server directories, operating over port 389 or 636 (SSL). Prominent examples of LDAP servers include Active Directory, Sun Directory, Novell eDirectory, and OpenLDAP. Each entry in the LDAP directory is defined by a DN (Distinguished Name) and poses the challenge of retrieval of accounts, user groups, and attributes for access policy.
In Cisco ISE, access to multiple LDAP servers can be configured, thereby implementing redundancy. If the primary LDAP server is unavailable, ISE will attempt to contact the secondary one and so on. Additionally, if there are 2 PANs, one LDAP server can be prioritized for the primary PAN, while another LDAP is for the secondary PAN.
ISE supports 2 types of lookups when working with LDAP servers: User Lookup and MAC Address Lookup. User Lookup allows searching for users in the LDAP database and retrieving the following information without authentication: users and their attributes, user groups. MAC Address Lookup also allows performing a search by MAC address in LDAP directories without authentication and retrieving information about the device, groups of devices by MAC address, and other specific attributes.
As an example of integration, we will add Active Directory to Cisco ISE as an LDAP server.
1) Go to the tab Administration → Identity Management → External Identity Sources → LDAP → Add.
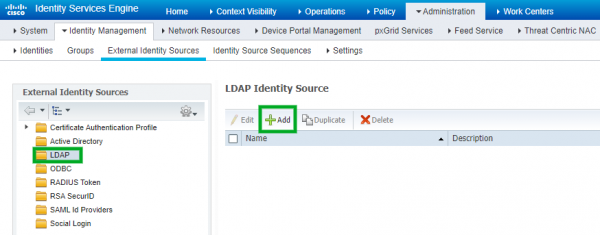 Figure 4. Adding an LDAP Server
2) In the panel General specify the name of the LDAP server and the schema (in our case, Active Directory).
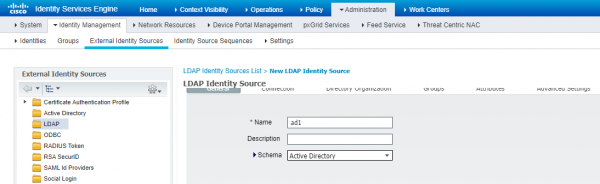 Figure 5. Adding an LDAP Server with Active Directory Schema
3) Next, go to the Connection tab and specify Hostname/IP address of the AD server, port (389 — LDAP, 636 — SSL LDAP), domain administrator credentials (Admin DN — full DN), other parameters can be left as default.
Note: use the admin domain data to avoid potential issues.
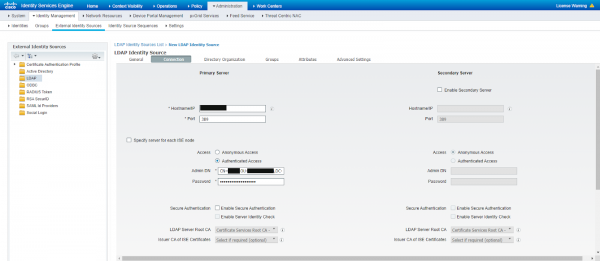 Figure 6. LDAP Server Data Input
4) In the tab Directory Organization you should specify the directory scope via DN from which to pull users and user groups.
 Figure 7. Defining directories from which to pull user groups
5) Go to the window Groups → Add → Select Groups From Directory to select the groups to be pulled from the LDAP server.
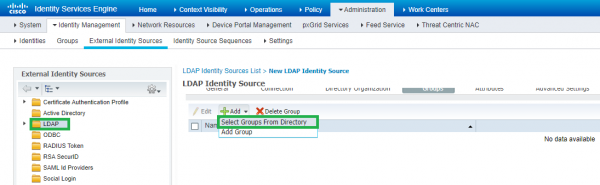 Figure 8. Adding groups from the LDAP server
6) In the window that appears, click Retrieve Groups. If the groups are successfully pulled, it means the preliminary steps were completed successfully. Otherwise, try another administrator and check the accessibility of ISE with the LDAP server via the LDAP protocol.
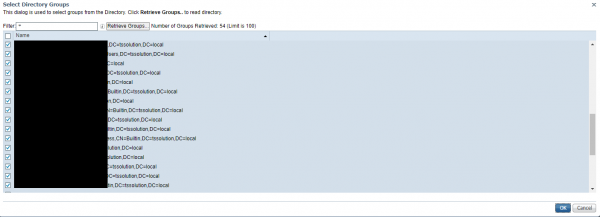 Figure 9. List of retrieved user groups
7) In the tab Attributes you can optionally specify which attributes from the LDAP server should be pulled, and in the window Advanced Settings enable the option Enable Password Change, which will require users to change their password if it has expired or been reset. In any case, click , which takes us back to the page to continue.
8) The LDAP server has appeared in the corresponding tab and can be used for access policy formation going forward.
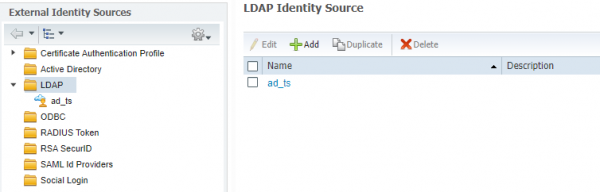 Figure 10. List of added LDAP servers
4. Integration with Active Directory
1) After adding the Microsoft Active Directory server as an LDAP server, we obtained users, user groups, but no logs. Next, I suggest setting up full integration of AD with Cisco ISE. Go to the tab Administration → Identity Management → External Identity Sources → Active Directory → Add.
Note: for successful integration with AD, ISE must be in the domain and have full connectivity to DNS, NTP, and AD servers; otherwise, it will not work.
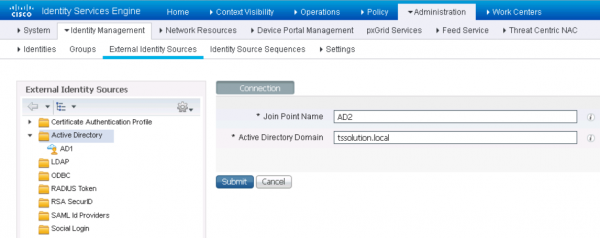 Figure 11. Adding Active Directory server
2) In the window that appears, enter the domain administrator's credentials and check the box Store Credentials. Additionally, you can specify the OU (Organizational Unit) if ISE is in a specific OU. Next, you will need to select the Cisco ISE nodes you want to connect to the domain.
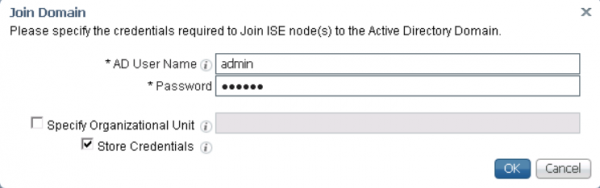 Figure 12. Entering credentials
3) Before adding domain controllers, ensure that the PSN in the tab Administration → System → Deployment has the option enabled Passive Identity Service. PassiveID — an option that allows translating User to IP and vice versa. PassiveID obtains information from AD via WMI, special AD agents, or a SPAN port on the switch (not the best option).
Note: to check the status of Passive ID, enter in the ISE console show application status ise | include PassiveID.
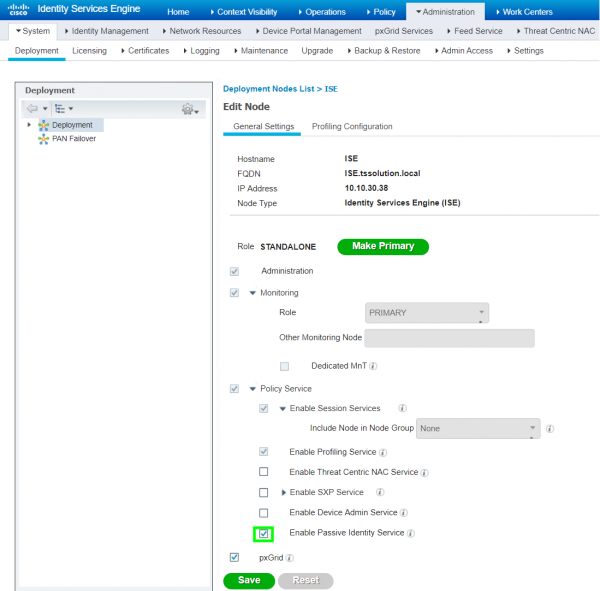 Figure 13. Enabling the PassiveID option
4) Go to the tab Administration → Identity Management → External Identity Sources → Active Directory → PassiveID and select the option Add DCs. Then, select the necessary domain controllers with checkboxes and click OK.
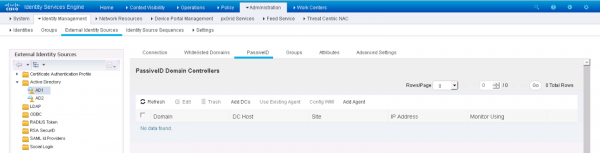 Figure 14. Adding domain controllers
5) Select the added DC and click the Edit. Specify FQDN of your DC, domain login and password, as well as the connection option WMI or Agent. Choose WMI and click OK.
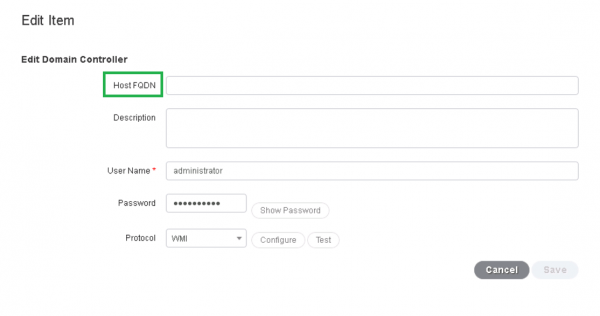 Figure 15. Entering domain controller information
6) If WMI is not the preferred method of communication with Active Directory, you can use agent-based methods. The agent-based method means that you can install special agents on the servers that will log login events. There are 2 installation options: automatic and manual. To automatically install the agent in the same tab, PassiveID select the item Add Agent → Deploy New Agent (the DC must have Internet access). Then fill in the required fields (agent name, FQDN server, domain administrator login/password) and click OK.
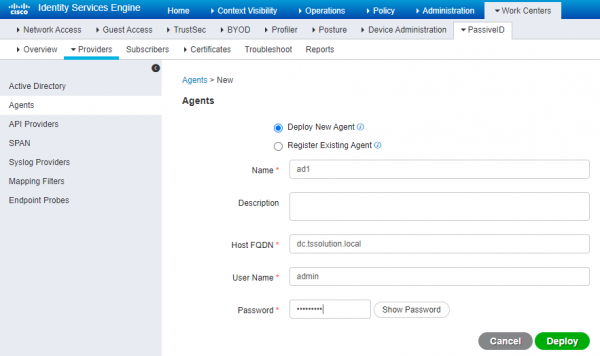 Figure 16. Automatic installation of the ISE agent
7) For manual installation of the Cisco ISE agent, you need to select the item Register Existing Agent. By the way, you can download the agent in the tab Work Centers → PassiveID → Providers → Agents → Download Agent.
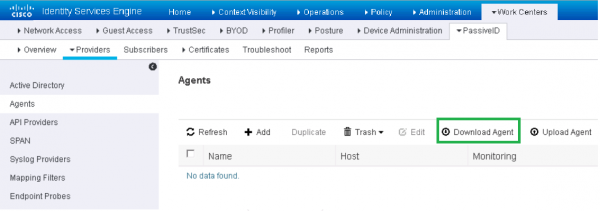 Figure 17. Downloading the ISE agent
Important: PassiveID does not read logoff! The parameter responsible for the timeout is called user session aging time and is equal to 24 hours by default. Therefore, you should either log off yourself at the end of the workday or write some script that will automatically log off all logged-in users.
To obtain information logoff endpoint probes are used. There are several endpoint probes in Cisco ISE: RADIUS, SNMP Trap, SNMP Query, DHCP, DNS, HTTP, Netflow, NMAP Scan. RADIUS The probe using CoA (Change of Authorization) packets provides information about user rights changes (for this an embedded 802.1X), while those configured on access switches via SNMP will provide information on connected and disconnected devices.
Below is an example relevant to Cisco ISE + AD configuration without 802.1X and RADIUS: a user is logged into a Windows machine, and without logging off, logs in from another PC via WiFi. In this case, the session on the first PC will remain active until a timeout occurs or a forced logoff takes place. If the devices have different permissions, the last logged-in device will apply its permissions.
8) Additionally in the tab Administration → Identity Management → External Identity Sources → Active Directory → Groups → Add → Select Groups From Directory You can select groups from AD that you want to pull into ISE (this was done in item 3 'Adding the LDAP Server'). Select the option Retrieve Groups → OK.
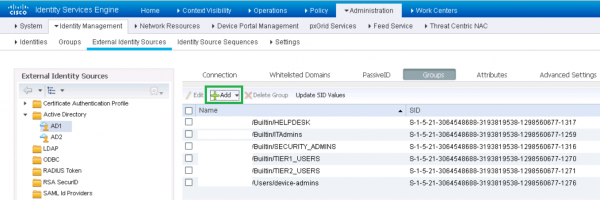 Figure 18 a). Pulling user groups from Active Directory
9) In the tab Work Centers → PassiveID → Overview → Dashboard You can observe the number of active sessions, the number of data sources, agents, and more.
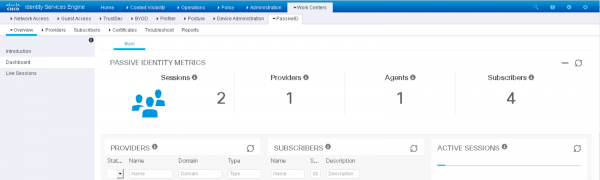 Figure 19. Monitoring domain user activity
10) In the tab Live Sessions the current sessions are displayed. Integration with AD is configured.
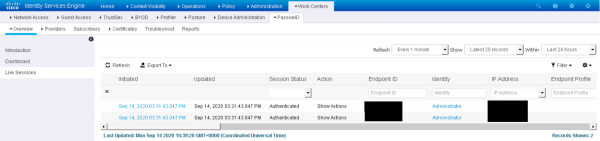 Figure 20. Active sessions of domain users
5. Conclusion
This article discussed the topics of creating local users in Cisco ISE, adding LDAP servers, and integrating with Microsoft Active Directory. The next article will cover guest access in a comprehensive guide.
If you have any questions on this topic or need assistance in testing the product, feel free to reach out at .
Stay updated through our channels (, , , , ).
Source: habr.com
