


Hello, this is the second article about the NGFW solution from the company . The purpose of this article is to demonstrate how to install the UserGate firewall on a virtual system (I will use VMware Workstation virtualization software) and perform its initial setup (allow local network access through the UserGate gateway to the internet).
1. Introduction
First, I will describe the various ways to deploy this gateway in a network. I want to note that depending on the chosen connection option, certain functionalities of the gateway may be unavailable. The UserGate solution supports the following connection modes:
L3-L7 firewall
L2 transparent bridge
L3 transparent bridge
Virtual out of band, using the WCCP protocol
Virtual out of band, using Policy Based Routing
Router on a Stick
Explicitly defined WEB proxy
UserGate as the default gateway
Mirror port monitoring
UserGate supports 2 types of clusters:
Configuration cluster. Nodes joined in a configuration cluster support unified settings within the cluster.
High availability cluster. Up to 4 nodes of the configuration cluster can be combined into a high availability cluster, supporting Active-Active or Active-Passive modes. Several high availability clusters may be assembled.
2. Installation
As mentioned in the previous article, UserGate is supplied as a hardware-software complex or can be deployed in a virtual environment. From the personal cabinet on the site we download the image in OVF (Open Virtualization Format), this format is suitable for VMware and Oracle Virtualbox vendors. For Microsoft Hyper-V and KVM, disk images for virtual machines are provided.
According to the UserGate website, to ensure the virtual machine operates correctly, it is recommended to use a minimum of 8GB of RAM and a dual-core virtual processor. The hypervisor must support the operation of 64-bit operating systems.
Installation begins with importing the image into the chosen hypervisor (VirtualBox and VMware). In the case of Microsoft Hyper-V and KVM, it is necessary to create a virtual machine and specify the downloaded image as the disk, after which integration services in the settings of the created virtual machine should be disabled.
By default, after importing into VMware, a virtual machine is created with the following settings:
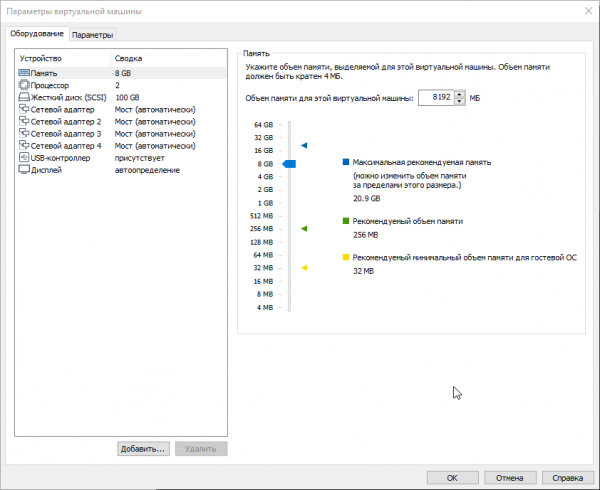
As mentioned above, the RAM should be at least 8GB, and you need to add an additional 1GB for every 100 users. The default hard disk size is 100GB, but this is usually insufficient for storing all logs and settings. The recommended size is 300GB or more. Therefore, in the properties of the virtual machine, we modify the disk size as needed. Initially, the virtual UserGate UTM is supplied with four interfaces assigned to zones:
Management — the first interface of the virtual machine, a zone for connecting trusted networks from which UserGate management is allowed.
Trusted — the second interface of the virtual machine, a zone for connecting trusted networks, such as LAN networks.
Untrusted — the third interface of the virtual machine, a zone for interfaces connected to untrusted networks, such as the internet.
DMZ — the fourth interface of the virtual machine, a zone for interfaces connected to the DMZ network.
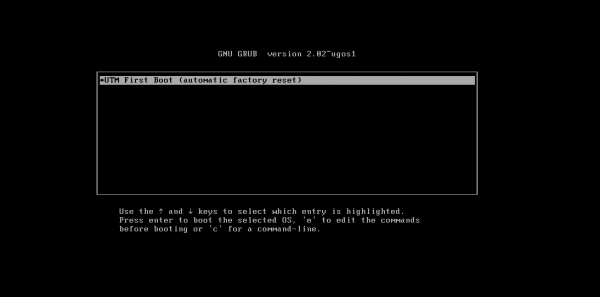
Next, we launch the virtual machines. Although the manual states that you should select Support Tools and perform a Factory reset of the UTM, we only see one option (UTM First Boot). During this step, the UTM configures the network adapters and increases the size of the disk partition to the full size of the disk:
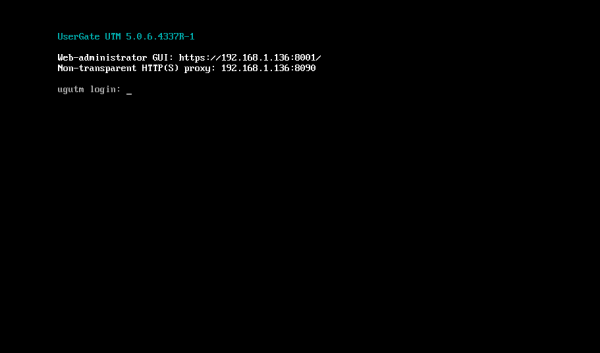
To connect to the UserGate web interface, you need to access it through the Management zone, handled by the eth0 interface, which is configured to obtain an IP address automatically (DHCP). If there is no possibility to assign an address for the Management interface automatically via DHCP, it can be explicitly set using the CLI (Command Line Interface). For this, you need to enter the CLI using the username and password of a user with Full administrator rights (by default, Admin with a capital A). If the UserGate device has not completed initial initialization, you should use Admin as the username and utm as the password for CLI access. Then, enter a command similar to iface config –name eth0 –ipv4 192.168.1.254/24 –enable true –mode static. Later, we proceed to the UserGate web console at the specified address, which should look something like this:https://UserGateIPaddress:8001:
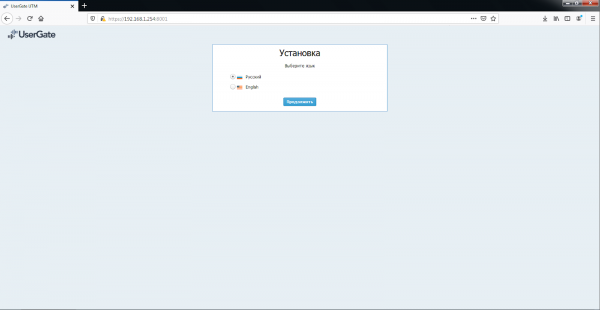
In the web console, we continue the installation; we need to select the interface language (currently, it can be either Russian or English), set the time zone, and then read and agree to the license agreement. We set the username and password for accessing the web management interface.
3. Configuration
After installation, the web management interface window looks like this:
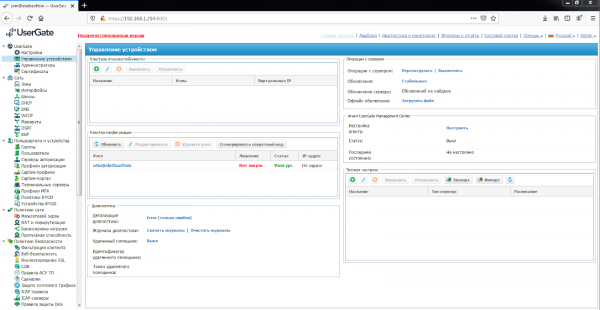
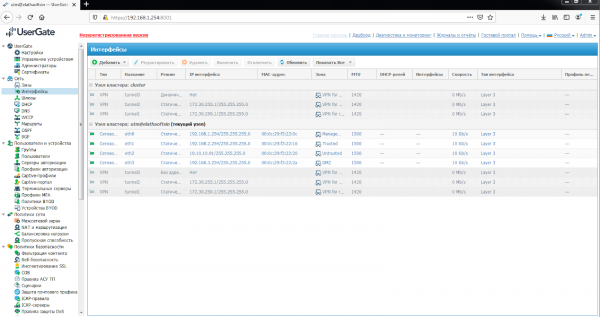
Next, it is necessary to configure the network interfaces. For this, in the 'Interfaces' section, you need to enable them, set the correct IP addresses, and assign the corresponding zones.
The 'Interfaces' section displays all physical and virtual interfaces available in the system, allows changing their settings, and adding VLAN interfaces. It also shows all interfaces of each cluster node. Interface settings are specific to each node, meaning they are not global.
In the interface properties:
Enable or disable the interface
Specify the interface type — Layer 3 or Mirror
Assign a zone to the interface
Assign a Netflow profile for sending statistical data to the Netflow collector
Change the physical parameters of the interface — MAC address and MTU size
Select the type of IP address assignment — no address, static IP address, or obtained via DHCP
Configure the DHCP relay operation on the selected interface.
The 'Add' button allows adding the following types of logical interfaces:
VLAN
Bond
Bridge
PPPoE
VPN
Tunnel
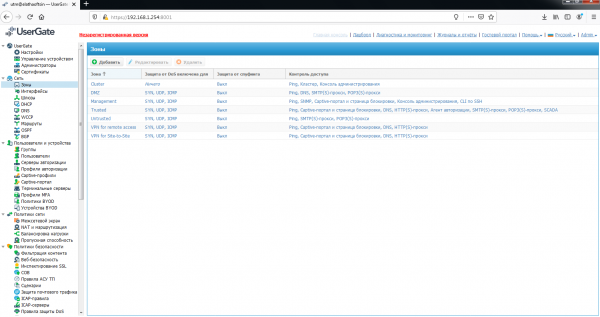
In addition to the previously mentioned zones provided with the Usergate image, there are three more predefined types:
Cluster — a zone for interfaces used for cluster operation
VPN for Site-to-Site — a zone that includes all Office-to-Office type clients connected to UserGate via VPN
VPN for remote access — a zone that includes all mobile users connected to UserGate via VPN
UserGate administrators can change the settings of the default zones as well as create additional zones, but as stated in the version 5 guide, no more than 15 zones can be created. To modify or create them, you need to go to the zones section. For each zone, you can set a packet drop threshold, supporting SYN, UDP, ICMP. Access control to Usergate services can also be configured, and anti-spoofing protection is enabled.
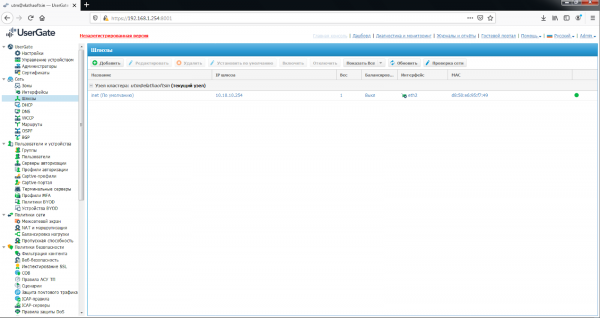
After configuring the interfaces, you need to set the default route in the "Gateways" section. That is, to connect UserGate to the Internet, you must specify the IP address of one or more gateways. If multiple providers are used for Internet connectivity, multiple gateways must be specified. The gateway configuration is unique for each node in the cluster. When two or more gateways are specified, there are two possible modes of operation:
Traffic balancing between gateways.
Primary gateway with failover to backup.
The gateway status (available – green, unavailable – red) is determined as follows:
Network checking is disabled – the gateway is considered available if UserGate can obtain its MAC address via an ARP request. Internet access through this gateway is not verified. If the gateway's MAC address cannot be determined, the gateway is considered unavailable.
Network checking is enabled — the gateway is considered available if:
UserGate can obtain its MAC address via an ARP request.
The verification of Internet access through this gateway was successful.
Otherwise, the gateway is considered unavailable.
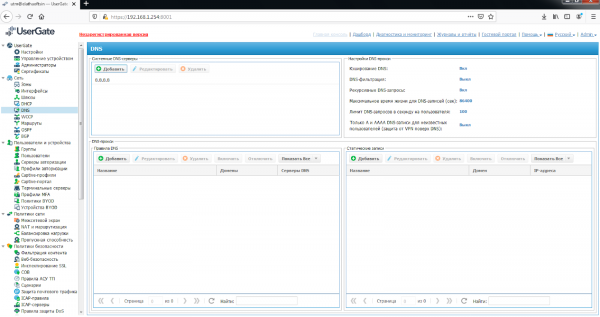
In the "DNS" section, you need to add DNS servers that UserGate will use. This configuration is specified in the System DNS servers area. Below are the settings for managing DNS requests from users. UserGate allows the use of a DNS proxy. The DNS proxy service can intercept DNS requests from users and modify them according to the administrator's needs. With DNS proxy rules, you can specify DNS servers to which requests for certain domains are forwarded. Additionally, using the DNS proxy, you can set static host records (A-records).
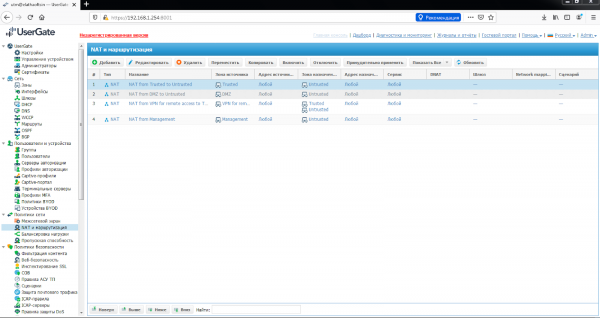
In the 'NAT and Routing' section, you need to create the necessary NAT rules. A NAT rule for internet access for users in the Trusted network has already been created — 'Trusted->Untrusted'; you just need to enable it. Rules are applied from top to bottom in the order they are listed in the console. Only the first rule that matches the conditions specified in that rule is executed. For the rule to be triggered, all conditions specified in the rule parameters must match. UserGate recommends creating general NAT rules, for example, a NAT rule from the local network (usually the Trusted zone) to the internet (usually the Untrusted zone), while distinguishing access by users, services, and applications using firewall rules.
It is also possible to create DNAT rules, port forwarding, Policy-based routing, and Network mapping.
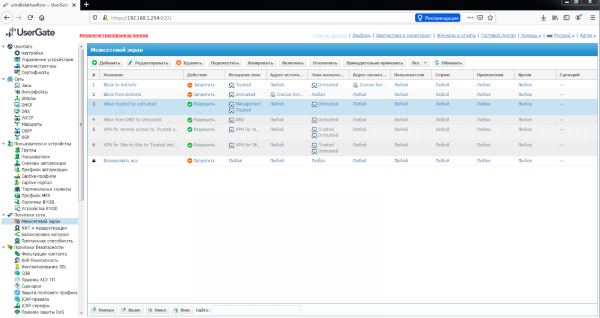
After that, in the 'Firewall' section, you need to create firewall rules. For unlimited internet access for users in the Trusted network, a firewall rule has also already been created — 'Internet for Trusted', which needs to be enabled. With the help of firewall rules, the administrator can allow or block any type of transit network traffic passing through UserGate. Zones and IP addresses of the source/destination, users and groups, services, and applications can serve as conditions for the rules. The rules are applied just like in the 'NAT and Routing' section, i.e., from top to bottom. If no rules are created, any transit traffic through UserGate is blocked.
4. Conclusion
That concludes the article. We installed the UserGate firewall on a virtual machine and performed the minimum necessary configurations to enable internet access in the Trusted network. Further configurations will be covered in the upcoming articles.
Stay updated through our channels (, , , )!
Source: habr.com
