

Introduction
In many projects I have worked on, people did not customize TestRail and relied on the standard settings. Therefore, in this article, I will describe an example of custom settings that can help you increase the effectiveness of your work. For this example, let's take a mobile application development project.
A small disclaimer. This article does not describe the basic functionality of TestRail (there are many guides for that) and does not include sales pitches describing why you should choose this vendor to create a test repository.
Project justification (what will be implemented)
General requirements
The case should be able to be passed by absolutely anyone
Cases should remain relevant for as long as possible
Cases should thoroughly cover the functionality of the mobile application to the extent that it does not contradict the first two points
Separation into TestCase and TestScenario
Quick generation of TestRun of various types
Smoke
Regress
Impact testing, etc.
Optimization of case support
Abandoning 'dead' hardcoded screenshots and moving to 'movable data'
Requirements
To edit the fields, you will need administrator access
Choosing the project type
You can choose three types of projects:
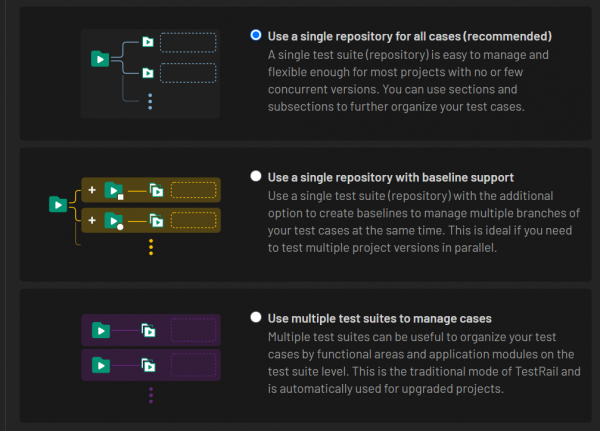
We will select the default type. It will allow access to all cases simultaneously. We will use smart filtering and dynamically manage all cases at once.
Adding fields for viewing the list of test cases
Let's add a field to display the priority of test cases:
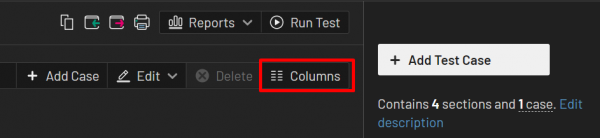
You can also add other fields.
Setting up fields and tags for the test case
Open the settings menu:
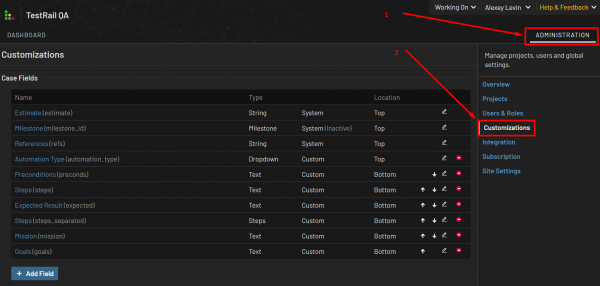
We will need the following fields:
Field 'Summary' (header of the test case)

This field already exists; we will just systematize its use. We will separate cases into TestCase and TestScenario. For better readability of large lists of cases, it is better to agree in advance on the rules for writing summaries.
TestScenario:
Example: TestScenario — Main scenario for using the mobile application
TestCase:
Example: MainScreen — Authorization Section — Entering login
Thus, in the case summary, we see the classic understanding: 'what, where, when.' We also visually separate high-level test scenarios from low-level test cases in the most suitable automation format.
The "StartScreen" tag (the screen from which the TestScenario begins; many test cases may affect neighboring screens)
What it may be needed for: we will be removing standard steps from the text cases that lead the user to the current test case screen. (standard steps for creating a certain test situation) All standard steps for all test cases will be documented in one file. I will write more about it separately.
Creating a new field:
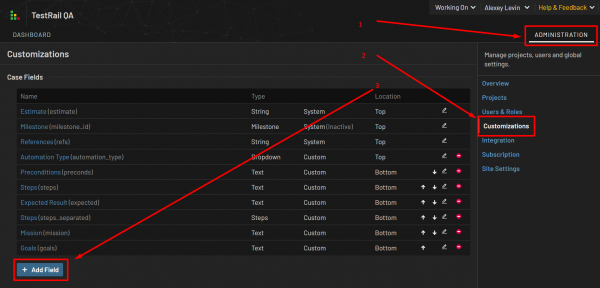
Filling in the components of the new field:
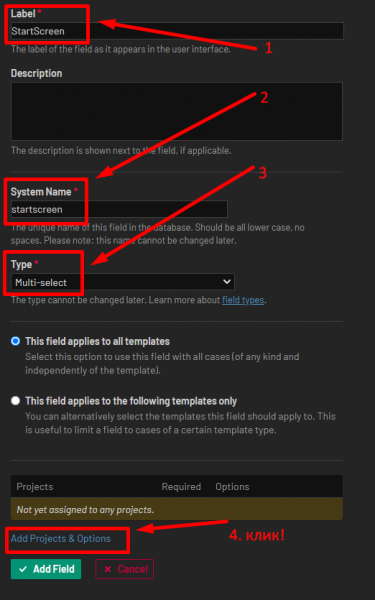
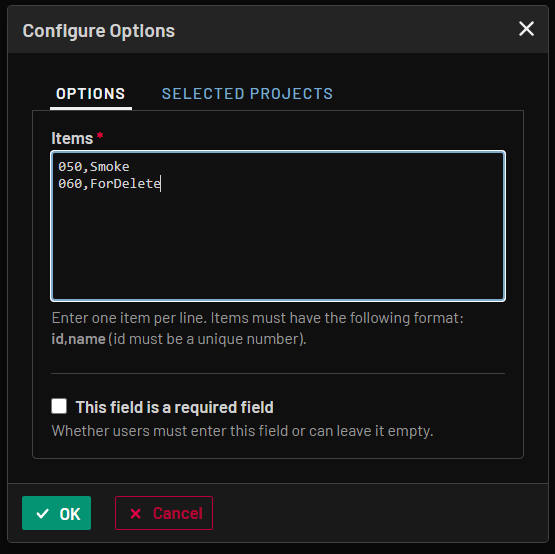
In this case, we are creating a dropdown field. We are entering the values for this field:
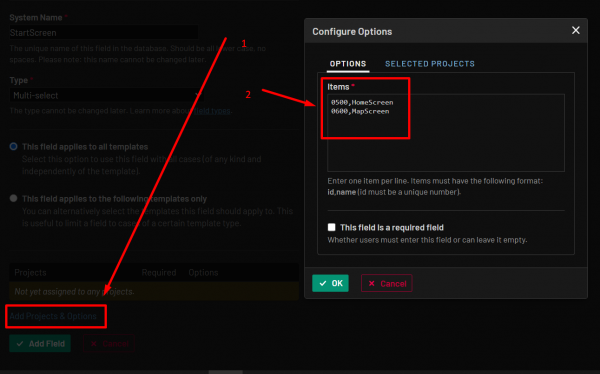
Note that the values’ id do not start from one and are not consecutive. Why is this done? The reason is that if we have test cases recorded with the given id,
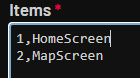
and then we need to create a third screen between two existing ones,
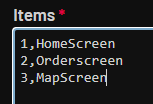
we will have to rewrite the id, and since existing test case tags are already linked to it, they will simply be deleted. This would be very inconvenient.
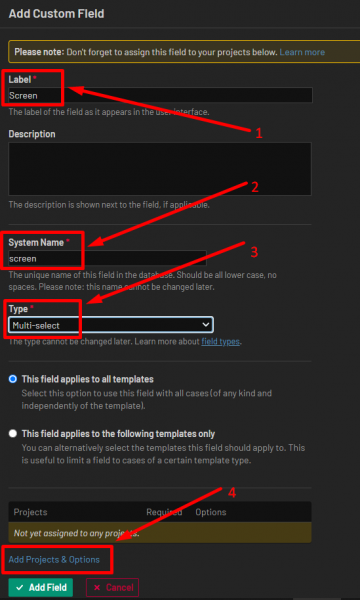
The "Screen" tag (the name of the screen that the TestCase touches)
What it may be needed for: one of the anchors for impact testing. For example, developers created a cool new feature. We need to test it, but to do that, we need to understand what exactly this feature might have affected. By default, we can rely on the paradigm that different screens (Activities) of the application have different classes and therefore constitute various components of the application. Of course, in this case, an individual approach is needed.
Example: home_screen, MapScreen, PayScreen, etc.
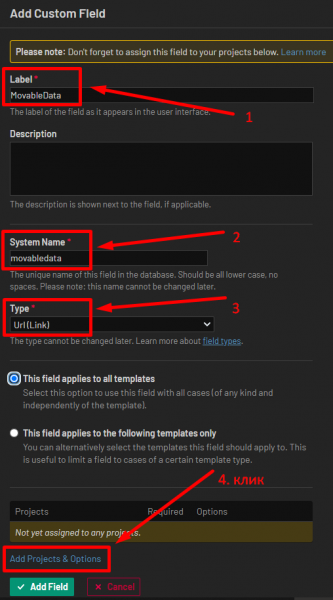
The "MovableData" field (link to the proxy database with changeable test data)
Next, we will try to solve the issue of maintaining data relevance in test cases:
Links to the current mockups (this is much better than making dead screenshots)
Standard steps to the screen with the test situation
SQL queries
Links to external data and other information
Instead of entering test data within each test case, we will create one external file and link to it in all the test cases. When updating this data, we won’t have to go through all the test cases to change them; instead, we can modify this data in just one place. If someone unprepared opens a test case, they will see a link to the file in the body of the test case and a hint indicating that they need to go there for test data.
We will package all this data into one external file that will be available to anyone interested in the project. For example, we can use Google Sheets or Excel and set up a search within the file. Why these vendors in particular? This is because we operate under the paradigm that any team member should be able to open and execute a test case without needing to install any tools beforehand.
For Google Sheets SQL queries can be used. Example:
=query(DATA!A1:M1146;"
SELECT C,D
WHERE
C contains '"&SEARCH!A2&"'")
For Excel allows for easy setup of instant search macros. (filtering) Example .
The idea itself is not new and is described in the first book for testers "Testing dot com". (author Roman Savin) We are merely integrating the methodologies proposed by Roman Savin into TestRail. To do this, we will create a field with a link to the created file:
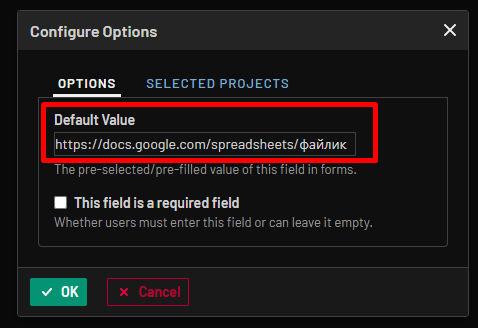
we fill in the default value of the link so that every new test case already contains the link:
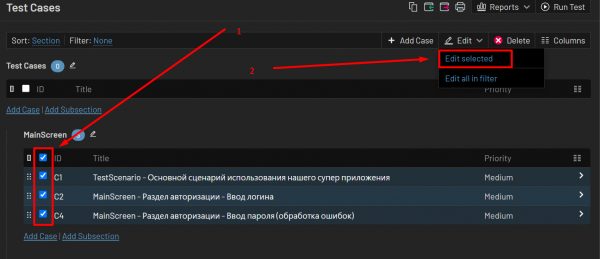
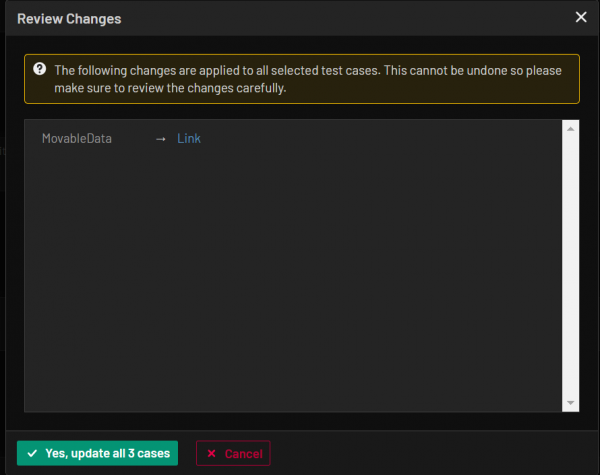
If the location of the external file changes (we consider any force majeure), we can conveniently modify one or more fields in all test cases at once:
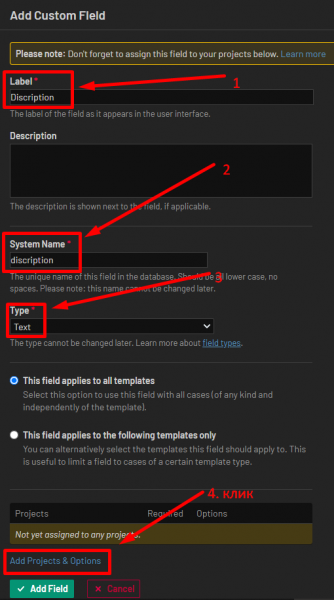
The field "Descriptions" (description or idea of the test case, standard instructions)
Purpose: In this text field, we will place a brief description of the test case and standard instructions.
Example: All test data (relevant layouts, usage of tools, and other data) from this test case are indicated by links {…} and are located in the MovableData file. The link to MovableData is in the corresponding field at the top.
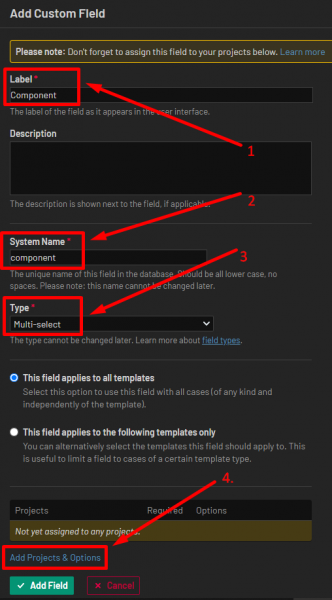
The tag "Component" (component of the mobile application)
Purpose: for impact testing. If a mobile application can be divided into components (which affect each other as little as possible), then it will be sufficient (with some risks) to verify changes within the same component, reducing the need for comprehensive regression testing. If information indicates that one component may affect another, an impact testing matrix is created.
Examples of components: GooglePay, Order, Users, Map, Authorization, etc.
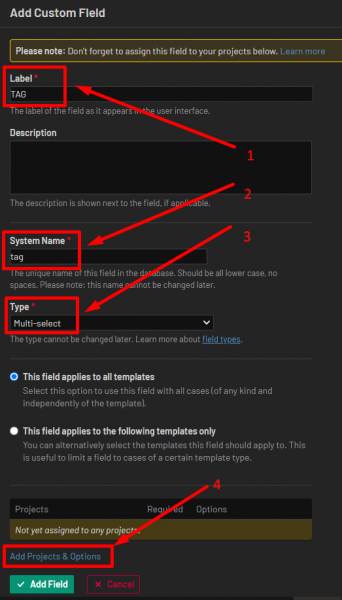
Tag 'TAG' (Other tags for filtering)
Tagging test cases with labels for arbitrary filtering.
Very useful for:
quick creation of TestRuns for various standard tasks: smoke, regression, etc.
whether tests will be automated or are already automated
any other tags
Example: Smoke, Automated, WhiteLabel, ForDelete, etc.
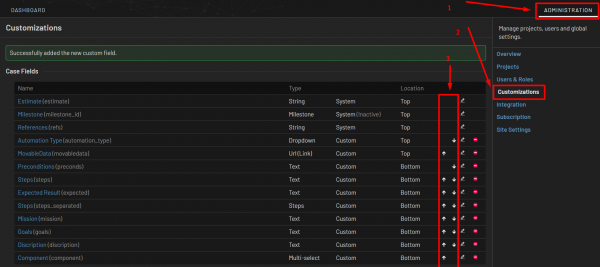
Setting the order of fields display in the test case
We have created many new fields; it is time to arrange them in a convenient order:
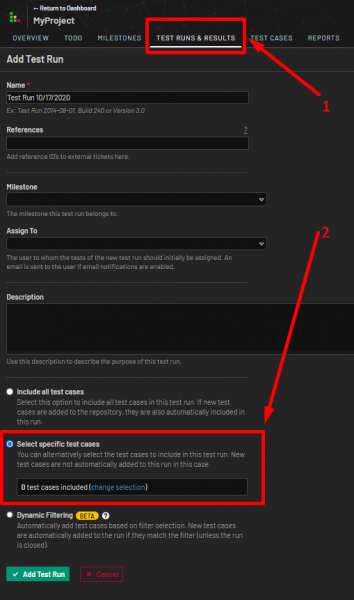
Creating a TestRun
Now we will create a new test run with relevant cases for conducting smoke testing in three clicks:
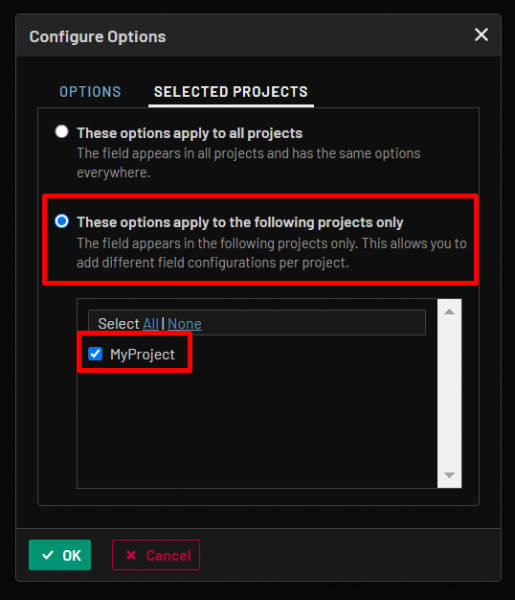
Other useful tips
If there are multiple projects in TestRail, remember to create new fields only for your project; otherwise, your colleagues from neighboring teams will be quite surprised by the appearance of new unusual fields. Local blackouts are possible.
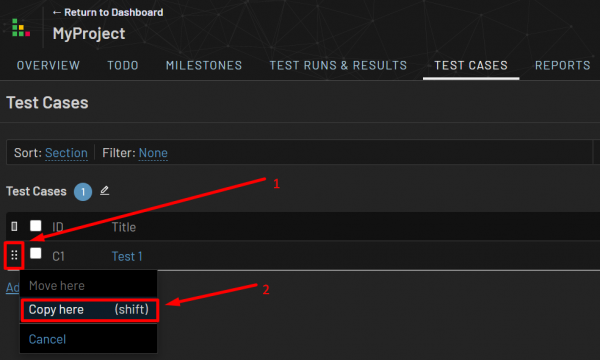
2. Cases with a large number of fields are easier to copy from a similar group rather than creating new ones.
3. Accounts can be shared. For example, one administrator account and several user accounts.
Conclusion
The above examples have been implemented in several projects and have proven effective. I hope they help improve your understanding of this tool and assist in creating efficient and convenient 'test stores'. I would greatly appreciate it if you could share your experience using TestRail and any helpful tips in the comments.
Links:
Book:
Thank you very much for your attention!
Source: habr.com
