


provides a terminal user interface for interacting with Kubernetes clusters. The goal of this Open Source project is to facilitate easy navigation of applications in K8s, monitoring them, and managing them. K9s continuously tracks changes in Kubernetes and offers quick commands for working with monitored resources.
The project is written in Go and has been around for over a year and a half: the first commit was made on February 1, 2019. At the time of writing, it has over 9000 stars on and about 80 contributors. So, what can k9s do?
Installation and Launch
This is a client application (relative to the Kubernetes cluster) that is easiest to run as a Docker image:
docker run --rm -it -v $KUBECONFIG:/root/.kube/config quay.io/derailed/k9sThere are also installation packages available for some Linux distributions and other operating systems. In general, for Linux systems you can install the binary file:
sudo wget -qO- https://github.com/derailed/k9s/releases/download/v0.22.0/k9s_Linux_x86_64.tar.gz | tar zxvf - -C /tmp/
sudo mv /tmp/k9s /usr/local/bin
There are no specific requirements for the K8s cluster itself. According to user reviews, the application works even with older versions of Kubernetes, such as 1.12.
The application starts using the standard config .kube/config — similar to how it does with kubectl.
Navigation
By default, it opens a window with the standard namespace specified for the context. That is, if you have set kubectl config set-context --current --namespace=test, then the namespace test. will open (See below for switching contexts/namespaces.)
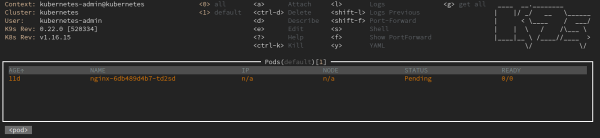
Switching to command mode is done by pressing ":". After that, you can manage k9s using commands — for example, to view the list of StatefulSets (in the current namespace) you can enter :sts.

For some other Kubernetes resources:
-
:ns— Namespaces; -
:deploy— Deployments; -
:ing— Ingresses; -
:svc— Services.
To output the full list of resource types available for viewing, there is the command :aliases.
It is convenient to view the list of commands available through hotkey combinations within the current window: just press "?".
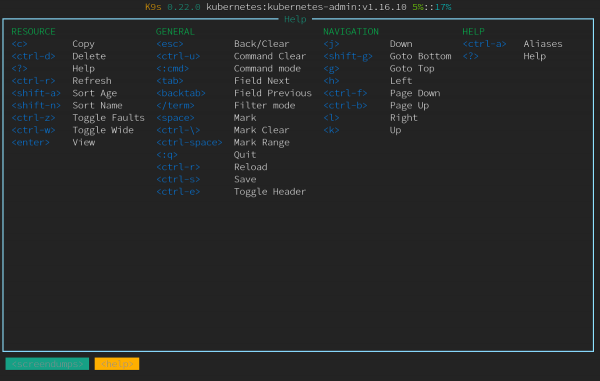
K9s also has a search mode, to enter which you simply type "/". This allows you to search within the current "window". For example, if you previously typed :ns, you will be presented with a list of namespaces. If there are too many, instead of scrolling down long, you can simply enter in the namespaces window. /mynamespace.
To search by labels, you can select all pods in the desired namespace, then enter, for example, / -l app=whoami. We will obtain a list of pods with this label:

The search works in all types of windows, including logs, viewing YAML manifests, and of the PVC object: for resources — more about these capabilities can be found below.
What does the overall sequence of actions for navigation look like?
Using the command :ctx you can select the context:

To select a namespace, there is the already mentioned command :ns, and then you can use the search for the required space: /test.
If you now select the resource of interest (for example, the same StatefulSet), relevant information will appear for it: how many pods are running with brief details about them.

Only the pods may be of interest — then it is enough to enter :pod. In the case of ConfigMaps (:cm — for the list of these resources), you can select the object of interest and press "u", after which K9s will suggest who specifically is using it (this CM).
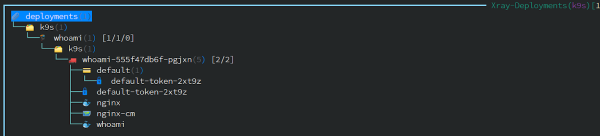
Another convenient feature for viewing resources is their "X-Ray view". This mode is invoked by the command :xray RESOURCE and… it’s easier to show how it works than to explain. Here’s an illustration for StatefulSets:
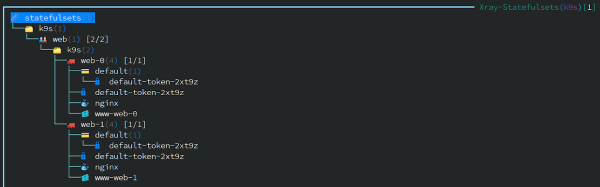
(Each of these resources can be edited, changed, made of the PVC object:.)
Here’s a Deployment with Ingress:
Working with resources
You can get information about each resource in YAML or its of the PVC object: by pressing the corresponding keyboard shortcuts ("y" and "d" respectively). There are, of course, many more basic operations: their list and keyboard shortcuts are always visible thanks to a convenient "header" in the interface (it hides when pressing Ctrl + e).

When editing any resource ("e" after selecting it), a text editor defined in environment variables opens (export EDITOR=vim).
Here’s how the detailed description of the resource looks (of the PVC object:):
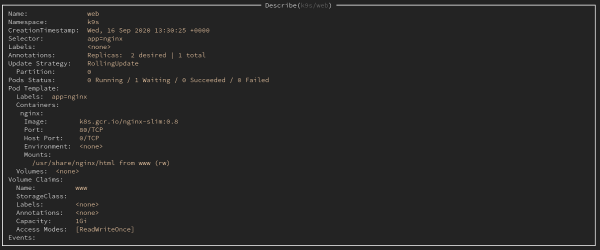
Such output (or the output of the YAML manifest of the resource) can be saved using the familiar keyboard shortcut Ctrl + s. Where it will be saved will be noted in the K9s message:
Log /tmp/k9s-screens-root/kubernetes/Describe-1601244920104133900.yml saved successfully! From the created backup files, you can also restore resources, removing system labels and annotations beforehand. To do this, you will need to go to the directory with them (:dir /tmp), after which you can select the desired file and apply it. Apply.
By the way, you can revert to any previous ReplicaSet at any moment if there are issues with the current one. To do this, you need to select the desired RS (:rs from their list):

… and perform a rollback using Ctrl + l. We should receive a notification that everything was successful:
k9s/whoami-5cfbdbb469 successfully rolled backTo scale the replicas, simply press 's' (scale) and choose the desired number of instances:
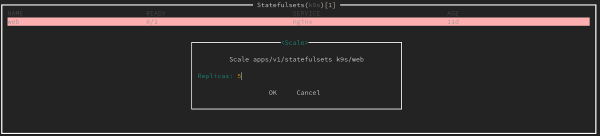
You can access any of the containers using the shell: navigate to the desired pod, press 's' (shell), and select the container.
Other capabilities
Of course, log viewing is also supported ('l' for the selected resource). To view new logs, there is no need to keep pressing Enter: just mark the logs ('m'), and then you’ll only track the new messages.

In this same window, you can select a time range for log output:
- key '1' — for 1 minute;
- '2' — for 5 minutes;
- '3' — for 15 minutes;
- '4' — for 30 minutes;
- '5' — for 1 hour;
- '0' — for the entire lifespan of the pod.
The special Pulse mode (command :pulse) shows general information about the Kubernetes cluster:
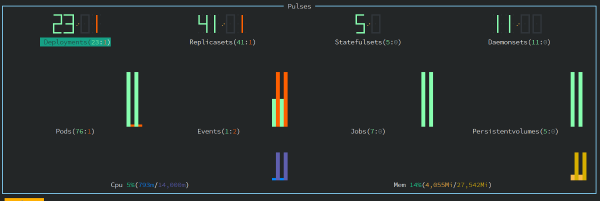
In it, you can see the number of resources and their status (those with a status are shown in green. Running).
Another interesting feature of K9s is called Popeye. It checks all resources against certain correctness criteria and outputs the resulting 'rating' with explanations. For example, you can see that there are missing requests or limits, and some container may be running under root…
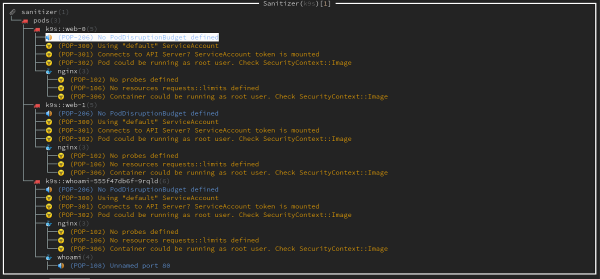
There is basic support for Helm. For example, you can view the releases deployed in the cluster:
:helm all # all
:helm $namespace # in a specific namespace
Benchmark
K9s even includes a — this is a simple load generator for an HTTP server, an alternative to the more well-known ab (ApacheBench).
To enable it, port-forwarding in the pod needs to be activated. To do this, select the pod and press Shift + f, then access the port-forward submenu using the alias 'pf'.
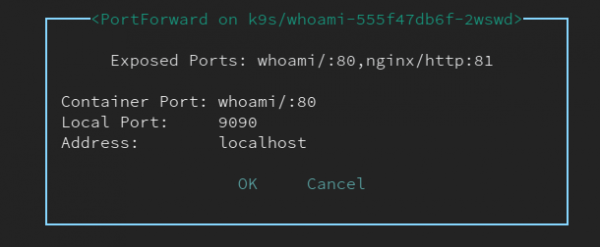
After selecting the port and pressing Ctrl + b, the benchmark will start. The results will be saved in /tmp and available for later viewing in K9s.

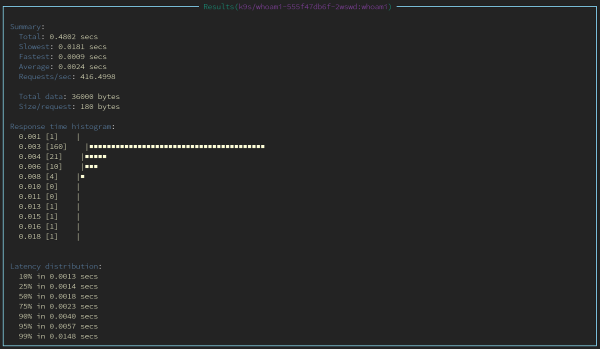
To change the benchmark configuration, you need to create a file $HOME/.k9s/bench-.yml (defined for each cluster).
NB: It is important that the extension of all YAML files in the directory .k9s is exactly .yml (.yaml (it doesn't work correctly).
Configuration example:
benchmarks:
  defaults:
    # Number of threads
    concurrency: 2
    # Number of requests
    requests: 1000
  containers:
    # Settings for the benchmark container
    # The container is defined as namespace/pod-name:container-name
    default/nginx:nginx:
      concurrency: 2
      requests: 10000
      http:
        path: /
        method: POST
        body:
          {"foo":"bar"}
        header:
          Accept:
            - text/html
          Content-Type:
            - application/json
 services:
    # Benchmarking can be done on services like NodePort and LoadBalancer
    # Syntax: namespace/service-name
    default/nginx:
      concurrency: 5
      requests: 500
      http:
        method: GET
        path: /auth
      auth:
        user: flant
        password: s3cr3tp455w0rd
The PerformanceResourceTiming
The view of columns for resource lists is modified by creating a file $HOME/.k9s/views.yml. An example of its content:
k9s:
 views:
   v1/pods:
     columns:
       - AGE
       - NAMESPACE
       - NAME
       - IP
       - NODE
       - STATUS
       - READY
   v1/services:
     columns:
       - AGE
       - NAMESPACE
       - NAME
       - TYPE
       - CLUSTER-IP
However, the column for labels is missing, which has an .
Sorting by columns is done using keyboard shortcuts:
- Shift + n — by name;
- Shift + o — by nodes;
- Shift + i — by IP;
- Shift + a — by container lifespan;
- Shift + t — by number of restarts;
- Shift + r — by readiness status;
- Shift + c — by CPU usage;
- Shift + m — by memory usage.
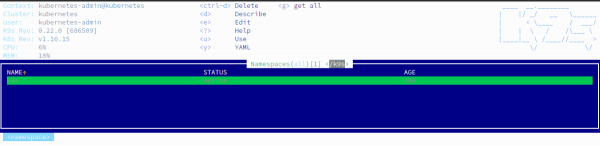
If someone is not satisfied with the default color scheme, K9s even supports . Ready-made examples (7 total) are available . Here’s an example of one of those skins (in the navy):
Plugins
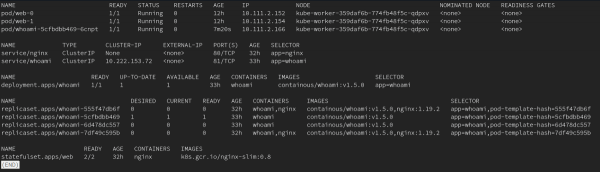
Finally, allow for extending K9s capabilities. Personally, I have only used one of them — kubectl get all -n $namespace.
It looks like this. We create a file $HOME/.k9s/plugin.yml with the following content:
plugin:
 get-all:
   shortCut: g
   confirm: false
   description: get all
   scopes:
   - all
   command: sh
   background: false
   args:
   - -c
   - "kubectl -n $NAMESPACE get all -o wide | less"
Now you can switch to the namespace and press 'g' to execute with the corresponding command:
Among the plugins, there are integrations with kubectl-jq and the log viewing utility .
Conclusion
In my opinion, K9s has proven to be very convenient to work with: it is quite fast to get used to searching for everything you need without using kubectl. I was pleased with the log viewing and saving, quick resource editing, overall speed*, and the Popeye mode turned out to be useful. The ability to create plugins and customize the application to your needs deserves a separate mention.
* While dealing with large volumes of logs, I also noticed that K9s could be slow. During those times, the utility would consume 2 cores from the Intel Xeon E312xx and could even hang.
What is currently lacking? A quick rollback to the previous version (not referring to RS) without switching to the directory. Furthermore, restoration only occurs for – this can already be a the resource: if you deleted an annotation or label, you'll need to delete and restore the entire resource (this is where directory access becomes necessary). Another minor issue is the absence of a date for such saved 'backups.'
P.S.
Also read in our blog:
- «»;
- «»;
- «».
Source: habr.com
