

I welcome readers to the third article in the UserGate Getting Started article series, which talks about the NGFW solution from the company . In the last article, the process of installing a firewall was described and its initial configuration was made. For now, we'll take a closer look at creating rules in sections such as Firewall, NAT and Routing, and Bandwidth.
The ideology of the UserGate rules, such that the rules are executed from top to bottom, until the first one that works. Based on the above, it follows that more specific rules should be higher than more general rules. But it should be noted, since the rules are checked in order, it is better in terms of performance to create general rules. When creating any rule, the conditions are applied according to the “AND” logic. If it is necessary to use the logic “OR”, then this is achieved by creating several rules. So what is described in this article applies to other UserGate policies as well.
Firewall
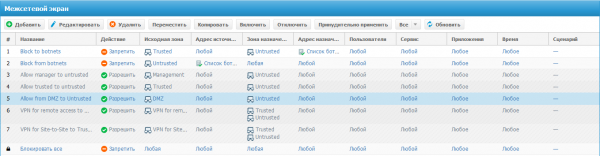
After installing UserGate, there is already a simple policy in the “Firewall” section. The first two rules prohibit traffic for botnets. The following are examples of access rules from different zones. The last rule is always called “Block all” and is marked with a lock symbol (it means that the rule cannot be deleted, modified, moved, disabled, it can only be enabled for the logging option). Thus, because of this rule, all explicitly not allowed traffic will be blocked by the last rule. If you want to allow all traffic through UserGate (although this is strongly discouraged), you can always create the penultimate rule “Allow All”.
When editing or creating a firewall rule, the first General tab, you need to do the following:
Checkbox "On" enable or disable the rule.
enter the name of the rule.
set the description of the rule.
choose from two actions:
Deny - blocks traffic (when setting this condition, it is possible to send ICMP host unreachable, you just need to set the appropriate checkbox).
Allow - allows traffic.
Scenario item - allows you to select a scenario, which is an additional condition for the rule to fire. This is how UserGate implements the concept of SOAR (Security Orchestration, Automation and Response).
Logging — log information about traffic when a rule is triggered. Possible options:
Log the start of the session. In this case, only information about the beginning of the session (the first packet) will be written to the traffic log. This is the recommended logging option.
Log every packet. In this case, information about each transmitted network packet will be recorded. For this mode, it is recommended to enable the logging limit to prevent high device load.
Apply rule to:
All packages
to fragmented packets
to unfragmented packages
When creating a new rule, you can choose a place in the policy.
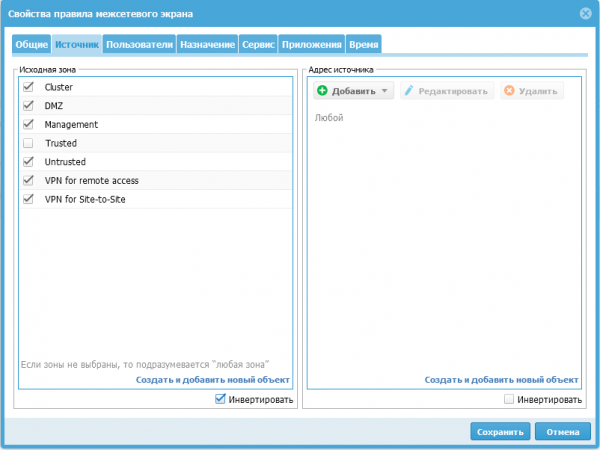
The next Source tab. Here we indicate the source of traffic, it can be the zone from which the traffic comes, or you can specify a list or a specific ip-address (Geoip). In almost all rules that can be set in the device, an object can be created from a rule, for example, without going to the “Zones” section, you can use the “Create and add a new object” button to create the zone we need. The “Invert” checkbox is also often found, it reverses the action in the condition of the rule, which is similar to the logical action negation. Destination tab similar to the source tab, but instead of the traffic source, we set the traffic destination. Users Tab - in this place you can add a list of users or groups for which this rule applies. Service tab - select the type of service from the already predefined one or you can set your own. Application Tab - specific applications or groups of applications are selected here. AND Time tab specify the time when this rule is active.
Since the last lesson, we have a rule for accessing the Internet from the “Trust” zone, now I will show as an example how to create a deny rule for ICMP traffic from the “Trust” zone to the “Untrusted” zone.
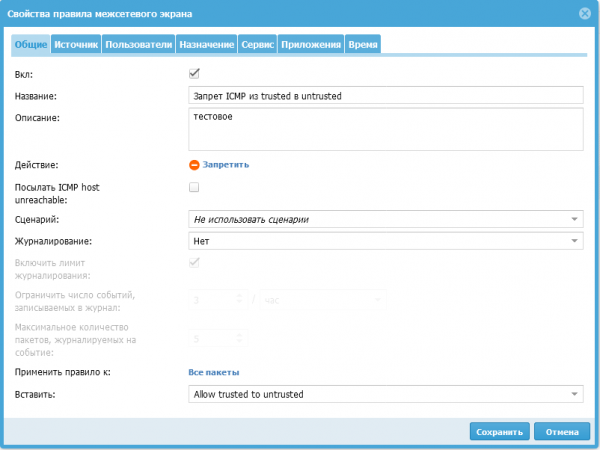
First, create a rule by clicking on the “Add” button. In the window that opens, on the general tab, fill in the name (Restrict ICMP from trusted to untrusted), check the “On” checkbox, select the disable action, and most importantly, choose the correct location for this rule. According to my policy, this rule should be placed above the "Allow trusted to untrusted" rule:
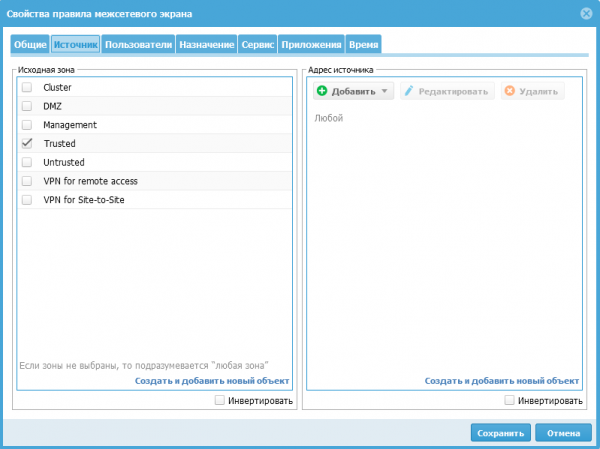
On the “Source” tab for my task, there are two options:
By selecting the “Trusted” zone
By selecting all zones except “Trusted” and ticking the “Invert” checkbox
The Destination tab is configured similarly to the Source tab.
Next, go to the “Service” tab, since UserGate has a predefined service for ICMP traffic, then by clicking the “Add” button, we select a service with the name “Any ICMP” from the proposed list:

Perhaps this was the intention of the creators of UserGate, but I managed to create several completely identical rules. Although only the first rule from the list will be executed, I think the ability to create rules with the same name that are different in functionality can cause confusion when several device administrators work.
NAT and routing
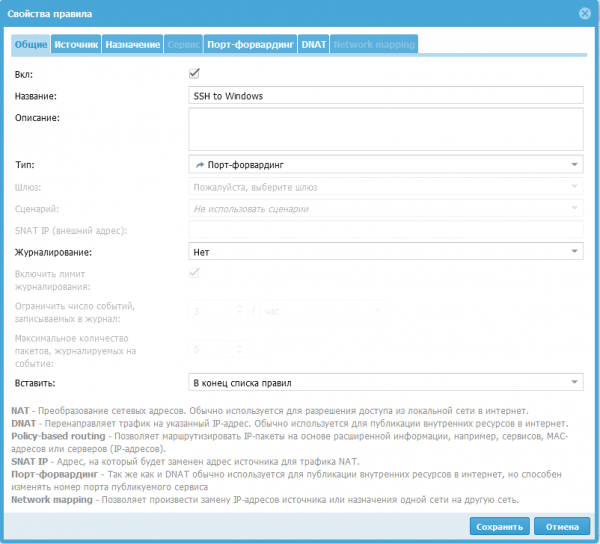
When creating NAT rules, we see several similar tabs, as for the firewall. The “Type” field appeared on the “General” tab, it allows you to choose what this rule will be responsible for:
NAT - Network Address Translation.
DNAT - Redirects traffic to the specified IP address.
Port forwarding - Redirects traffic to the specified IP address, but allows you to change the port number of the published service
Policy-based routing - Allows you to route IP packets based on extended information, such as services, MAC addresses, or servers (IP addresses).
Network mapping - Allows you to replace the source or destination IP addresses of one network with another network.
After selecting the appropriate rule type, settings for it will be available.
In the SNAT IP (external address) field, we explicitly specify the IP address to which the source address will be replaced. This field is required if there are multiple IP addresses assigned to interfaces in the destination zone. If you leave this field blank, the system will use a random address from the list of available IP addresses assigned to the destination zone interfaces. UserGate recommends specifying SNAT IP to improve firewall performance.
As an example, I will publish the SSH server service Windows, located in the "DMZ" zone using the "port forwarding" rule. To do this, click the "Add" button and fill out the "General" tab, specifying the rule name "SSH to Windows” and “Port forwarding” type:
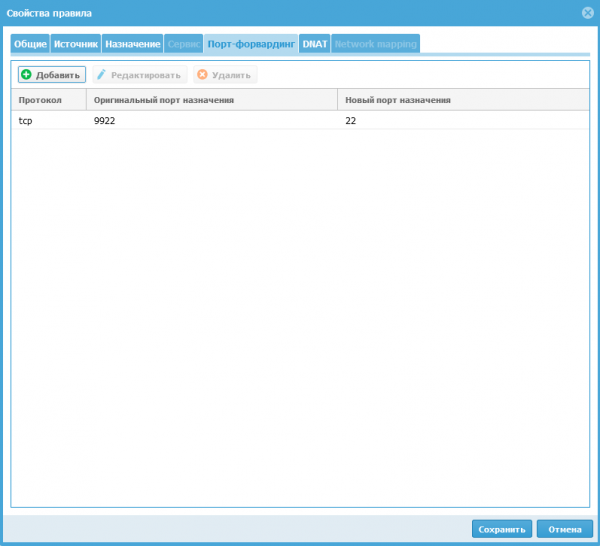
On the “Source” tab, select the “Untrusted” zone and go to the “Port-forwarding” tab. Here we must specify the “TCP” protocol (four options are available - TCP, UDP, SMTP, SMTPS). Original destination port 9922 — port number to which users send requests (ports: 2200, 8001, 4369, 9000-9100 cannot be used). The new destination port (22) is the port number to which user requests to the internal published server will be forwarded.
On the “DNAT” tab, set the ip-address of the computer on the local network, which is published on the Internet (192.168.3.2). And you can optionally enable SNAT, then UserGate will change the source address in packets from the external network to its own IP address.
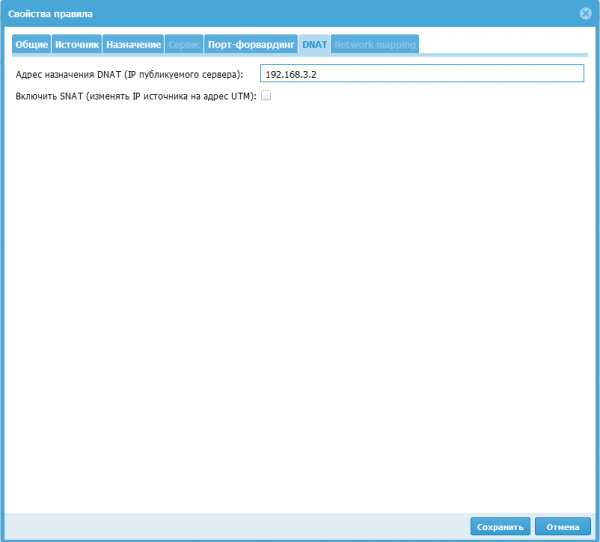
After all the settings, a rule is obtained that allows access from the “Untrusted” zone to the server with the ip-address 192.168.3.2 via the SSH protocol, using the external UserGate address when connecting.

Throughput
This section defines the rules for bandwidth control. They can be used to restrict the channel of certain users, hosts, services, applications.
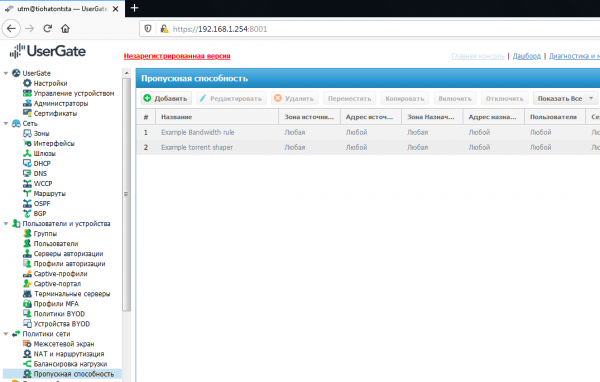
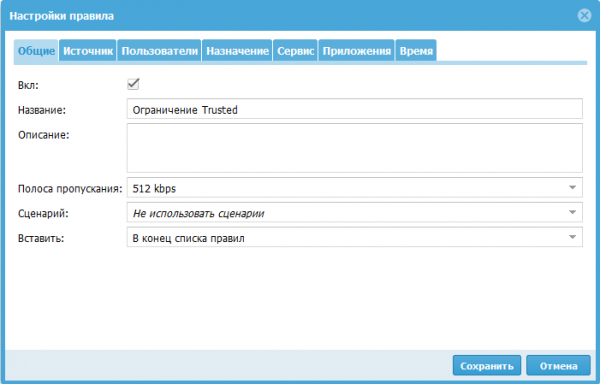
When creating a rule, the conditions on the tabs determine the traffic to which restrictions are applied. The bandwidth can be selected from the proposed, or set your own. When creating bandwidth, you can specify a DSCP traffic prioritization label. An example of when DSCP labels are applied: by specifying in a rule the scenario in which this rule is applied, then this rule can automatically change these labels. Another example of how the script works: the rule will work for the user only when a torrent is detected or the amount of traffic exceeds the specified limit. The remaining tabs are filled in the same way as in other policies, based on the type of traffic to which the rule should be applied.
Conclusion
In this article, I covered the creation of rules in the Firewall, NAT and Routing, and Bandwidth sections. And at the very beginning of the article, he described the rules for creating UserGate policies, as well as the principle of the conditions when creating a rule.
Stay tuned for updates in our channels (, , , )!
Source: habr.com
