

With this GSM relay, you can turn on any load rated at 220 V and a maximum power of 2 kW, from anywhere in the world where there is a cellular network.
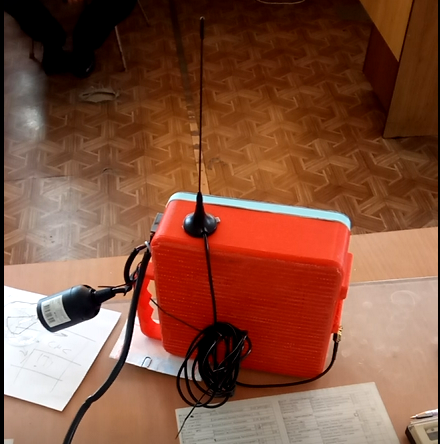
This device is controlled by an Arduino Nano through a SIM800L GSM module. The functional diagram with a list of components is provided below. It can operate from built-in batteries or from a 220 V network. When operating from the network, the load can consume up to 2 kW of electricity. From the batteries, the maximum output power is 300 W.
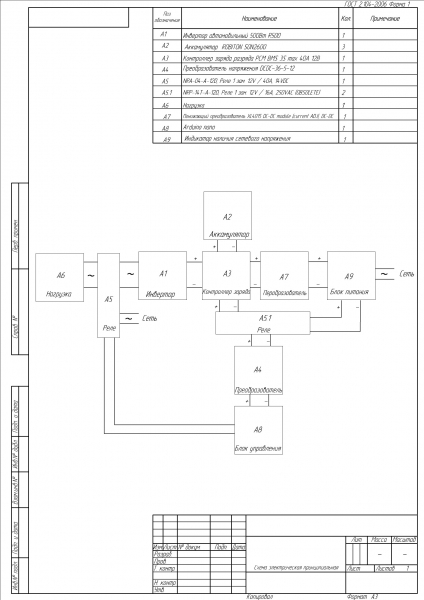
A brief overview of the diagram.
This device can be divided into 4 blocks:
- inverter block
- controller and battery block
- uninterruptible power supply block
- control block.
The inverter block is a standard 500 W automotive inverter. A lower power inverter will also work, but the maximum output power will decrease proportionally to the inverter's power.
The controller and battery block is a standard inexpensive BMS S3 driver designed for connecting 3 lithium-ion batteries. The batteries are high-current. They can deliver a current of 35 amps. If you have lower power requirements, you can buy cheaper batteries with a lower maximum current.
The uninterruptible power supply block is built on transistors VT3, VD4, R4, R5, R3. The cathode of the stabilizer VD4 is directly connected to the power supply, and when power is applied, the transistor VT3 opens. After it opens, a negative potential reaches all relay inputs, and the relays switch to the power supply mode from the power unit. An important feature of ready relay modules: some of them work when a positive potential is applied to the input, while others activate with a negative potential. If you have the first type, you will need to reposition R3 in the emitter connection of transistor VT3 and connect the relay input to the emitter of that same transistor.
The control block is assembled on a SIM800 module and Arduino Nano.
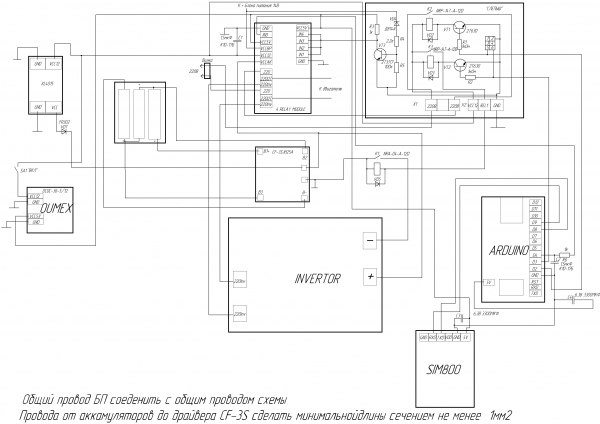
Here is the assembled diagram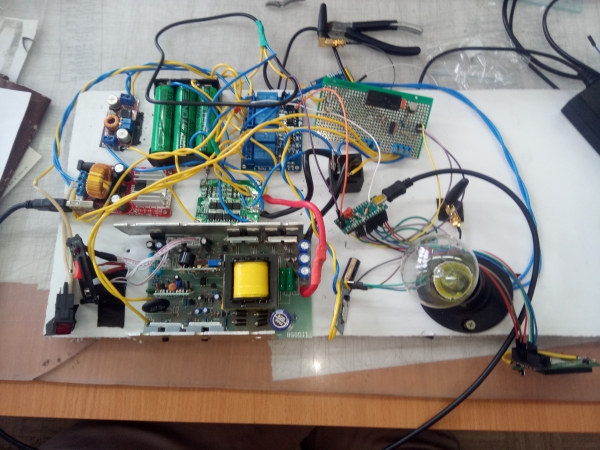
Here it is in the packed state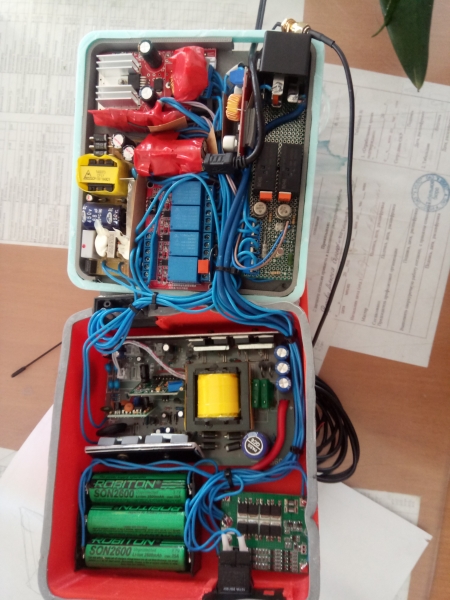
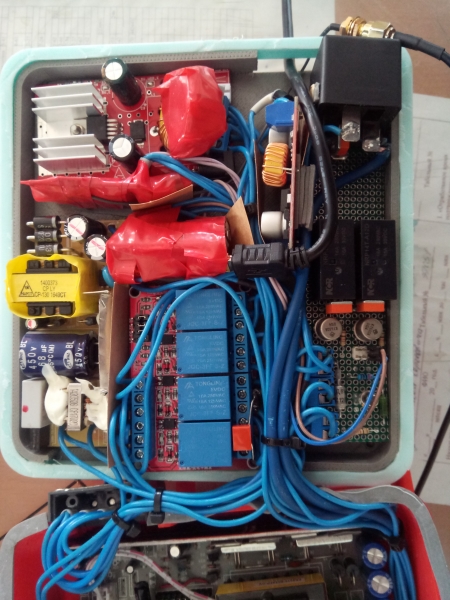
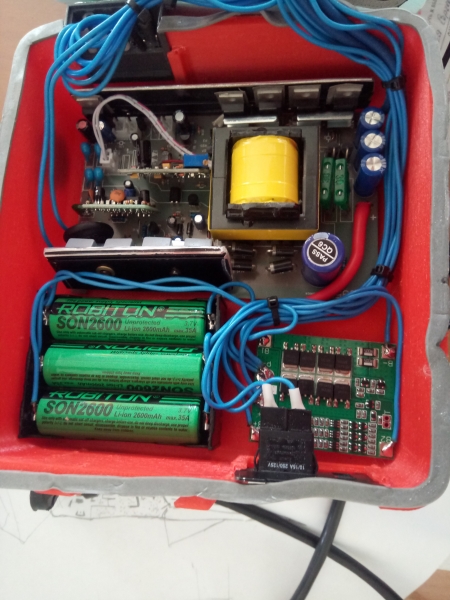
For the device to start receiving SMS from your phone, you need to assign your phone number to the variable your_phone. An LCD display, such as WH1601 or WH0802, can also be connected to the Arduino, but you will need to uncomment all lines with the label lcd.
Code
char your_phone = "+79148389933";

#include <SoftwareSerial.h>                                          // Подключаем библиотеку SoftwareSerial для общения с модулем по программной шине UART
SoftwareSerial softSerial(8,9);                                      // Создаём объект softSerial указывая выводы RX, TX (можно указывать любые выводы Arduino UNO)
// include the library code:
//#include <LiquidCrystal.h>

// initialize the library by associating any needed LCD interface pin
// with the arduino pin number it is connected to
//const int rs = 12, en = 11, d4 = 5, d5 = 6, d6 = 7, d7 = 10;
//LiquidCrystal lcd(rs, en, d4, d5, d6, d7);                                                               // В данном случае вывод TX модуля подключается к выводу 2 Arduino, а вывод RX модуля к выводу 3 Arduino.
//  Инициируем работу шин UART с указанием скоростей обеих шин:      //
String buf2,buf3;
int g=0;

    String cmd1;
void setup(){                                                        //
init_port();
      // lcd.begin(16, 2);
  // Print a message to the LCD.
  //lcd.clear();
  //  lcd.setCursor(0, 0);
 /// lcd.print("VKL");
 // lcd.setCursor(0, 1);
 /// lcd.print("ZHDITE");

        /// init_port();// Инициируем передачу данных по аппаратной  шине UART на скорости  9600 (между Arduino и компьютером)
    softSerial.begin(9600);                                         // Инициируем передачу данных по программной шине UART на скорости 38400 (между модулем и Arduino)
        Serial.begin(9600);
        delay(30000);

  //  cmd1 ="AT+CMGF=1rn";
  softSerial.print("AT+CMGF=1rn");
  ///  print_lcd(cmd1);
delay(1000);
       dellAllSMS();
//  cmd1 ="AT+CMGDA="DEL ALL"rn";
    // print_lcd(cmd1);
//cmd1="AT+CPAS";
  ///   print_lcd(cmd1);
}                                                                    //


      char c;
      int m=0;
      int i=0;//
      int n=0;
//  Выполняем ретрансляцию:                                          // Всё что пришло с модуля - отправляем компьютеру, а всё что пришло с компьютера - отправляем модулю

void dellAllSMS(){
  /* This deletes all sms in memory

  */

  softSerial.print("AT+CMGDA="DEL ALL"rn"); // set sms to text mode

delay(3000);
}
void pin_on_setb()
{
 digitalWrite(2,1);
  digitalWrite(13,1);
}
void pin_off_setb()
{
 digitalWrite(2,0);
  digitalWrite(13,0);
}
void pin_on_inv()
{
 digitalWrite(3,1);
  //  digitalWrite(13,1);
}
void pin_off_inv()
{
 digitalWrite(3,0);
   // digitalWrite(13,0);
}
void init_port()
{
pinMode(2,1);
pinMode(3,1);
    pinMode(13,1);
}
String readData(){
   // this function just reads the raw data
   uint16_t timeout=0;
   while (!softSerial.available() && timeout<10000)
   {
     delay(10);
     timeout++;
   }
   if(softSerial.available())
   {
     String output = softSerial.readString();
     //if(DEBUG)
    ///   Serial.println(output);
     return output;
   }
 }
String buf, bufferIndex;
int tempIndex=0;
int messageIndex;
int prev=0;
int power=0;
void loop(){                                                         //
   /* if(softSerial.available()){    Serial.write(softSerial.read());} // Передаём данные из программной шины UART в аппаратную  (от модуля     через Arduino к компьютеру)
    if(    Serial.available()){softSerial.write(    Serial.read());} // Передаём данные из аппаратной  шины UART в программную (от компьютера через Arduino к модулю    )*/

         //   lcd.clear();
     //  lcd.setCursor(0, 0);
     //  lcd.print("Nagruzka");
            //  lcd.setCursor(0, 1);
           //   if (power==1)
          //    {
         //              lcd.print("VKL");
     //         }
         //     else {lcd.print("VIKL");}
      softSerial.print(F("AT+CMGL="ALL",0"));
  softSerial.print("r");
  buf = readData();
 // Serial.println(buf);
tempIndex = buf.lastIndexOf("+CMGL: ");
tempIndex = tempIndex + 6;
    bufferIndex = buf.substring(tempIndex);
    bufferIndex = bufferIndex.substring(1,(bufferIndex.indexOf(",")));
    messageIndex = bufferIndex.toInt();
    ///Serial.println(messageIndex);
    if(prev!=messageIndex)
    {
      tempIndex = buf.lastIndexOf(your_phone);
     //  lcd.clear();
     //  lcd.setCursor(0, 0);
     //  lcd.print("SMS READ");

     if((digitalRead(4))&&(tempIndex!=-1))
     {
      pin_on_inv();
      delay(2000);
      pin_off_inv();
     // i=1;
   //  power=1;
     }
     else
     {
     pin_on_setb();
           delay(2000);
     pin_off_setb();
  //   i=1;
 //         power=1;
     }
        //    send_sms(number3);


    prev++;

    }
if(messageIndex>=2)
{
 dellAllSMS();
// lcd.clear();
     //   lcd.setCursor(0, 0);
     //  lcd.print("SMS READ");
     //   lcd.setCursor(0, 1);
// lcd.print("SMS DEL");
 //  cmd1 ="AT+CMGDA="DEL ALL"rn";
   //  print_lcd(cmd1);
prev=0;
}
delay(10000);

}
The STL file for 3D printing the box can be found .
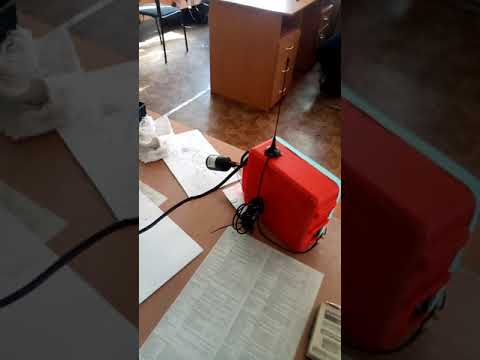
Video demonstration:
Source: habr.com
