

We will use Gitlab CI and manual GitOps for deploying and using Canary deployments in Kubernetes.

Articles from this series:
- (this article)
- Canary Deployment using Istio
- Canary Deployment using Jenkins-X Istio Flagger
We will perform Canary deployment manually through GitOps by creating or modifying essential Kubernetes resources. This article is primarily intended to introduce how Canary deployment works in Kubernetes, as there are more efficient automation methods that we will discuss in subsequent articles.
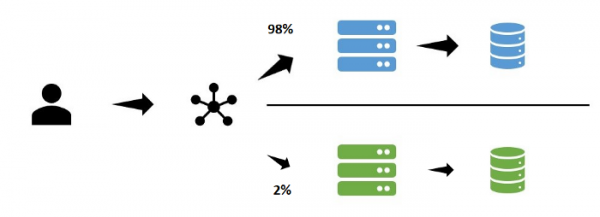
Canary Deployment
With the Canary update strategy, updates are first applied only to a portion of users. Through monitoring, log data, manual testing, or other feedback channels, the release is tested before being rolled out to all users.
Kubernetes Deployment (rolling update)
The default strategy for Kubernetes Deployment is a rolling-update, where a specified number of pods with new image versions are launched. If they are created without issues, the old version pods are terminated while the new pods are created in parallel.
GitOps
We use GitOps in this example because we:
- use Git as the single source of truth
- use Git Operations for building and deploying (no commands other than git tag/merge are needed)
Example
Let's adopt a good practice — having one repository for application code and one for infrastructure.
Repository for applications
This is a very simple API in Python+Flask, returning a response in JSON format. We will build the package through GitlabCI and push the result to Gitlab Registry. In the registry, we have two different versions of the releases:
wuestkamp/k8s-deployment-example-app:v1wuestkamp/k8s-deployment-example-app:v2
The only difference between them is the change in the returned JSON file. We use this application for a straightforward visualization of which version we are interacting with.
Infrastructure Repository
In this repo, we will deploy through GitlabCI in Kubernetes, .gitlab-ci.yml looks as follows:
image: traherom/kustomize-docker

before_script:
   - printenv
   - kubectl version

stages:
 - deploy

deploy test:
   stage: deploy
   before_script:
     - echo $KUBECONFIG
   script:
     - kubectl get all
     - kubectl apply -f i/k8s

   only:
     - master
To run it yourself, you will need a cluster, Gcloud can be used:
gcloud container clusters create canary --num-nodes 3 --zone europe-west3-b

gcloud compute firewall-rules create incoming-80 --allow tcp:80
You need to make a fork and create a variable KUBECONFIG in GitlabCI, which will contain the config for access kubectl to your cluster.
You can read about how to obtain credentials for the cluster (Gcloud) .
Infrastructure Yaml
In the infrastructure repository we have a service:
apiVersion: v1
kind: Service
metadata:
 labels:
   id: app
 name: app
spec:
 ports:
 - port: 80
   protocol: TCP
   targetPort: 5000
 selector:
   id: app
 type: LoadBalancer
And deployment in deploy.yaml:
apiVersion: apps/v1
kind: Deployment
metadata:
 name: app
spec:
 replicas: 10
 selector:
   matchLabels:
     id: app
     type: main
 template:
   metadata:
     labels:
       id: app
       type: main
   spec:
     containers:
     - image: registry.gitlab.com/wuestkamp/k8s-deployment-example-app:v1
       name: app
       resources:
         limits:
           cpu: 100m
           memory: 100Mi
And another deployment in deploy-canary.yaml:
kind: Deployment
metadata:
 name: app-canary
spec:
 replicas: 0
 selector:
   matchLabels:
     id: app
     type: canary
 template:
   metadata:
     labels:
       id: app
       type: canary
   spec:
     containers:
     - image: registry.gitlab.com/wuestkamp/k8s-deployment-example-app:v2
       name: app
       resources:
         limits:
           cpu: 100m
           memory: 100Mi
Note that app-deploy currently has no defined replicas.
Executing the initial deployment
To start the initial deployment, you can manually run the GitLabCI pipeline in the master branch. After that kubectl it should output the following:
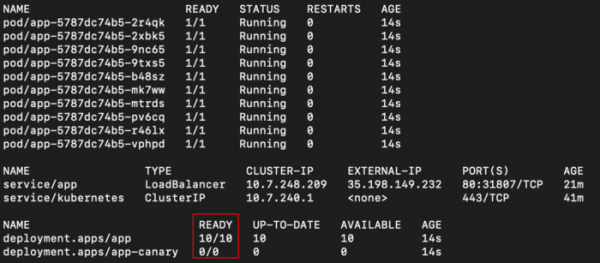
We see app the deployment with 10 replicas and app-canary with 0. There’s also a LoadBalancer from which we can reach via curl through External IP:
while true; do curl -s 35.198.149.232 | grep label; sleep 0.1; done
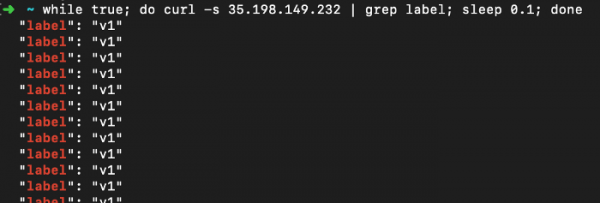
We see that our test application returns only “v1.”
Executing the Canary deployment
Step 1: Release a new version for a subset of users
We set the number of replicas to 1 in the deploy-canary.yaml file and the image of the new version:
kind: Deployment
metadata:
 name: app-canary
spec:
 replicas: 1
 selector:
   matchLabels:
     id: app
     type: canary
 template:
   metadata:
     labels:
       id: app
       type: canary
   spec:
     containers:
     - image: registry.gitlab.com/wuestkamp/k8s-deployment-example-app:v2
       name: app
       resources:
         limits:
           cpu: 100m
           memory: 100Mi
In the file deploy.yaml we changed the number of replicas to 9:
kind: Deployment
metadata:
 name: app
spec:
 replicas: 9
 selector:
   matchLabels:
     id: app
...
We push these changes to the repository that will trigger the deployment (via GitLabCI) and finally see:
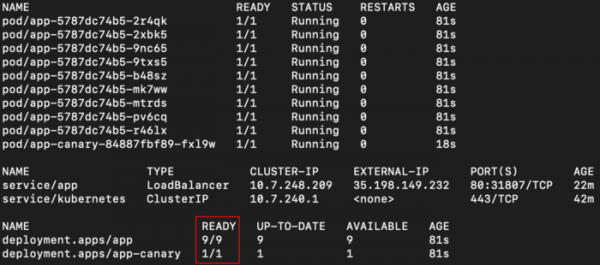
Our Service will point to both deployments since both have the app selector. Due to random distribution by default in Kubernetes, we should see different responses for ~ 10% of the requests:
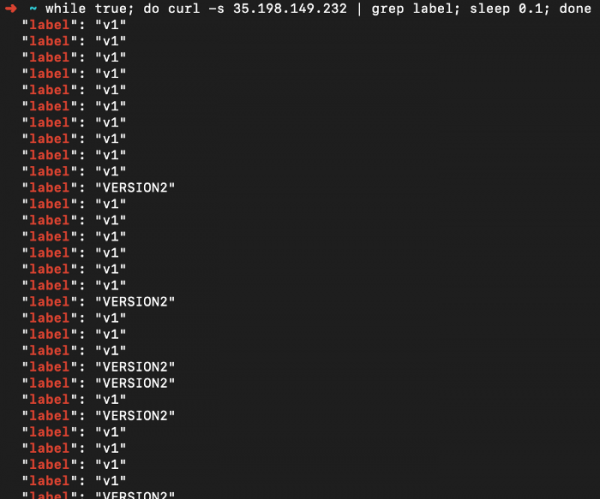
The current state of our application (GitOps, taken from Git as the Single Source Of Truth) is the existence of two deployments with active replicas, one for each version.
~10% of users are getting acquainted with the new version and unintentionally testing it. Now it’s time to check for errors in the logs and monitoring data for any issues.
Step 2: Release the new version for all users
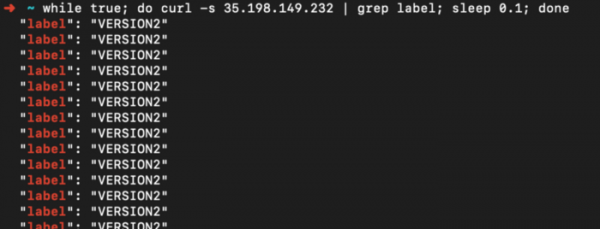
We have decided that everything went well, and now we need to deploy the new version to all users. To do this, we simply update deploy.yaml by setting the new version of the image and the number of replicas equal to 10. In deploy-canary.yaml We set the number of replicas equal to zero. After deployment, the result will be as follows:
In summary
For me, launching the deployment manually this way helps understand how easily it can be configured with k8s. Since Kubernetes allows updating everything via the API, these steps can be automated using scripts.
Another thing to implement is an entry point for testers (LoadBalancer or through Ingress), through which only the new version can be accessed. It can be used for manual reviews.
In the following articles, we will explore other automated solutions that implement most of what we have done.
Also, read other articles in our blog:
Source: habr.com
