

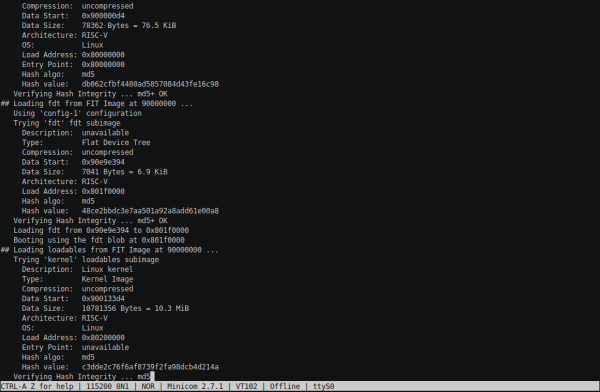
 In a more or less functional memory controller has been implemented, specifically a wrapper over the IP Core from Quartus, serving as an adapter to TileLink. Today, in the section "Porting RocketChip to a little-known Chinese board with Cyclone," you will see a working console. The process took a bit longer than expected: I thought I would quickly boot up Linux and we could move on, but that was not the case. In this part, I propose to look at the process of booting U-Boot, BBL, and the tentative attempts of the Linux kernel to initialize. But there is a console — U-Boot's, which is quite advanced, featuring much of what you would expect from a full-fledged console.
The hardware part will include an SD card connected via SPI interface, as well as UART. In the software part, BootROM will be replaced with xip to sdboot and, accordingly, the following boot stages will be added (on the SD card).
Refining the hardware part
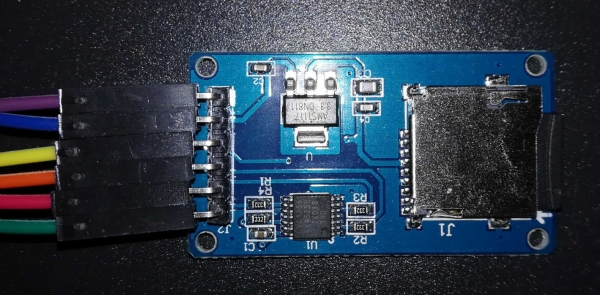
So, the task is: to switch to a "large" core and connect UART (from Raspberry) and the SD adapter (a certain board from Catalex with six pins: GND, VCC, MISO, MOSI, SCK, CS).
In principle, everything was quite straightforward. But before realizing this, I was tossed back and forth a bit: after the previous attempt, I thought I just needed to mix in System something like HasPeripheryUART (and in the implementation accordingly), the same for the SD card — and everything would be ready. Then I decided to see how it was implemented in a "serious" design. So, what do we have here that is serious? Arty, apparently, is not suitable — the monster unleahshed.DevKitConfigs. And suddenly I discovered that there are overlays everywhere, which are added through parameters via keys. I suspect that this is probably very flexible and configurable, but I would just like to start with anything first... Do you have something similar, just a bit simpler and more hacky? That’s when I stumbled upon vera.iofpga.FPGAChip for Microsemi FPGAs and immediately pulled apart into snippets, trying to make my implementation by analogy, fortunately, all the "system board wiring" is in one file.
It turned out, you really just need to add in System.scala the lines
class System(implicit p: Parameters) extends RocketSubsystem
...
  with HasPeripherySPI
  with HasPeripheryUART
...
{
  val tlclock = new FixedClockResource("tlclk", p(DevKitFPGAFrequencyKey))
  ...
}

class SystemModule[+L <: System](_outer: L)
  extends RocketSubsystemModuleImp(_outer)
...
    with HasPeripheryUARTModuleImp
    with HasPeripheryGPIOModuleImp
...
The line in the class body System adds information about the frequency at which this part of our SoC operates into the dts file. As I understand it, DTS/DTB is a static analog of plug-and-play technology for embedded devices: the dts description tree compiles into a binary dtb file and is passed by the bootloader to the kernel so that it can correctly configure the hardware. Interestingly, without the line containing tlclock everything synthesizes perfectly, but compiling BootROM (remind you, it will now be sdboot) won't work—during the compilation process, it parses the dts file and creates a header with a macro TL_CLK, enabling it to correctly configure frequency dividers for external interfaces.
Also, a bit of re-routing will be required:
Platform.scala:
class PlatformIO(implicit val p: Parameters) extends Bundle {

...

  // UART
  io.uart_tx := sys.uart(0).txd
  sys.uart(0).rxd := RegNext(RegNext(io.uart_rx))

  // SD card
  io.sd_cs := sys.spi(0).cs(0)
  io.sd_sck := sys.spi(0).sck
  io.sd_mosi := sys.spi(0).dq(0).o
  sys.spi(0).dq(0).i := false.B
  sys.spi(0).dq(1).i := RegNext(RegNext(io.sd_miso))
  sys.spi(0).dq(2).i := false.B
  sys.spi(0).dq(3).i := false.B
}
The chains of registers, to be honest, were added simply by analogy with some other places from the original code. Most likely, they should protect against . Perhaps, in some blocks there is already some protection, but for starters, I want to run it at least "at a quality level." A more interesting question for me is why MISO and MOSI are hanging on different dq? Ответа я пока так и не нашёл, но, похоже, остальной код рассчитывает именно на такое подключение.
Physically, I simply assigned the design pins to free contacts on the header and moved the voltage selection jumper to 3.3V.
SD adapter
Top view:
Bottom view:
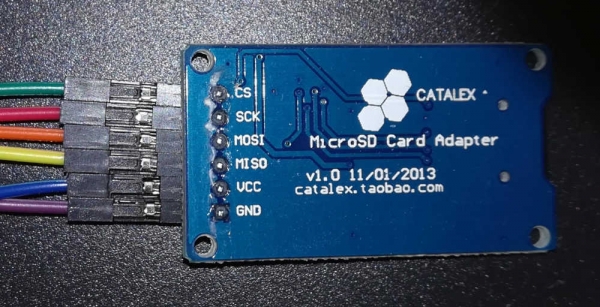
Debugging the software part: tools
First, let's talk about the available debugging tools and their limitations.
Minicom
First of all, we will need some way to read what the bootloader and kernel output. For this, on Linux (in this case, on the one running on Raspberry Pi), we will need the Minicom program. In general, any program for working with a serial port will do.
Note that when starting, you need to specify the device name of the port as -D /dev/ttyS0 — after the option -D. And the main information: to exit, use Ctrl-A, X. I did have a case where this combination didn't work—then you can simply say from another SSH session killall -KILL minicom.
There is one more feature. Specifically, the Raspberry Pi has two UARTs, and both ports can already be configured for something: one for Bluetooth, while the console data from the kernel is output through the other by default. Fortunately, this behavior can be reconfigured. .
Memory rewriting
During debugging, to verify hypotheses, I sometimes had to load the bootloader (sorry) into RAM directly from the host. Maybe this can be done straight from GDB, but I ultimately took the simpler route: I copied the necessary file to the Raspberry, forwarded port 4444 (telnet from OpenOCD) through SSH, and used the command load_image. When you execute it, it seems like everything has frozen, but in reality, it's not asleep, it's just blinking slowly: it loads the file, but does it at a speed of a couple of kilobytes per second.
Features of setting breakpoints
Many may not have thought about it while debugging ordinary programs, but breakpoints are not always set in hardware. Sometimes, setting a breakpoint involves temporarily writing a special instruction to the desired location directly in machine code. For example, my standard command worked like this in b GDB. Here’s what follows from this:
- you can't place a breakpoint inside BootROM because ROM
- you can set a breakpoint on code loaded into RAM from the SD card, but you need to wait for it to load. Otherwise, we won’t overwrite a piece of code, but the bootloader will overwrite our breakpoint.
I’m sure you can explicitly request to use hardware breakpoints, but there’s a limited number of them anyway.
Quick BootROM substitution
At the initial stage of debugging, there is often a desire to fix the BootROM and try again. But there's a problem: BootROM is part of the design loaded into the FPGA, and synthesizing it takes a few minutes (and this is after the almost instantaneous compilation of the BootROM image from C and Assembler...). Fortunately, everything is actually much faster: the sequence of actions is as follows:
- regenerate bootrom.mif (I switched to MIF instead of HEX because I always had issues with HEX, whereas MIF is the native Altera format)
- in Quartus, say
Processing -> Update Memory Initialization File - at the Assembler point (in the left column of Tasks), command Start again
It takes just a couple of dozen seconds.
Preparing the SD card
Everything here is relatively simple, but you need to be patient and have about 14GB of disk space:
git clone https://github.com/sifive/freedom-u-sdk
git submodule update --recursive --init
make
After that, you need to insert a clean, or rather, a card containing nothing useful, SD card, and execute
sudo make DISK=/dev/sdX format-boot-loader… where sdX — is the device assigned to the card. WARNING: data on the card will be deleted, overwritten, and completely! It's unlikely that you should do the entire build under sudo, because then all build artifacts will belong to root, and the build will have to be done under sudo constantly.
As a result, you get a card partitioned with GPT into four partitions, one of which has FAT containing uEnv.txt and a boot image in FIT format (it contains several sub-images, each with its own load address), another partition is clean and is expected to be formatted in Ext4 for Linux. The other two partitions are mysterious: one contains U-Boot (its offset, as I understand it, is hardcoded in BootROM), and the other seems to store its environment variables, but I'm not using them yet.
Level one, BootROM
There's a saying: "If programming involves dancing with a tambourine, then in electronics, it involves dancing with a fire extinguisher." It's not even that once I almost burned a board, thinking, "Well, GND is the same as a low level" (apparently, a resistor would have helped...) It's more about the fact that if your hands don't come from the right place, electronics will continue to surprise you: while soldering a connector onto the board, I couldn't manage to properly solder the contacts — they show on video how solder flows across the whole connection as soon as you touch the soldering iron, but mine just splatted all over the place. Well, maybe the solder wasn't suitable for the soldering iron's temperature, maybe something else... Anyway, seeing that I already had a dozen contacts, I gave up and started debugging. And then the mysteriousness began mysterious: I connected RX/TX from the UART, loaded the firmware — it says
INIT
CMD0
ERROR
Well, it's all logical — I hadn't connected the SD card module. I fixed the situation, loaded the firmware... And silence... I thought about everything, but the box was just opening: one of the module's pins needed to be connected to VCC. In my case, the module supported 5V for power, so without thinking twice, I plugged the wire from the module to the opposite side of the board. As a result, the poorly soldered connector got skewed, and I just lost the UART contact. facepalm.jpg In general, "a foolish head gives no rest to the feet", and crooked hands trouble the head…
In the end, I saw the long-awaited output in Minicom
INIT
CMD0
CMD8
ACMD41
CMD58
CMD16
CMD18
LOADING /
Moreover, the loading indicator is moving around. It brings back memories of school days and the slow loading of MinuetOS from a floppy disk. The only difference is that the drive isn't grinding.
The problem is that nothing happens after the BOOT message. Now is the perfect time to connect via OpenOCD on the Raspberry, then GDB on the host, and see what this is all about.
First of all, connecting with GDB immediately showed that $pc (program counter, address of the current instruction) is going to 0x0 — probably, this happens after a multiple error. Therefore, right after the message is displayed, BOOT we'll add an infinite loop. This will hold it up for a bit...
diff --git a/bootrom/sdboot/sd.c b/bootrom/sdboot/sd.c
index c6b5ede..bca1b7f 100644
--- a/bootrom/sdboot/sd.c
+++ b/bootrom/sdboot/sd.c
@@ -224,6 +224,8 @@ int main(void)

        kputs("BOOT");

+    while(*(volatile char *)0x10000){}
+
        __asm__ __volatile__ ("fence.i" : : : "memory");
        return 0;
 }
Such clever code is used "for reliability": I’ve heard somewhere that an infinite loop is Undefined Behavior, and the compiler probably won't suspect anything (Recall that it’s located in the BootROM). 0x10000 It seems, well, what else is to be expected — it’s harsh embedded, what source code can be here. But indeed in
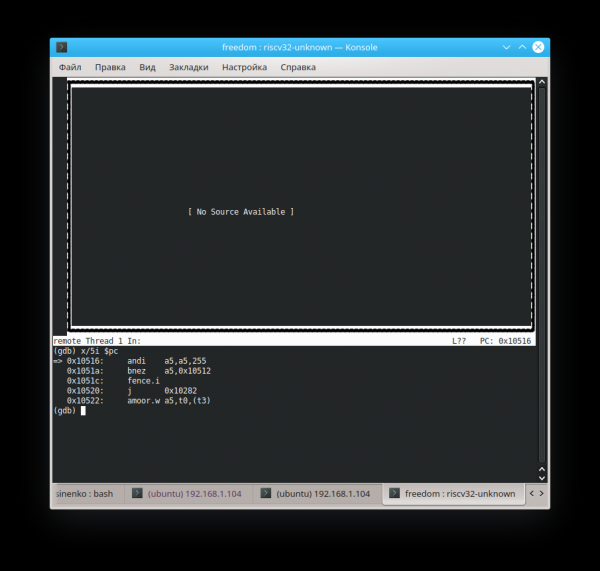
that article (gdb) file builds/zeowaa-e115/sdboot.elf A program is being debugged already. Are you sure you want to change the file? (y or n) y Reading symbols from builds/zeowaa-e115/sdboot.elf...done.
But we need to load not a MIF file or a bin, but the original version in ELF format.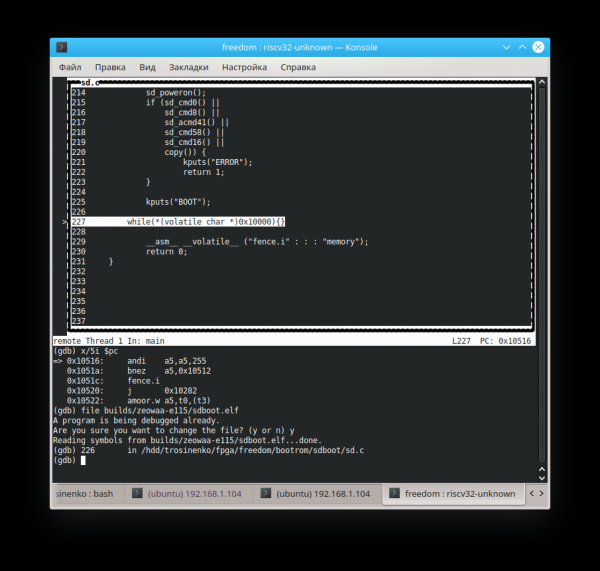
Now we can take a guess at the address where execution will continue (this is another reason why the compiler shouldn't have suspected that the loop is infinite). The command
set variable $pc=0xADDR
allows changing the register value on the fly (in this case, the address of the current instruction). With it, you can also modify values stored in memory (and memory-mapped registers).Ultimately, I came to a conclusion (not sure if it's right), that we have "an sd card image of the wrong system", and we need to transition not to the very beginning of the loaded data, but to
a byte further: 0x89800 diff --git a/bootrom/sdboot/head.S b/bootrom/sdboot/head.S index 14fa740..2a6c944 100644 --- a/bootrom/sdboot/head.S +++ b/bootrom/sdboot/head.S @@ -13,7 +13,7 @@ _prog_start: smp_resume(s1, s2) csrr a0, mhartid la a1, dtb - li s1, PAYLOAD_DEST + li s1, (PAYLOAD_DEST + 0x89800) jr s1.section .rodata
diff --git a/bootrom/sdboot/head.S b/bootrom/sdboot/head.S
index 14fa740..2a6c944 100644
--- a/bootrom/sdboot/head.S
+++ b/bootrom/sdboot/head.S
@@ -13,7 +13,7 @@ _prog_start:
   smp_resume(s1, s2)
   csrr a0, mhartid
   la a1, dtb
-  li s1, PAYLOAD_DEST
+  li s1, (PAYLOAD_DEST + 0x89800)
   jr s1

   .section .rodata
Perhaps this was also influenced by the fact that, not having an unnecessary 4Gb card on hand, I took a 2Gb one and replaced it in the Makefile by trial and error. DEMO_END=11718750 to DEMO_END=3078900 (don’t look for meaning in the specific value — there isn’t any, it’s just that now the image fits on the card).
Level two, U-Boot
Now we are still "falling," but we end up at the address 0x0000000080089a84. Here I must admit: actually, the exposition is not going "with all stops," but is partially written "later," which is why I have already managed to insert the correct dtb file from our SoC and fix the settings. HiFive_U-Boot variable CONFIG_SYS_TEXT_BASE=0x80089800 (instead of 0x08000000), so that the load address matches the actual one. We're now loading the next level of the other image:
(gdb) file ..\/freedom-u-sdk\/work\/HiFive_U-Boot\/u-boot
(gdb) tui en
And we see:
   │304     \/*                                               │
   │305      * trap entry                                    │
   │306      *\/                                              │
   │307     trap_entry:                                      │
   │308         addi sp, sp, -32*REGBYTES                    │
  >│309         SREG x1, 1*REGBYTES(sp)                      │
   │310         SREG x2, 2*REGBYTES(sp)                      │
   │311         SREG x3, 3*REGBYTES(sp)                      │
And we jump between lines 308 and 309. It’s not surprising, considering that in $sp is the value 0xfffffffe31cdc0a0. Unfortunately, it also constantly "escapes" because of line 307. So let's try to set a breakpoint on trap_entry, and then go back to 0x80089800 (the U-Boot entry point), and hopefully it doesn’t require the correct register settings before jumping… It seems to work:
(gdb) b trap_entry
Breakpoint 1 at 0x80089a80: file \/hdd\/trosinenko\/fpga\/freedom-u-sdk\/HiFive_U-Boot\/arch\/riscv\/cpu\/HiFive\/start.S, line 308.
(gdb) set variable $pc=0x80089800
(gdb) c
Continuing.

Breakpoint 1, trap_entry () at \/hdd\/trosinenko\/fpga\/freedom-u-sdk\/HiFive_U-Boot\/arch\/riscv\/cpu\/HiFive\/start.S:308
(gdb) p\/x $sp
$4 = 0x81cf950
Not a great stack pointer, to put it mildly: it points completely away from RAM (unless, of course, we don’t have address translation yet, but let’s hope for the simple variant).
Let's try to replace the pointer with 0x881cf950. Ultimately, we end up with the fact that handle_trap is called repeatedly, and we go into _exit_trap with the argument epc=2148315240 (in decimal):
(gdb) x/10i 2148315240
   0x800cb068 :     lbu     a4,0(a5)
   0x800cb06c :     bnez    a4,0x800cb078
   0x800cb070 :     sub     a0,a5,a0
   0x800cb074 :     ret
   0x800cb078 :     addi    a5,a5,1
   0x800cb07c :     j       0x800cb064
   0x800cb080 : addi    sp,sp,-32
   0x800cb084 :       sd      s0,16(sp)
   0x800cb088 :       sd      ra,24(sp)
   0x800cb08c :      li      s0,0
Setting a breakpoint at strnlen, continue and see:
(gdb) bt
#0 strnlen (s=s@entry=0x10060000 "", count=18446744073709551615) at lib/string.c:283
#1 0x00000000800cc14c in string (buf=buf@entry=0x881cbd4c "", end=end@entry=0x881cc15c "", s=0x10060000 "", field_width=, precision=, flags=) at lib/vsprintf.c:265
#2 0x00000000800cc63c in vsnprintf_internal (buf=buf@entry=0x881cbd38 "exception code: 5 , ", size=size@entry=1060, fmt=0x800d446e "s , epc x , ra lxn", fmt@entry=0x800d4458 "exception code: %d , %s , epc x , ra lxn", args=0x881cc1a0,
 args@entry=0x881cc188) at lib/vsprintf.c:619
#3 0x00000000800cca54 in vsnprintf (buf=buf@entry=0x881cbd38 "exception code: 5 , ", size=size@entry=1060, fmt=fmt@entry=0x800d4458 "exception code: %d , %s , epc x , ra lxn", args=args@entry=0x881cc188) at lib/vsprintf.c:710
#4 0x00000000800cca68 in vscnprintf (buf=buf@entry=0x881cbd38 "exception code: 5 , ", size=size@entry=1060, fmt=fmt@entry=0x800d4458 "exception code: %d , %s , epc x , ra lxn", args=args@entry=0x881cc188) at lib/vsprintf.c:717
#5 0x00000000800ccb50 in printf (fmt=fmt@entry=0x800d4458 "exception code: %d , %s , epc x , ra lxn") at lib/vsprintf.c:792
#6 0x000000008008a9f0 in _exit_trap (regs=, epc=2148315240, code=) at arch/riscv/lib/interrupts.c:92
#7 handle_trap (mcause=, epc=, regs=) at arch/riscv/lib/interrupts.c:55
#8 0x0000000080089b10 in trap_entry () at /hdd/trosinenko/fpga/freedom-u-sdk/HiFive_U-Boot/arch/riscv/cpu/HiFive/start.S:343
Backtrace stopped: frame did not save the PC
It seems that _exit_trap wants to provide debugging information about the exception that occurred, but it's unable to. So, we are again not seeing the source files. set directories ../freedom-u-sdk/HiFive_U-Boot/ Oh! Now they are displayed!
Well, let's run it again and see from the stack trace the cause of the original problem that triggered the first error (mcause == 5). If I understood correctly what was written on line 37, this exception indicates Load access fault. The reason seems to be that here
arch/riscv/cpu/HiFive/start.S:
call_board_init_f:
    li  t0, -16
    li  t1, CONFIG_SYS_INIT_SP_ADDR
    and sp, t1, t0  /* force 16 byte alignment */

#ifdef CONFIG_DEBUG_UART
    jal debug_uart_init
#endif

call_board_init_f_0:
    mv  a0, sp
    jal board_init_f_alloc_reserve
    mv  sp, a0
    jal board_init_f_init_reserve

    mv  a0, zero    /* a0 <-- boot_flags = 0 */
    la t5, board_init_f
    jr t5       /* jump to board_init_f() */
$sp has that incorrect value, and within board_init_f_init_reserve an error occurs. It seems that the culprit is the variable with the unambiguous name CONFIG_SYS_INIT_SP_ADDR. It is defined in the file HiFive_U-Boot/include/configs/HiFive-U540.h. At one point, I even thought, maybe I should forget about fine-tuning the bootloader for the processor — perhaps it's easier to make slight adjustments to the processor? But then I realized that this looked more like an artifact from not fully set parameters for a different memory configuration, and I could try doing this:#if 0-
diff --git a/include/configs/HiFive-U540.h b/include/configs/HiFive-U540.h
index ca89383..245542c 100644
--- a/include/configs/HiFive-U540.h
+++ b/include/configs/HiFive-U540.h
@@ -65,12 +65,9 @@
 #define CONFIG_SYS_SDRAM_BASE PHYS_SDRAM_0
 #endif
 #if 1
-/*#define CONFIG_NR_DRAM_BANKS 1*/
+#define CONFIG_NR_DRAM_BANKS 1
 #define PHYS_SDRAM_0 0x80000000 /* SDRAM Bank #1 */
-#define PHYS_SDRAM_1
- (PHYS_SDRAM_0 + PHYS_SDRAM_0_SIZE) /* SDRAM Bank #2 */
-#define PHYS_SDRAM_0_SIZE 0x80000000 /* 2 GB */
-#define PHYS_SDRAM_1_SIZE 0x10000000 /* 256 MB */
+#define PHYS_SDRAM_0_SIZE 0x40000000 /* 1 GB */
 #define CONFIG_SYS_SDRAM_BASE PHYS_SDRAM_0
 #endif
 /*
@@ -81,7 +78,7 @@
 #define CONSOLE_ARG "console=ttyS0,115200 "

 /* Init Stack Pointer */
-#define CONFIG_SYS_INIT_SP_ADDR (0x08000000 + 0x001D0000 -
+#define CONFIG_SYS_INIT_SP_ADDR (0x80000000 + 0x001D0000 -
 GENERATED_GBL_DATA_SIZE)

 #define CONFIG_SYS_LOAD_ADDR 0xa0000000 /* partway up SDRAM */
At some point, the number of workarounds reached a critical point. After some struggle, I realized the need to create a proper port for my board. To do this, I needed to copy and adjust several files for our configuration.
So, approximately, here is a bit
trosinenko@trosinenko-pc:/hdd/trosinenko/fpga/freedom-u-sdk/HiFive_U-Boot$ git show --name-status
commit 39cd67d59c16ac87b46b51ac1fb58f16f1eb1048 (HEAD -> zeowaa-1gb)
Author: Anatoly Trosinenko
Date:   Tue Jul 2 17:13:16 2019 +0300

    Initial support for Zeowaa A-E115FB board

M       arch/riscv/Kconfig
A       arch/riscv/cpu/zeowaa-1gb/Makefile
A       arch/riscv/cpu/zeowaa-1gb/cpu.c
A       arch/riscv/cpu/zeowaa-1gb/start.S
A       arch/riscv/cpu/zeowaa-1gb/timer.c
A       arch/riscv/cpu/zeowaa-1gb/u-boot.lds
M       arch/riscv/dts/Makefile
A       arch/riscv/dts/zeowaa-1gb.dts
A       board/Zeowaa/zeowaa-1gb/Kconfig
A       board/Zeowaa/zeowaa-1gb/MAINTAINERS
A       board/Zeowaa/zeowaa-1gb/Makefile
A       board/Zeowaa/zeowaa-1gb/Zeowaa-A-E115FB.c
A       configs/zeowaa-1gb_defconfig
A       include/configs/zeowaa-1gb.h
You can find more details in .
As it turned out, on this SiFive board, the registers of some devices have different addresses. It also turned out that U-Boot is configured using the familiar Kconfig mechanism from the Linux kernel — for example, you can command make menuconfig, and a convenient text interface will appear showing descriptions of the parameters. ? And so on. Overall, by piecing together descriptions of two boards to create a third one, discarding any pompous PLL reconfigurations (presumably related to control from the host computer via PCIe, but I'm not sure), I produced a firmware that, under the right conditions on Mars, would send me a message via UART indicating which commit hash it was built from and how much DRAM I had (though I noted that information in the header myself).
It's just too bad that after this, the board usually stopped responding via the CPU JTAG, and booting from the SD card—unfortunately, in my configuration—is not a fast process. On the other hand, sometimes the BootROM would output a message stating ERROR, failed to boot, and then immediately U-Boot would pop up. That's when I realized: apparently, after rebooting, the bitstream in the FPGA does not overwrite the memory, it does not get 'detrained', etc. In short, when the message appears LOADING / , I could connect with the debugger and issue the command set variable $pc=0x80089800, thereby bypassing this lengthy boot process (provided, of course, that it failed early enough the last time and didn't manage to load something over the original code).
By the way, is it normal that the processor completely hangs, and the JTAG debugger cannot connect with the messages
Error: unable to halt hart 0
Error:   dmcontrol=0x80000001
Error:   dmstatus =0x00030c82
Wait a minute! I've seen this before! Something similar happens during a TileLink deadlock, and I don't really trust the memory controller—the author wrote it himself... Suddenly, after the very first successful recompilation of the processor after editing the controller, I saw:
INIT
CMD0
CMD8
ACMD41
CMD58
CMD16
CMD18
LOADING
BOOT

U-Boot 2018.09-g39cd67d-dirty (Jul 03 2019 - 13:50:33 +0300)

DRAM:  1 GiB
MMC:
BEFORE LOAD ENVBEFORE FDTCONTROLADDRBEFORE LOADADDRIn:    serial
Out:   serial
Err:   serial
Hit any key to stop autoboot:  3
On this strange line before In: serial Don't pay attention — I was trying to figure out on a hanging processor whether it works correctly with the environment. What does "It's been hanging for ten minutes" mean? At least it managed to relocate and get to the boot menu! A small aside: although U-Boot loads in the first 2^24 bytes from the SD card, once started, it copies itself somewhere else to an address either written in the configuration header or simply to the higher memory addresses, performs relocation of the ELF symbols, and hands over control there. So, it seems like this level was passed, and as a bonus, we got a processor that doesn't completely hang afterwards.
So, why isn't the timer working? It seems that the clock is somehow not running at all...
(gdb) x/x 0x0200bff8
0x200bff8:      0x00000000
What if I manually turn the hands?
(gdb) set variable *0x0200bff8=310000000
(gdb) c
Then:
Hit any key to stop autoboot:  0
MMC_SPI: 0 at 0:1 hz 20000000 mode 0
Conclusion: the clock isn't running. Probably, this is also why the keyboard input isn't working:
HiFive_U-Boot/cmd/bootmenu.c:
static void bootmenu_loop(struct bootmenu_data *menu,
        enum bootmenu_key *key, int *esc)
{
    int c;

    while (!tstc()) {
        WATCHDOG_RESET();
        mdelay(10);
    }

    c = getc();

    switch (*esc) {
    case 0:
        /* First char of ANSI escape sequence 'e' */
        if (c == 'e') {
            *esc = 1;
            *key = KEY_NONE;
        }
        break;
    case 1:
        /* Second char of ANSI '[' */
        if (c == '[') {
...
The problem turned out to be that I overcomplicated things a bit: I added a key to the processor configuration:
case DTSTimebase => BigInt(0)... based on the comment that said "if you don't know — leave it as 0". And indeed, WithNBigCores it was setting it to 1MHz (as, by the way, indicated in the U-Boot config). But I'm such a meticulous and detailed person: there I don't know, here it's 25MHz! In the end, nothing works. I removed my "improvements" and...
Hit any key to stop autoboot:  0
MMC_SPI: 0 at 0:1 hz 20000000 mode 0
## Unknown partition table type 0
libfdt fdt_path_offset() returned FDT_ERR_NOTFOUND
** No partition table - mmc 0 **
## Info: input data size = 34 = 0x22
Running uEnv.txt boot2...
## Error: "boot2" not defined
HiFive-Unleashed #
You can even enter commands! For example, after fiddling a bit, one can finally guess to enter mmc_spi 1 10000000 0; mmc part, reducing the SPI frequency from 20MHz to 10MHz. Why? Well, the config stated a maximum frequency of 20MHz, and it's still the same there. But, as far as I understand, the interfaces, at least here, work like this: the code divides the frequency of the hardware block (I have 25MHz everywhere) by the target frequency, and sets the resulting value as a divider in the corresponding control register. The problem is that if about 115200Hz for UART would result in what is needed, then if we divide 25000000 by 20000000, we get 1, which means it will operate at 25MHz. Maybe that's fine, but if they set limitations, it must be necessary for someone (but that's not certain)... In general, it's easier to set it and move on — far and, unfortunately, for a long time. 25MHz is not like a Core i9.
Console output
HiFive-Unleashed # env edit mmcsetup
edit: mmc_spi 1 10000000 0; mmc part
HiFive-Unleashed # boot
MMC_SPI: 1 at 0:1 hz 10000000 mode 0

Partition Map for MMC device 0  --   Partition Type: EFI

Part    Start LBA       End LBA         Name
        Attributes
        Type GUID
        Partition GUID
  1     0x00000800      0x0000ffde      "Vfat Boot"
        attrs:  0x0000000000000000
        type:   ebd0a0a2-b9e5-4433-87c0-68b6b72699c7
        type:   data
        guid:   76bd71fd-1694-4ff3-8197-bfa81699c2fb
  2     0x00040800      0x002efaf4      "root"
        attrs:  0x0000000000000000
        type:   0fc63daf-8483-4772-8e79-3d69d8477de4
        type:   linux
        guid:   9f3adcc5-440c-4772-b7b7-283124f38bf3
  3     0x0000044c      0x000007e4      "uboot"
        attrs:  0x0000000000000000
        type:   5b193300-fc78-40cd-8002-e86c45580b47
        guid:   bb349257-0694-4e0f-9932-c801b4d76fa3
  4     0x00000400      0x0000044b      "uboot-env"
        attrs:  0x0000000000000000
        type:   a09354ac-cd63-11e8-9aff-70b3d592f0fa
        guid:   4db442d0-2109-435f-b858-be69629e7dbf
libfdt fdt_path_offset() returned FDT_ERR_NOTFOUND
2376 bytes read in 0 ms
Running uEnv.txt boot2...
15332118 bytes read in 0 ms
## Loading kernel from FIT Image at 90000000 ...
   Using 'config-1' configuration
   Trying 'bbl' kernel subimage
     Description:  BBL/SBI/riscv-pk
     Type:         Kernel Image
     Compression:  uncompressed
     Data Start:   0x900000d4
     Data Size:    74266 Bytes = 72.5 KiB
     Architecture: RISC-V
     OS:           Linux
     Load Address: 0x80000000
     Entry Point:  0x80000000
     Hash algo:    sha256
     Hash value:   28972571467c4ad0cf08a81d9cf92b9dffc5a7cb2e0cd12fdbb3216cf1f19cbd
   Verifying Hash Integrity ... sha256+ OK
## Loading fdt from FIT Image at 90000000 ...
   Using 'config-1' configuration
   Trying 'fdt' fdt subimage
     Description:  unavailable
     Type:         Flat Device Tree
     Compression:  uncompressed
     Data Start:   0x90e9d31c
     Data Size:    6911 Bytes = 6.7 KiB
     Architecture: RISC-V
     Load Address: 0x81f00000
     Hash algo:    sha256
     Hash value:   10b0244a5a9205357772ea1c4e135a4f882409262176d8c7191238cff65bb3a8
   Verifying Hash Integrity ... sha256+ OK
   Loading fdt from 0x90e9d31c to 0x81f00000
   Booting using the fdt blob at 0x81f00000
## Loading loadables from FIT Image at 90000000 ...
   Trying 'kernel' loadables subimage
     Description:  Linux kernel
     Type:         Kernel Image
     Compression:  uncompressed
     Data Start:   0x900123e8
     Data Size:    10781356 Bytes = 10.3 MiB
     Architecture: RISC-V
     OS:           Linux
     Load Address: 0x80200000
     Entry Point:  unavailable
     Hash algo:    sha256
     Hash value:   72a9847164f4efb2ac9bae736f86efe7e3772ab1f01ae275e427e2a5389c84f0
   Verifying Hash Integrity ... sha256+ OK
   Loading loadables from 0x900123e8 to 0x80200000
## Loading loadables from FIT Image at 90000000 ...
   Trying 'ramdisk' loadables subimage
     Description:  buildroot initramfs
     Type:         RAMDisk Image
     Compression:  gzip compressed
     Data Start:   0x90a5a780
     Data Size:    4467411 Bytes = 4.3 MiB
     Architecture: RISC-V
     OS:           Linux
     Load Address: 0x82000000
     Entry Point:  unavailable
     Hash algo:    sha256
     Hash value:   883dfd33ca047e3ac10d5667ffdef7b8005cac58b95055c2c2beda44bec49bd0
   Verifying Hash Integrity ... sha256+ OK
   Loading loadables from 0x90a5a780 to 0x82000000
Okay, we've leveled up, but it still freezes. Sometimes it also throws exceptions. You can see mcause by intercepting the code at the specified address. $pc and after si finding yourself at trap_entryThe U-Boot handler can only output for mcause = 0..4, so be prepared to get stuck on incorrect loading. I went into the config to see what I had changed and remembered: it’s there in conf/rvboot-fit.txt it says:
fitfile=image.fit
# below much match what's in FIT (ugha)
Well then, let's align all the files, modifying the kernel command line approximately as there are suspicions that SIF0 is output somewhere via PCIe:
-bootargs=console=ttySIF0,921600 debug
+bootargs=console=ttyS0,125200 debug
And for good measure, we'll change the hashing algorithm from SHA-256 to MD5: I don't need cryptographic strength (especially during debugging), it's known to be horrendously slow, and for capturing integrity errors during loading, MD5 is more than sufficient. So what’s the result? We started going through the previous level noticeably faster (due to the simpler hashing), and the next one opened up:
...
   Verifying Hash Integrity ... md5+ OK
   Loading loadables from 0x90a5a758 to 0x82000000
libfdt fdt_check_header(): FDT_ERR_BADMAGIC
chosen {
        linux,initrd-end = ;
        linux,initrd-start = ;
        riscv,kernel-end = ;
        riscv,kernel-start = ;
        bootargs = "debug console=tty0 console=ttyS0,125200 root=/dev/mmcblk0p2 rootwait";
};
libfdt fdt_path_offset() returned FDT_ERR_NOTFOUND
chosen {
        linux,initrd-end = ;
        linux,initrd-start = ;
        riscv,kernel-end = ;
        riscv,kernel-start = ;
        bootargs = "debug console=tty0 console=ttyS0,125200 root=/dev/mmcblk0p2 rootwait";
};
   Loading Kernel Image ... OK
Booting kernel in
3
Only the clock isn't ticking...
(gdb) x/x 0x0200bff8
0x200bff8:      0x00000000
Oops, it seems that fixing the clock turned out to be a placebo, although it did seem to help back then. No, we definitely need to fix it, but let’s start by manually adjusting the hands and see what happens:
0x00000000bff6dbb0 in ?? ()
(gdb) set variable *0x0200bff8=1000000
(gdb) c
Continuing.
^C
Program received signal SIGINT, Interrupt.
0x00000000bff6dbb0 in ?? ()
(gdb) set variable *0x0200bff8=2000000
(gdb) c
Continuing.
^C
Program received signal SIGINT, Interrupt.
0x00000000bff6dbb0 in ?? ()
(gdb) set variable *0x0200bff8=3000000
(gdb) c
Continuing.
Meanwhile...
   Loading Kernel Image ... OK
Booting kernel in
3
2
1
0
## Starting application at 0x80000000 ...
No way, I'm going to automate the clock instead — else it might think about calibrating the timer!
And the address of the current instruction is pointing somewhere to
0000000080001c20 :
    80001c20:   1141                    addi    sp,sp,-16
    80001c22:   e022                    sd      s0,0(sp)
    80001c24:   842a                    mv      s0,a0
    80001c26:   00005517                auipc   a0,0x5
    80001c2a:   0ca50513                addi    a0,a0,202 # 80006cf0
    80001c2e:   e406                    sd      ra,8(sp)
    80001c30:   f7fff0ef                jal     ra,80001bae
    80001c34:   8522                    mv      a0,s0
    80001c36:   267000ef                jal     ra,8000269c
    80001c3a:   00010797                auipc   a5,0x10
    80001c3e:   41e78793                addi    a5,a5,1054 # 80012058
    80001c42:   639c                    ld      a5,0(a5)
    80001c44:   c399                    beqz    a5,80001c4a
    80001c46:   72c000ef                jal     ra,80002372
    80001c4a:   45a1                    li      a1,8
    80001c4c:   4501                    li      a0,0
    80001c4e:   dc7ff0ef                jal     ra,80001a14
    80001c52:   10500073                wfi
    80001c56:   bff5                    j       80001c52
inside the loaded Berkeley Boot Loader. Personally, I'm troubled by the mention of htif — the host interface used for tethered kernel booting (that is, in cooperation with the host ARM), I thought it was standalone. However, if you find this function in the source code, you can see that it's not so bad:
void poweroff(uint16_t code)
{
  printm("Power offrn");
  finisher_exit(code);
  if (htif) {
    htif_poweroff();
  } else {
    send_ipi_many(0, IPI_HALT);
    while (1) { asm volatile ("wfin"); }
  }
}
Quest: start the clock
Searching registers in CLINT leads us to
    val io = IO(new Bundle {
      val rtcTick = Bool(INPUT)
    })

    val time = RegInit(UInt(0, width = timeWidth))
    when (io.rtcTick) { time := time + UInt(1) }
Which connects to the RTC, or in the mysterious MockAON, about which I initially thought: "So, what do we have here? Not clear? Disconnect!" Since I still don't understand what kind of clock magic is happening there, I will simply re-implement this logic in System.scala:
  val rtcDivider = RegInit(0.asUInt(16.W)) // just to support up to 16GHz, I'm an optimist :)
  val mhzInt = p(DevKitFPGAFrequencyKey).toInt
  // Let's assume the frequency is equal to an integer megahertz
  rtcDivider := Mux(rtcDivider === (mhzInt - 1).U, 0.U, rtcDivider + 1.U)
  outer.clintOpt.foreach { clint =>
    clint.module.io.rtcTick := rtcDivider === 0.U
  }
Making my way to the Linux kernel
Here the narrative has already dragged on and become a bit monotonous, so I will describe it in broad strokes:
BBL assumed the presence of an FDT at address 0xF0000000, but I had already fixed that! Well, let's search some more… I found it in HiFive_U-Boot/arch/riscv/lib/boot.c, replaced it with 0x81F00000, specified in the U-Boot loading configuration.
Then BBL complained that there was not enough memory. My path led to the function mem_prop, that among riscv-pk/machine/fdt.c: from there I learned that it is necessary to mark the fdt ram node as device_type = "memory" — later, it might be necessary to fix the processor generator, but for now, I'll just enter it manually — anyway, I transferred this file manually.
Now I received a message (formatted with line breaks):
This is bbl's dummy_payload. To boot a real kernel, reconfigure bbl with the flag --with-payload=PATH, then rebuild bbl. Alternatively, bbl can be used in firmware-only mode by adding device-tree nodes for an external payload and use QEMU's -bios and -kernel options.It seems that the options are specified correctly. riscv,kernel-start and riscv,kernel-end in the DTB, but zeros are being parsed. Debugging query_chosen showed that BBL is trying to parse a 32-bit address, but it encounters a pair <0x0 0xADDR>, and the first value seems to be the least significant bits. Added to the section chosen
chosen {
      #address-cells = ;
      #size-cells = ;
      ...
}
and corrected the generation of values: do not append 0x0 as the first element.
These 100500 simple steps will allow you to easily see how the penguin crashes:
Hidden text
   Verifying Hash Integrity ... md5+ OK
   Loading loadables from 0x90a5a758 to 0x82000000
libfdt fdt_check_header(): FDT_ERR_BADMAGIC
chosen {
        linux,initrd-end = ;
        linux,initrd-start = ;
        riscv,kernel-end = ;
        riscv,kernel-start = ;
        #address-cells = ;
        #size-cells = ;
        bootargs = "debug console=tty0 console=ttyS0,125200 root=/dev/mmcblk0p2 rootwait";
        stdout-path = "uart0:38400n8";
};
libfdt fdt_path_offset() returned FDT_ERR_NOTFOUND
chosen {
        linux,initrd-end = ;
        linux,initrd-start = ;
        riscv,kernel-end = ;
        riscv,kernel-start = ;
        #address-cells = ;
        #size-cells = ;
        bootargs = "debug console=tty0 console=ttyS0,125200 root=/dev/mmcblk0p2 rootwait";
        stdout-path = "uart0:38400n8";
};
   Loading Kernel Image ... OK
Booting kernel in
3
2
1
0
## Starting application at 0x80000000 ...
bbl loader

                SIFIVE, INC.

         5555555555555555555555555
        5555                   5555
       5555                     5555
      5555                       5555
     5555       5555555555555555555555
    5555       555555555555555555555555
   5555                             5555
  5555                               5555
 5555                                 5555
5555555555555555555555555555          55555
 55555           555555           55555
   55555           55555           55555
     55555           5           55555
       55555                   55555
         55555               55555
           55555           55555
             55555       55555
               55555   55555
                 555555555
                   55555
                     5

           SiFive RISC-V Core IP
[    0.000000] OF: fdt: Ignoring memory range 0x80000000 - 0x80200000
[    0.000000] Linux version 4.19.0-sifive-1+ (trosinenko@trosinenko-pc) (gcc version 8.3.0 (Buildroot 2019.02-07449-g4eddd28f99)) #1 SMP Wed Jul 3 21:29:21 MSK 2019
[    0.000000] bootconsole [early0] enabled
[    0.000000] Initial ramdisk at: 0x(____ptrval____) (16777216 bytes)
[    0.000000] Zone ranges:
[    0.000000]   DMA32    [mem 0x0000000080200000-0x00000000bfffffff]
[    0.000000]   Normal   [mem 0x00000000c0000000-0x00000bffffffffff]
[    0.000000] Movable zone start for each node
[    0.000000] Early memory node ranges
[    0.000000]   node   0: [mem 0x0000000080200000-0x00000000bfffffff]
[    0.000000] Initmem setup node 0 [mem 0x0000000080200000-0x00000000bfffffff]
[    0.000000] On node 0 totalpages: 261632
[    0.000000]   DMA32 zone: 3577 pages used for memmap
[    0.000000]   DMA32 zone: 0 pages reserved
[    0.000000]   DMA32 zone: 261632 pages, LIFO batch:63
[    0.000000] software IO TLB: mapped [mem 0xbb1fc000-0xbf1fc000] (64MB)
(the emblem shows BBL, and the timestamps indicate the kernel).
Fortunately, I don't know if it's common everywhere, but on RocketChip, when connecting a debugger via JTAG, you can catch traps out of the box — the debugger will stop exactly at that point.
Program received signal SIGTRAP, Trace/breakpoint trap.
0xffffffe0000024ca in ?? ()
(gdb) bt
#0  0xffffffe0000024ca in ?? ()
Backtrace stopped: previous frame identical to this frame (corrupt stack?)
(gdb) file work/linux/vmlinux
A program is being debugged already.
Are you sure you want to change the file? (y or n) y
Reading symbols from work/linux/vmlinux...done.
(gdb) bt
#0  0xffffffe0000024ca in setup_smp () at /hdd/trosinenko/fpga/freedom-u-sdk/linux/arch/riscv/kernel/smpboot.c:75
#1  0x0000000000000000 in ?? ()
Backtrace stopped: frame did not save the PC
freedom-u-sdk/linux/arch/riscv/kernel/smpboot.c:
void __init setup_smp(void)
{
    struct device_node *dn = NULL;
    int hart;
    bool found_boot_cpu = false;
    int cpuid = 1;

    while ((dn = of_find_node_by_type(dn, "cpu"))) {
        hart = riscv_of_processor_hartid(dn);
        if (hart < 0)
            continue;

        if (hart == cpuid_to_hartid_map(0)) {
            BUG_ON(found_boot_cpu);
            found_boot_cpu = 1;
            continue;
        }

        cpuid_to_hartid_map(cpuid) = hart;
        set_cpu_possible(cpuid, true);
        set_cpu_present(cpuid, true);
        cpuid++;
    }

    BUG_ON(!found_boot_cpu); // < YOU ARE HERE
}
As was said in an old joke, CPU not found, running software emulation. Or maybe not running. Got lost in a single core processor.
/* The lucky hart to first increment this variable will boot the other cores */
atomic_t hart_lottery;
unsigned long boot_cpu_hartid;
A good comment in linux/arch/riscv/kernel/setup.c — this is like painting a fence using Tom Sawyer's method. In general, today there are somehow no winners, the prize is carried over to the next draw…
I propose to finish this already prolonged article.
To be continued. There will be a battle with a tricky bug that hides if approached slowly with a singlestep.
Text screencast on loading (external link):
Source: habr.com
