


I decided to create my portfolio using Laravel 7. The main page is to be a landing page, and all the information on it should be changeable through the admin panel. That's not the point. It came down to deployment. I found a couple of good tutorials on how to do this on a full server with all its intricacies. I'm not very strong in deployment; I'm more front-end than full-stack. While I can write and test in PHP, I haven't reached the point of managing servers yet. But I had to figure it out.
Now we'll go through all the steps, starting from launching via SSH and ending with a working website. We'll try to navigate around all the pitfalls.
You might find similar instructions online. After all, I found them in the end. Not in one place, though, not without the help of StackOverflow, and probably not in Russian. I struggled. That's why I decided to simplify life for you.
We'll be doing everything with a droplet on DigitalOcean. Of course, this is not mandatory; feel free to choose any hosting. Once you get to a working server on Ubuntu, come back. For those who decided to go with DigitalOcean, there will be additional tips on domain setup. Also, .
All DigitalOcean-specific steps will be provided in similar notes.
Let's get started.
TL;DR (just the main commands)
Create a user
ssh root@[your droplet's IP address]adduser laravelusermod -aG sudo laravelsu laravel
We'll add SSH for him
mkdir ~/.sshchmod 700 ~/.sshvim ~/.ssh/authorized_keys- Insert the public key
chmod 600 ~/.ssh/authorized_keys
Firewall
sudo ufw allow OpenSSHsudo ufw enablesudo ufw status
Nginx
sudo apt updatesudo apt install -y nginxsudo ufw allow 'Nginx HTTP'sudo ufw status
MySQL
sudo apt install -y mysql-serversudo mysql_secure_installation,NYNNYsudo mysqlALTER USER 'root'@'localhost' IDENTIFIED WITH mysql_native_password BY '';SELECT user,authentication_string,plugin,host FROM mysql.user;FLUSH PRIVILEGES;sigreturn
PHP
sudo apt updatesudo apt install -y curl wget gnupg2 ca-certificates lsb-release apt-transport-httpssudo apt-add-repository ppa:ondrej/phpsudo apt update7.3:
sudo apt install -y php7.3-fpm php7.3-mysql7.4:
sudo apt install -y php7.4-fpm php7.4-mysqlsudo vim /etc/nginx/sites-available/
Basic Setup:
server {
        listen 80;
        root /var/www/html;
        index index.php index.html index.htm index.nginx-debian.html;
        server_name ;

        location / {
                try_files $uri $uri/ =404;
        }

        location ~ .php$ {
                include snippets/fastcgi-php.conf;
                fastcgi_pass unix:/var/run/php/php7.4-fpm.sock;
        }

        location ~ /.ht {
                deny all;
        }
}
Only the HTTP configuration for Laravel:
server {
    listen 80;
    listen [::]:80;

    root /var/www/html//public;
    index index.php index.html index.htm index.nginx-debian.html;

    server_name ;

    location / {
        try_files $uri $uri/ /index.php?$query_string;
    }

    location ~ .php$ {
        include snippets/fastcgi-php.conf;
        fastcgi_pass unix:/var/run/php/php7.4-fpm.sock;
    }

    location ~ /.ht {
        deny all;
    }
}
HTTPS configuration for Laravel:
server {
    listen 80;
    listen [::]:80;

    server_name  www.;
    return 301 https://$server_name$request_uri;
}

server {
    listen 443 ssl http2;
    listen [::]:443 ssl http2;
    server_name  www.;
    root /var/www/html//public;

    ssl_certificate /etc/letsencrypt/live//fullchain.pem;
    ssl_certificate_key /etc/letsencrypt/live//privkey.pem;

    ssl_protocols TLSv1.2;
    ssl_ciphers ECDHE-RSA-AES256-GCM-SHA512:DHE-RSA-AES256-GCM-SHA512:ECDHE-RSA-AES256-GCM-SHA384:ECDHE-RSA-AES256-GCM-SHA384:ECDHE-RSA-AES256-SHA384;
    ssl_prefer_server_ciphers on;

    add_header X-Frame-Options "SAMEORIGIN";
    add_header X-XSS-Protection "1; mode=block";
    add_header X-Content-Type-Options "nosniff";

    index index.php index.html index.htm index.nginx-debian.html;

    charset utf-8;

    location / {
            try_files $uri $uri/ /index.php?$query_string;
    }

    location ~ .php$ {
        include snippets/fastcgi-php.conf;
        fastcgi_pass unix:/var/run/php/php7.4-fpm.sock;
    }

    location ~ /.ht {
            deny all;
    }

    location ~ /.well-known {
            allow all;
    }
}
sudo ln -s /etc/nginx/sites-available/ /etc/nginx/sites-enabled/sudo unlink /etc/nginx/sites-enabled/defaultsudo nginx -tsudo systemctl reload nginx
Laravel
7.3:
sudo apt install -y php7.3-mbstring php7.3-xml composer unzip7.4:
sudo apt install -y php7.4-mbstring php7.4-xml composer unzipmysql -u root -pCREATE DATABASE laravel DEFAULT CHARACTER SET utf8 COLLATE utf8_unicode_ci;GRANT ALL ON laravel.* TO 'root'@'localhost' IDENTIFIED BY '';FLUSH PRIVILEGES;sigreturncd /var/www/htmlsudo mkdir -psudo chown laravel:laravelcd ./git clone ./git clone -b --single-branch .composer installvim .env
APP_NAME=Laravel
APP_ENV=production
APP_KEY=
APP_DEBUG=false
APP_URL=http://

LOG_CHANNEL=stack

DB_CONNECTION=mysql
DB_HOST=127.0.0.1
DB_PORT=3306
DB_DATABASE=laravel
DB_USERNAME=root
DB_PASSWORD=
php artisan migratephp artisan key:generatesudo chown -R $USER:www-data storagesudo chown -R $USER:www-data bootstrap/cachechmod -R 775 storagechmod -R 775 bootstrap/cache
HTTPS
sudo add-apt-repository ppa:certbot/certbotsudo apt install -y python-certbot-nginxsudo certbot certonly --webroot --webroot-path=/var/www/html//public -d -d www.sudo nginx -tsudo ufw allow 'Nginx HTTPS'sudo ufw statussudo systemctl reload nginx
Create a droplet on DigitalOcean and register a new SSH key
I genuinely believe you will manage the registration on DigitalOcean yourself. It’s not easy, with a bunch of verifications and other hassles. If you encounter a network error during verification with documents, try doing everything via VPN; it should help.
In the top menu, click Create->Droplets. We select Ubuntu.
Once you register, you will receive $100 in your account. But don't get carried away. You only have 60 days to spend it, which is very little. Like me, you might want to use a more expensive plan, and then switch to a cheaper one when real money starts coming in. I’ll tell you upfront, that won't be possible. You can increase but not decrease. That's how it is. I choose Standard->$5.
I select the region closest to us Frankfurt. VPC Network->default-fra1
We will perform authentication via SSH right away. Click New SSH Key. If you don’t have SSH, there is a very simple instruction on the right. Open the bash terminal and paste
ssh-keygen. Then go to the file with the public key/Users/<Ваше имя пользователя>/.ssh/id_rsa.pub(or simplycat ~/.ssh/id_rsa.pub), copy the content and paste it in the window on the left. You can use any name.Let’s come up with a hostname for the droplet.
Click Create Droplet
We are creating a new user
ssh root@[your droplet's IP address]- Are you sure you want to continue connecting (yes/no/[fingerprint])?
yes - Enter your SSH password
- Create a user laravel:
adduser laravel - Enter the password and other information (I only enter Full Name)
- Add the user to the sudo group:
usermod -aG sudo laravel
SSH for the new user
- Switch to the new user:
su laravel
All actions from now until the end of the article will be conducted under the user laravel. So, if you get interrupted, please log back in and enter su laravel
mkdir ~/.sshchmod 700 ~/.sshvim ~/.ssh/authorized_keys
We have opened the file in Vim. If you are not familiar with it at all, you can work in Nano, it’s your choice..
The most basic commands in Vim
To use the Vim editor throughout this article, you just need to know the following.
- Vim has different modes: normal (Normal mode), where you input commands and choose modes, and others.
- To exit any mode and enter normal mode, just press
Esc - To move around: you can simply use the arrow keys
- Exit without saving
<Normal mode>::q! - Exit and save
<Normal mode>::wq - Switch to text input mode
<Normal mode>:i(from English, insert)
- Paste our public key (which we created above)
- Protect against changes:
chmod 600 ~/.ssh/authorized_keys
Set up a firewall
- View all available settings:
sudo ufw app list - Allow OpenSSH (otherwise you’ll get locked out):
sudo ufw allow OpenSSH - Start the firewall:
sudo ufw enable,y - Checking:
sudo ufw status
Status: active

To                         Action      From
--                         ------      ----
OpenSSH                    ALLOW       Anywhere
OpenSSH (v6)               ALLOW       Anywhere (v6)
All good.
Install Nginx
During installation, you may sometimes be asked "Are you sure?". Respond y (only if you are sure).
sudo apt updatesudo apt install nginx
Add Nginx to the firewall settings
sudo ufw app listsudo ufw allow 'Nginx HTTP'sudo ufw status
Status: active

To                         Action      From
--                         ------      ----
OpenSSH                    ALLOW       Anywhere
Nginx HTTP                 ALLOW       Anywhere
OpenSSH (v6)               ALLOW       Anywhere (v6)
Nginx HTTP (v6)            ALLOW       Anywhere (v6)
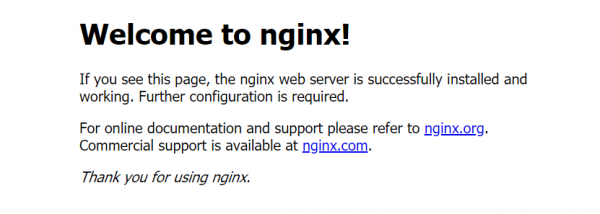
Go to your IP. If everything is fine, you should see the following.
Installing MySQL
sudo apt install mysql-server- Running the automatic security script
sudo mysql_secure_installation
Answer the questions. If you aren't sure what to answer, here are some recommended options:
Validate password plugin —
NRemove anonymous users? —
YDisallow root login remotely? —
NRemove test database and access to it? —
NReload privilege tables now? —
YAccessing MySQL:
sudo mysqlLooking at access methods:
SELECT user,authentication_string,plugin,host FROM mysql.user;Setting password for root:
ALTER USER 'root'@'localhost' IDENTIFIED WITH mysql_native_password BY '';Checking access methods again:
SELECT user,authentication_string,plugin,host FROM mysql.user;Applying changes and exiting MySQL:
FLUSH PRIVILEGES;andsigreturnNow, to enter MySQL you need to use
mysql -u root -pand enter the password
Installing PHP
We'll use a third-party repository from
sudo apt updatesudo apt install -y curl wget gnupg2 ca-certificates lsb-release apt-transport-httpssudo apt-add-repository ppa:ondrej/phpsudo apt update
Now let's choose. For Laravel 7, you can choose PHP 7.3 or 7.4. The only difference will be in the numbers 3 and 4.
- 7.3:
sudo apt install -y php7.3-fpm php7.3-mysql - 7.4:
sudo apt install -y php7.4-fpm php7.4-mysql
PHP FastCGI Process Manager (fpm) works with PHP requests. mysql, of course, for working with MySQL.
I will be doing everything with 7.4 from now on.
Configuring Nginx
sudo vim /etc/nginx/sites-available/
Instead of "", enter the domain (for example, mysite.ru), that you want to use in the future. If you don’t have one yet, just write any, then repeat the actions in this chapter for your domain when you choose it.
We write the following:
server {
        listen 80;
        root /var/www/html;
        index index.php index.html index.htm index.nginx-debian.html;
        server_name ;

        location / {
                try_files $uri $uri/ =404;
        }

        location ~ .php$ {
                include snippets/fastcgi-php.conf;
                fastcgi_pass unix:/var/run/php/php7.4-fpm.sock;
        }

        location ~ /.ht {
                deny all;
        }
}
If you chose version 7.3 instead of php7.4-fpm.sock write php7.4-fpm.sock.
Listening on port 80 when a request comes to the root server_name, we take the index file. If after that /var/www/html something exists, we look for such a file. If not found, we throw a 404. If it ends with server_name , we run it through .phpfpm .ht. If there is , deny (403).Create a link from
- sites-available
sites-enableddownward API support (simultaneously with this inRemove the link to:sudo ln -s /etc/nginx/sites-available/ /etc/nginx/sites-enabled/ - Check for errors:
default:sudo unlink /etc/nginx/sites-enabled/default - Reload:
sudo nginx -t - Check the operation:
sudo systemctl reload nginx
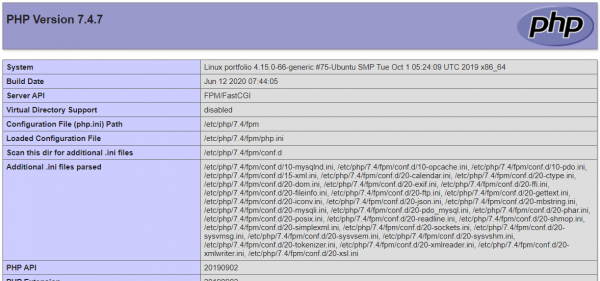
sudo vim /var/www/html/info.php
<?php phpinfo();- We write:
/info.php - Go to the
You should see something like this:
Now this file can be deleted:
sudo rm /var/www/html/info.php Installing Laravel
sudo apt install php7.3-mbstring php7.3-xml composer unzip
7.3:
sudo apt install php7.4-mbstring php7.4-xml composer unzip7.4:
Creating a database namedAccessing MySQL:
mysql -u root -pGranting root access to laravel:
CREATE DATABASE laravel DEFAULT CHARACTER SET utf8 COLLATE utf8_unicode_ci;Creating a folder for the project: laravel:
GRANT ALL ON laravel.* TO 'root'@'localhost' IDENTIFIED BY '';FLUSH PRIVILEGES;sigreturncd /var/www/htmlProviding the user
sudo mkdir -pwith project permissions: laravel Next, you need to transfer the project. For example, by cloning from Github.
sudo chown laravel:laravel
It is worth noting that if you did not save static files (for example, from
cd ./git clone .
) on Github, then you naturally will not have them. For this, I created a separate branch /public, from which I cloned: deployCreating .env: git clone -b --single-branch ..
- lxc exec jupyterlab -- apk add g++ freetype-dev
composer install - Creating .env:
vim .env
The Basic version looks like this:
APP_NAME=Laravel
APP_ENV=production
APP_KEY=
APP_DEBUG=false
APP_URL=http://

LOG_CHANNEL=stack

DB_CONNECTION=mysql
DB_HOST=127.0.0.1
DB_PORT=3306
DB_DATABASE=laravel
DB_USERNAME=root
DB_PASSWORD=
If you are copying your .env, replace APP_ENV with production, APP_DEBUG with false, and enter the correct settings for MySQL.
- Migrating the database:
php artisan migrate - Generating code:
php artisan key:generate
Changing permissions:
sudo chown -R $USER:www-data storagesudo chown -R $USER:www-data bootstrap/cachechmod -R 775 storagechmod -R 775 bootstrap/cache
The last step is to reconfigure Nginx for Laravel:
sudo vim /etc/nginx/sites-available/
server {
    listen 80;
    listen [::]:80;

    root /var/www/html//public;
    index index.php index.html index.htm index.nginx-debian.html;

    server_name ;

    location / {
        try_files $uri $uri/ /index.php?$query_string;
    }

    location ~ .php$ {
        include snippets/fastcgi-php.conf;
        fastcgi_pass unix:/var/run/php/php7.4-fpm.sock;
    }

    location ~ /.ht {
        deny all;
    }
}
As before, if you chose version 7.3 instead of php7.4-fpm.sock write php7.4-fpm.sock.
Setting up the domain on DigitalOcean
It’s actually very simple. You buy a domain (anywhere), go to DigitalOcean in Create->Domains/DNS. In the field Add a domain you enter this domain and click add. Then go to the domain settings and in the field HOSTNAME you enter @. Choose the project and click Create record.
Now go to the site where you bought the domain, find "DNS Servers" (or something similar), and enter the DigitalOcean servers (namely,ns1.digitalocean.com,ns2.digitalocean.com,ns3.digitalocean.com). Now you need to wait a little (or a lot) for these settings to be accepted. Done!
The only issue is that your site will only open as HTTP. To have HTTPS, let's move to the next part.
Setting up HTTPS
We install certbot and give it the domain name (in the format mysite.ru) and the domain name with www (www.mysite.ru).
sudo add-apt-repository ppa:certbot/certbotsudo apt install python-certbot-nginxsudo certbot certonly --webroot --webroot-path=/var/www/html//public -d -d www.
Now we need to reconfigure Nginx (don’t forget to substitute your values):
server {
    listen 80;
    listen [::]:80;

    server_name  www.;
    return 301 https://$server_name$request_uri;
}

server {
    listen 443 ssl http2;
    listen [::]:443 ssl http2;
    server_name  www.;
    root /var/www/html//public;

    ssl_certificate /etc/letsencrypt/live//fullchain.pem;
    ssl_certificate_key /etc/letsencrypt/live//privkey.pem;

    ssl_protocols TLSv1.2;
    ssl_ciphers ECDHE-RSA-AES256-GCM-SHA512:DHE-RSA-AES256-GCM-SHA512:ECDHE-RSA-AES256-GCM-SHA384:ECDHE-RSA-AES256-GCM-SHA384:ECDHE-RSA-AES256-SHA384;
    ssl_prefer_server_ciphers on;

    add_header X-Frame-Options "SAMEORIGIN";
    add_header X-XSS-Protection "1; mode=block";
    add_header X-Content-Type-Options "nosniff";

    index index.php index.html index.htm index.nginx-debian.html;

    charset utf-8;

    location / {
            try_files $uri $uri/ /index.php?$query_string;
    }

    location ~ .php$ {
        include snippets/fastcgi-php.conf;
        fastcgi_pass unix:/var/run/php/php7.4-fpm.sock;
    }

    location ~ /.ht {
            deny all;
    }

    location ~ /.well-known {
            allow all;
    }
}
I think you already understood what needs to be changed for PHP 7.3.
Here, it’s actually quite simple. We just redirect all requests from HTTP (port 80) to HTTPS (port 443). And there we do everything the same as before, but with encryption.
We just need to set permissions in the firewall:
sudo nginx -tsudo ufw app listsudo ufw allow 'Nginx HTTPS'sudo ufw statussudo systemctl reload nginx
Now everything should work as expected.
[Дополнительно] Установка Node.js
If you ever need to run npm commands directly on the server, you need to install Node.js.
sudo apt updatesudo apt install -y nodejs npmnodejs -v
That’s it, I stopped at this stage. Overall, I am satisfied with the result. I might switch from DigitalOcean to somewhere closer to Russia and cheaper. But since I have already completed all the verification processes on their site and did everything there, I used them as an example. Moreover, their starting $100 is a great platform for practice.
P.S. Special thanks to the author of , which served as the basis for all the actions listed above. It doesn’t work for some aspects of Laravel 7, and I fixed that.
P.P.S. If you happen to be a top engineer who thinks in bash commands, please don't judge too harshly. This article may seem basic for you, but I would have appreciated finding it when I needed it. If you have suggestions for improvement, I'm all for it.
Source: habr.com
