

В we talked about the importance of two-factor authentication on corporate portals of companies. Last time we demonstrated how to set up secure authentication in the IIS web server.
In the comments we were asked to write instructions for the most common web servers under Linux — nginx and Apache.
You asked, we wrote.
What do you need to get started?
- Any modern distribution LinuxI did a test setup in MX Linux 18.2_x64. This is certainly not a server distribution, but for Debian There are unlikely to be any differences. For other distributions, the paths to the configuration libraries may be slightly different.
- Token. We continue to use the model , which is ideal for corporate applications in terms of speed characteristics.
- To work with the token in Linux The following packages need to be installed:
libccid libpcsclite1 pcscd pcsc-tools opensc

Issuance of certificates
In previous articles, we relied on the fact that server and client certificates would be issued using a Microsoft CA. But since we're setting everything up in Linux, then at the same time we will tell you about an alternative way of issuing these certificates - without leaving Linux.
We will use XCA as CA (), which is available in any modern distribution LinuxAll the actions we'll perform in XCA can also be performed in command line mode using the OpenSSL and pkcs11-tool utilities, but for simplicity and clarity, we won't cover them in this article.
Beginning of work
- Install:
$ apt-get install xca - And we run:
$ xca - Create our database for CA - /root/CA.xdb
We recommend that you store the Certificate Authority database in a folder that only the administrator has access to. This is important to protect the private keys of the root certificates, which are used to sign all other certificates.
Create Keys and Root CA Certificate
Public Key Infrastructure (PKI) is based on a hierarchical system. The main thing in this system is the root certificate authority or root CA. Its certificate also needs to be created first of all.
- Create an RSA-2048 private key for the CA. To do this, on the tab Private keys push New Key and choose the appropriate type.
- Set a name for the new key pair. I named it CA Key.
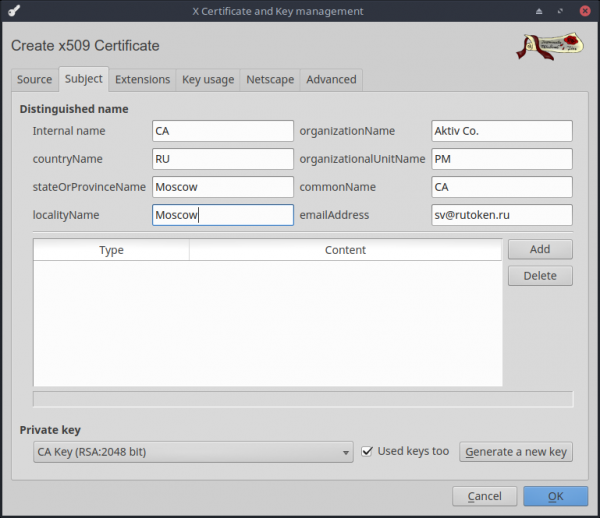
- We issue the CA certificate itself, using the generated key pair. To do this, go to the tab Certificates and push New Certificate.
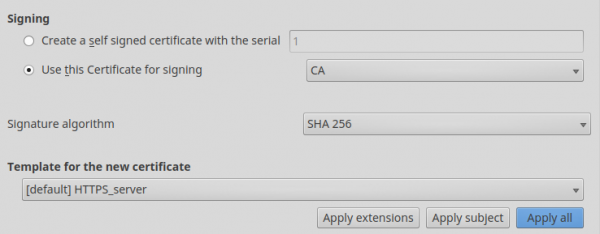
- Be sure to choose SHA-256, because using SHA-1 can no longer be considered secure.
- As a template, be sure to select [default]CA. Don't forget to click on apply all, otherwise the template is not applied.
- On the Advanced tab Subject choose our key pair. There you can fill in all the main fields of the certificate.
Create keys and certificate for the https server
- Similarly, we create an RSA-2048 private key for the server, I called it Server Key.
- When creating a certificate, we select that the server certificate must be signed on a CA certificate.
- Don't forget to choose SHA-256.
- Choose as a template [default] HTTPS_server. Click on apply all.
- Then on the tab Subject select our key and fill in the required fields.
Create keys and certificate for the user
- The user's private key will be stored on our token. To work with it, you need to install the PKCS#11 library from our website. For popular distributions, we distribute ready-made packages that are located here - . We also have builds for arm64, armv7el, armv7hf, e2k, mipso32el which can be found in our SDK − . In addition to builds for Linux, there are also builds for macOS, freebsd and android.
- Adding a new PKCS#11 Provider to XCA. To do this, go to the menu Options to the tab PKCS#11 Provider.
- We press Add and choose the path to the PKCS#11 library. In my case, this is usrliblibrtpkcs11ecp.so.
- We need a formatted Rutoken EDS PKI token. Download the rtAdmin utility -
- perform
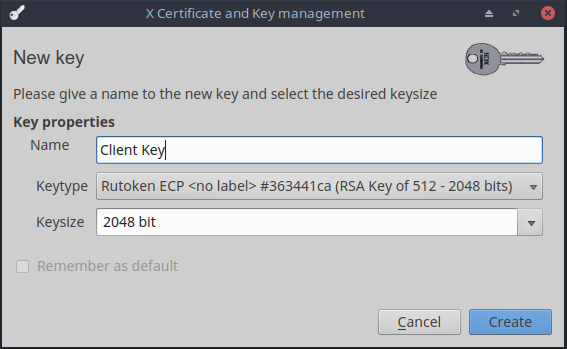
$ rtAdmin -f -q -z /usr/lib/librtpkcs11ecp.so -u <PIN-код пользователя> - As the type of key, select the RSA-2048 key for Rutoken EDS PKI. I named this key Client Key.

- Enter the PIN code. And we are waiting for the completion of the hardware generation of the key pair

- We create a certificate for the user by analogy with the server certificate. This time choose a template [default] HTTPS_client and don't forget to click apply all.
- On the Advanced tab Subject enter information about the user. We answer in the affirmative to the request to save the certificate for the token.
As a result, on the tab Certificates in XCA you should get something like this picture.

This minimum set of keys and certificates is enough to start configuring the servers directly.
To configure, we need to export the CA certificate, server certificate and server private key.
To do this, select the desired entry on the appropriate tab in the XCA and click Export.
Nginx
I won’t write how to install and run the nginx server - there are enough articles on the Internet on this topic, not to mention the official documentation. Let's proceed immediately to setting up HTTPS and two-factor authentication by token.
Add the following lines to the server section in nginx.conf:
server {
	listen 443 ssl;
	ssl_verify_depth 1;
	ssl_certificate /etc/nginx/Server.crt;
	ssl_certificate_key /etc/nginx/ServerKey.pem;
	ssl_client_certificate /etc/nginx/CA.crt;
	ssl_verify_client on;
}
A detailed description of all the parameters related to setting up ssl in nginx can be found here -
I will only briefly describe those that I asked myself:
- ssl_verify_client Indicates that the certificate's chain of trust should be verified.
- ssl_verify_depth - determines the depth of the search for a trusted root certificate in the chain. Since our client certificate is immediately signed on the root certificate, the depth is set to 1. If the user certificate is signed on an intermediate CA, then 2 must be specified in this parameter, and so on.
- ssl_client_certificate - Specifies the path to the trusted root certificate, which is used when verifying trust in the user's certificate.
- ssl_certificate/ssl_certificate_key - indicate the path to the server's certificate/private key.
Do not forget to run nginx -t to check that there are no typos in the config, and that all files are in the right place, and so on.
And actually everything! As you can see, the setup is very simple.
Checking work in Firefox
Since we do everything completely in Linux, then we will assume that our users also work in Linux (if they have Windows, then the .
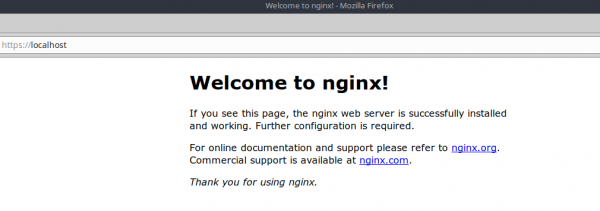
- We launch Firefox.
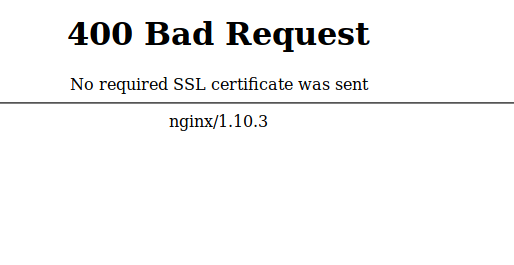
- Let's try to enter without a token at the beginning. We get this picture:

- Go to about: preferences # privacy, and go to Security Devices…
- We press Loadto add a new PKCS#11 Device Driver and set the path to our librtpkcs11ecp.so.
- To check that the certificate is seen, you can go to certificate Manager. You will be prompted to enter a PIN code. After correct input, you can check that on the tab Your Certificates our certificate from the token appeared.
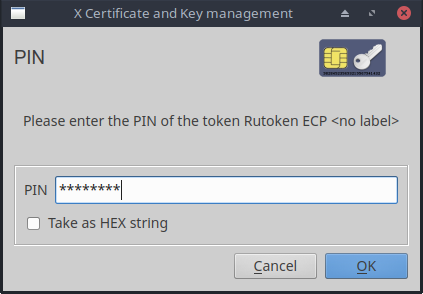
- Now let's go with the token. Firefox prompts you to select a certificate to be selected for the server. We choose our certificate.

- PROFIT!


The configuration is done once, and as you can see in the certificate request window, we can save our choice. After that, each time we enter the portal, we will only need to insert the token and enter the user PIN that was set during formatting. After such authentication, the server already knows which user logged into it and you can no longer make any additional windows for verification, but immediately let the user into his personal account.
Apache
Just like with nginx, no one should have problems installing apache. If you do not know how to install this web server, just use the official documentation.
And we proceed to configure our HTTPS and two-factor authentication:
- First you need to activate mod_ssl:
$ a2enmod ssl - And then enable the site's default HTTPS settings:
$ a2ensite default-ssl - Now we edit the configuration file: /etc/apache2/sites-enabled/default-ssl.conf:
    SSLEngine on
    SSLProtocol all -SSLv2

    SSLCertificateFile	/etc/apache2/sites-enabled/Server.crt
    SSLCertificateKeyFile /etc/apache2/sites-enabled/ServerKey.pem

    SSLCACertificateFile /etc/apache2/sites-enabled/CA.crt

    SSLVerifyClient require
    SSLVerifyDepth  10
As you can see, the names of the parameters almost coincide with the names of the parameters in nginx, so I will not explain them. Again, who are interested in the details - welcome to the documentation.
Now we restart our server:$ service apache2 reload $ service apache2 restart
As you can see, you can set up two-factor authentication on any web server, which is Windows, what in Linux It takes an hour tops. And setting up browsers takes about 5 minutes. Many people think that setting up and using two-factor authentication is complicated and confusing. I hope this article debunks this myth, at least a little.
Only registered users can participate in the survey. , you are welcome.
Do I need instructions for setting up TLS with certificates for GOST 34.10-2012:
Yes, TLS-GOST is very necessary
No, setting up with GOST algorithms is not interesting
44 users voted. 9 users abstained.
Source: habr.com
