

After searching the internet for software to build your own VPN, you constantly come across numerous guides related to the cumbersome setup and usage of OpenVPN, which requires the proprietary Wireguard client. Only SoftEther stands out with a reasonable implementation amidst this circus. However, we will discuss the native Windows VPN implementation – Routing And Remote Access (RRAS).
For some strange reason, no one has mentioned in any guide how to deploy this and enable NAT on it, so we will correct this now and show you how to create your own VPN on Windows Server.
You can order a ready-to-use and pre-configured VPN from our , which actually works out of the box.
1. Install the services
First, we need Windows Server Desktop Experience. The Core installation will not work because it lacks the NPA component. If the computer is a member of the domain, Server Core can suffice; in that case, it can all fit within one gigabyte of RAM.
We need to install RRAS and NPA (Network Policy Server). The first is necessary for creating the tunnel, and the second is needed if the server is not a member of the domain.
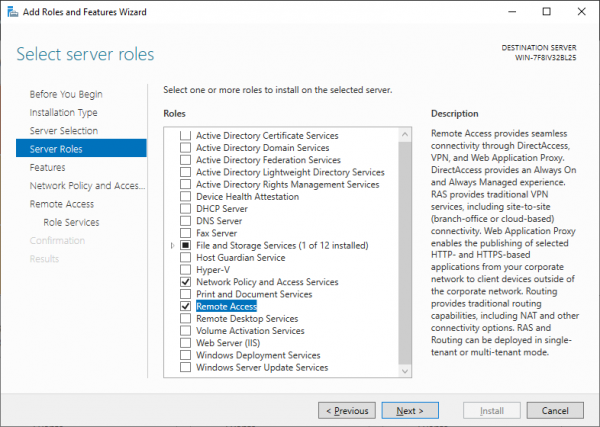
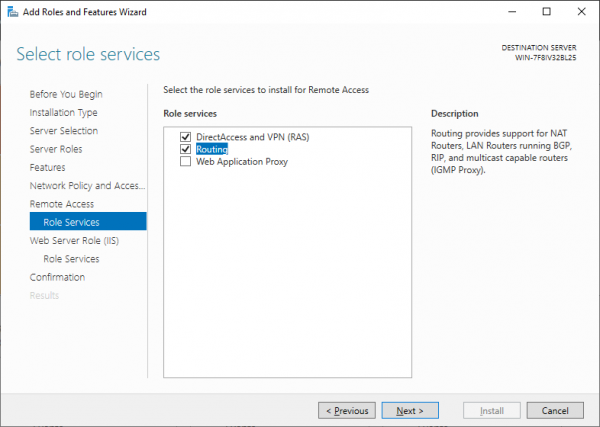
In the RRAS component selection, choose Direct access and VPN and Routing.
2. Configure RRAS
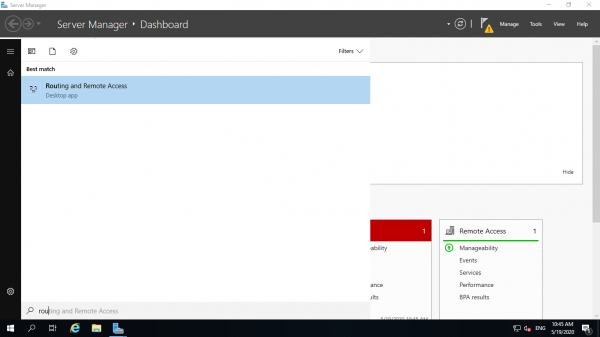
After we have installed all components and rebooted the machine, we need to proceed with the configuration. As shown in the image, in the start menu, find the RRAS Manager.
Through this snap-in, we can manage servers with installed RRAS. Right-click, select configuration, and proceed.
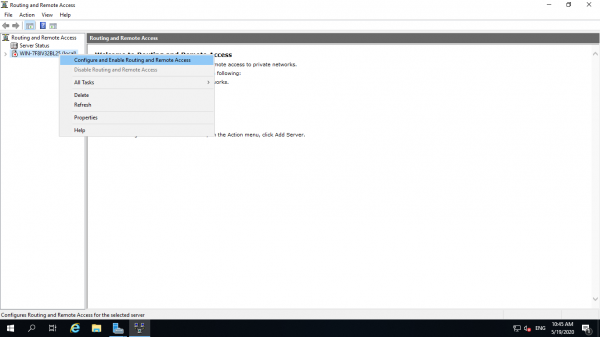
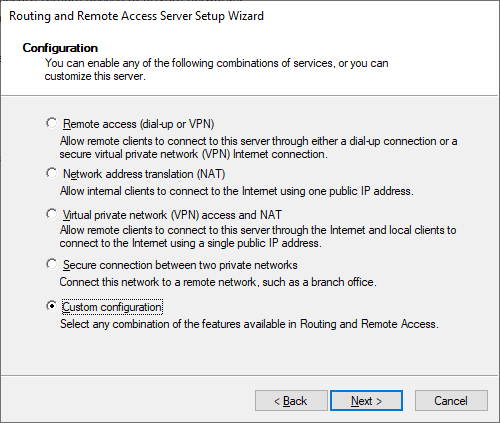
Skipping the first page, we proceed to configuration selection and choose our own.
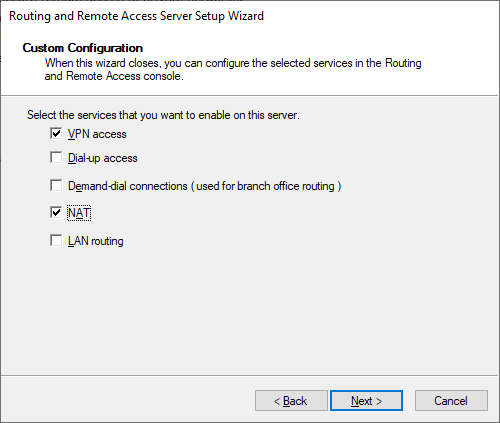
On the next page, we are prompted to select components; we choose VPN and NAT.
Next, next. Done.
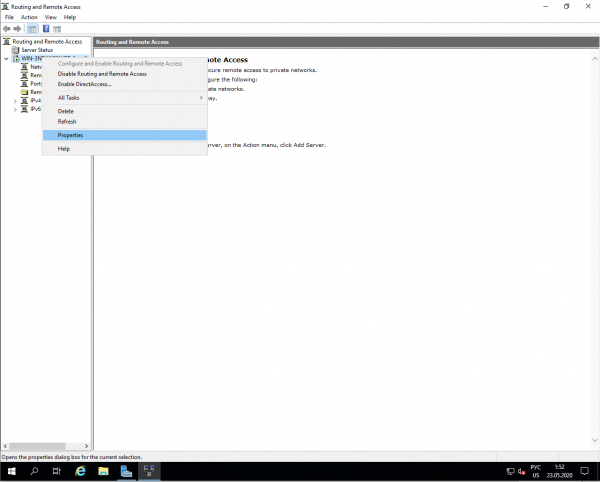
Now we need to enable IPsec and assign an address pool that will be used by our NAT. Right-click the server and go to properties.
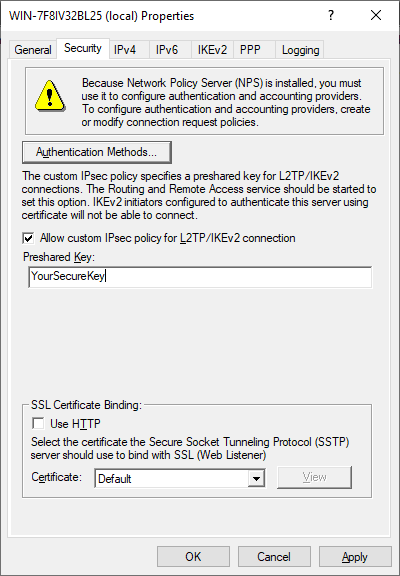
First, enter your password for L2TP IPsec.
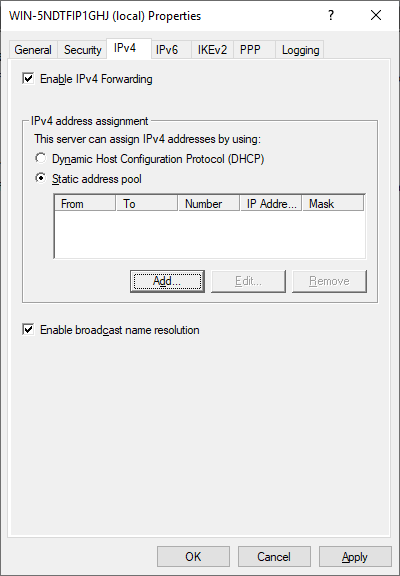
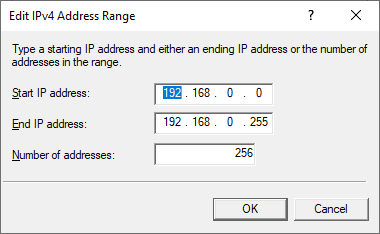
On the IPv4 tab, make sure to set the range of IP addresses issued to clients. Without this, NAT will not work.
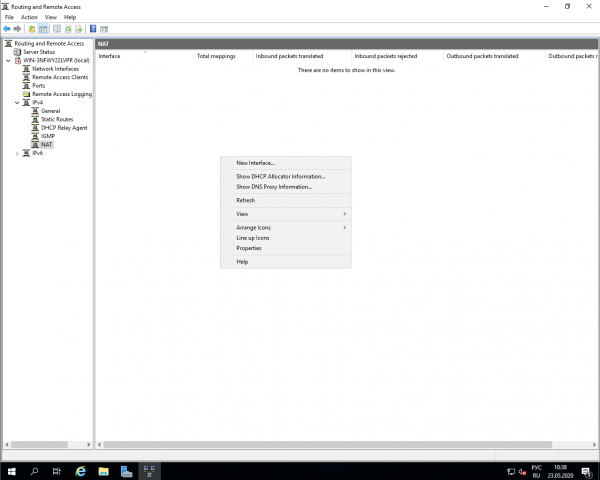
Now we just need to add an interface for NAT. Go to the IPv4 subsection, right-click an empty space, and add a new interface.
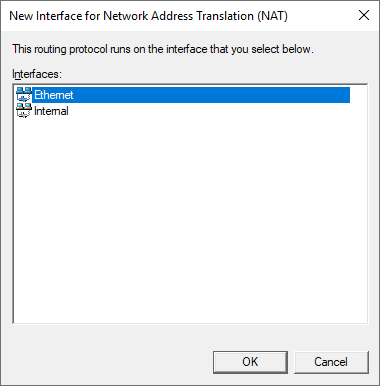
On the interface (the one that is not Internal), enable NAT.
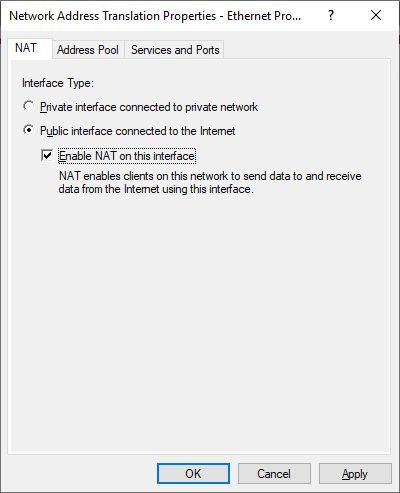
3. Allow rules in the firewall
It's all straightforward here. You need to find the Routing and Remote Access group of rules and enable all of them.
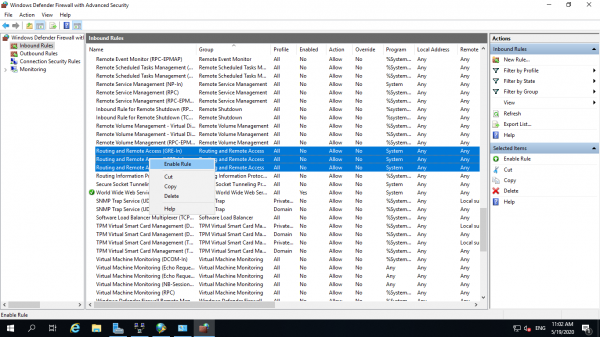
4. Setting Up NPS
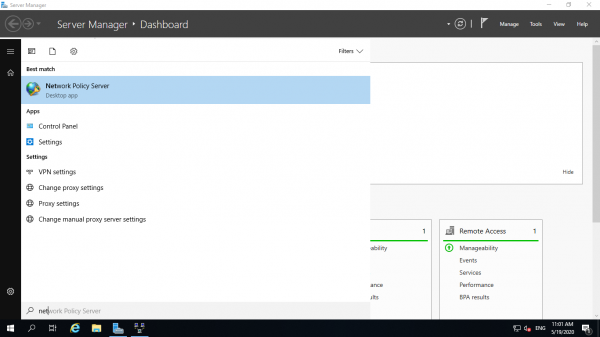
Search for Network Policy Server in the Start menu.
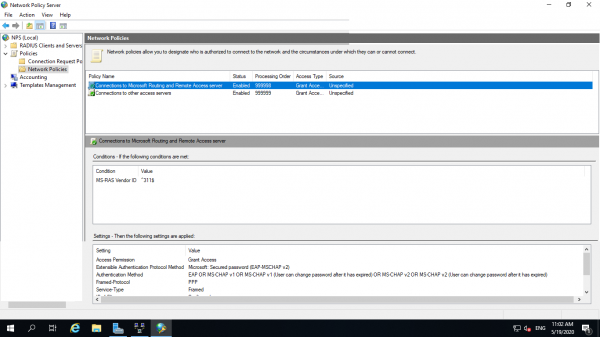
In the tabs where all policies are listed, you need to enable both standard ones. This will allow all local users to connect to the VPN.
5. Connecting via VPN
For demonstration purposes, let's choose Windows 10. We'll look for VPN in the Start menu.
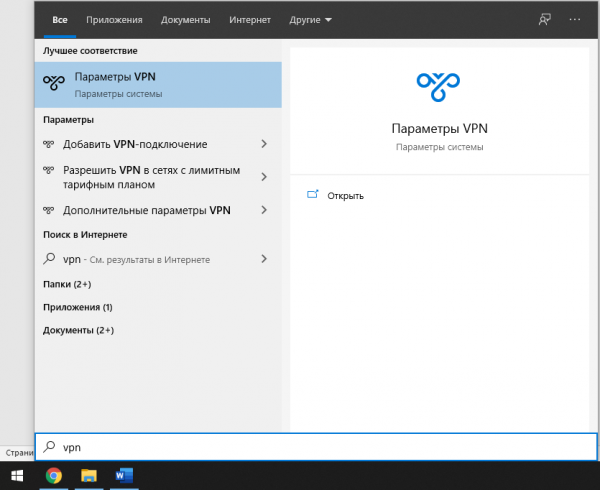
Click on the add connection button and go to the settings.
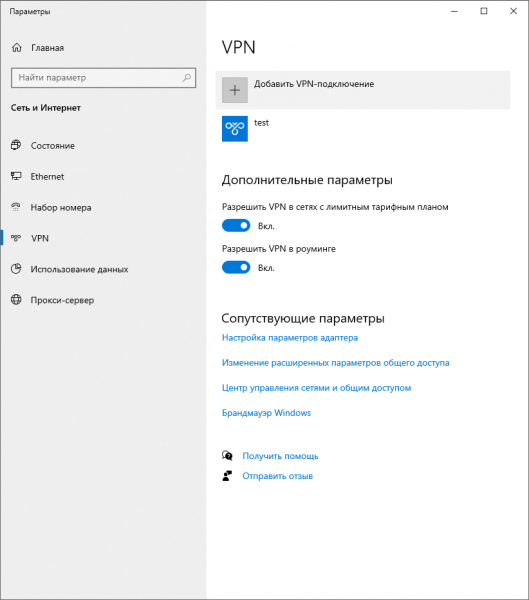
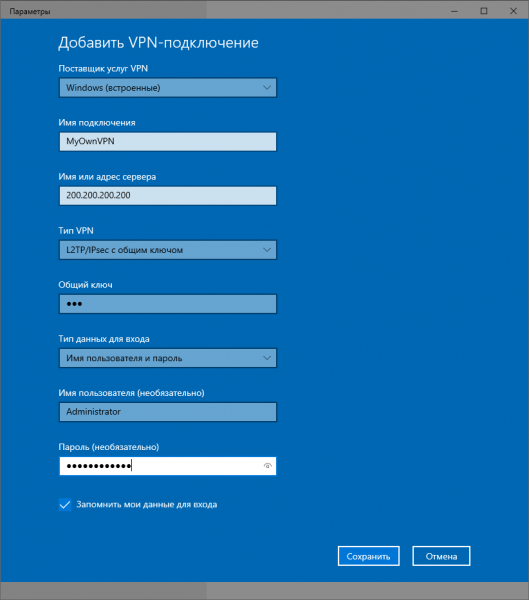
You can name the connection whatever you like.
The IP address is the address of your VPN server.
VPN type is L2TP with a pre-shared key.
The shared key is vpn (for our image in the marketplace).
And the login and password are the login and password for the local user, that is, the administrator.
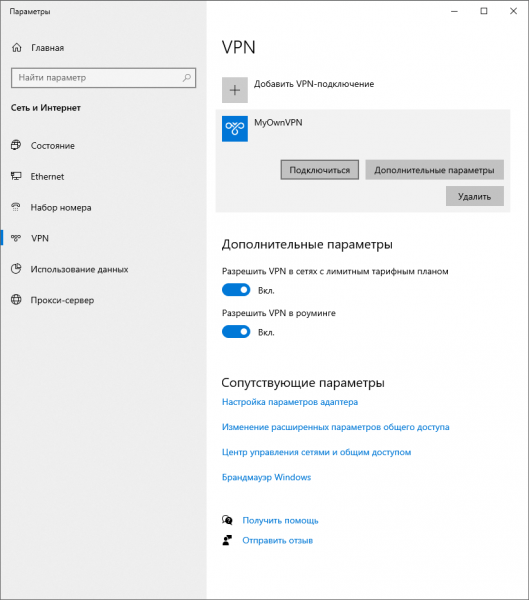
Click on connect and you’re done. There is your own VPN ready.
We hope our guide provides another option for those who want to create their own VPN without dealing with Linux or simply want to add a gateway to their AD.
Source: habr.com
