

Hello, Habr!
This is a prequel to my and at the same time a remake of the article .
This time I will share my experience of integrating JMeter with IBM MQ for smooth application testing on IBM WAS. I faced this task; it was not easy. I want to help save time for everyone interested.

Introduction
About the project: a data bus, multiple XML messages, three exchange areas (queues, databases, file systems), web services with their message processing logic. As the project evolved, manual testing became increasingly complicated. Apache JMeter was summoned to help — a powerful open-source tool with a large user community and a friendly interface. The ease of customizing the out-of-the-box version allows covering any use cases, and the promise from the lead developer to assist if needed (did assist) ultimately confirmed my choice.
Preparing the Initial Context
To interact with the queue manager, an initial context is needed. There are several types, and here you can read more about it.
For its creation, it is convenient to use MQ Explorer:
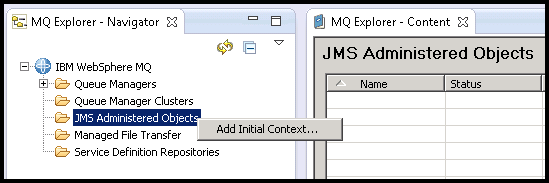
Figure 1: Adding the Initial Context
Select the context file type and directory for storage .bindings file that will contain the description of JNDI objects:
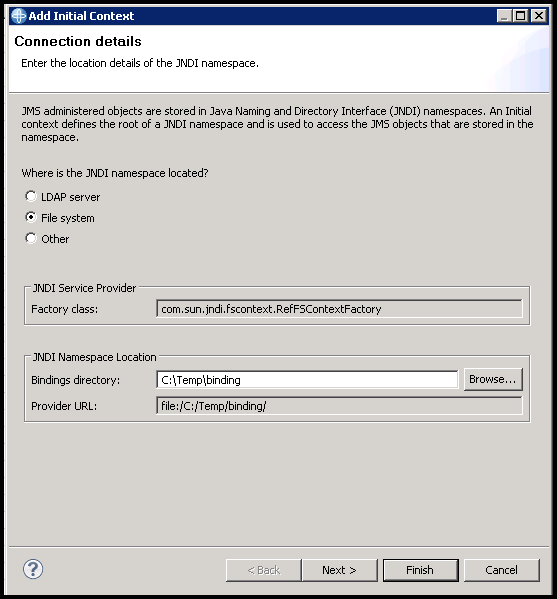
Figure 2: Choosing the Type of Initial Context
After which you can proceed to create these objects. Start with the connection factory:
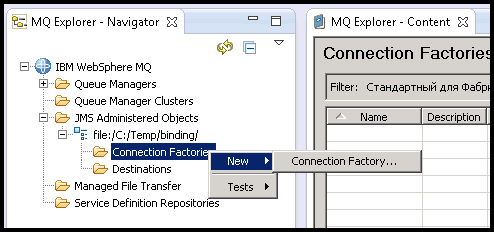
Figure 3: Creating the Connection Factory
Choose a descriptive name…
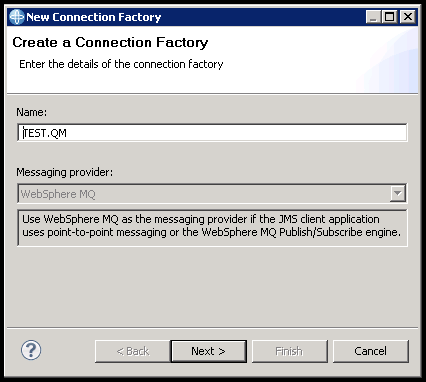
Figure 4: Choosing the Connection Factory Name
… and type Queue Connection Factory:
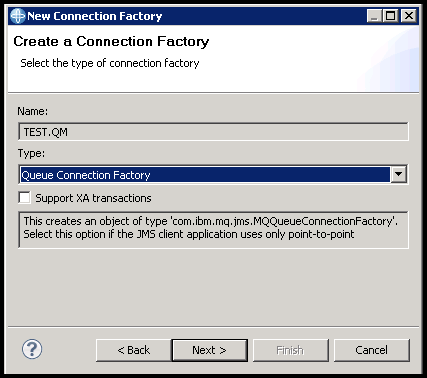
Figure 5: Choosing the Connection Factory Type
Protocol — MQ Client to enable remote interaction with MQ:
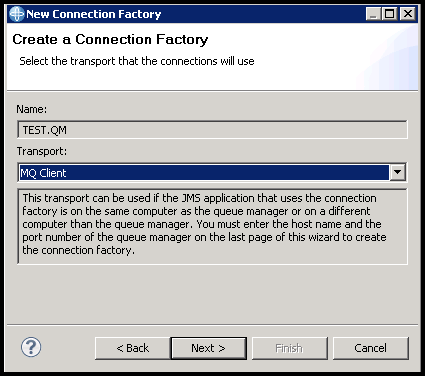
Figure 6: Selecting the Connection Factory Protocol
In the next step, you can select an existing factory and copy the further settings from it. Click Next, if there is none:
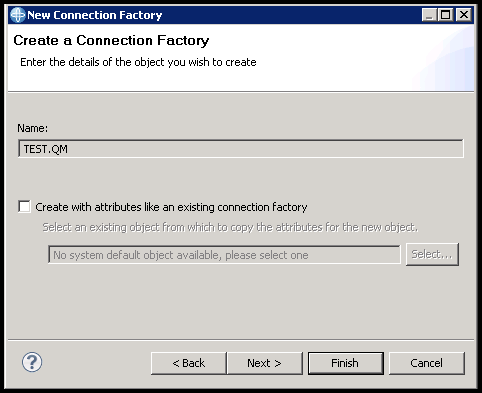
Figure 7: Choosing Settings for the Existing Connection Factory
In the parameter selection window, it's enough to set three. On the tab Connection specify the queue manager name and the IP of the environment where it is located (leave the port) 1414 :
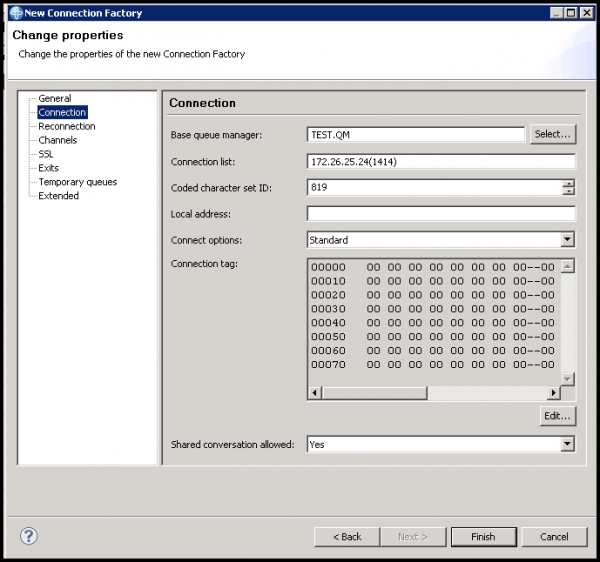
Figure 8: Configuring Connection Factory Parameters
And on the tab Channels — the connection channel. Click Finish to finish:
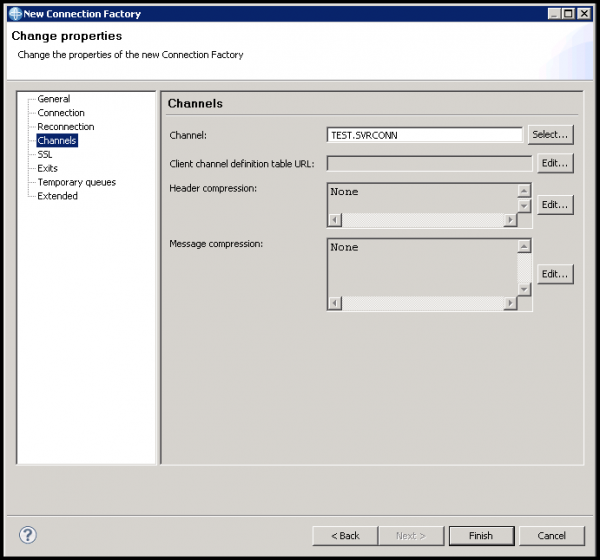
Figure 9: Completing the Creation of the Connection Factory
Now let's create a connection to the queue:
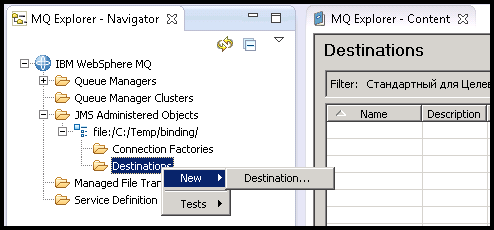
Figure 10: Creating a target object
Let's choose an understandable name (I prefer to specify the real name of the queue) and type Queue:
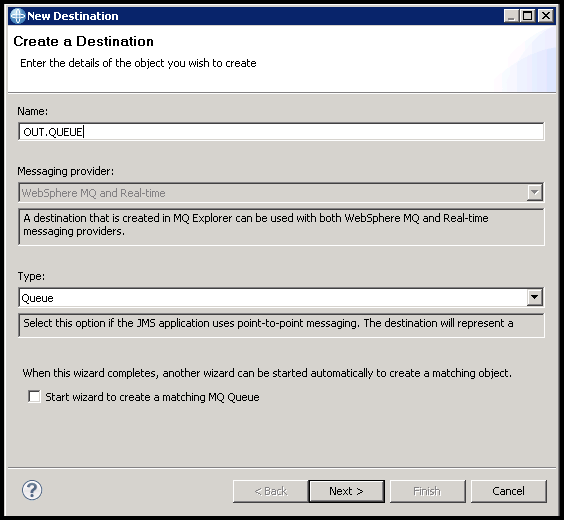
Figure 11: Choosing the name and type of the target object
Similarly to Figure 7 , we can copy settings from an existing queue. We also click Next, if it is the first one:
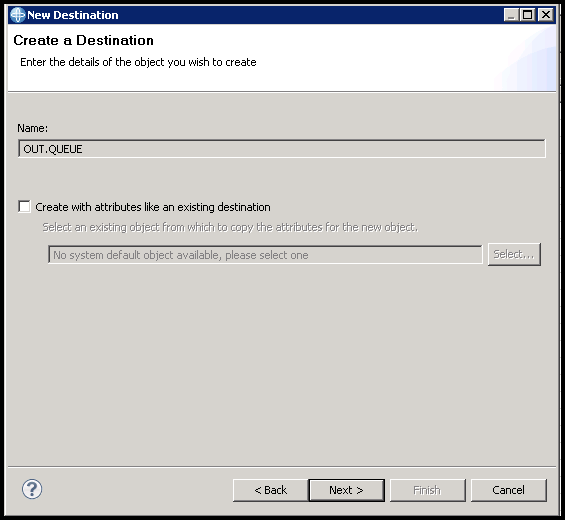
Figure 12: Choosing settings for the existing target object
In the settings window, it's enough to select the manager name and the required queue, then click Finish. After that, repeat the process as many times as necessary until all queues needed for interaction with JMeter are created:
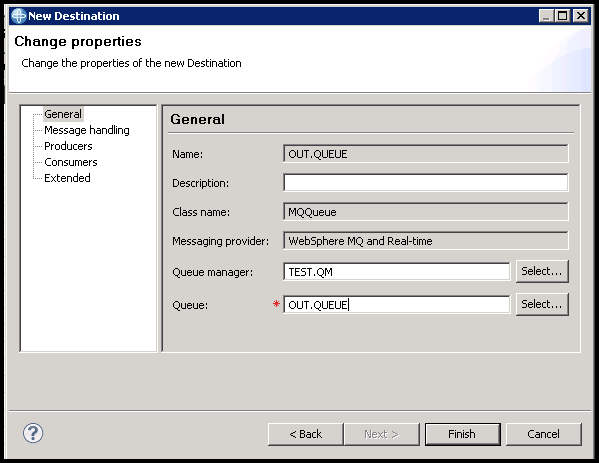
Figure 13: Completing the creation of the target object
Preparing JMeter
Preparing JMeter involves adding libraries necessary for interaction with MQ. They are located in %wmq_home%/java/lib. Copy them to %jmeter_home%/lib/ext before starting JMeter.
- com.ibm.mq.commonservices.jar
- com.ibm.mq.headers.jar
- com.ibm.mq.jar
- com.ibm.mq.jmqi.jar
- com.ibm.mq.pcf.jar
- com.ibm.mqjms.jar
- dhbcore.jar
- fscontext.jar
- jms.jar
- jta.jar
- providerutil.jar
An alternative list suggested by downward API support (simultaneously with this in with a slight nuance: javax.jms-api-2.0.jar instead of jms.jar.
Using jms.jar leads to a NoClassDefFoundError, the solution for which was found by .
- com.ibm.mq.allclient.jar
- fscontext.jar
- javax.jms-api-2.0.jar
- providerutil.jar
Both library lists work successfully with JMeter 5.0 and IBM MQ 8.0.0.4.
Configuring the test plan
The necessary and sufficient set of JMeter elements looks like this:
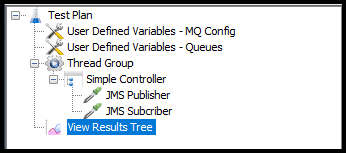
Figure 14: Test Plan
In the test plan example, there are five variables. Despite their small number, I recommend creating separate configuration elements for different types of variables. As the tests grow, this will significantly simplify navigation. In this case, there are two lists. The first contains connection parameters to MQ (see Figure 2 and Figure 4):
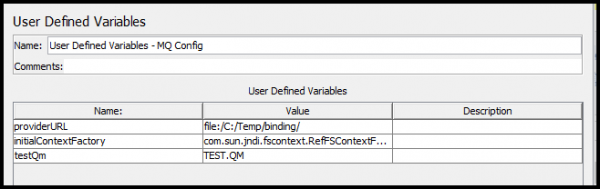
Figure 15: Connection parameters to MQ
The second contains the names of target objects referencing the queues:
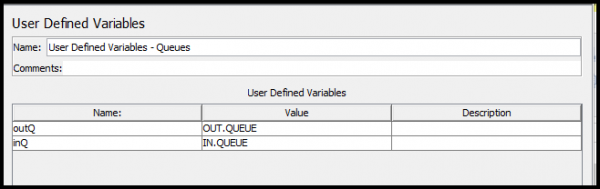
Figure 16: Parameterized queue names
Next, we need to configure the JMS Publisher to send a test message to the outgoing queue:
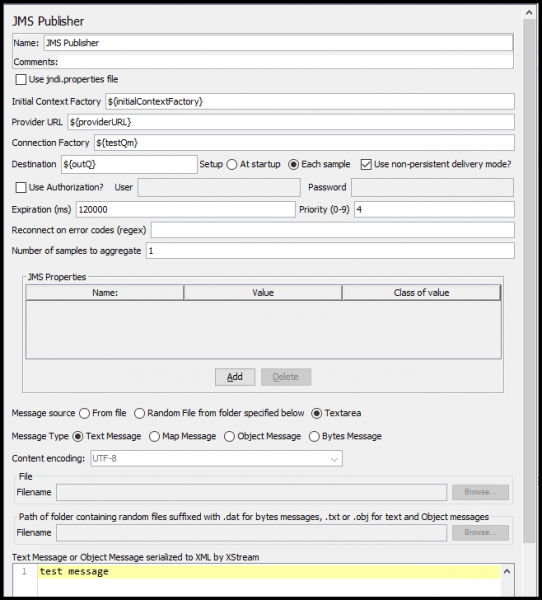
Figure 17: Configuring the JMS Publisher
And the JMS Subscriber to read the message from the incoming queue:
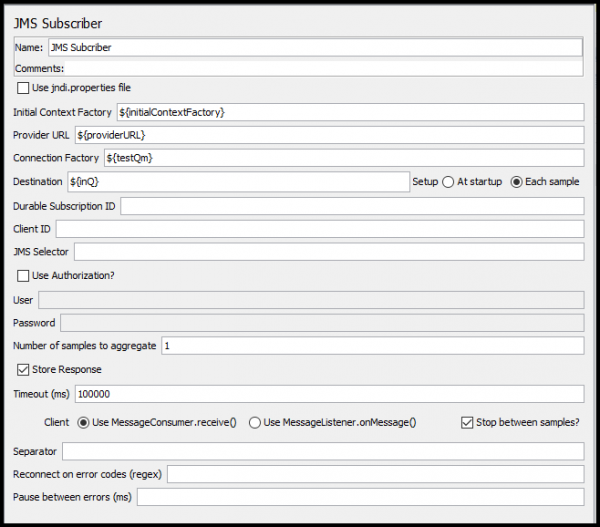
Figure 18: Configuring the JMS Subscriber
If everything is done correctly, the result in the listener will be filled with bright and cheerful green colors.
Conclusion
I intentionally left out the questions of routing and administration; these are quite intimate and extensive topics for separate publications.
Additionally, there are many nuances when working with queues, databases, and files, which I would also like to discuss in detail.
Save your time. Thank you for your attention.

Source: habr.com
