

Kubernetes Dashboard is an easy-to-use tool for getting up-to-date information about the running cluster and minimal management of it. You come to appreciate it even more when access to these capabilities is not only needed by administrators/DevOps engineers, but also by those who are less accustomed to the console and/or do not intend to delve into all the nuances of interacting with kubectl and other utilities. This was the case for us: developers wanted quick access to the Kubernetes web interface, and since we use GitLab, the solution was a natural fit.
Why is this needed?
Direct developers may be interested in a tool like K8s Dashboard for debugging tasks. Sometimes there's a need to view logs and resources, while at other times you may want to kill pods, scale Deployments/StatefulSets, and even access container consoles (such requests do come up, for which, however, there is another path — for instance, through ).
Moreover, there is a psychological aspect for managers when they want to look at the cluster — to see that everything is 'green' and thus feel reassured that 'everything is working' (which, of course, is quite relative... but that's beyond the scope of this article).
As the standard CI system, we have GitLab: all developers use it. Therefore, to provide them access, it was logical to integrate the Dashboard with GitLab accounts.
I should also note that we use NGINX Ingress. If you are working with other , you will need to find equivalents of the authorization annotations yourself.
Trying out the integration
Installing the Dashboard
Attention: If you plan to follow the steps described below, please read through to the next subheading to avoid unnecessary operations.
Since we use this integration in many installations, we have automated its setup. The sources needed for this are published in . They are based on slightly modified YAML configurations from , as well as a Bash script for quick deployment.
The script installs the Dashboard in the cluster and configures it for integration with GitLab:
$ .\/ctl.sh
Usage: ctl.sh [OPTION]... --gitlab-url GITLAB_URL --oauth2-id ID --oauth2-secret SECRET --dashboard-url DASHBOARD_URL
Install kubernetes-dashboard to Kubernetes cluster.
Mandatory arguments:
 -i, --install                install into 'kube-system' namespace
 -u, --upgrade                upgrade existing installation, will reuse password and host names
 -d, --delete                 remove everything, including the namespace
     --gitlab-url             set gitlab url with schema (https://gitlab.example.com)
     --oauth2-id              set OAUTH2_PROXY_CLIENT_ID from gitlab
     --oauth2-secret          set OAUTH2_PROXY_CLIENT_SECRET from gitlab
     --dashboard-url          set dashboard url without schema (dashboard.example.com)
Optional arguments:
 -h, --help                   output this message
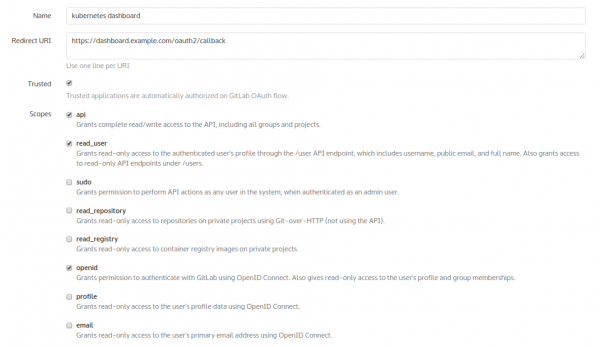
However, before using it, you must log into GitLab: Admin area → Applications — and add a new application for the future panel. Let’s name it "kubernetes dashboard":
As a result of its addition, GitLab will provide hashes:
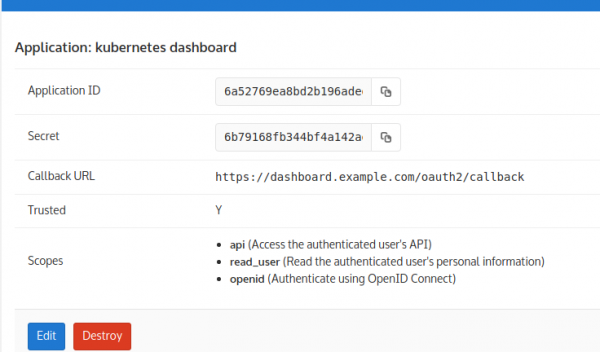
These hashes are used as arguments for the script. Thus, the installation looks as follows:
$ .\/ctl.sh -i --gitlab-url https://gitlab.example.com --oauth2-id 6a52769e… --oauth2-secret 6b79168f… --dashboard-url dashboard.example.comAfter that, let’s check if everything has started:
$ kubectl -n kube-system get pod | egrep '(dash|oauth)'
kubernetes-dashboard-76b55bc9f8-xpncp   1/1       Running   0          14s
oauth2-proxy-5586ccf95c-czp2v           1/1       Running   0          14s
Sooner or later, everything will start, however the authorization will not work immediately! The fact is that the image used (the situation is similar in other images) incorrectly implements the process of catching the redirect in the callback. This circumstance leads to oauth deleting the cookie that oauth itself provides us...
The problem is solved by building your own oauth image with a patch.
Patch to oauth and reinstalling
For this, we will use the following Dockerfile:
FROM golang:1.9-alpine3.7
WORKDIR /go/src/github.com/bitly/oauth2_proxy

RUN apk --update add make git build-base curl bash ca-certificates wget
&& update-ca-certificates
&& curl -sSO https://raw.githubusercontent.com/pote/gpm/v1.4.0/bin/gpm
&& chmod +x gpm
&& mv gpm /usr/local/bin
RUN git clone https://github.com/bitly/oauth2_proxy.git .
&& git checkout bfda078caa55958cc37dcba39e57fc37f6a3c842
ADD rd.patch .
RUN patch -p1 < rd.patch
&& ./dist.sh

FROM alpine:3.7
RUN apk --update add curl bash ca-certificates && update-ca-certificates
COPY --from=0 /go/src/github.com/bitly/oauth2_proxy/dist/ /bin/

EXPOSE 8080 4180
ENTRYPOINT [ "/bin/oauth2_proxy" ]
CMD [ "--upstream=http://0.0.0.0:8080/", "--http-address=0.0.0.0:4180" ]
Here is how the patch rd.patch looks
diff --git a/dist.sh b/dist.sh
index a00318b..92990d4 100755
--- a/dist.sh
+++ b/dist.sh
@@ -14,25 +14,13 @@ goversion=$(go version | awk '{print $3}')
sha256sum=()

echo "... running tests"
-.\/test.sh
+#.\/test.sh

-for os in windows linux darwin; do
-    echo "... building v$version for $os/$arch"
-    EXT=
-    if [ $os = windows ]; then
-        EXT=".exe"
-    fi
-    BUILD=$(mktemp -d ${TMPDIR:-\/tmp}\/oauth2_proxy.XXXXXX)
-    TARGET="oauth2_proxy-$version.$os-$arch.$goversion"
-    FILENAME="oauth2_proxy-$version.$os-$arch$EXT"
-    GOOS=$os GOARCH=$arch CGO_ENABLED=0
-        go build -ldflags="-s -w" -o $BUILD/$TARGET/$FILENAME || exit 1
-    pushd $BUILD/$TARGET
-    sha256sum+=("$(shasum -a 256 $FILENAME || exit 1)")
-    cd .. && tar czvf $TARGET.tar.gz $TARGET
-    mv $TARGET.tar.gz $DIR/dist
-    popd
-done
+os='linux'
+echo "... building v$version for $os/$arch"
+TARGET="oauth2_proxy-$version.$os-$arch.$goversion"
+GOOS=$os GOARCH=$arch CGO_ENABLED=0
+    go build -ldflags="-s -w" -o ./dist/oauth2_proxy || exit 1

checksum_file="sha256sum.txt"
cd $DIR/dists
diff --git a/oauthproxy.go b/oauthproxy.go
index 21e5dfc..df9101a 100644
--- a/oauthproxy.go
+++ b/oauthproxy.go
@@ -381,7 +381,9 @@ func (p *OAuthProxy) SignInPage(rw http.ResponseWriter, req *http.Request, code
       if redirect_url == p.SignInPath {
               redirect_url = "\/"
       }
-
+       if req.FormValue("rd") != "" {
+               redirect_url = req.FormValue("rd")
+       }
       t := struct {
               ProviderName  string
               SignInMessage string
Now we can build the image and push it to our GitLab. manifests/kube-dashboard-oauth2-proxy.yaml we will specify the usage of the desired image (replace it with your own):
image: docker.io/colemickens/oauth2_proxy:latestIf you have a secured registry, don’t forget to add the secret for pulling the images:
      imagePullSecrets:
     - name: gitlab-registry
... and add the secret for the registry:
---
apiVersion: v1
data:
 .dockercfg: eyJyZWdpc3RyeS5jb21wYW55LmNvbSI6IHsKICJ1c2VybmFtZSI6ICJvYXV0aDIiLAogInBhc3N3b3JkIjogIlBBU1NXT1JEIiwKICJhdXRoIjogIkFVVEhfVE9LRU4iLAogImVtYWlsIjogIm1haWxAY29tcGFueS5jb20iCn0KfQoK
=
kind: Secret
metadata:
 annotations:
 name: gitlab-registry
 namespace: kube-system
type: kubernetes.io/dockercfg
The attentive reader will notice that the long string above is the base64 of the config:
{"registry.company.com": {
 "username": "oauth2",
 "password": "PASSWORD",
 "auth": "AUTH_TOKEN",
 "email": "mail@company.com"
}
}
This is the user's data in GitLab, which Kubernetes will use to pull the image from the registry.
After everything is done, you can remove the current (malfunctioning) Dashboard installation with the command:
$ ./ctl.sh -d... and reinstall everything:
$ .\/ctl.sh -i --gitlab-url https://gitlab.example.com --oauth2-id 6a52769e… --oauth2-secret 6b79168f… --dashboard-url dashboard.example.comIt's time to access the Dashboard and find the rather archaic authorization button:
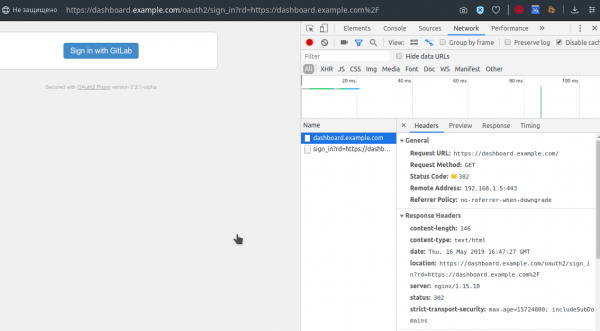
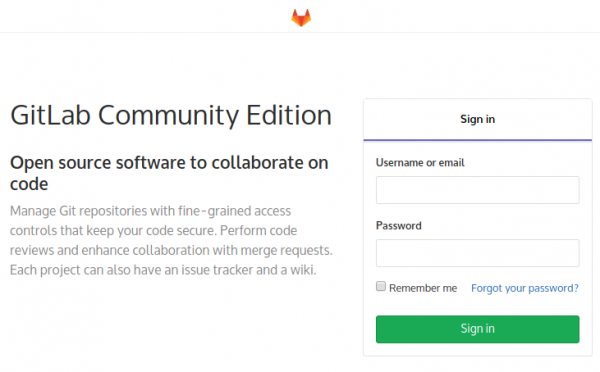
After clicking it, we will be greeted by GitLab, inviting us to log in on its familiar page (of course, if we haven't already been logged in there):
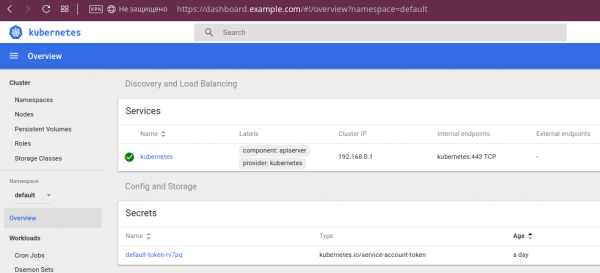
We log in with our GitLab credentials — and everything is set:
On the capabilities of the Dashboard
If you are a developer who has not previously worked with Kubernetes, or simply have not encountered Dashboard for some reason, I will illustrate some of its capabilities.
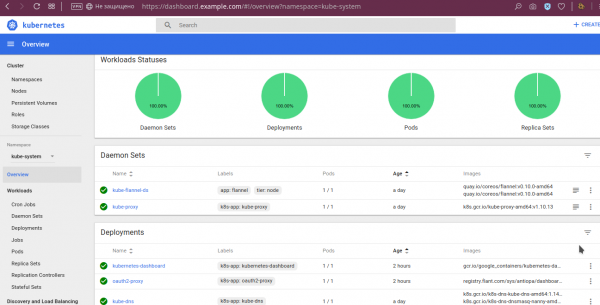
First, you can see that 'everything is green':
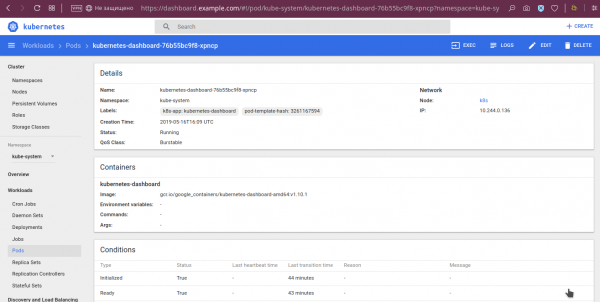
Detailed data is available for pods, such as environment variables, the pulled image, launch arguments, and their status:
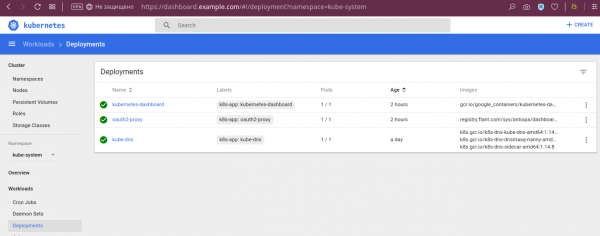
Deployment statuses are visible:
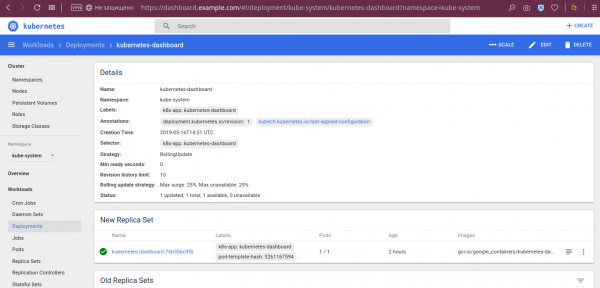
… and other details:
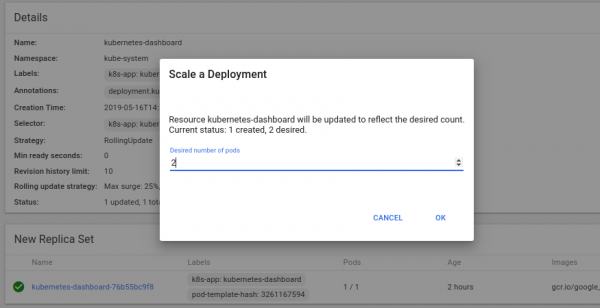
… as well as the ability to scale deployments:
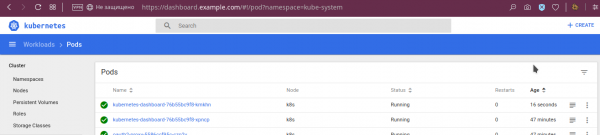
The result of this operation:
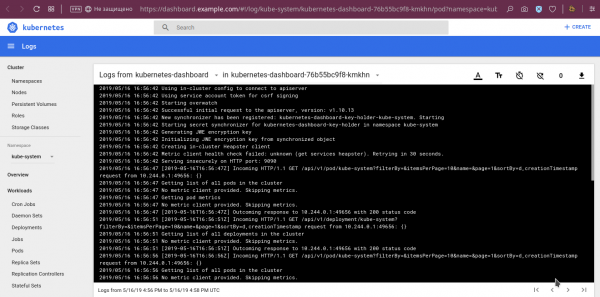
Among other useful features already mentioned at the beginning of the article is log viewing:
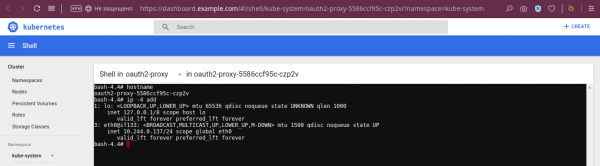
… and the ability to access the console of the containers in the selected pod:
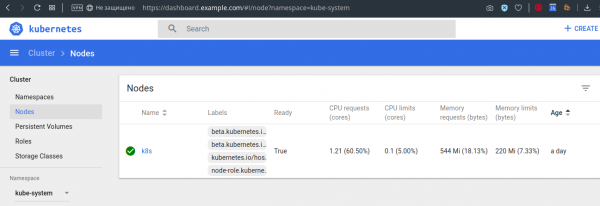
Additionally, for example, you can view limits/requests on the nodes:
Of course, these are not all the features of the panel, but I hope that a general understanding has been formed.
Disadvantages of integration and Dashboard
In the described integration, there is no access control. With it, all users who have any access to GitLab gain access to the Dashboard. Their access in the Dashboard itself is identical, corresponding to the permissions of the Dashboard itself, which . Clearly, this will not be suitable for everyone, but for our case, it turned out to be sufficient.
Notable downsides in the Dashboard panel include the following:
- it is impossible to access the init container console;
- it is impossible to edit Deployments and StatefulSets, though this can be fixed in ClusterRole;
- compatibility of the Dashboard with the latest Kubernetes versions and the project's future raises questions.
The last problem deserves special attention.
Status and alternatives of the Dashboard
The compatibility table of the Dashboard with Kubernetes releases, presented in the latest version of the project (), is not very promising:
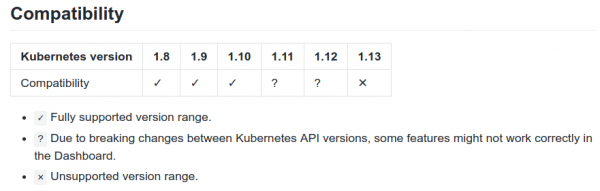
Despite this, there is an already accepted (in January) , which announces support for K8s 1.13. Additionally, among the project's issues, you can find mentions of users working with the panel in K8s 1.14. Finally, to the project's codebase continue. So (at the very least!) the actual status of the project is not as bad as it may initially seem from the official compatibility table.
Finally, there are alternatives to the Dashboard. Among them:
- — a young interface (with initial commits dating back to March of this year), already offering decent features such as a visual representation of the current cluster status and management of its objects. It is positioned as a 'real-time interface', as it automatically updates the displayed data without requiring a page refresh in the browser.
- — a web interface from Red Hat OpenShift, which will also bring other developments from the project to your cluster, though this may not suit everyone.
- — an interesting project created as a lower-level (compared to the Dashboard) interface with the ability to view all objects in the cluster. However, it appears that its development has ceased.
- — just the other day a project that combines the functions of a panel (showing the current state of the cluster but not managing its objects) with automatic 'validation of best practices' (checking the cluster for the correctness of configurations deployed in it).
Instead of conclusions
Dashboard — the standard tool for Kubernetes clusters that we service. Its integration with GitLab has also become part of our 'default installation', as many developers appreciate the capabilities they gain with this panel.
Kubernetes Dashboard periodically has alternatives from the Open Source community (and we are happy to consider them), but at this stage, we remain with this solution.
P.S.
Also read in our blog:
- «»;
- «»;
- «»;
- «».
Source: habr.com
