

Hello everyone! I recently faced a seemingly simple task — to increase the disk size on a Linux server 'on the fly'.
Task Description
I have a cloud server. In my case, it’s Google Cloud — Compute Engine. The operating system is Ubuntu. Currently, there is a disk size of 30 GB connected. The database is growing, files are inflating, so I need to increase the disk size, say, to 50 GB. Meanwhile, we won't turn anything off or reboot.
Attention! Before starting, make a backup of all important information!
1. First, let's check how much free space we have in total. In the Linux console, we write:
df -h 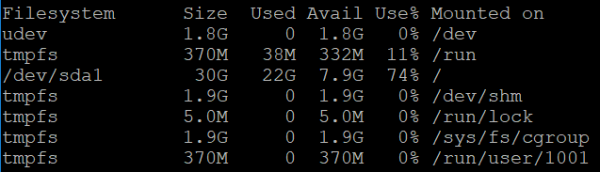
Simply put, I have 30 GB in total and 7.9 GB currently free. It needs to be increased.
2. Next, I go to my hosting provider's console and attach a bit more GB. In Google Cloud, this is done easily, without rebooting. I go to Compute Engine -> Disks -> Select the disk of my server — we will change its size:
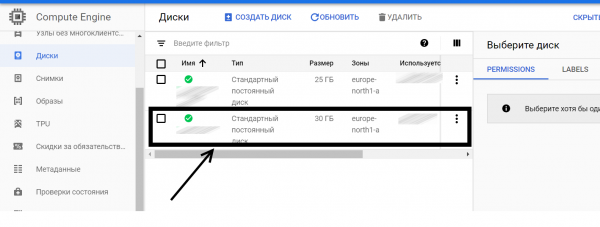
I enter, click 'Edit', and increase the disk size to the desired dimensions (in my case, to 50 GB).
3. So, now we have 50 GB. Let's check this with server with the command:
sudo fdisk -l 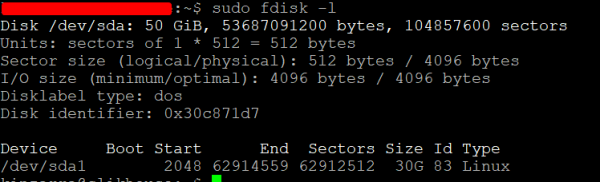
We see our new 50 GB, but currently, we can only use 30 GB.
4. Now we will delete the current 30 GB partition and create a new one for 50 GB. You may have several partitions. You might need to create a few new partitions as well. For this operation, we will use the program fdisk, which allows managing hard disk partitions. It’s also important to understand what disk partitions are and their purposes — read . To launch the program fdisk we use the command:
sudo fdisk /dev/sda5. Inside the interactive mode of the program fdisk we perform several operations.
First, we type in:
p 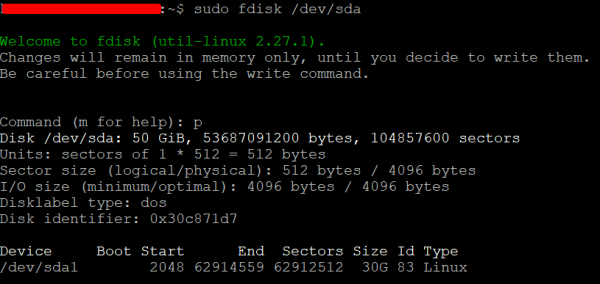
The command outputs a list of our current partitions. In my case, there is one partition of 30 GB and another 20 GB floating free, so to speak.
6. Next, we type in:
d 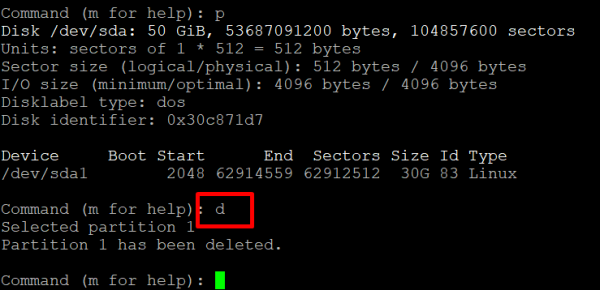
We delete the current partition to create a new one for all 50 GB. Before the operation, double-check if we've made a backup of important information!
7. Next, we specify to the program:
n 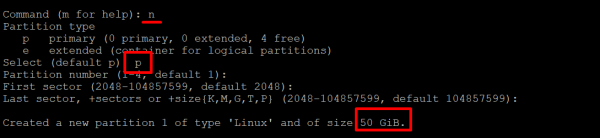
The command creates a new partition. All parameters should be set to default — you can just hit Enter. If you have a specific case, specify your own parameters. As shown in the screenshot, I created a partition of 50 GB — just what I need.
8. As a result, I specify to the program:
w 
This command writes the changes and exits. fdiskDon't be alarmed that reading the partition table failed. The next command will help fix this. We're almost there.
9. We exited fdisk and returned to the main Linux command line. Next, we type as advised earlier:
sudo partprobe /dev/sdaIf everything goes well, you won't see any message. If you don't have the program partprobe, then install it. This will partprobe update the partition tables, allowing us to extend the partition to 50 GB online. Let's continue.
Tip! You can install partprobe like this:
apt-get install partprobe
10. Now we need to redefine the partition size using the program resize2fs. It will do this online — I even had scripts running and writing to the disk at that moment.
Program resize2fs will rewrite the filesystem metadata. For this, we use the following command:
sudo resize2fs /dev/sda1 
Here sda1 is the name of your partition. In most cases, it's sda1, but there may be exceptions. Be careful. As a result, the program changed our partition size. I think this is a success.
11. Now let's make sure that the partition size has changed and we now have 50 GB. To do this, we repeat the very first command:
df -h 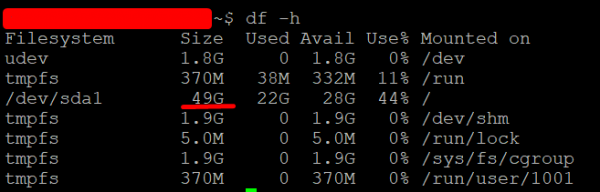
Source: habr.com
