


Simple passwords offer no protection, while complex ones are difficult to remember. That's why they often end up on a sticky note under the keyboard or on the monitor. To help forgetful users remember their passwords while maintaining security, two-factor authentication (2FA) is available.
By combining ownership of a device with knowledge of its PIN code, the PIN can be simpler and easier to memorize. Any shortcomings in the length or randomness of the PIN are mitigated by the requirement for physical possession and restrictions on PIN cracking.
Moreover, government institutions often prefer compliance with GOST standards. This discussion will focus on a 2FA option for logging into Linux. I'll start from the beginning.
PAM Modules
Pluggable Authentication Modules (PAM) are modules with a standard API that implement various authentication mechanisms in applications.
All utilities and applications that can work with PAM adopt them and may use them for user authentication.
In practice, it works roughly like this: the login command interacts with PAM, which performs all necessary checks using the modules specified in the configuration file and returns the results back to the login command.
librtpam
The module developed by Aktiv adds two-factor authentication for users through smart cards or USB tokens using asymmetric keys in accordance with the latest domestic cryptography standards.
Let’s examine how it works:
- the token stores the user's certificate and private key;
- the certificate is stored in the user's home directory as trusted.
The authentication process occurs as follows:
- The Rutoken searches for the user's personal certificate.
- The token's PIN code is requested.
- Random data is signed with the private key directly in the Rutoken chip.
- The resulting signature is verified using the public key from the user's certificate.
- The module returns the verification result to the calling application.
Authentication can occur using GOST R 34.10-2012 keys (with lengths of 256 or 512 bits) or the obsolete GOST R 34.10-2001.
You don't have to worry about the security of the keys – they are generated directly in the Rutoken and never leave its memory during cryptographic operations.

Rutoken ECP 2.0 is certified by the FSB and FSTEC according to NDV 4, so it can be used in information systems that process confidential information.
Practical Use
Almost any modern Linux will do, for example, we will use xUbuntu 18.10.
1) Install the required packages
sudo apt-get install libccid pcscd opensc
If you want to add a screen saver to lock the desktop, additionally install the package libpam-pkcs11.
2) Add the PAM module with GOST support
Load the library from
Copy the contents of the PAM folder librtpam.so.1.0.0 to the system folder
/usr/lib/ or /usr/lib/x86_64-linux-gnu/or /usr/lib64
3) Install the package with librtpkcs11ecp.so
Download and install the DEB or RPM package from the link:
4) Check that Rutoken ECP 2.0 works in the system
Execute in the terminal
$ pkcs11-tool --module /usr/lib/librtpkcs11ecp.so -T
If you see the line Rutoken ECP – then everything is fine.
5) Read the certificate
Check that the device has a certificate
$ pkcs11-tool --module /usr/lib/librtpkcs11ecp.so -O
If the following line appears:
Using slot 0 with a present token (0x0)
- and information about keys and certificates is displayed, then you need to read the certificate and save it to disk. To do this, execute the following command, where instead of {id}, you should substitute the ID of the certificate you saw in the output of the previous command: $ pkcs11-tool --module /usr/lib/librtpkcs11ecp.so -r -y cert --id {id} --output-file cert.crt
If the file cert.crt is created, proceed to step 6).
nothing - , then the device is empty. Contact the administrator or create the keys and certificate yourself by following the next step.5.1) Create a test certificate
Attention! The methods described for creating keys and certificates are suitable for testing and are not intended for use in operational mode. For this, you need to use keys and certificates issued by a trusted certification authority of your organization or an accredited certifying center.
Attention! The methods described for creating keys and certificates are suitable for testing and are not intended for production use. For this, you need to use keys and certificates issued by a trusted certification authority of your organization or an accredited certificate authority.
The PAM module is designed to protect local computers and is intended for use in small organizations. Since there are few users, the Administrator can monitor certificate revocation and manually block accounts, as well as manage certificate expiration. The PAM module currently does not support checking certificates against CRLs or building trust chains.
A simple way (via the browser)
To obtain a test certificate, use . The process will take no more than 5 minutes.
The geek way (via the console and possibly the compiler)
Check the version of OpenSC
$ opensc-tool --version
If the version is less than 0.20, update or build from our GitHub (as of the publication of this article, release 0.20 has not yet been released) or from the master branch of the main OpenSC project no later than
Generate a key pair with the parameters:
--key-type: GOSTR3410-2012-512:A (GOST-2012 512 bits with parameter set A), GOSTR3410-2012-256:A (GOST-2012 256 bits with parameter set A)
--id: object identifier (CKA_ID) in the form of two-digit hex numbers from the ASCII table. Use only ASCII codes of printable characters since the id will need to be passed to OpenSSL as a string. For example, the ASCII code "3132" corresponds to the string "12". For convenience, you can use .
$ ./pkcs11-tool --module /usr/lib/librtpkcs11ecp.so --keypairgen --key-type GOSTR3410-2012-512:A -l --id 3132
Next, we will create a certificate. Below, two paths will be described: the first through a CA (we will use test CAs), the second – self-signed. For this, you first need to install and configure OpenSSL version 1.1 or newer to work with Rutoken through the special rtengine module using the guide .
For example: for '--id 3132' in OpenSSL, you need to specify "pkcs11:id=12«.
You can use the services of a test CA, many of which exist, for example, , and , for this, let's create a certificate request
Another option is to give in to laziness and create a self-signed one.
$ openssl req -utf8 -new -keyform engine -key "pkcs11:id=12" -engine rtengine -out req.csr
Upload the certificate to the device
$ openssl req -utf8 -x509 -keyform engine -key "pkcs11:id=12" -engine rtengine -out cert.cer
6) Register the certificate in the system
Make sure your certificate looks like a base64 file:
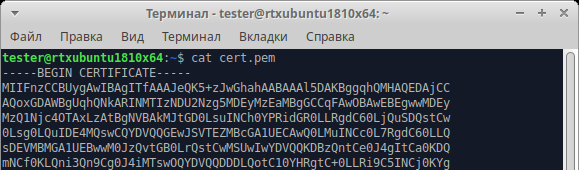
If your certificate looks like this:
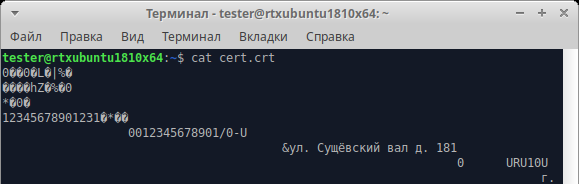
then you need to convert the certificate from DER format to PEM format (base64)
$ openssl x509 -in cert.crt -out cert.pem -inform DER -outform PEM
Check again to ensure everything is now in order.
Adding the certificate to the list of trusted certificates
$ mkdir ~/.eid
 $ chmod 0755 ~/.eid
 $ cat cert.pem >> ~/.eid/authorized_certificates
 $ chmod 0644 ~/.eid/authorized_certificates
The last line protects the list of trusted certificates from accidental or intentional changes by other users. This prevents someone from adding their certificate here and being able to log in as you.
7) Configuring authentication
Setting up our PAM module is entirely standard and is done exactly the same way as the setup of other modules. Create a file /usr/share/pam-configs/rutoken-gost-pam containing the full name of the module, whether it is enabled by default, the module's priority, and the authentication parameters.
The authentication parameters have requirements for a successful operation:
- required: such modules must return a positive response. If the result of the module call contains a negative response, it will lead to an authentication error. The request will be dropped, but the remaining modules will be called.
- requisite: similar to required, but it immediately leads to an authentication failure and ignores the remaining modules.
- sufficient: if no required or sufficient modules before it returned a negative result, then the module will return a positive response. The remaining modules will be ignored.
- optional: if there are no required modules in the stack and none of the sufficient modules returned a positive result, then at least one of the optional modules must return a positive response.
The full content of the file /usr/share/pam-configs/rutoken-gost-pam:
Name: Rutoken PAM GOST
 Default: yes
 Priority: 800
 Auth-Type: Primary
 Auth: sufficient /usr/lib/librtpam.so.1.0.0 /usr/lib/librtpkcs11ecp.so
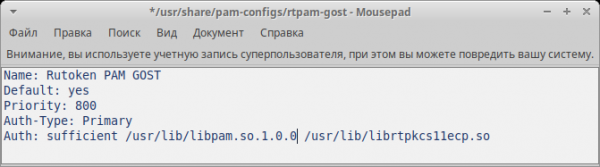
save the file, after which we execute
$ sudo pam-auth-update
in the window that appears, place a star next to Rutoken PAM GOST and click OK
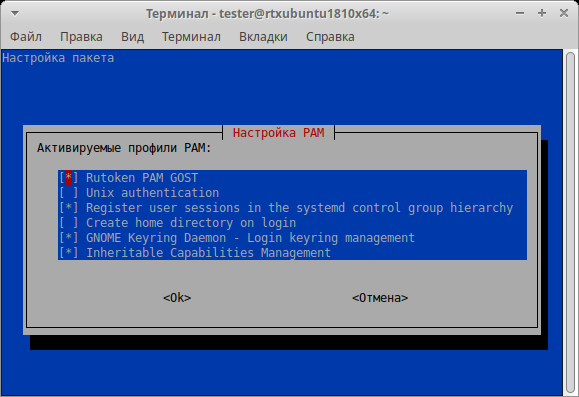
8) Check the configuration
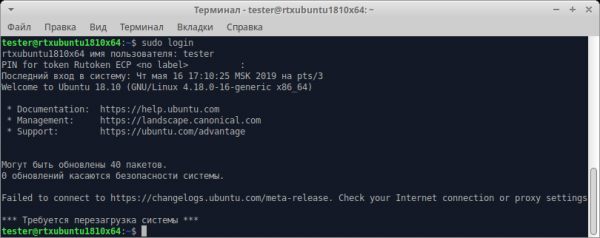
To understand that everything is set up correctly and not lose the ability to log in, enter the command
$ sudo login
Enter the username. Everything is set up correctly if the system prompts for the device's PIN code.
9) Configure computer lock when the token is removed
The package includes the utility libpam-pkcs11 pkcs11_eventmgr, which allows various actions to be performed when PKCS#11 events occur. For configuration,
pkcs11_eventmgr serves the configuration file: For various Linux distributions, the command that invokes the account lock when smart cards or tokens are removed will differ. See /etc/pam_pkcs11/pkcs11_eventmgr.conf
event card_remove An example of the configuration file is presented below:.
An example configuration file is shown below:
pkcs11_eventmgr
{
    # Run in background
    daemon = true;

    # Set debug messages
    debug = false;

    # Polling time in seconds
    polling_time = 1;

    # Set timeout for card removal
    # Default 0
    expire_time = 0;

    # Select pkcs11 library for working with Rutoken
    pkcs11_module = usr/lib/librtpkcs11ecp.so;

    # Actions with the card
    # Card inserted:
    event card_insert {
        # Keep default values (do nothing)
        on_error = ignore ;

        action = "/bin/false";
    }

    # Card removed
    event card_remove {
        on_error = ignore;

        # Call the screen lock function

        # For GNOME
        action = "dbus-send --type=method_call --dest=org.gnome.ScreenSaver /org/gnome/ScreenSaver org.gnome.ScreenSaver.Lock";

        # For XFCE
        # action = "xflock4";

        # For Astra Linux (FLY)
        # action = "fly-wmfunc FLYWM_LOCK";
    }

    # Card has been removed for a long time
    event expire_time {
        # Keep default values (do nothing)
        on_error = ignore;

        action = "/bin/false";
    }
}
After that, add the application serves the configuration file: to the startup. To do this, edit the .bash_profile file:
$ nano /home//.bash_profile
Add the line pkcs11_eventmgr at the end of the file and reboot.
The described steps for configuring the operating system can be used as a guide in any modern Linux distribution, including local ones.
Conclusion
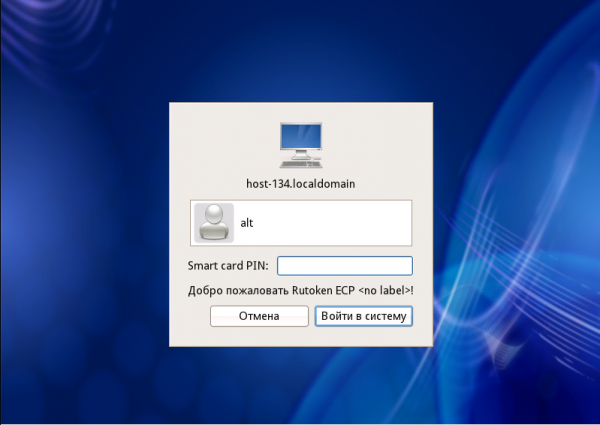
Linux PCs are becoming increasingly popular in Russian government structures, and setting up reliable two-factor authentication on this OS is not always easy. We hope this guide helps solve the "password problem" and securely protect access to PCs without spending much time on it.
Source: habr.com
