

How to configure OpenLiteSpeed for reverse proxy in Nextcloud, which is located in a private network?
Surprisingly, searching for OpenLiteSpeed on Habr yields nothing! I rush to correct this injustice, as LSWS is a worthy web server. I love it for its speed and trendy web administration interface:
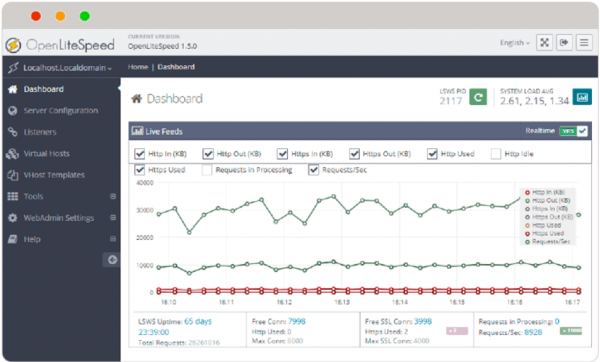
Although OpenLiteSpeed is best known as a 'booster' for WordPress, in today's article I will show quite a specific application of it. Specifically, reverse proxying requests. You might say that using nginx is more common for this? I would agree. But we have grown quite fond of LSWS!
Proxying is fine, but where to? To the equally wonderful service – Nextcloud. We use Nextcloud to create private 'file-sharing clouds.' We allocate a separate VM with Nextcloud for each client and do not want to expose them 'outward.' Instead, we proxy requests through a shared reverse proxy. This solution allows:
1) to remove the server that stores the client's data from the internet and
2) to save IP addresses.
The scheme looks like this:
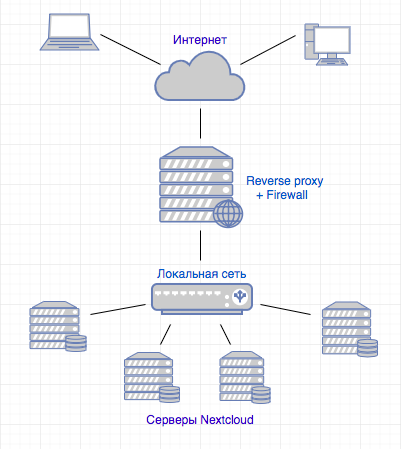
It is clear that the diagram is simplified, as the organization of the web services infrastructure is not the topic of today's article.
I will also skip the installation and basic configuration of Nextcloud in this article, especially since there are dedicated materials on Habr about this topic. However, I will definitely show the settings without which Nextcloud will not function behind a proxy.
Given:
Nextcloud is installed on host 1 and configured to work via http (without SSL), having only a local network interface and a 'gray' IP address of 172.16.22.110.
We will configure OpenLiteSpeed on host 2. It has two interfaces, an external one (facing the internet) and an internal one with an IP address in the 172.16.22.0/24 network.
The DNS name cloud.connect.link points to the IP address of the external interface of host 2.
Task:
Accessing from the internet via the link ‘‘ (SSL) to Nextcloud in the internal network.
- We install OpenLiteSpeed on Ubuntu 18.04.2.
Let’s add the repository:
wget -O — |sudo bash
sudo apt-get update
install it and start:
sudo apt-get install openlitespeed
sudo /usr/local/lsws/bin/lswsctrl start
- Let’s minimally configure the firewall.
sudo ufw allow ssh
sudo ufw default allow outgoing
sudo ufw default deny incoming
sudo ufw allow http
sudo ufw allow https
sudo ufw allow from your management host to any port 7080
sudo ufw enable - We will configure OpenLiteSpeed as a reverse proxy.
Create directories for the virtual host.cd /usr/local/lsws/
sudo mkdir cloud.connect.link
cd cloud.connect.link/
sudo mkdir {conf,html,logs}
sudo chown lsadm:lsadm ./conf/
We will configure the virtual host from the LSWS web interface.
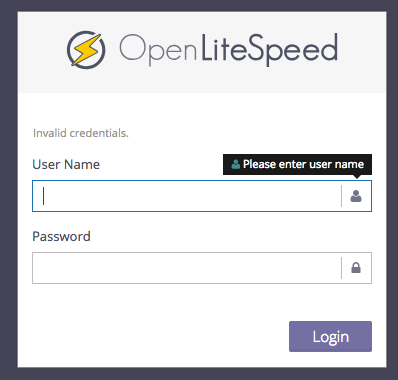
Open the management URL.
Default login/password: admin/123456
Adding a virtual host (Virtual Hosts > Add).
An error message will appear when adding — missing configuration file. This is normal, it can be resolved by clicking Click to create.
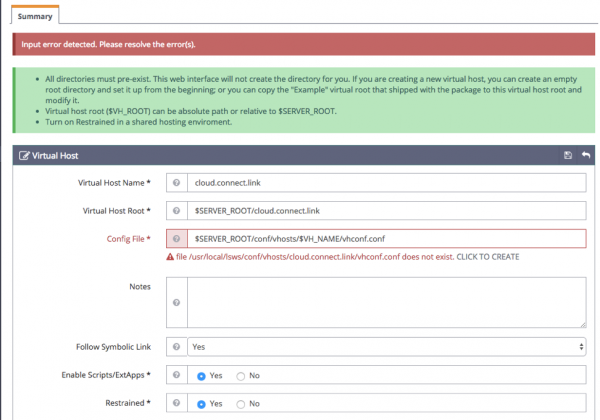
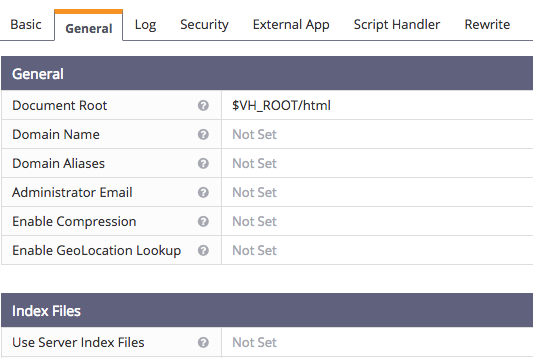
In the General tab, specify the Document Root (even though it won't be needed, without it the config won't work). The Domain Name, if not specified, will be taken from the Virtual Host Name, which we named after our domain.
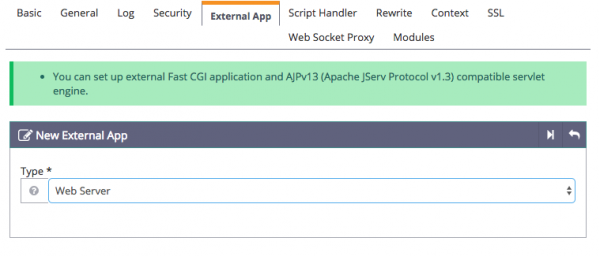
Now, let's remember that we are not just a web server, but a reverse proxy. The following settings will inform LSWS what to proxy and where to send it. In the virtual host settings, open the External App tab and add a new application of type Web server:
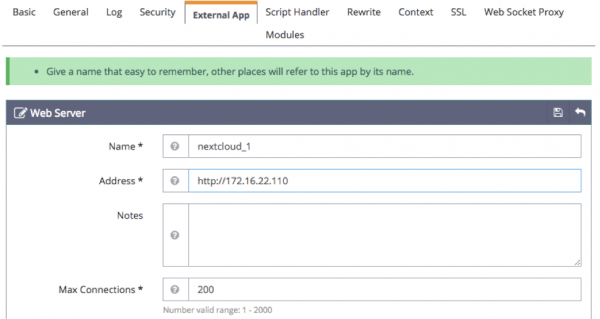
Specify the name and address. The name can be arbitrary, but remember it, it will be useful in the next steps. The address is where Nextcloud resides in the internal network:
In the same virtual host settings, open the Context tab and create a new context of type Proxy:
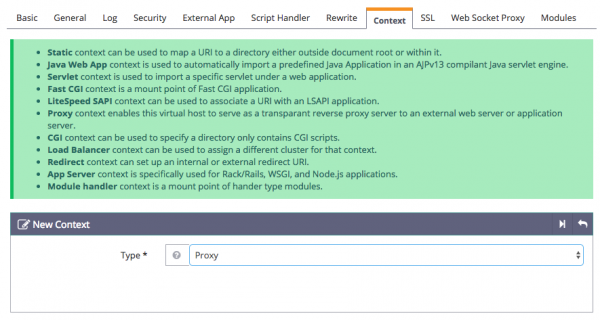
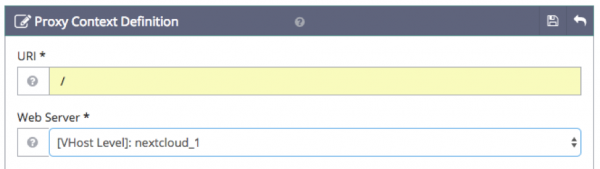
Specify the parameters: URI = /, Web server = nextcloud_1 (name from the previous step)
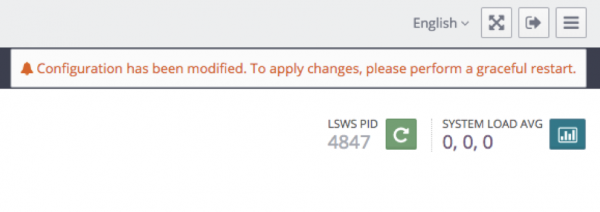
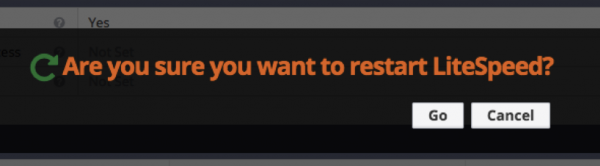
Restart LSWS. This is done with one click from the web interface, amazing! (a descendant of mouse 'talking' in me)
- Install the certificate, configure https.
and agree that we already have it and it is located with the key in the directory /etc/letsencrypt/live/cloud.connect.link.
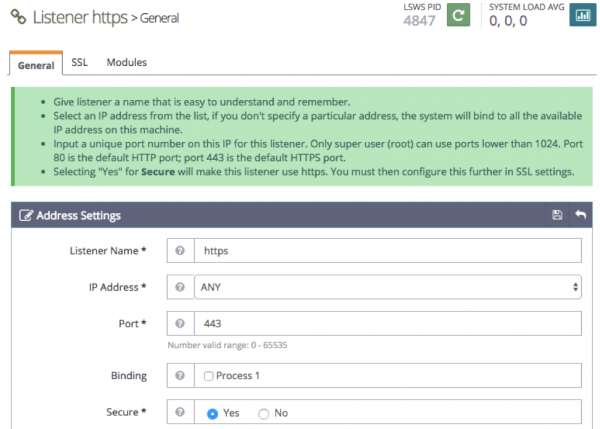
Create a 'listener' (Listeners > Add), name it 'https'. Specify port 443 and mark it as Secure:
In the SSL tab, indicate the path to the key and certificate:
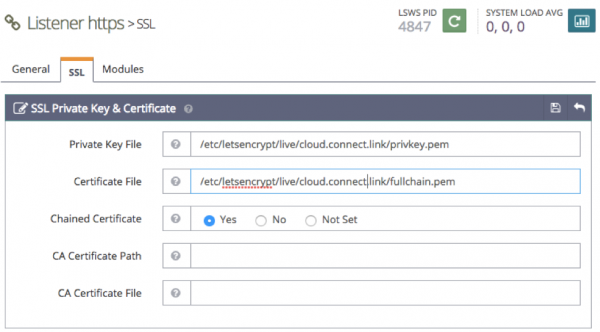
The 'listener' is created, now in the Virtual Host Mappings section add our virtual host to it:
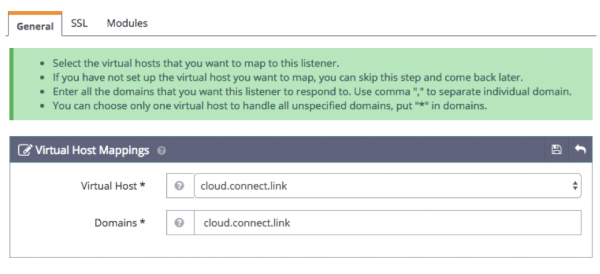
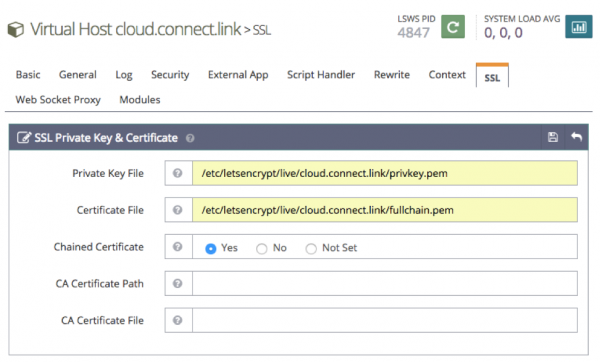
If LSWS will only proxy to one service, the setup can end here. But we plan to use it for forwarding requests to different 'instances' depending on the domain name. And all domains will have their own certificates. Therefore, we need to go to the virtual host config and specify its key and certificate again in the SSL tab. This needs to be done for each new virtual host in the future.
Finally, set up URL rewriting so that http requests are directed to https.
(By the way, when will this end? It's time for browsers and other software to default to https, and handle no-SSL redirection manually when necessary).
Enable Rewrite and write down Rewrite Rules:
RewriteCond %{SERVER_PORT} 80
RewriteRule ^(.*)$ } [R=301,L]
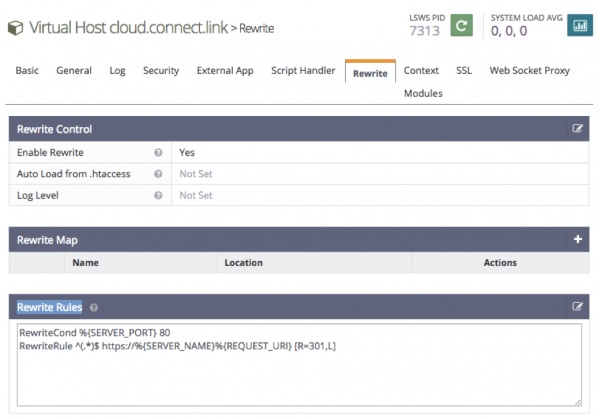
The usual Rewrite rules cannot be applied gracefully due to a strange misunderstanding. Therefore, we’ll restart LSWS not elegantly, but roughly and effectively:
sudo systemctl restart lsws.service
To enable the server to listen on port 80, we will create another Listener. We will name it http, specify port 80, and set it to be non-secure:
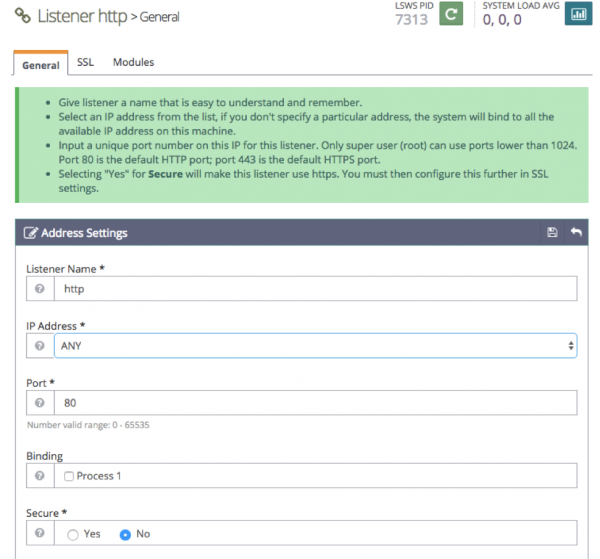
Similarly to the https listener setup, we'll map our virtual host to it.
Now LSWS will listen on port 80 and redirect requests from it to 443, rewriting the URL.
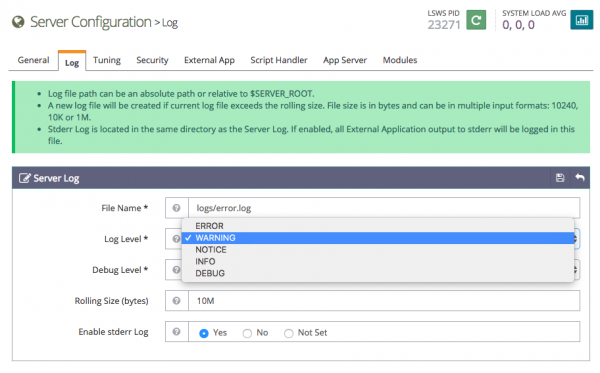
Finally, I recommend lowering the logging level of LSWS, which is set to Debug by default. In this mode, logs accumulate rapidly! For most cases, the Warning level is sufficient. Let's go to Server Configuration > Log:
At this point, the OpenLiteSpeed configuration as a reverse proxy is complete. We restart LSWS once again and go to the link and see:
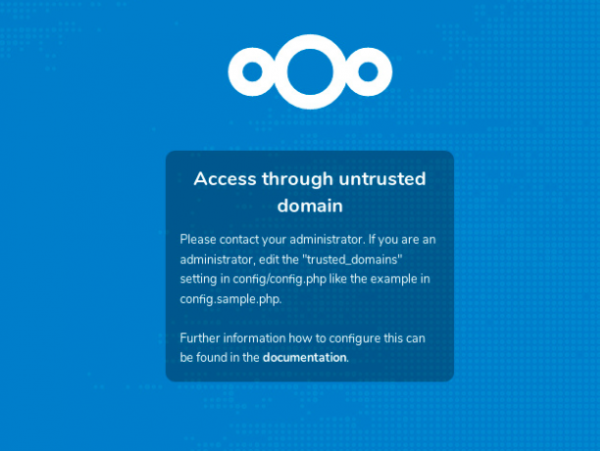
In order for Nextcloud to accept us, it is necessary to add the domain cloud.connect.link to the trusted list. Let's go edit config.php. I installed Nextcloud automatically when setting up Ubuntu, and the config is located here: /var/snap/nextcloud/current/nextcloud/config.
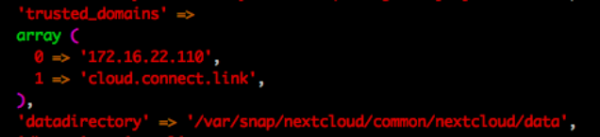
To the trusted_domains key, we add the parameter ‘cloud.connect.link’:
'trusted_domains' =>
array (
0 => ‘172.16.22.110’,
1 => ‘cloud.connect.link’,
),
Next, in the same config, we need to specify the IP address of our proxy. I emphasize that the address must be one that is visible to the Nextcloud server, i.e., the IP of the LSWS local interface. Without this step, the Nextcloud web interface works, but applications will not log in.
'trusted_proxies' =>
array (
0 => ‘172.16.22.100’,
),
Great, after this we can access the login interface:

The task is solved! Now every client can safely use the 'file cloud' through their personal URL, the server with files is separated from the internet, future clients will receive the same, and no additional IP address will be affected.
Additionally, a reverse proxy can be used to deliver static content, but in the case of Nextcloud, this will not provide a noticeable speed boost. So this is optional and by choice.
I'm glad to share this story, and I hope someone will find it useful. If you know more elegant and effective methods to solve the task at hand – I would appreciate your comments!
Source: habr.com
